 When I was plotting the garden earlier this year, I planned on using a large amount of space for cucumbers because I think nothing beats a freshly picked cucumber when making a salad. Whether it is a bowl of lettuce topped with tomatoes and cucumbers or a bowl of slices in a hot-sweet, vinegar marinade, cucumbers are one of my favorite guilt-free pleasures. This year, I made sure to plant plenty of them so that I could have them all summer long.
In the past, I have tried to grow pickling cukes too but haven’t had much luck with them. While at the feed store stocking up on chicken scratch, I came across a package of pickling cucumbers from Livingston Seeds and appropriately titled, Homemade Pickles. According to the website, the vines only grow 2-3/4 feet, mine grew vertically on a trellis and I can assure you, they went at least 6 feet a piece! Allow them plenty of space and if you go vertically, give them a sturdy structure with plenty of surface space to grab onto. Since I pick them regularly, almost daily, they have continued to produce a pretty good amount for over a month now and my pantry is beginning to look like a pickle shop!
When I am going to can pickles, I like to boil the jars and lids to sanitize them. My canning pot holds a lot of water and can seal about a dozen jars at once.
 The light in the kitchen is beautiful in the morning. It is one of the things I like most about our home. The windows allow a lot of light in and in the summer, we can go most of the day and into evening without turning on lights in the kitchen.
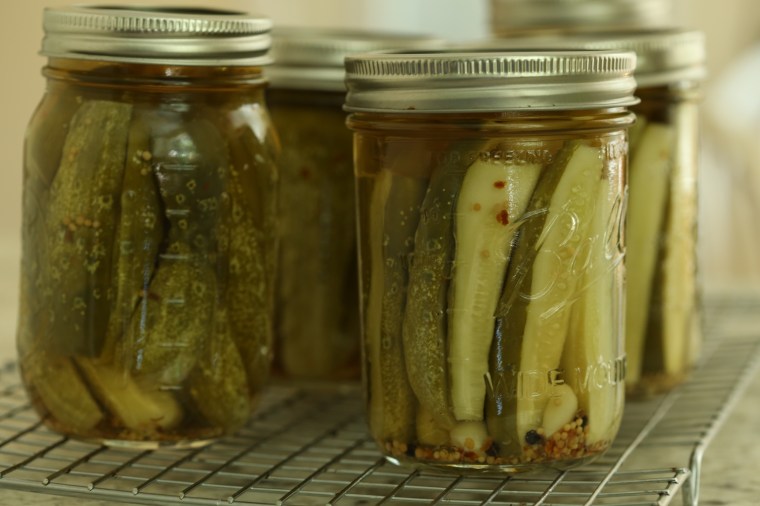
 These cucumbers have good flavor, soft skin and did not get bitter even when left on the vine too long-a few got missed in the leaves, swelled up and still did not turn bitter. These have been soaked overnight in a brine and are draining while the jars boil and the vinegar mixture is prepared.
 When I make dill pickles, I like to add a few mustard seeds and a pinch of dill seeds. Fresh garlic, crushed red pepper, black peppercorns, dill from the garden are added to a boiled mixture of cider vinegar , water and salt.
 If you like to can, I highly recommend picking up a pot that comes with a basket. It makes putting the jars into the pot and removing them so much easier and safer.
 The other tool I recommend, a pair of canning tongs, seriously, if you do not have them, buy them. Too many times I have tried to use regular kitchen tongs and have scalded my hands on more occasions than I can count!
 The pickles are packed into the jars with the spices and herbs and then the boiled vinegar mix is poured over them leaving about half an inch of space.
 When the tops are put on, be sure not to screw the bands too tightly. Nothing is worse than removing the jars from the water bath only to see that they have crimped and buckled because the bands were too tight! Load them into the basket and then lower it into the boiling water.
 After a boil of 10 minutes, raise the basket and remove the jars to a rack to cool. Listen for the lids to pop as they cool. If you find that some haven’t popped and appear sunken in the middle, put those in the fridge and use them first.
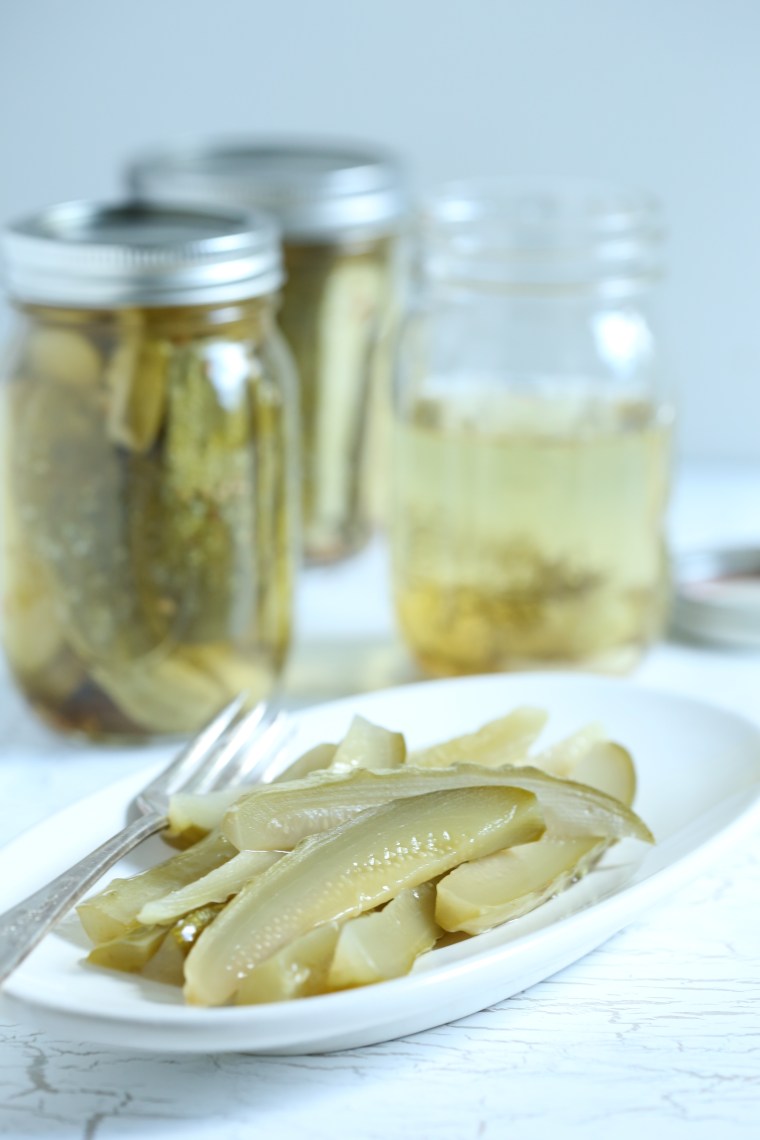 The recipe I used recommended allowing the jars to sit for 3 weeks to age and allow the flavors to develop. Since I have been making these pickles a few jars at a time, I decided to open one today and taste them. They did not disappoint! One thing about this recipe, no alum was used and despite that, they were pretty crispy, for a pickle anyway.
 The color has changed dramatically over the weeks. These will be enjoyed with many sandwiches…
 Sandwich-Sliced Dill Pickles
(not sliced, speared)
adapted from The Joy of Pickling by Linda Ziedrich
makes 6 -8 pints
5 pounds pickles with blossom ends removed-I only had 3.5 pounds but used the full recipe and yielded 5 pints plus one half pint
6 tablespoons sea salt, divided
2 quarts plus 3 cups cold water
2 cloves garlic jar each jar
1/4 teaspoon red pepper flakes per jar
4-8 peppercorns per jar
1/4 teaspoon mustard seeds per jar
pinch of dill seed per jar
1-2 sprigs fresh dill per jar
2 3/4 cups cider vinegar
Quarter the pickles into spears or cut into 3/16 inch slices, make sure to cut the blossom ends off and remove the stem end as well. Place into a large non-reactive bowl. Dissolve 3 tablespoons of the salt in 2 quarts of cold water. Pour over the cut pickles, cover loosely with plastic and place a plate on top to weight them down. Allow them to sit at room temperature for 12 hours. When ready to can, dump the pickles into a colander in the sink and allow them to drain completely.
Place the canning jars and lids into the basket and lower it into the canning pot. Fill the jars with water and then fill the entire pot so that the jars are covered by 2-3 inches of water. Over high heat, bring the water to a boil and allow the jars and lids to boil for a few minutes. Raise the basket and using canning tongs, carefully lift and drain the jars one at a time. Place them upside down on a rack to drain and dry. Do this for the lids as well. Keep the water at the boil, adding hot water if much has evaporated.
In another smaller, nonreactive pot, bring the vinegar to a boil with the remaining 3 cups of water and 3 tablespoons of salt. Stir to dissolve the salt and then turn off the heat and keep it on the stove while you pack the jars.
Place the spices and herbs into each jar. Fill the jars so that the spears are snug but not so tight that they are crushed against each other. Pour the hot vinegar mix over the pickles, leaving about a half inch of space. Wipe the rims, place the lids on and screw the bands so that they are secure but not tight. Make sure the water in the pot is at the boil. Load the jars into the basket and carefully lower it into the pot. Boil for 10 minutes, raise the basket and remove the jars with the tongs. Place them on a rack and allow them to cool completely before storing in a dark, dry place. Check the lids, if any have not popped and inverted, place them in the fridge, allow them to age for a couple weeks and use them first. The remaining jars should be ready to use in three weeks.

My mother in law taught me to pickle a couple of years ago and it was so fun!! She got me one of those giant pots so I can do my own at home! I need to do it before the end of the summer!
LikeLike
In the past, I have canned jams and marmalades but with this garden, I have branched out to pickles. Last year we pickled a bunch of tomatoes and made tomatillo jam and tomato marmalade. So far this year, I have hot and sweet relish, pickle spears and chips and bread and butter chips as well as pickled beets!
LikeLike
ha ha – cucumbers filling our greenhouse like some kind of sci-fi critter at the moment.
LikeLike
our lemon cuke plant could easily fall into that catergory but as crazy as the vines are, we still haven’t picked a single fruit!!!
LikeLike