 Gardeners have preferences when it comes to the plants chosen each season and I am no different than most. In my flower beds, I always include a mix of herbs and edible flowers as well as those that will attract beneficial insects and help repel the destructive ones. My vegetable garden follows the same plan and tucked in between the crops are many of those same herbs and flowers. Companion planting is another of my strategies in the garden but honestly, I haven’t seen a huge improvement by following the does and the don’ts of plant location.
This year, like every other year, I have planted cucumbers in my garden. The selection of varieties chosen include Marketmore (both #70 and #76), Homemade Pickles, Charming White, Lemon and Tendergreen. The weather pattern this summer has been challenging and while none of my squash plants survived and produced fruits, the cucumbers have done well, at least, two varieties have. Homemade Pickle plants produced enough cukes that I have completely stocked my pantry with pickles and relish and I have enough gathered now to make one last batch of relish.
Making salads with cucumbers is another one of my favorite summer activities. While I enjoy adding slices to green salads or just mixing the slices with a little rice wine vinegar, honey and chili flakes, I decided to try something different. With more Tendergreen Cukes than I could eat, I thought about a loaf of bread and what it might be like with cucumber puree in it.
 The previous photo is a Homemade Pickle and this one is Marketmore #76. In the past, Marketmore #76 has been a great producer, this year, not so much. My thoughts are that the weather has affected the yield but more importantly, I think the soil is still lacking. If you have been following this blog, you are aware that we started this garden from the ground up two years ago and this is the first year that we are planting in the ground. Lots of layering with materials such as compost, leaves, coffee, chicken litter from our hens and eggshells has greatly improved the structure but I think it needs to be amended further and turned as well as given a season off to let the nitrogen levels fix.
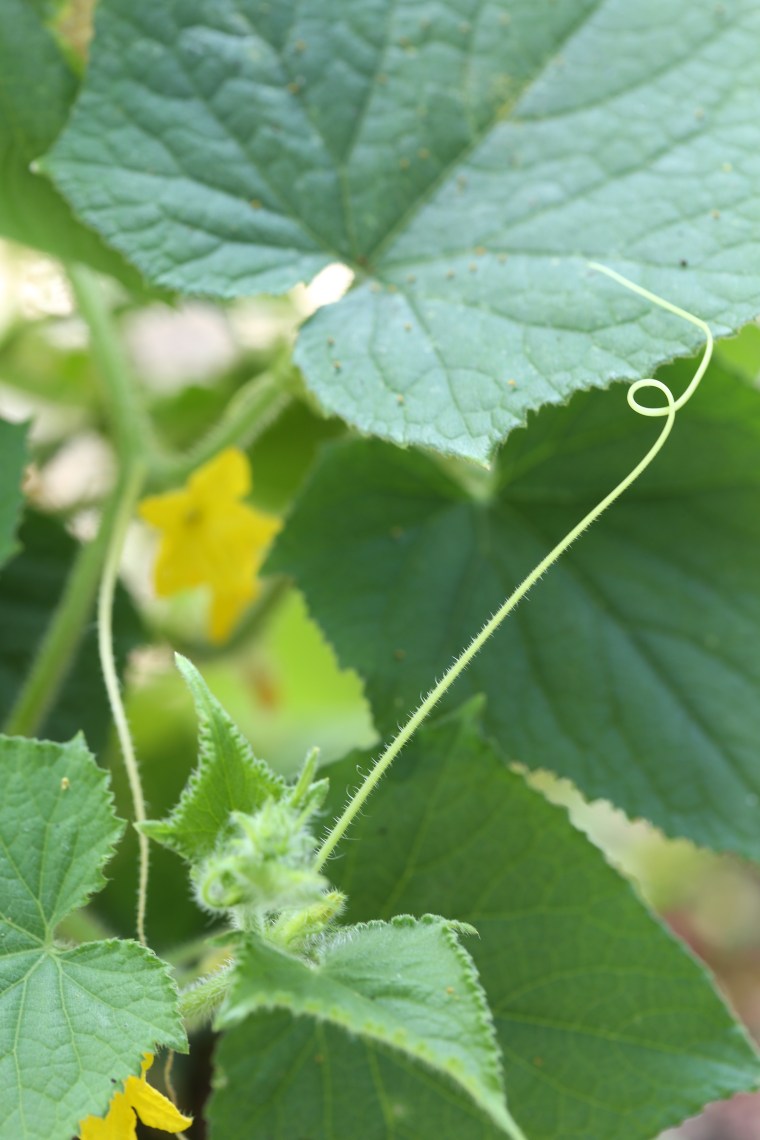 The tendrils are amazingly strong and these plants would sprawl out all over if I give them a chance.
 For my first batch, I peeled, seeded and pureed some cukes. The pale green liquid was added to a hard roll recipe and the dough was shaped into batards. My thought was to keep it simple and I added a few dill seeds to the mix.
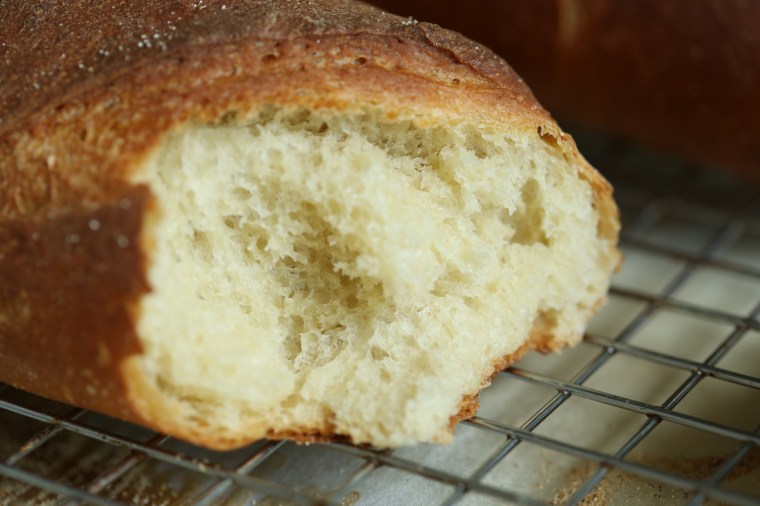 Once baked, it was nearly impossible to see that the cucumbers had an effect on the dough. The interior of the loaf is nearly white and the crumb is a tiny bit compact. Not the results I was hoping for but still a good loaf of bread.
 After giving it some thought. I started a second batch of dough using a different recipe. For this batch, I left the skin on the cukes but removed the seeds before pureeing. The liquid was a much darker shade of green and had little flecks of skin in it. For the dough itself, I settled on a recipe that used a Poolish style starter to develop more flavor in the dough. After letting the flour, water and yeast mixture age overnight, I mixed the dough using a method that does not include kneading the dough.
There are several good books out there that use this method but I chose to follow the Country Loaf recipe found in Tartine Bread by Chad Robertson and found here in this New York Times Recipe. To clarify, I did not use his recipe, just his method for mixing, shaping and baking the dough.
 As you can see, the inclusion of skin gave the dough a good amount of green color. The little flecks of skin provide some visual interest and a little texture, as well.
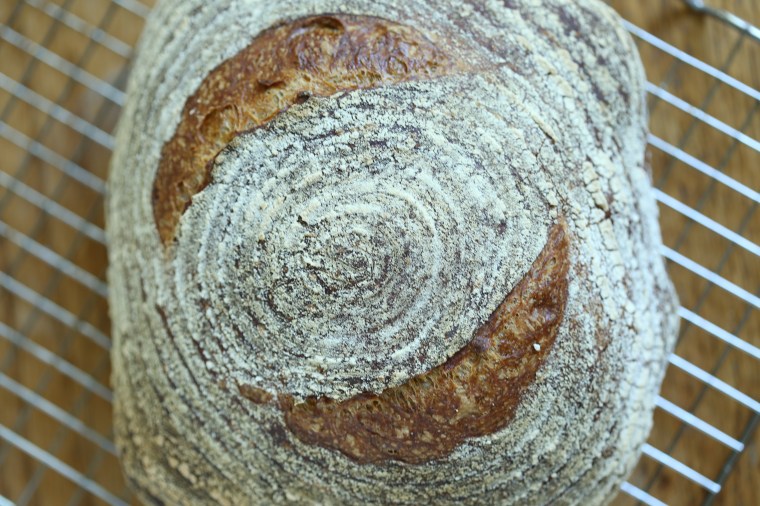 Using a lovely little banneton mold that my husband gave me, I was able to give the loaf a nice spiral pattern on the surface.
 As you can see, the interior has a tint of green to it and a few green specks here and there. The crust baked up crisply and it tasted wonderful while still a little warm. The problem, it just didn’t taste like cucumber, at least not while it was warm. Once the loaf cooled and sat for several hours, the flavor of caramelized flour and dough from the crust of the bread was no longer the predominant flavor. The subtle, earthy and almost sweet, flavor of the cucumbers was fairly obvious.
This loaf recipe is a work in progress and if all goes well, it will be part of my next book. Until then, I will have to make more bread and test it for flavor and color, and you will have to forgive me for not including a recipe that is only half done!
 My mother gave me several issues of the magazine Saveur that she was finished with. They have been sitting on the coffee table in the living room for several months and recently, I found myself flipping through one, Issue 182 from April 2016. The cover promised a Taste of Sicily, and I went through the article in search of bread recipes and I wasn’t disappointed.
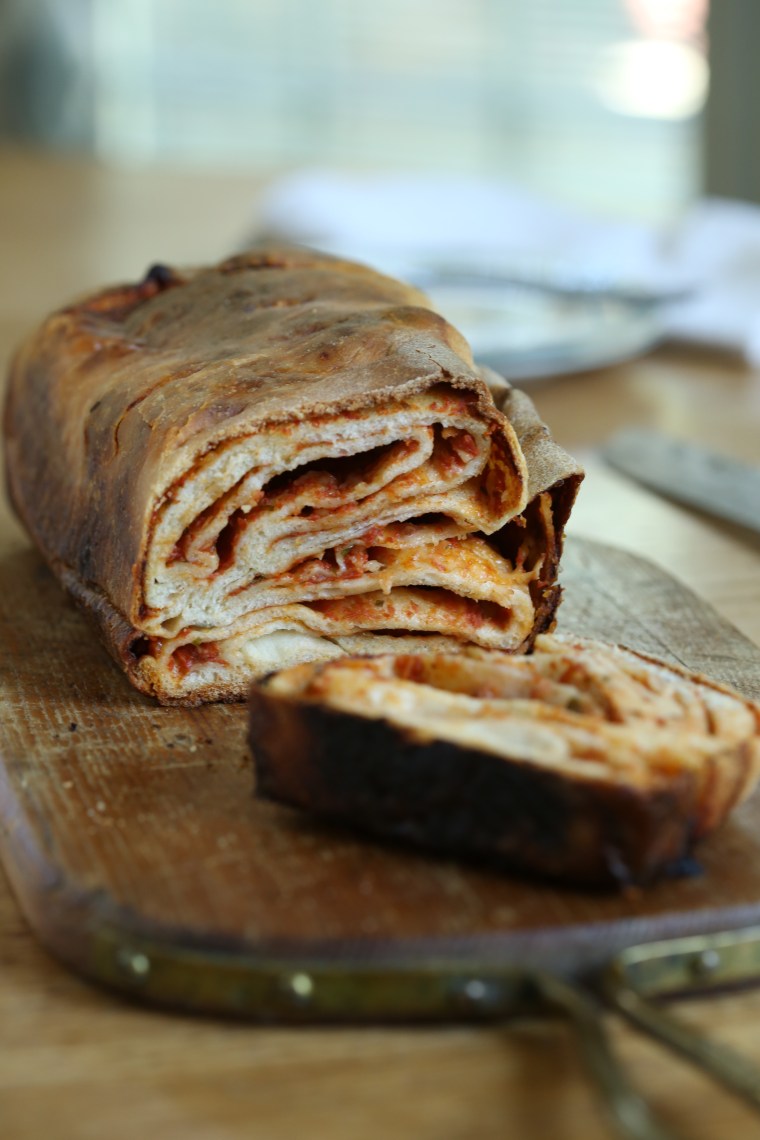
 Scaccia is favorite snack food in Sicily and can be easily found in shops and is made with many thin layers of semolina bread stacked with tomato sauce and a traditional cheese called Caciocavallo, a traditional stretched cheese curd. Having never traveled to Sicily, I will accept that fact and add this to it, it is not easy to find here! The recipe looked easy enough and after checking my pantry for semolina flour, I mixed up a batch of the dough. This recipe instructs you to also make the tomato sauce but I suspect that you could use just about any sauce, homemade or purchased. Caciocavallo, which translates as cheese on horseback in English, is similar to Provolone in flavor and is made from either sheep or cow’s milk and as much as I would like to try it, I didn’t go out in search of it and just substituted some grated Asiago.
 First, the dough is rolled out into a large rectangle. The result is a very thin sheet which gets topped with sauce and cheese before being folded up. Then more sauce and cheese, more folding and finally, a log of layered dough, sauce and cheese is folded in half and placed into a pan lined with parchment paper.
 The loaf is not given a rising period but I did let mine sit for at least 30 minutes while the oven preheated.
 Looking at the loaf, I was worried. Knowing that only 1/4 teaspoon of yeast was used to leaven the dough was obvious; it did not appear to rise much, if at all.
 After baking the loaf for nearly and hour, I was surprised to see that it did rise a small amount. The aroma that filled the kitchen was undeniably that of lasagna or of a similar baked tomato sauce and pasta dish. Having waited for about 20 minutes, I carefully sliced into loaf and revealed the layers of spongy dough, tomato sauce and cheese. Not only did it smell like lasagna, it tasted like it too, both in flavor as well as the texture of the interior.
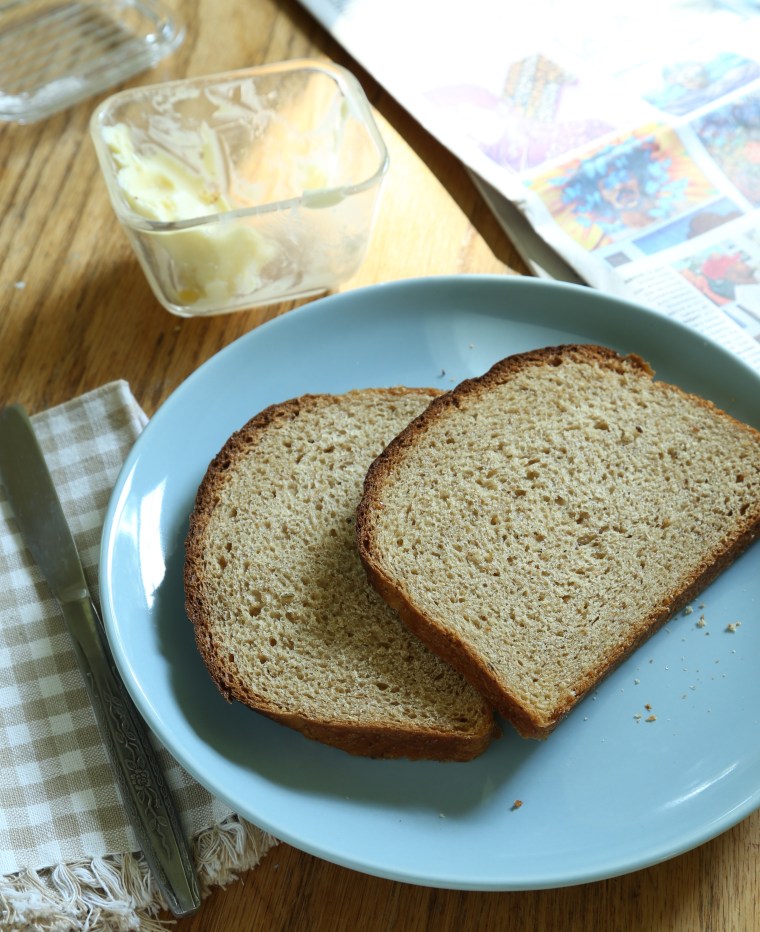 It has been quite a while since I have participated in the Tuesdays with Dorie baking. What can I say, life gets in the way? Partly, the other angle; having a pile of sweets in the house for just two of us means we eat way more than we should! When I saw the choices included a bread recipe this month, I decided to get in gear and give it a go.
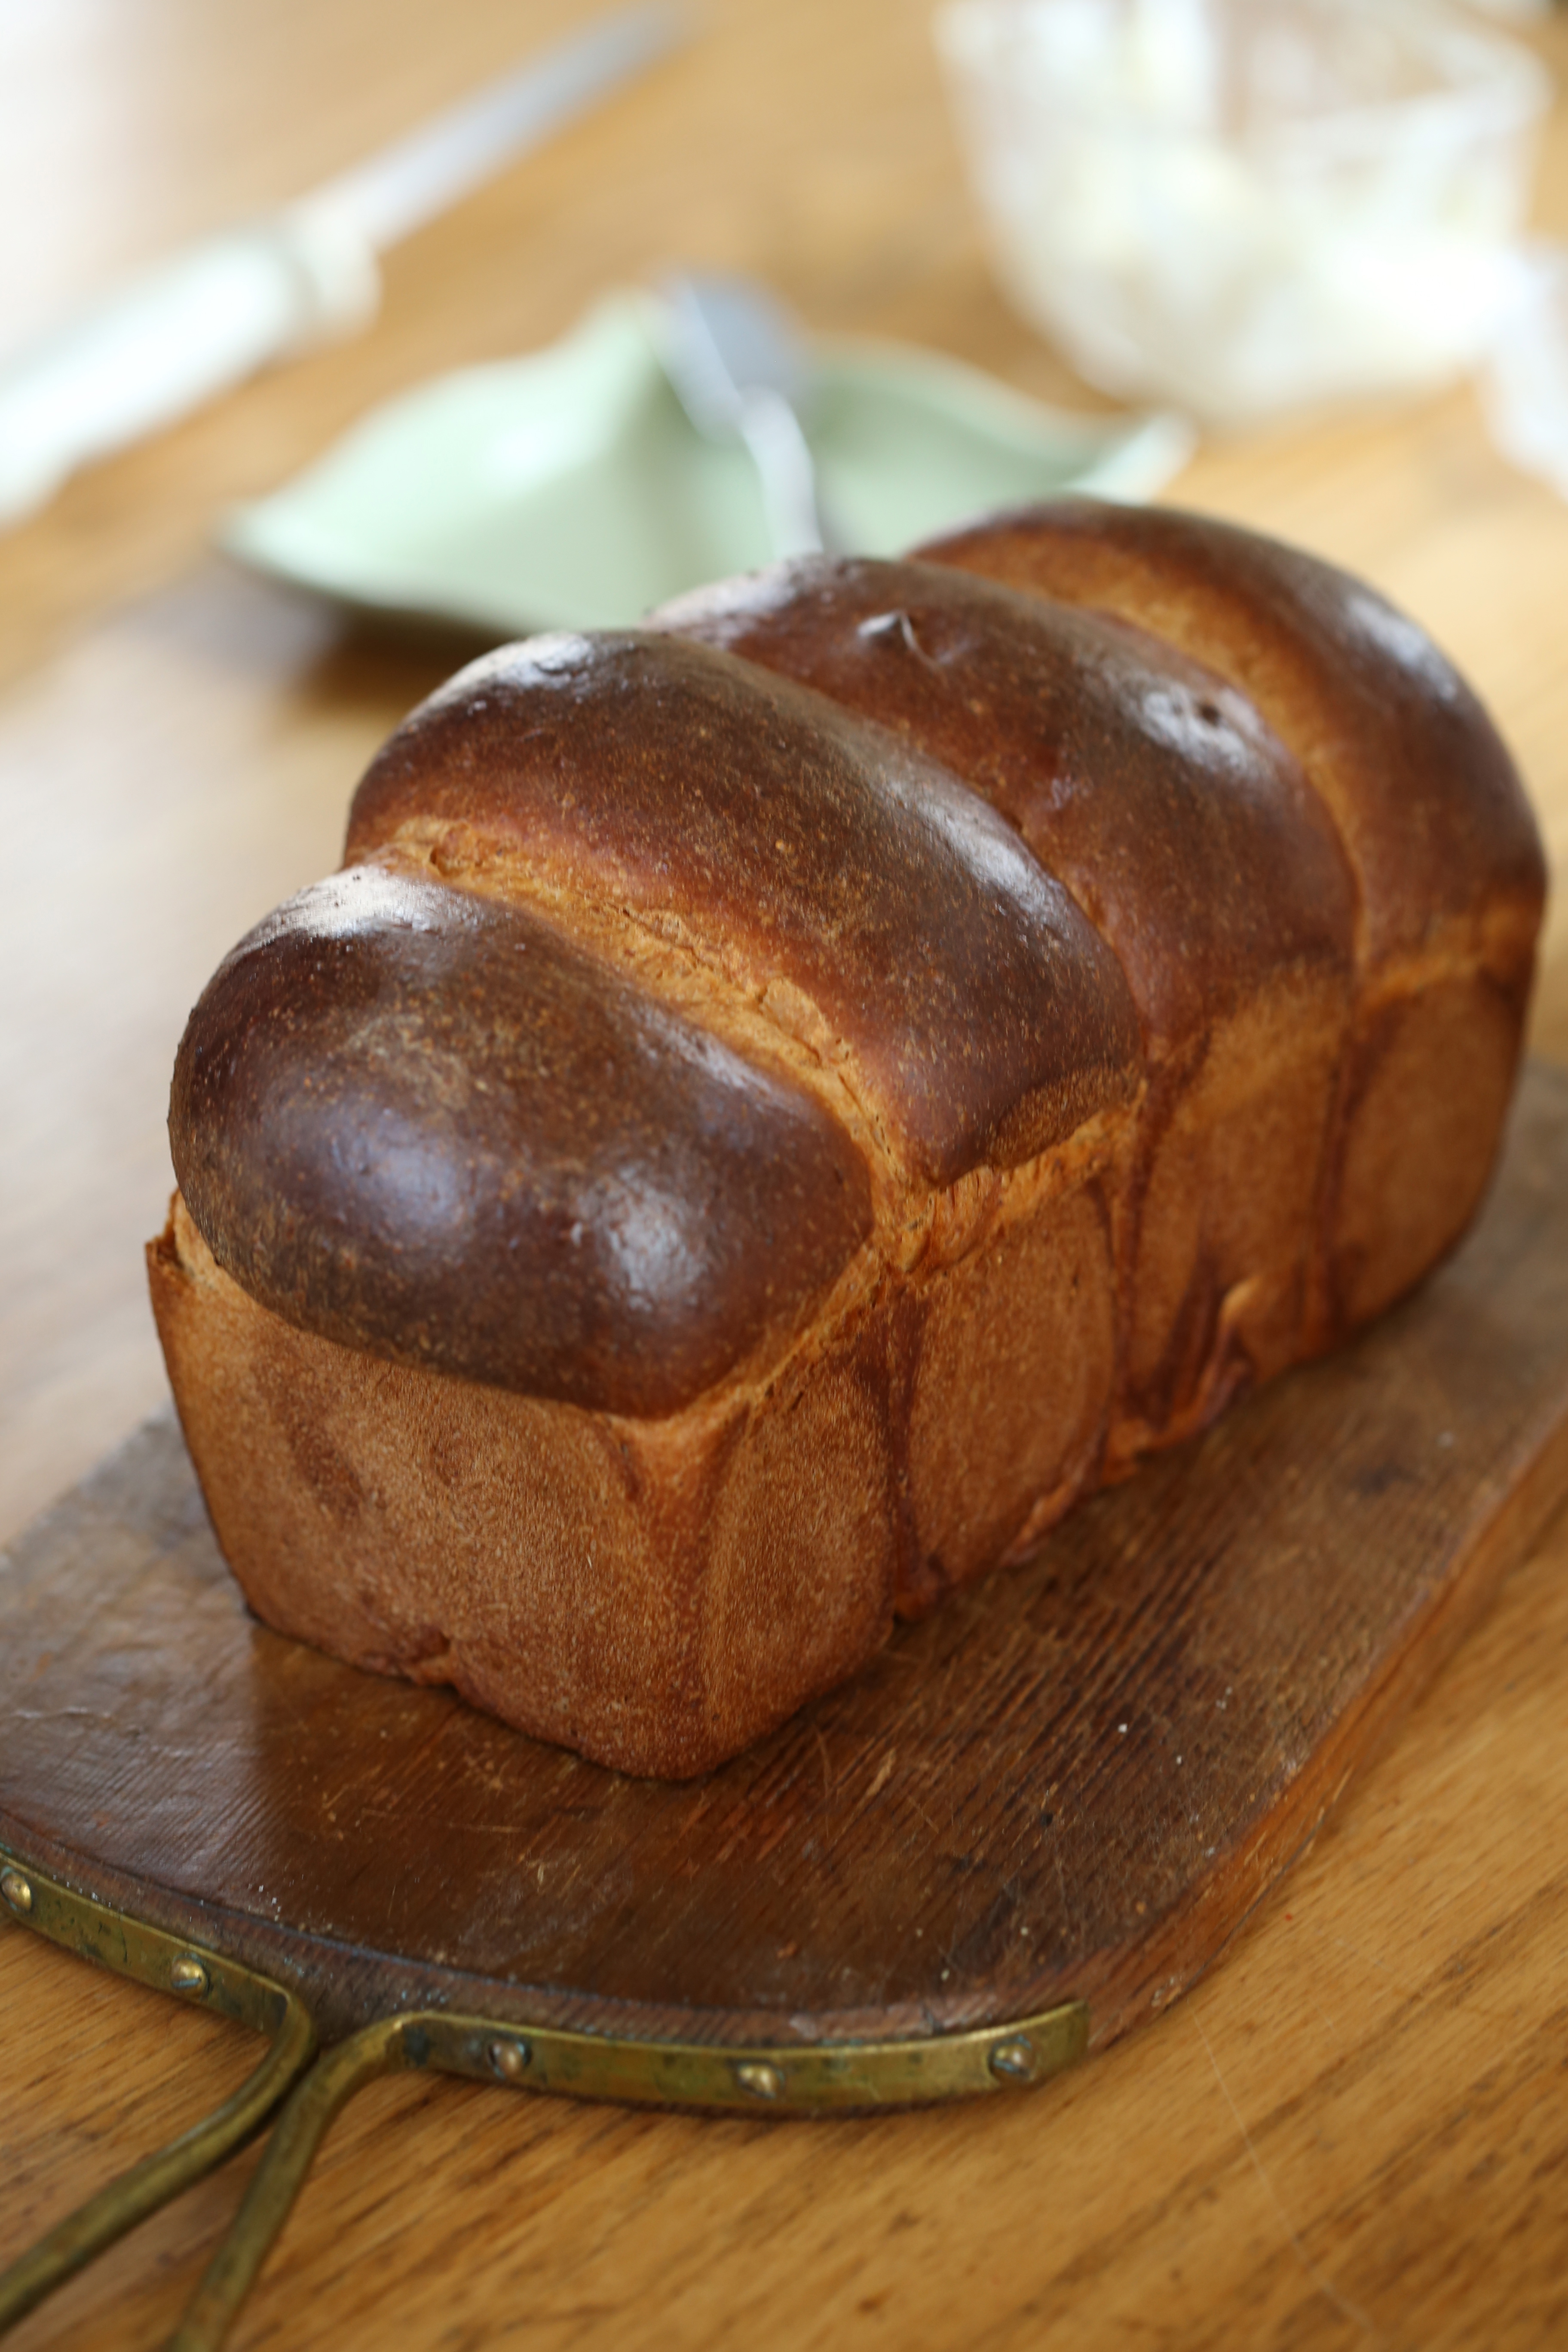
 Rather than bake it in the round 9 inch pans the recipe calls for, I used 6 inch square pans. They made the most perfect cube shaped loaves and the slices were just large enough that two thin slices of toast were more than filling.
 My rye flour was stone ground and it added a nice texture to the crumb. Little flecks of rye and seeds, this one is a keeper. Since the recipe made two loaves, I froze one for later.
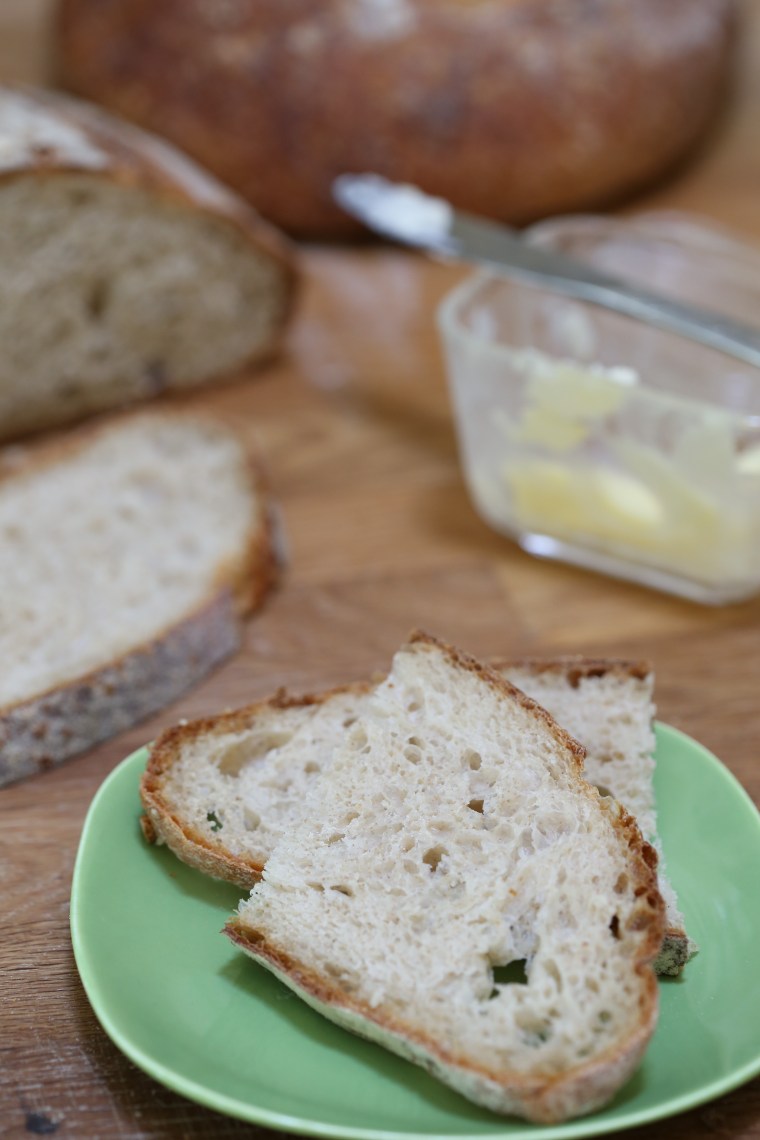 On my last birthday, my husband gave me a copy of the Tartine Bread book. We were out on a rainy Saturday, wandering through the shops in Merchant Square and I had a chance to look through a copy of the book. The cover shot, the dark loaf with the blistered crust…Yes, it was bread lust at first glance. However, I suspect my husband was also lusting over that loaf of bread and now that I have made the Country Bread, I am sure of it!
 The only step I did not follow was creating a starter to leaven the bread because I have a starter that I grew from grapes that were growing in the Demonstration Garden that I worked in when I lived in Tennessee. The starter has been in use since 2009 and when we moved in 2014, it was one of the things I was most worried about losing! We had a 12 hour drive, stopped multiple times for the dog and for the night in the middle of that drive, the entire time the starter was tucked in a cooler with some ice. It made the trip like a champ and nearly 2 years later, I am still using it.
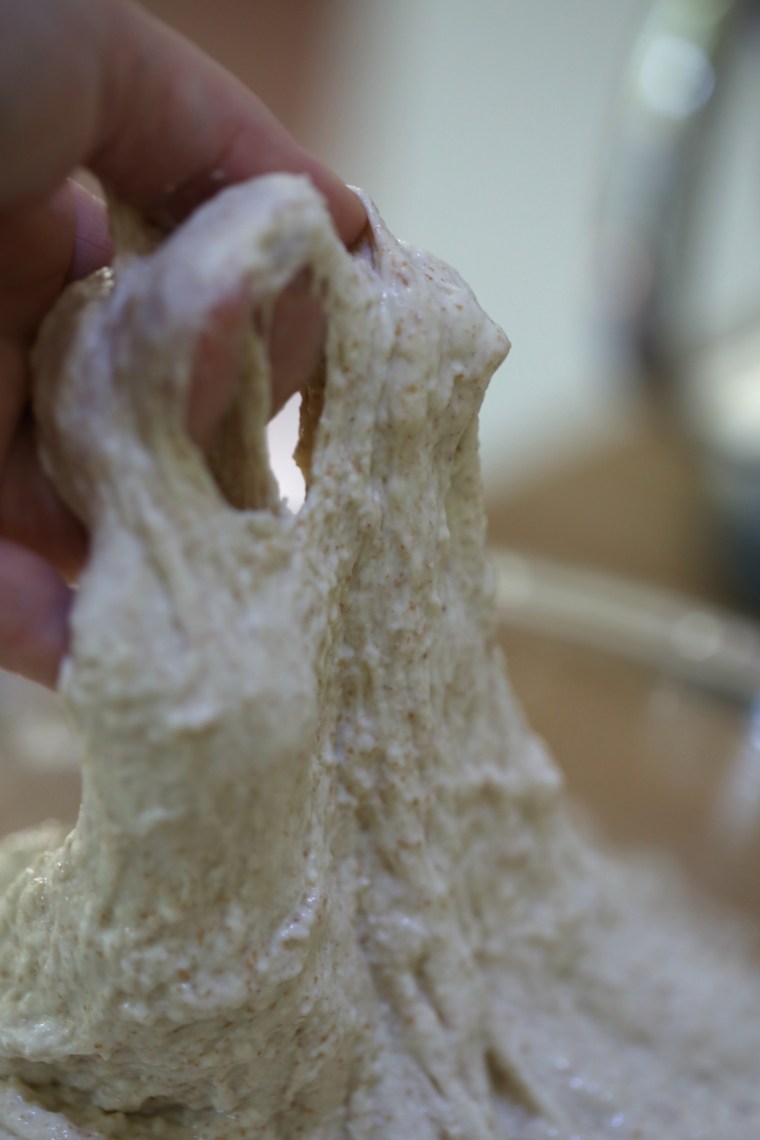 There are two schools of thought on adding salt to flour dough. One says add it to the dough as you add the flour, one calls for holding it back and adding it later because it can affect the structure of the dough. At Tartine, they hold the salt and a small amount of water back and add them after the initial mixing and resting period. The salt is sprinkled over the dough, water is poured on and using your hand, you squeeze and squish and work the dough onto itself to mix it all in.
 As the dough develops during the bulk fermentation, bubbles form around the sides of the bowl. Rather than dumping it onto a table and forcibly kneading it, the dough is “turned” in the bowl every thirty minutes for three hours.
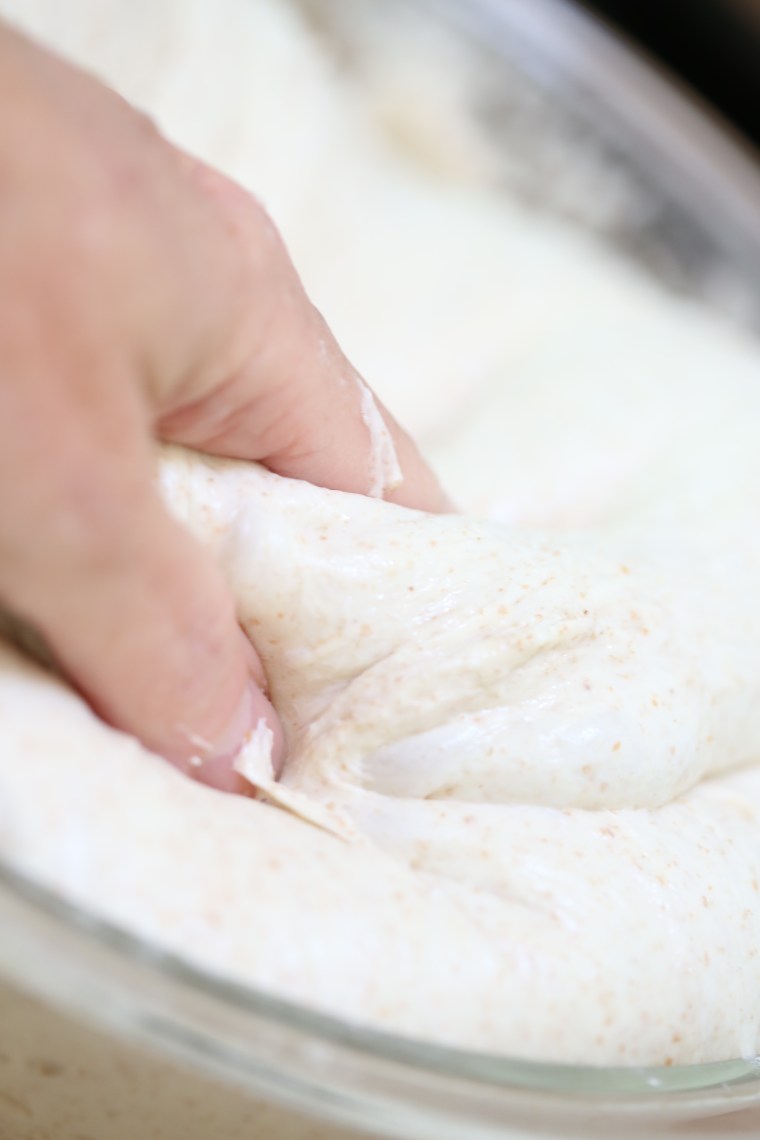 Using a wet hand, the dough is pulled up from the bottom of the bowl and stretched across itself, turning it. This is done 2-3 times each half hour, each time is called a “turn” and it is all the kneading the dough will get.
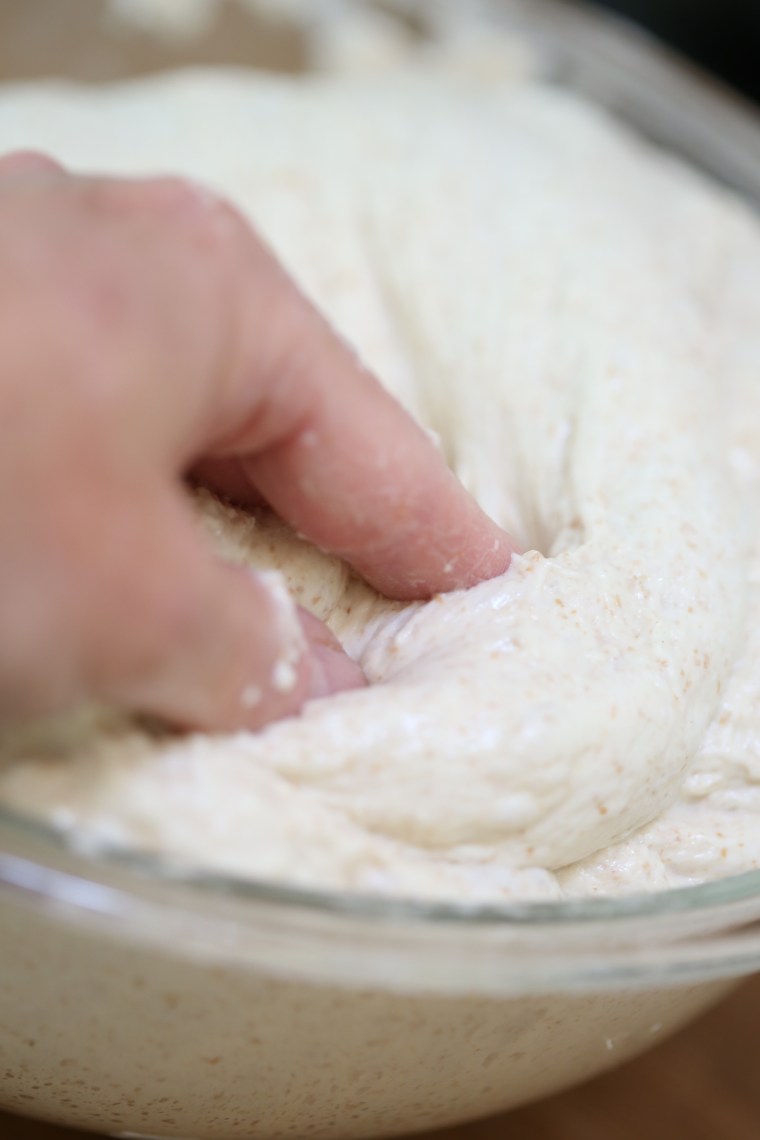 As the dough develops and rises, it gets softer and lighter and you need to take care not to press the air out in the process of turning the dough.
 When it is ready, dumped onto a table and cut in half. A minimal amount of flour is used to help with shaping. The folding and shaping is probably the most complicated step and it is completed with one hand and a bench knife. Lifting and stretching the dough across it’s center, it is carefully shaped so that it is not deflated.
 After shaping, it is allowed to rise in a cloth lined bowl which has been floured.
 The loaves rise for about 3 hours and because most of us do not have two dutch ovens or even the ability to bake with two of them simultaneously, you will want to hold one back by placing it in the fridge for a while.
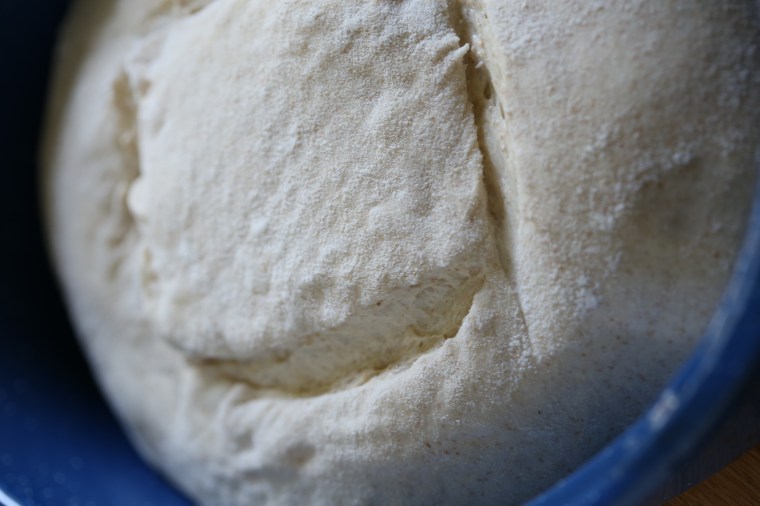 Once the oven and the dutch oven are heated properly, flour the surface of the dough (do not forget this step-it will not come out of the pan if you do!) and turn it into the hot pan. Using a lame or a very sharp blade, score the dough, cover it and place it in the oven. Twenty minutes covered, twenty minutes uncovered and it will be ready to take from the oven.

 Beautifully colored, perfectly blistered. Let it cool completely before cutting into the loaf.
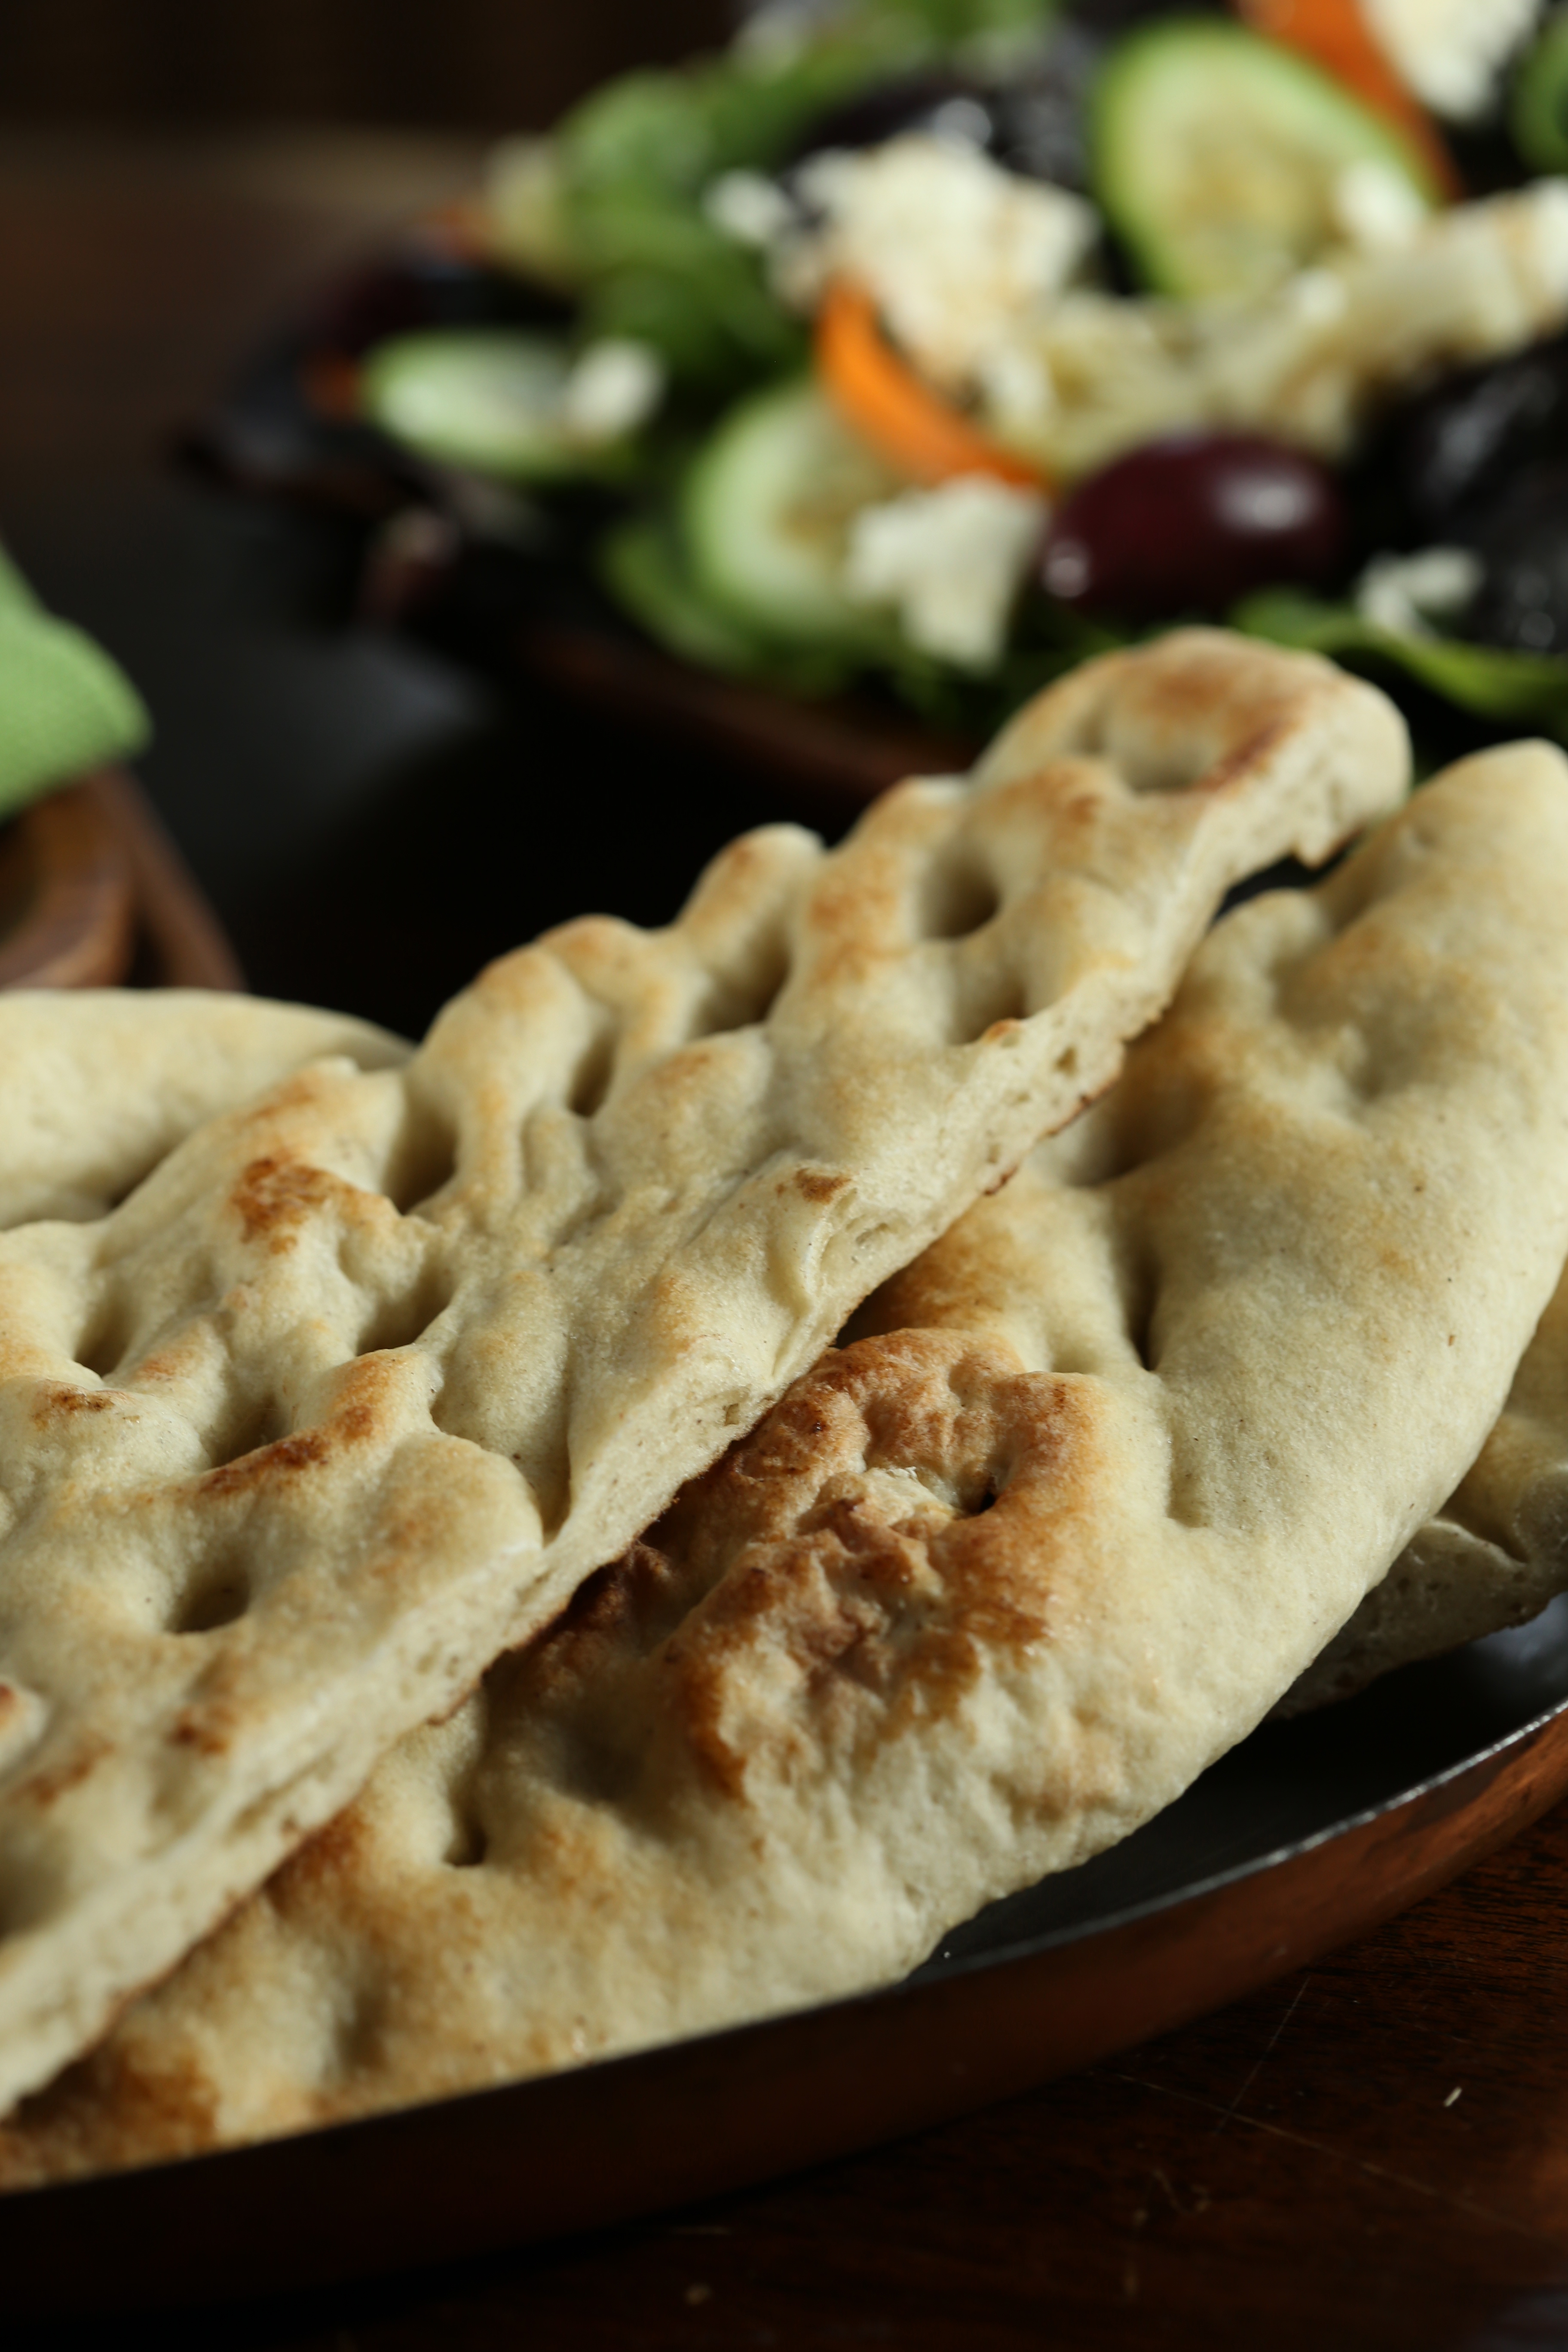
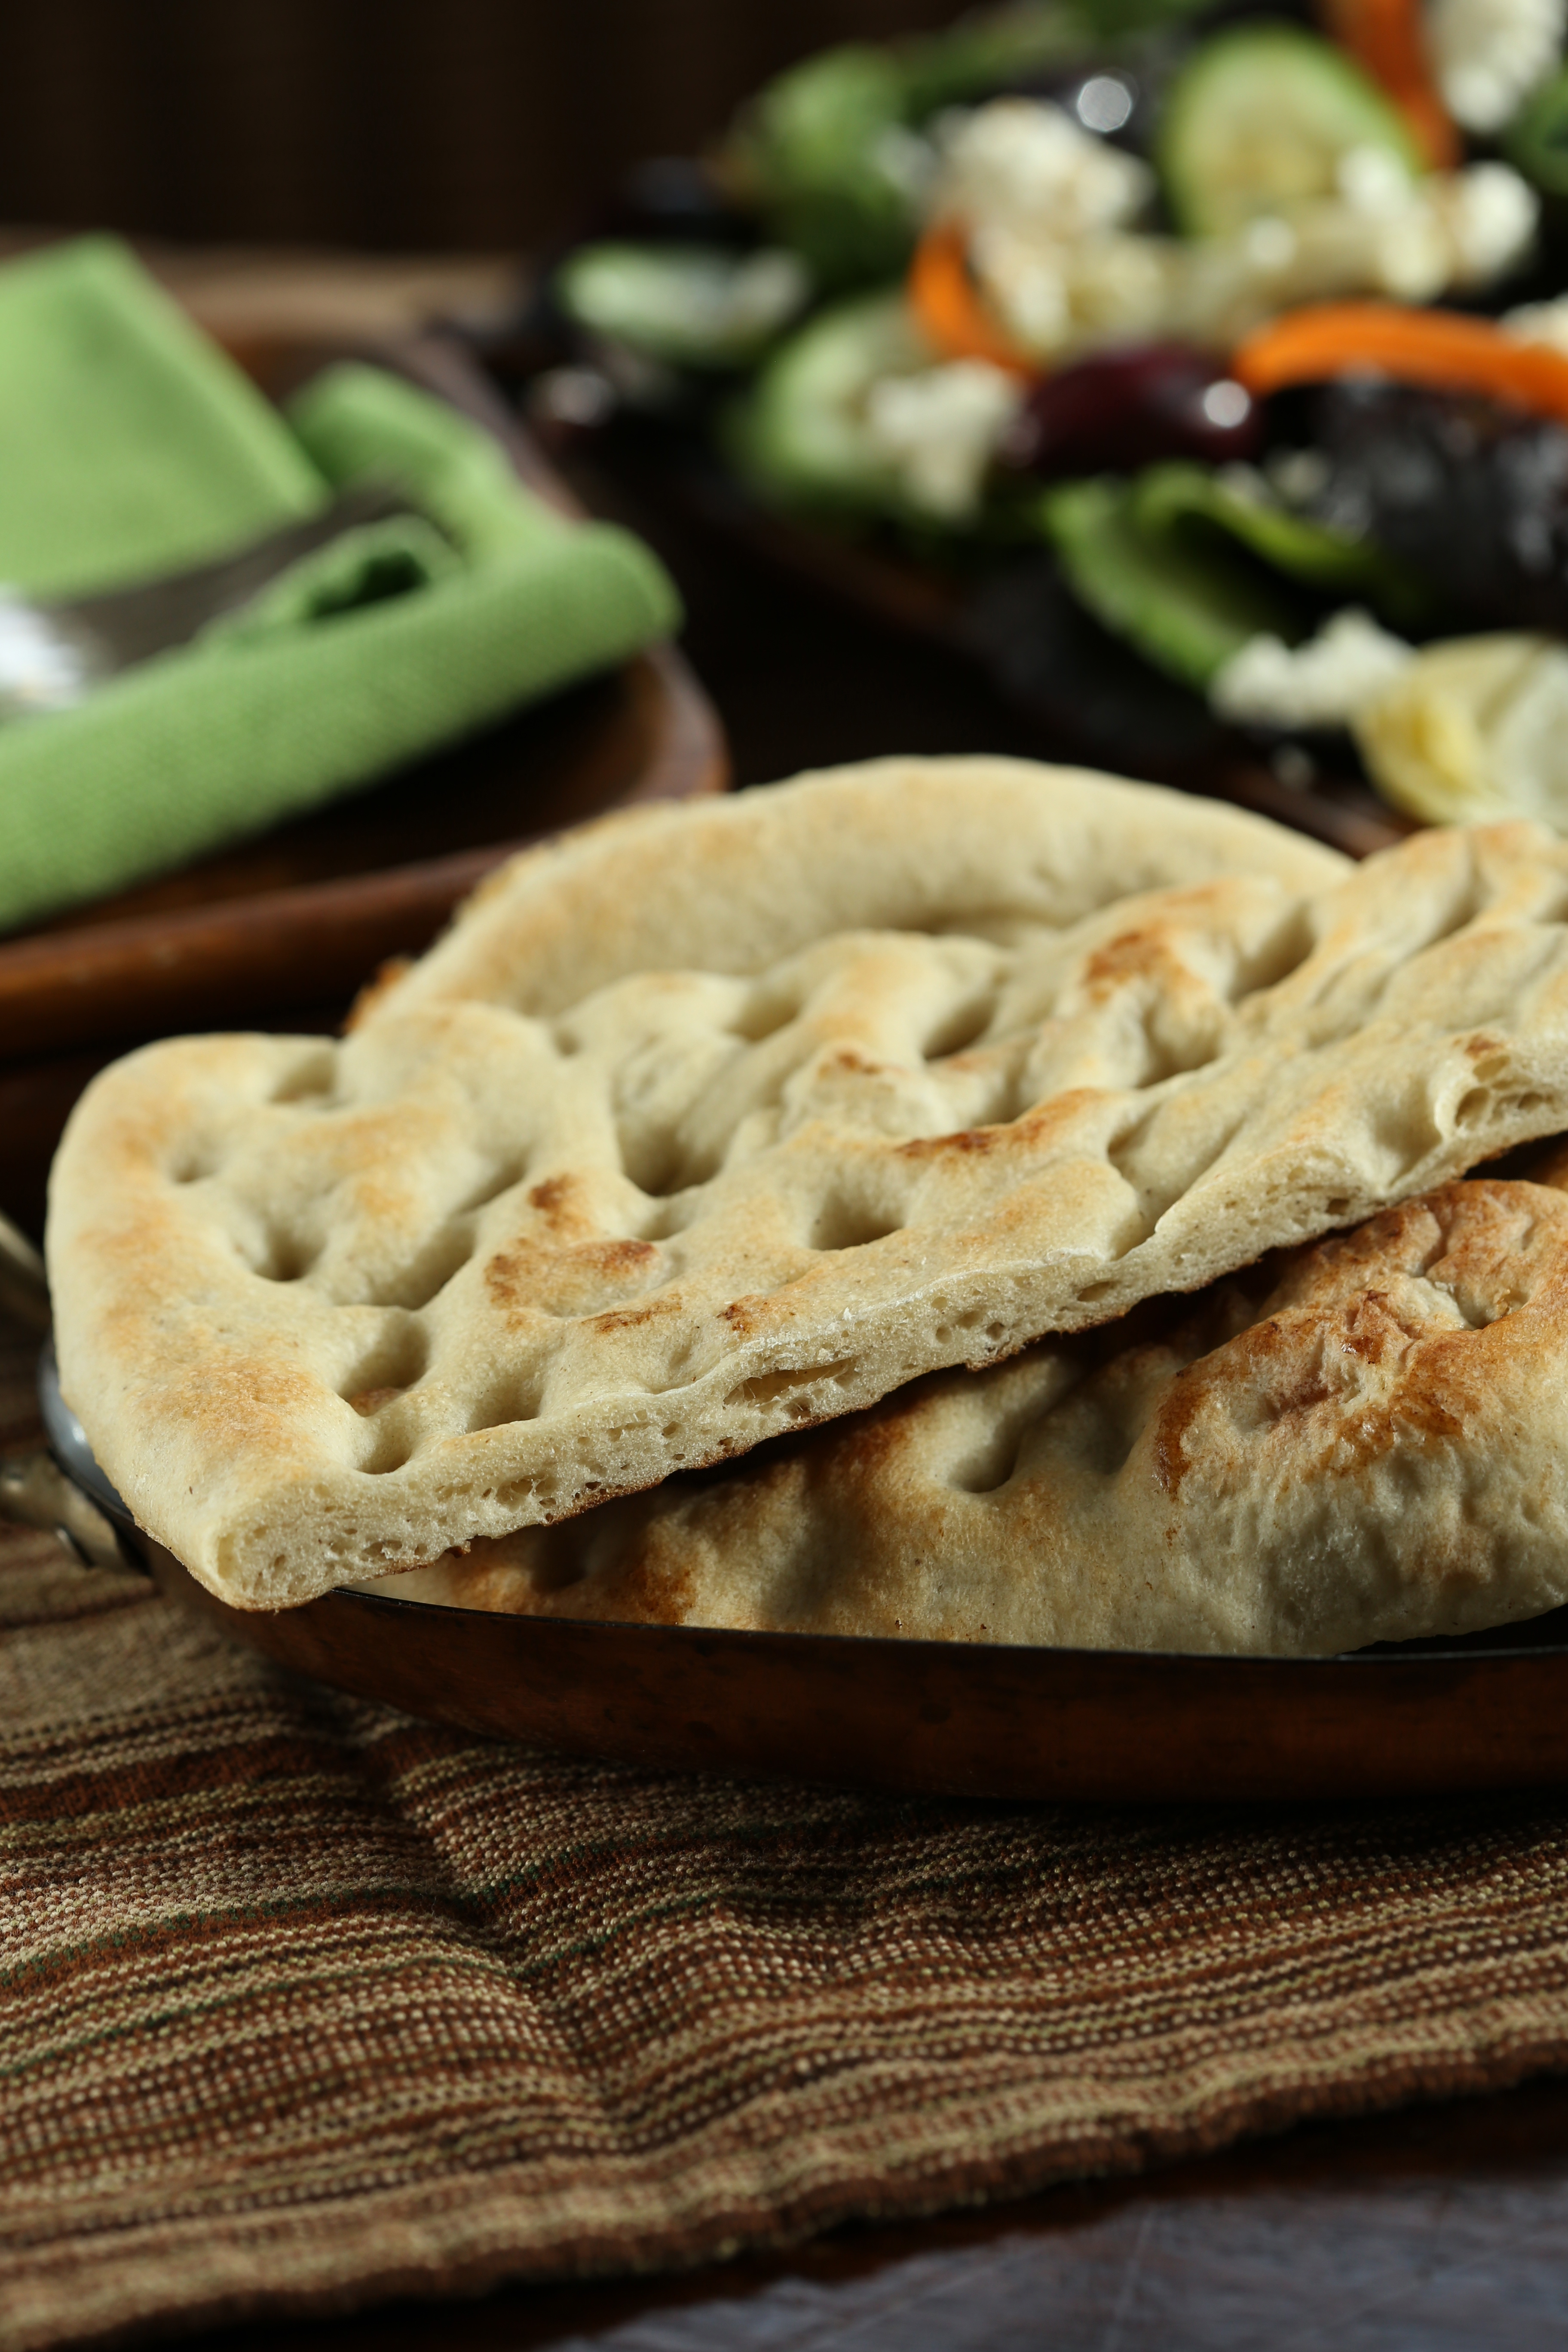
 This week, we revisited a recipe we prepared once before because part of baking every recipe in a cookbook means that on occasion, you make a recipe more than once. Sort of. The dough for Persian Naan is also the dough used for Oasis Naan, a flat bread we made way back when I lived in Nashville. The dough is quick and easy to mix and only requires a single rise until doubled before being shaped and baked.
 The bread is not one that holds well and as a result, I made half the recipe. Considering that the loaves are stretched until they are about 18 inches long, halving the recipe really made sense. My loaves were only about 12 inches long which fit my baking stone with room to spare. After dividing, preshaping and resting the dough while the oven heated, the dough was heavily dimpled with wet fingertips before the stretching began.
 My first loaf inflated like a balloon in the oven so I chose to dock the rest of them to prevent them from looking more like a bread pillow than a bread sheet.
 The recipe called for a simple topping of sesame seeds and I stuck to the recipe this time out. It was chewy and pliable with a light crust, perfect for scooping up stuff or wrapping around something while it was warm. My plan is to tear off pieces and eat it with some roasted vegetables for dinner.
 Late last month, I made a loaf of the buttermilk bread from Baking with Julia. It was the challenge for the week chosen by the Tuesdays with Dorie bakers and despite baking it on time, I never posted my photos.
 One of my favorite types of bread is Japanese Hokkaido Milk Bread. The tall loaves are actually made of smaller loaves placed side by side in the pan. Once baked, you can separate them into smaller pieces. Because there is just the two of us here, I chose to make my loaf into three smaller loaves.
 After the loaf cooled, I pulled it apart and froze two pieces for later. The texture was so nice and fluffy and it had wonderful flavor. We ate it all pretty quickly, it made fantastic sandwiches! This is definitely a loaf worth making again and if you haven’t made it yet, I highly recommend giving it a go-just add the flour cautiously, you may not need it all.
 The day I made the loaf was one of those days that I had a list of things to do that was as long as I am tall. Taking a lot of photos was not an option and I had to make do with what was in front of me rather than styling the photo. Rather than drag bounce cards and tripod out, I took an empty box of cereal and clipped a binder page to it to reflect the light.
 This week, the recipe was a true challenge that took two weeks to complete. Now if that doesn’t deter you from trying to mix up a batch of this bread, not much will! To make a traditional Pain de Campagne, you have to save a piece of the dough from your batch to act as a starter for your next loaf which means you are always working with a bit of old dough called a chef. If you find yourself without a chef, you have to start one with whole wheat flour and water and pray the yeast feels like cooperating.
 The rye is on the left, the graham is on the right. What a disappointment it was, I had assumed that since I do a fair amount of bread baking here that there would be plenty of yeast to grab and get the starter going.
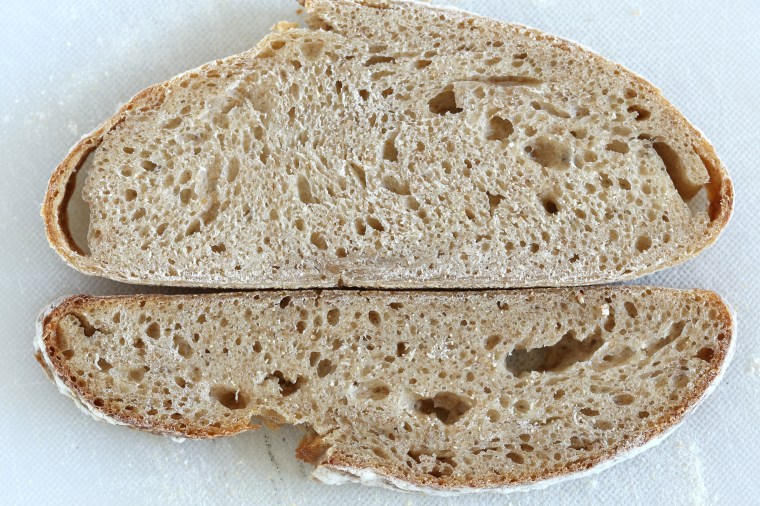 Out of curiosity, I sliced the loaves to see what the interior looked like. It was dense, moist and a bit gummy. Both of them were. It was pretty obvious that there just was not enough yeast in the chef and then the levain to give rise to the bread. Honestly, I was surprised that the graham loaf had a ribbon of raw dough along the bottom crust-it had risen pretty well. The flavor was surprisingly sour, a mild sour but it was there.
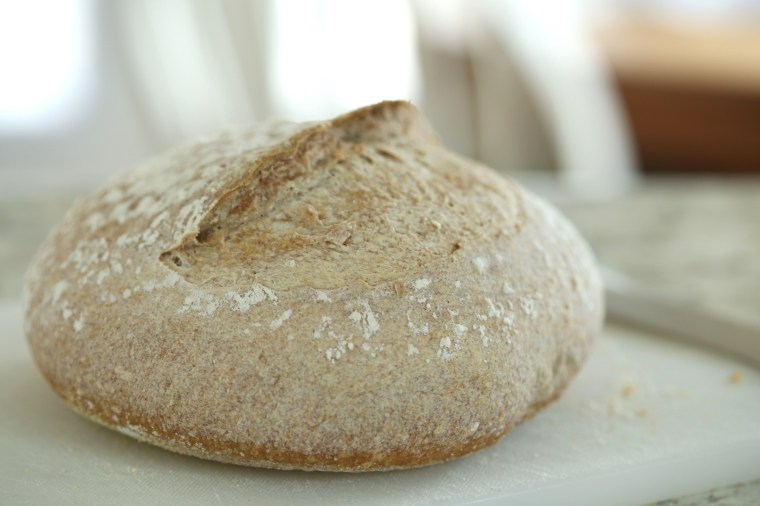 The little ball of dough rose nicely and because I ran out of time, I decided I would put the basket of dough in the fridge to rise overnight. Because I am curious, I pulled off a walnut sized piece and set it aside in the fridge; I was going to use it as a chef for a full batch of dough. The next morning, I pulled the basket out of the fridge and let it sit on the counter to warm up and rise a little more.
 When the time came to bake the loaf, I was excited-this one actually rose! There was oven spring too-it rose more! The only thing I did not understand was the pale color of the crust on the top, it browned nicely on the bottom. The interior looked nice, no stripes and no gummy crumb. It also had a nice sour flavor. As for that piece I set aside, I used it to start a new loaf but this time, I made a full batch.
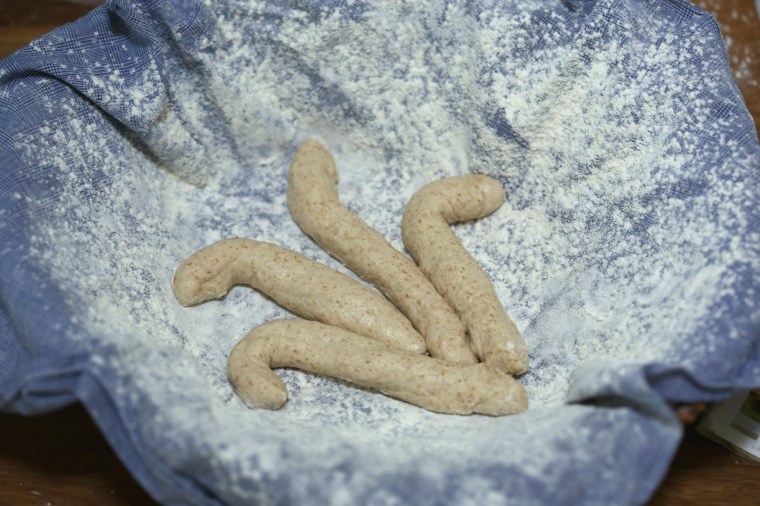 The shaping was easy to do and I cannot remember when I did this type of baking last-perhaps at school…My wheat stalks in the bottom of the basket.
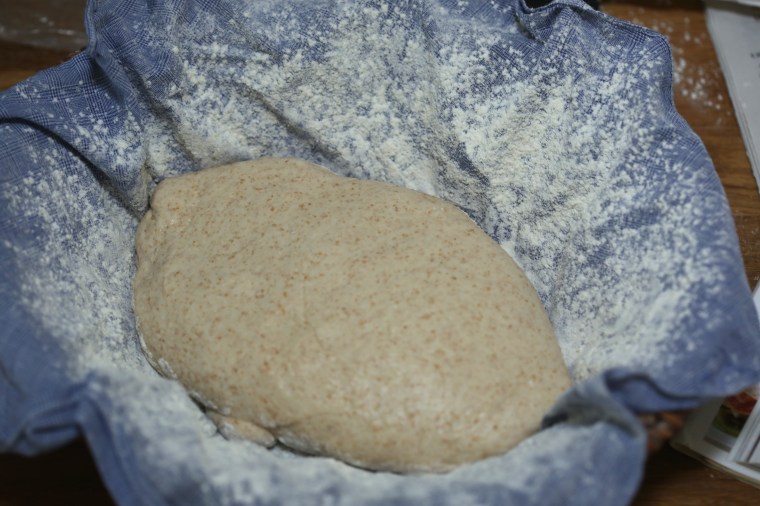 The loaf was placed over the wheat stalks.
 The loaf gets wrapped with a braid of dough and then it is left to rise in the basket. Two hours later, I turned it out onto the peel and let it rise some more. Just before baking, I brushed the loaf with a wash of egg whites and snipped the wheat stalks.
 Fresh out of the oven, my wheat stalks look more like paws.
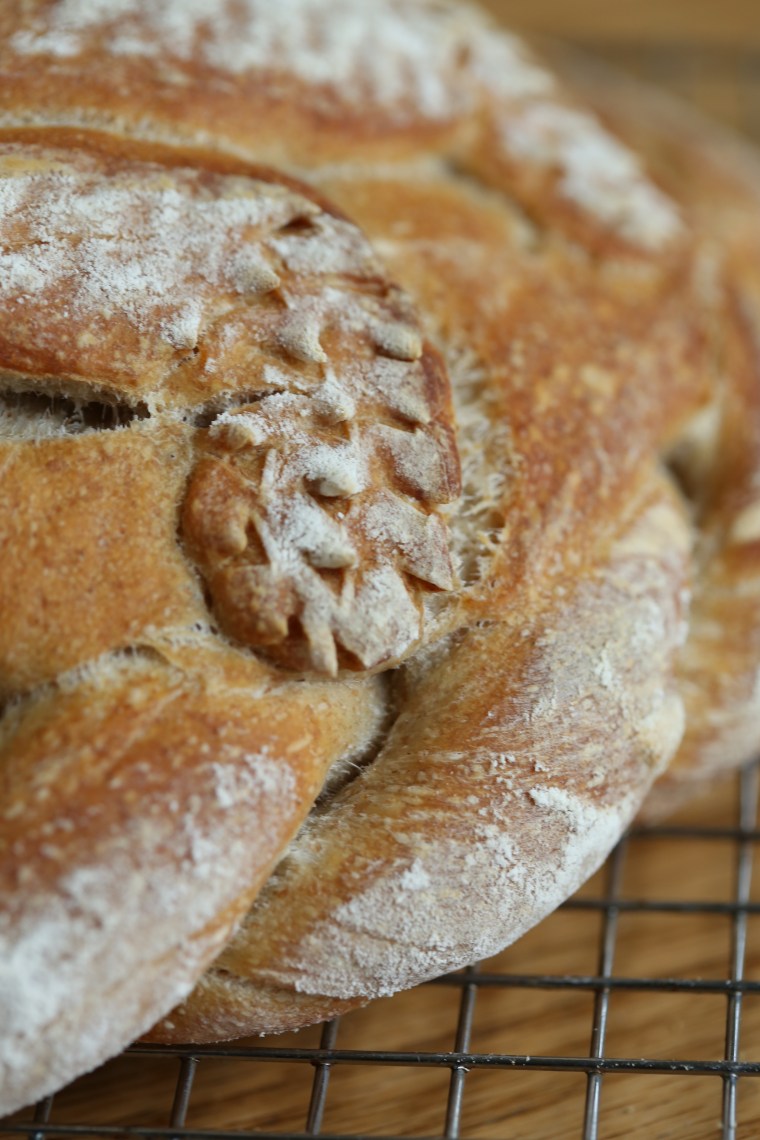 The scissors did a nice job on the stalks. It was fun to make this loaf and now it is sitting on the counter taunting me…
 May have to make another one just so I can make those wheat stalks again! Be sure to visit the