Middle Eastern bread recipes have long since been an interest of mine and living in Nashville made it easy to learn about them. Our former home was located within the largest Kurdish community in the US and I had an opportunity to visit a small local bakery and watch as the women prepared fresh naan and then baked it in a tandoori oven. It was unsettling to watch as they threw the bread against the sides of the oven using bare hands knowing full well that the temperature was about 700 degrees. The bread cooked so quickly in the high heat that as fast as one loaf was thrown in, it was taken out in what seemed to be less than a minute and it probably was. Slightly spongy and chewy, fresh-baked naan quickly became a favorite of ours and we frequently returned to the shop to buy more. The most amazing thing about that bread was the cost. While you might expect to pay several dollars a piece for the 14″ rounds of bread, you would be shocked to learn that a bag of 3-4 rounds cost less than $3. Sadly, we left Nashville for Williamsburg and our love of fresh-baked naan has become a memory.
 Every now and then, I pull my copy of Flatbreads and Flavors by Jeffrey Alford and Naomi Duguid off the shelf and make a batch of Middle Eastern flat bread in the hope of experiencing the same texture as the naan that we miss. So far, it has been hit or miss, mostly miss but I do not think it is the book’s fault. My kitchen does not have the types of ovens called for in the traditional baking methods and I am usually attempting to utilize various kitchen implements to do the job. While the authors give great suggestions on how to get the described results, I have not had the time to make multiple batches in an effort to find my groove…

This week, the Tuesdays with Dorie group chose to make the Moroccan Pebble Bread from Baking with Julia and it just so happens to have been contributed to the book by the authors of Flatbreads and Flavors. Feeling as though I had a little experience with this sort of bread and a familiarity with their recipes, I went ahead and mixed up half a batch-more than enough for the two of us.
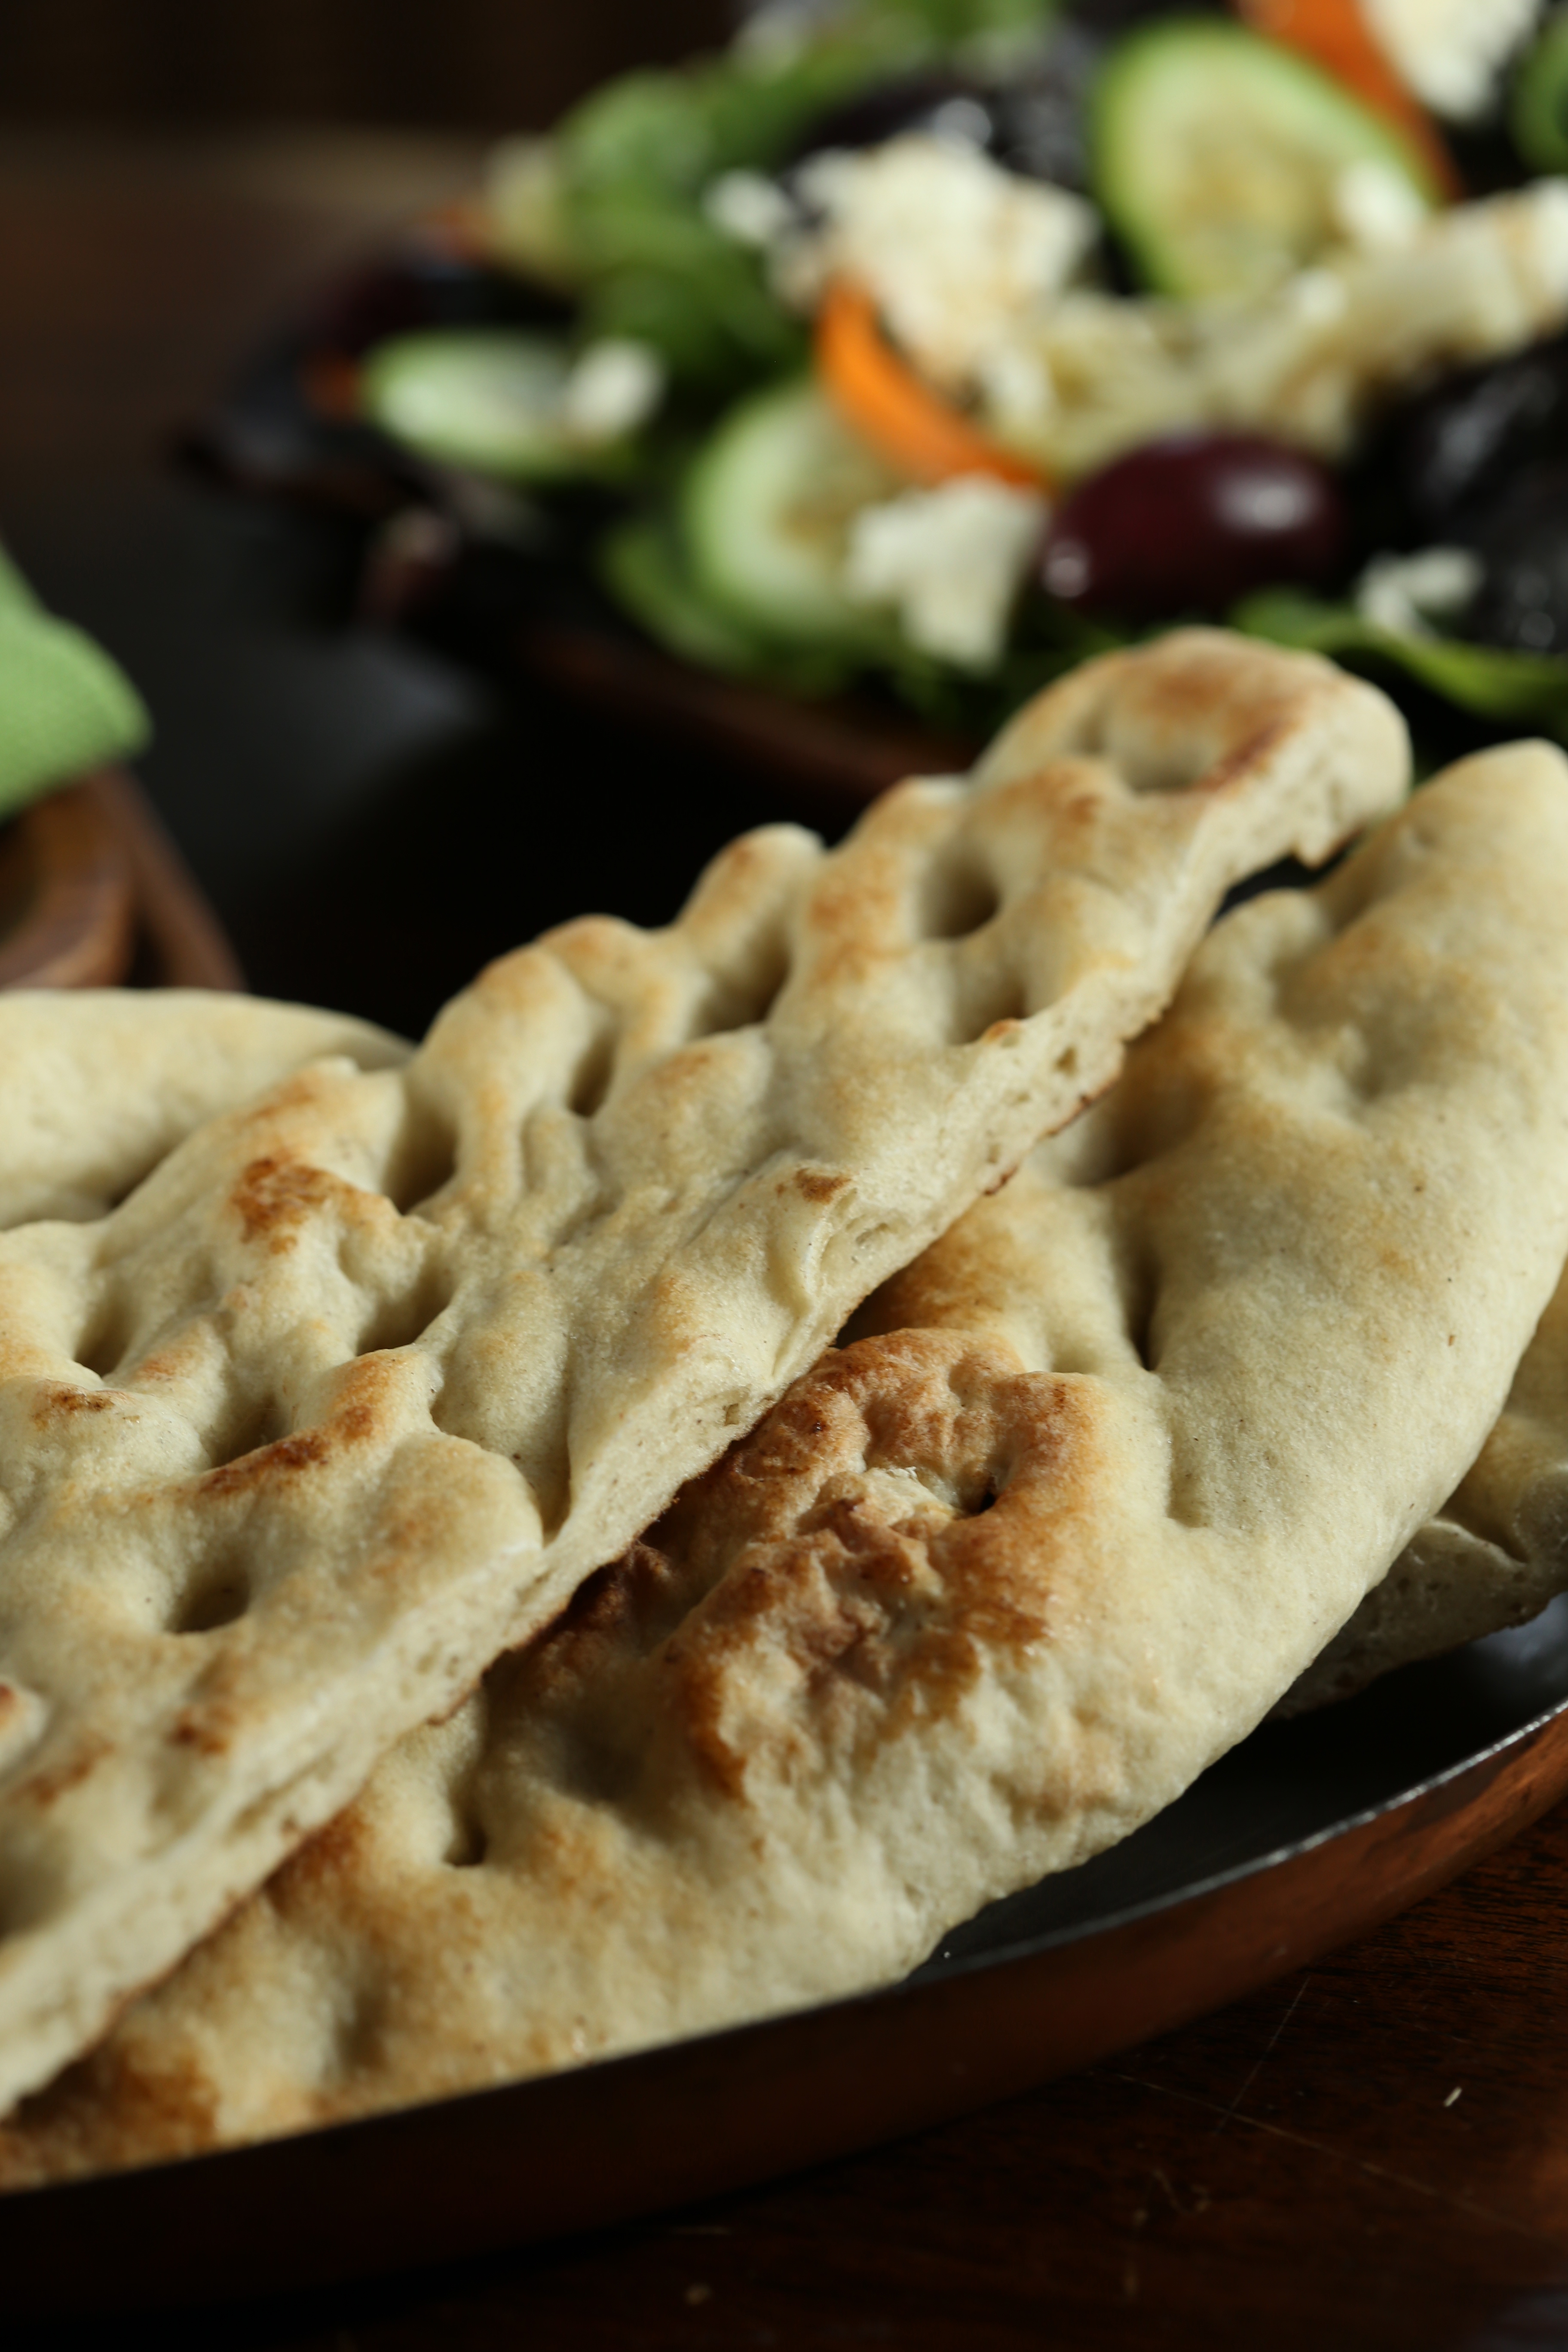
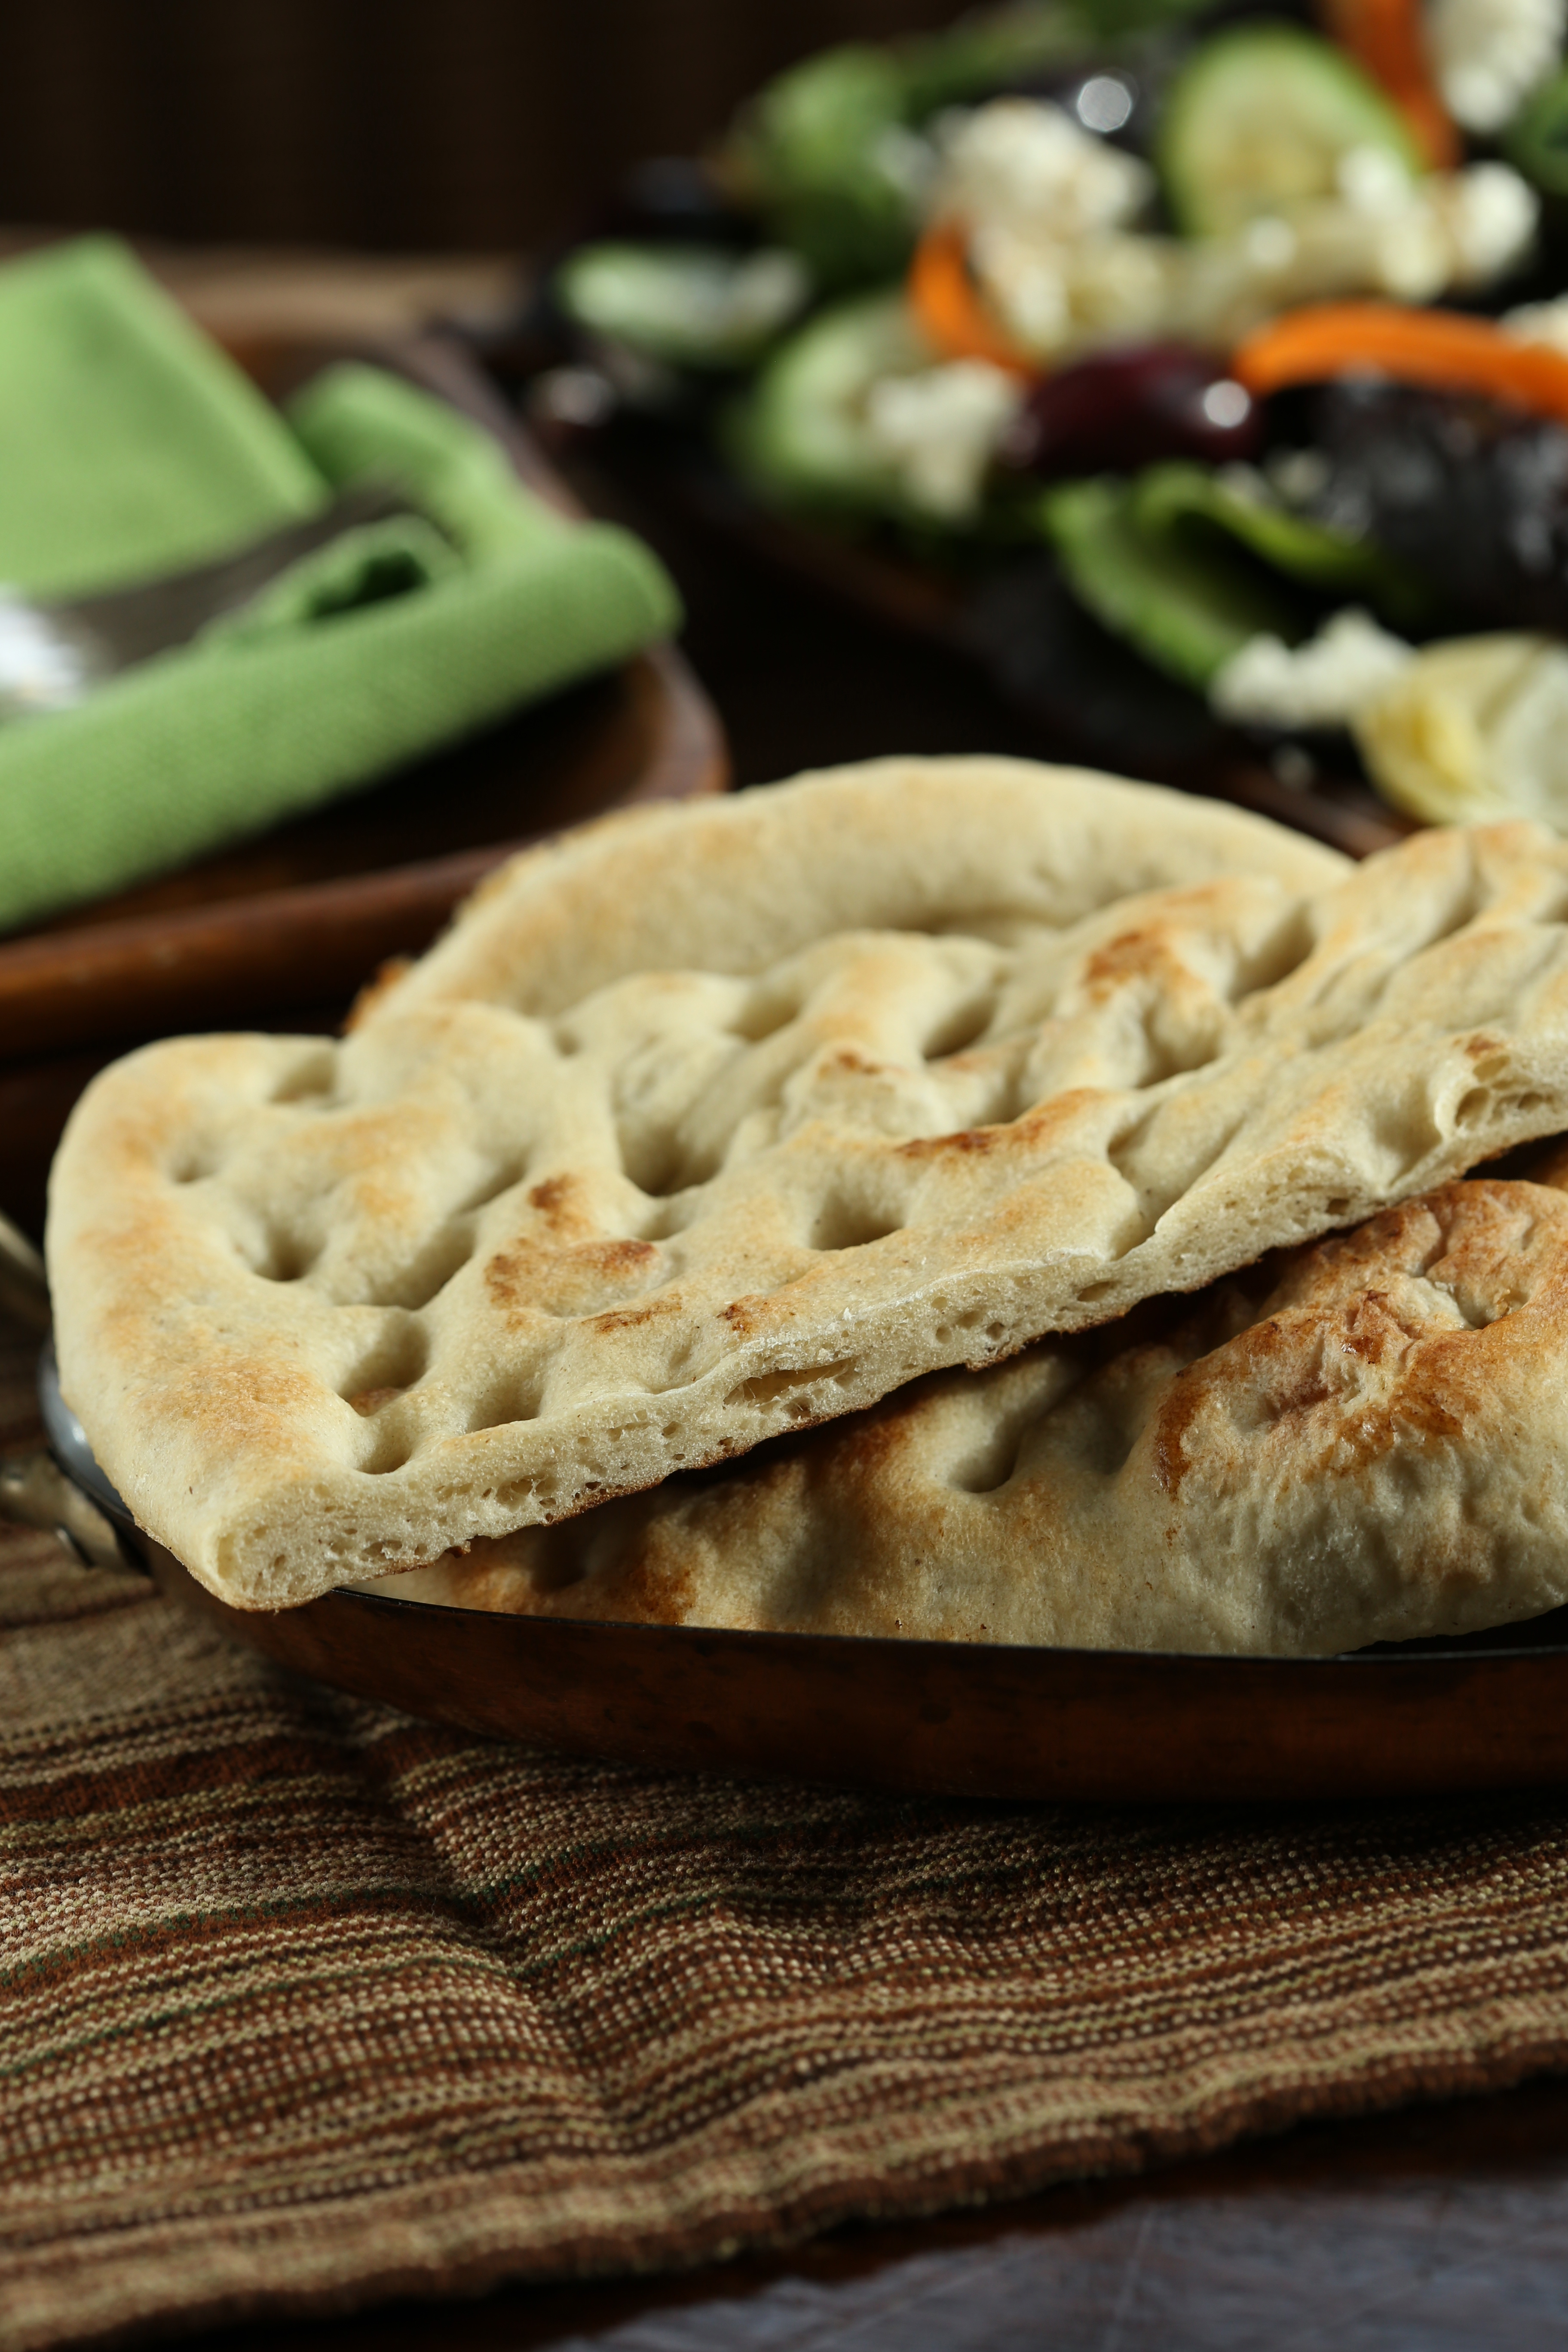
You are instructed to use a blend of barley and bread flours and I was surprised to find Bob’s Big Red Mill barley flour in my local grocery store; they sold it with the natural foods. With that first hurdle cleared, I went about figuring out how I would bake the loaves. Our gas range is still in storage awaiting the installation of gas service from the street out front to the house and I have had to learn to cook on a glass-topped electric range. While they may be easy to clean, the glass is easy to scratch and even break so you must know how cautious I was with my cast iron skillet on the stove top. The directions call for an oven safe skillet that you will be moving from the stove top to the broiler for each loaf and I was worried that moving a cast iron skillet around on the stove was a recipe for disaster-pun intended. To preserve my sanity, as well as the glass cooktop, I parked the skillet on the burner and set my baking stone about 7″ below the broiler and gave it a solid preheating. Rather than move the skillet, I moved the loaves from the stove top to the stone using a pair of tongs. It seemed to work fairly well and if I were to make this bread again, I would use this method. The only other note I will make, my dough needed a lot less bread flour than the recipe suggested. Since I was making half a batch, it called for 2 cups of bread flour but my ball of dough used about 1 1/4 cups and since it was so stiff and hard to roll out, I would suggest using a little less next time.

The only thing I did differently, and quite by accident I will add, was that I did not oil the skillet before adding the loaf and since my cast iron skillet is well seasoned, it did not make a difference. As the bread sizzled and steam rose, the bottom cooked quickly and after pressing the surface to make more dimples, in a few minutes I was able to lift the loaf using my tongs and put it on the stone where the broiler could cook the top of the loaf. It went quickly and for the most part, the loaves baked evenly although there were a few spots here and there that the bread was slightly underdone, something that rolling it out the dough thinner will eliminate. Even so, this was the closest I have gotten to achieving a good loaf of Naan-like bread. The texture was slightly spongy and just a little chewy with the dark spots from the skillet and the broiler giving it a wonderful toasted flavor. It won my husbands approval and honestly, mine too.
With summer approaching, I may have to try this one outside on the grill because there isn’t much better than a salad with fresh bread on a summer day! To see what the other bakers came up with, be sure to visit the Tuesdays with Dorie website and look for the LYL page.

Thanks for the tips, and glad to hear the good review. I skipped out on it this week, but will make it up with the end-of-month rewind.
LikeLike
Thanks for the tips, and glad to hear the good review. I skipped out on it this week but will make the bread for the end-of-month rewind.
LikeLike
Nice pictures!
I also made a half batch and found that I had way too much flour. (I kept my skillet on the stove and put the bread directly on the oven rack to broil).
This would be a great grill bread.
LikeLike
glad to hear I was not the only one thinking the flour amount was off! my pizza stone lives in the oven and I went ahead and used it, never even thought to just put them on the rack.
LikeLike
Your bread is beautiful! I too have tried nann with very poor results. I’m going to try this using your technique. Great post!
LikeLike
Wow-I can’t believe you made this at home. It looks wonderful. I would have believed you if you’d said you had found a way to make these on the sides of the hot oven and risk your hand with the 700degrees 🙂
LikeLike
Even though I bake for a living, the thought of sticking my hand in a tandoori oven scares me!
LikeLike
Great post! Your bread is beautiful. I have tried nann before with very poor results. I’m going to try thid recipe and use your tecnique.
LikeLike
The authors suggested something similar but I just made changes to suit my kitchen. Please let me know if they work for you!
LikeLike
Your bread came out beautifully. It really looks professional. Thanks for the tips. I’m hoping to get around to making this one soon.
LikeLike