Well, it goes without saying, I have neglected this blog lately. As spring approached, things in the garden at home and in the Demonstration Garden got busy, very busy. As we have worked to prepare the Demonstration Garden, a small team of volunteers worked on getting the word out. The result, a chance to tape two segments for a local TV show, Talk of the Town. The plan, tie the garden into the Royal wedding happening this Saturday. The result, a Blackberry-Lime Julep Cake and opportunity to talk about flowers.
While the cake the royal couple chose sounds delicious, I had to give it a southern spin. Spring in the south means horse races, lots of flowers and a bit of bourbon drinking in the form of mint juleps. For a cake, those things all work well. Elderflowers are not easy to come by but blackberries are so I decided to make a cake that combined blackberries and lime with a rich bourbon buttercream. And for those of you that are shaking your head and wondering about the mint, I chose to use it to decorate the cake. In the photo above, you can see Mountain Mint, False Blue Indigo, Red roses, Blackberry blossoms, Cilantro blossoms, Chamomile blossoms, Tansy leaves and Thyme. If you want to use fresh flowers or herbs to decorate a cake, be sure that they have not been treated with any chemicals. These all came from the garden and were grown without any chemicals, and with the exception of the Tansy and the False Blue Indigo, they are all edible.
And because I love to swirl colors together, I marbleized the layers of the cake and I suggest you do this too! The pale green color of the lime batter contrasted nicely with the purple blackberry batter. Honestly, you could do this with blueberries as well, the recipe was adapted from one in my first book, Sky High Irresistible Triple Layer Cakes.

Blackberry Julep Cake
Makes 1 (8-inch) triple layer cake to serve about 16
2 sticks (8 ounces) unsalted butter, at room temperature
2 cups sugar
1 tablespoon freshly grated lime zest
½ teaspoon salt
7 egg whites
3 cups cake flour
4 teaspoons baking powder
1-1/4 cups milk
Blackberry-Lime Preserves, recipe follows
Bourbon Buttercream, recipe follows
Fresh flowers, mint sprigs and blackberries for decoration
1. Preheat the oven to 350 degrees F. Grease 3 (8”) cake pans, line them with parchment paper and grease the paper. In a mixer bowl, cream the butter with the sugar, lime zest and salt until light and fluffy. Gradually add the egg whites, 2-3 at a time, beating well between additions and stopping to scrape the bowl.
2. Combine the flour with the baking powder and whisk gently to blend. In 2-3 alternating additions, beat the dry ingredients and milk into the butter mixture, scraping down the sides of the bowl several times. Beat on medium-high speed for about 1 minute to smooth out any lumps and aerate the batter.
3. Scoop out 1 cup of the batter into a small bowl. Divide the remainder equally among the 3 prepared pans, smoothing out the tops with a rubber spatula. Mix 2-1/2 tablespoons of the Blackberry-Lime Preserves to the reserved batter and blend well. Drizzle heaping teaspoons of this blackberry mixture over the batter in the pans. Using a skewer or paring knife, swirl the blackberry mixture in short strokes to drag it down through the batter but take care not to mix it in.
4. Bake for about 25 minutes or until a cake tester or toothpick stuck into the center comes out clean and the cake begins to pull away from the sides of the pan. Let the layers cool in the pan for about 10 minutes, then turn them out onto wire racks, remove the parchment paper and allow them to cool completely.
5. To assemble the cake, place a layer, flat side up on a cake stand or serving plate. Spread half of the Blackberry-Lime Preserves over the top. Place a second layer on top of the first and spread the remaining preserves over it. Finally, place the third layer on top of the second and frost the sides and top of the cake with the Bourbon Buttercream Frosting. Arrange the flowers, mint and berries around the top of the cake and the serving plate.
Blackberry-Lime Preserves
Makes about 1 cup
3 cups frozen blackberries, fresh or frozen
¾ cups sugar
2 tablespoons freshly squeezed lime juice
2 teaspoons freshly grated lime zest
1 teaspoon grated fresh ginger
1. If using frozen blackberries, allow them to thaw and the juices to accumulate. Place the berries and the juice into a blender. Puree the berries and pass them through a strainer to remove the seeds.
2. In a heavy medium nonreactive saucepan, combine the blackberry puree with the sugar, lime juice, lime zest and the ginger. Bring to a gentle boil over medium heat, stirring frequently dissolve the sugar. Continue cooking, stirring often, for 20 minutes, until the preserves have thickened and are reduced to 1 cup.
Bourbon Buttercream
Makes about 3-1/2 cups
1 cup sugar
6 tablespoons Bourbon
2 eggs
3 sticks (12 ounces) unsalted butter, at room temperature
2 tablesoons freshly squeezed lime juice
1. In a small nonreactive saucepan, combine the sugar and Bourbon. Bring to a boil over medium heat, stirring to dissolve the sugar. Continue to boil with out stirring, occasionally washing down the sides of the pan with a wet pastry brush, until the syrup reaches the soft-ball stage, 238 degrees F, on a candy thermometer. Immediately remove from the heat.
2. In a large mixer bowl with the mixer on medium speed, beat the eggs briefly. Slowly add the hot syrup in a thin stream, pouring it down the sides of the bowl; be careful to avoid hitting the beaters or the syrup will splatter. When all of the syrup has been added, raise the speed to medium-high and beat until the mixture is very fluffy and cooled to body temperature. This can take 15 minutes or longer.
3. Reduce the mixer speed to medium-low and gradually add the softened butter 2-3 tablespoons at a time, beating well between additions. As you’re adding the last few tablespoons of butter, the frosting will appear to break, then suddenly come together like whipped butter. Beat in the lime juice, and the frosting is ready for use.

Many thanks to Tuwanda Coleman and Talk of the Town for the opportunity to tape the segments and for promoting the Urban Gardening Festival. To see the segments from Talk of the Town, follow these links:
 Every month, our Master Gardener group has a potluck dinner that precedes our meeting. Each member brings a dish to feed about 8-10 people and I always bring cake. My original plan was to make an apple cake to use a few leftover apples, but when I went to the grocery store, pineapples were on sale. My plans quickly changed.
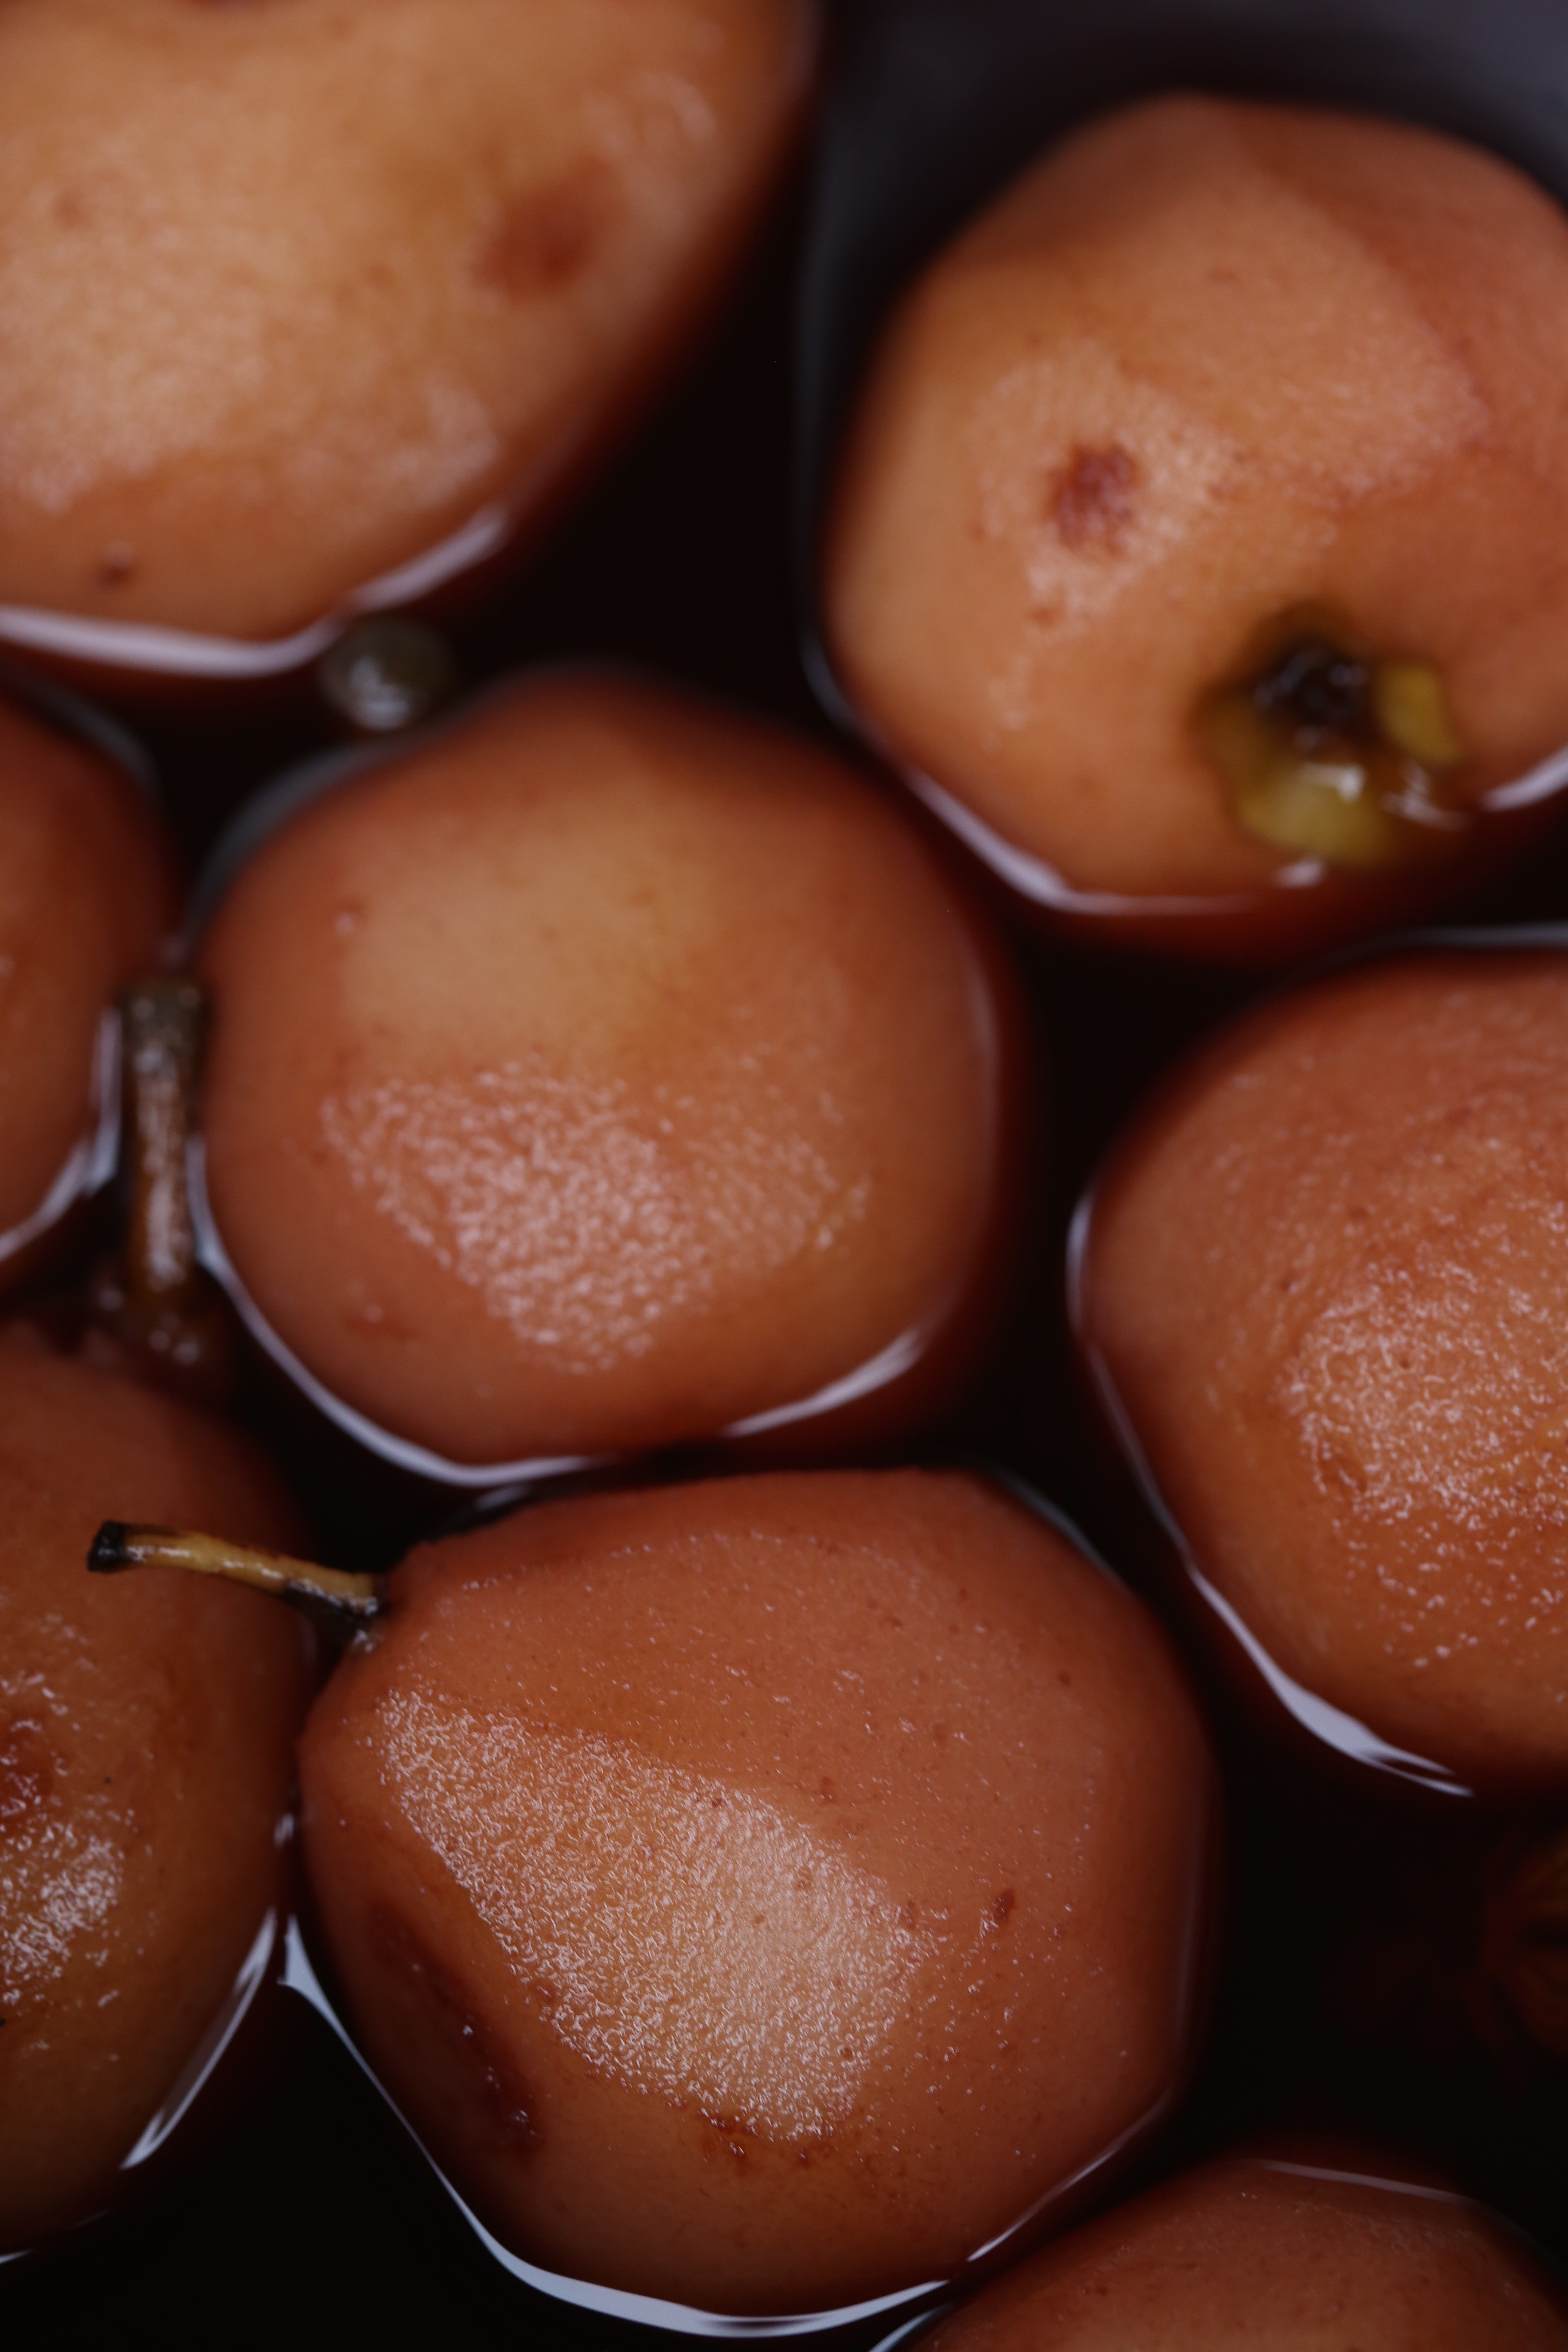
 To make a really good pineapple upside-down cake, you must use a fresh pineapple. While canned fruit will work in a pinch, it just does not have the flavor of a fresh pineapple. If you do not want to mess with cleaning a fresh one, look in the refrigerated section of the produce department in the grocery store. Most stores will stock fresh pineapple that has been peeled and cored, keep in mind that it will also cost at least double the price.
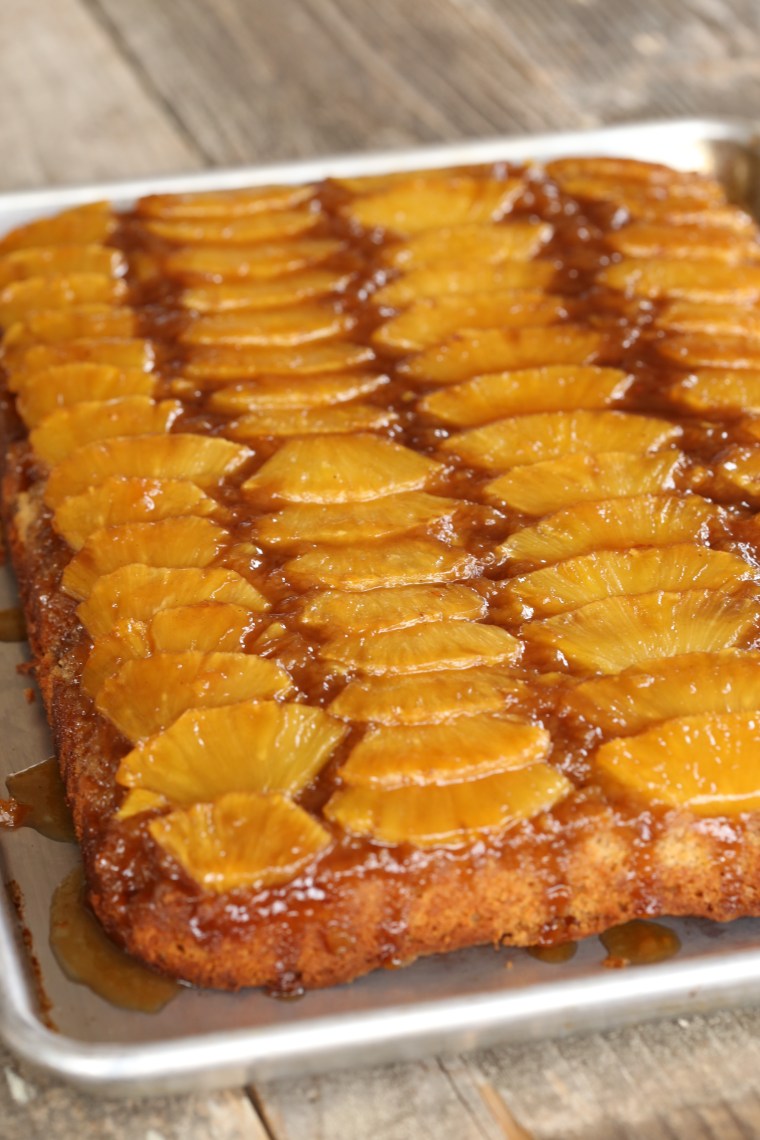
 Use a roasting pan that is 10 inches by 13 inches or use a rectangular cake pan of a similar size as long as the sides are close to two inches high. Grease the pan well and pour in the caramel. Tilt the pan to spread it evenly across the bottom and then layer in the slices in any pattern that suits you. For my cake, I chose rows simply because they would act as a cutting guide for the person who would be slicing the cake and it worked out beautifully.
 When the cake comes out of the oven, it is important that you let it sit for 10 minutes before unmolding it or the fruit will stick to the pan. The caramel is boiling at that point and it needs to cool a bit to form a bond with the fruit and the cake. If you wait too long, you will need to return it to the oven to heat it up again, so this step is not one that you want to lose track of. Set your timer for 10 minutes when you take it from the oven and wait for it! Place a sheet tray or serving platter over the cake and invert it. The cake should release immediately and fall right out onto the platter. Allow it to completely cool off before slicing or the cake will crumble.
 The perfect blend of spice cake and caramelized fruit!
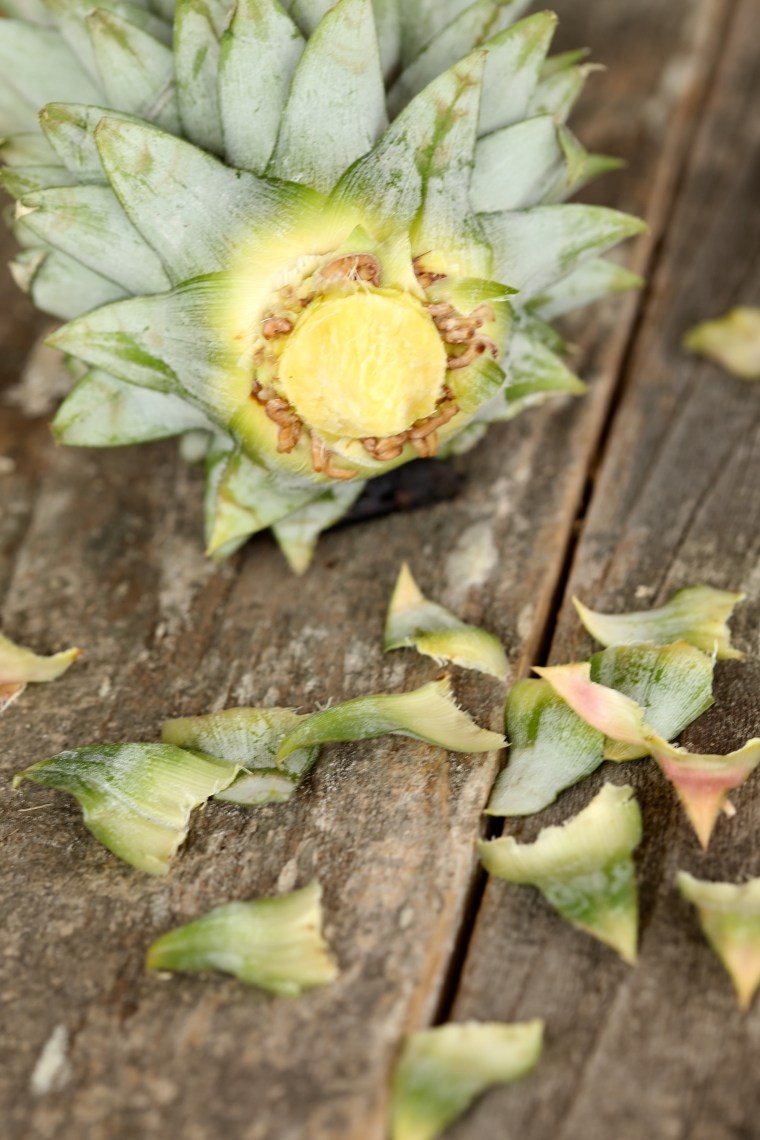 While your cake cools, let’s get that crown taken care of! Gently pull off the leaves of the crown until you reveal what looks like roots. Believe it or not, they are roots! When you have a nice layer of them that goes all the way around the pointed end, place it in a glass of water.
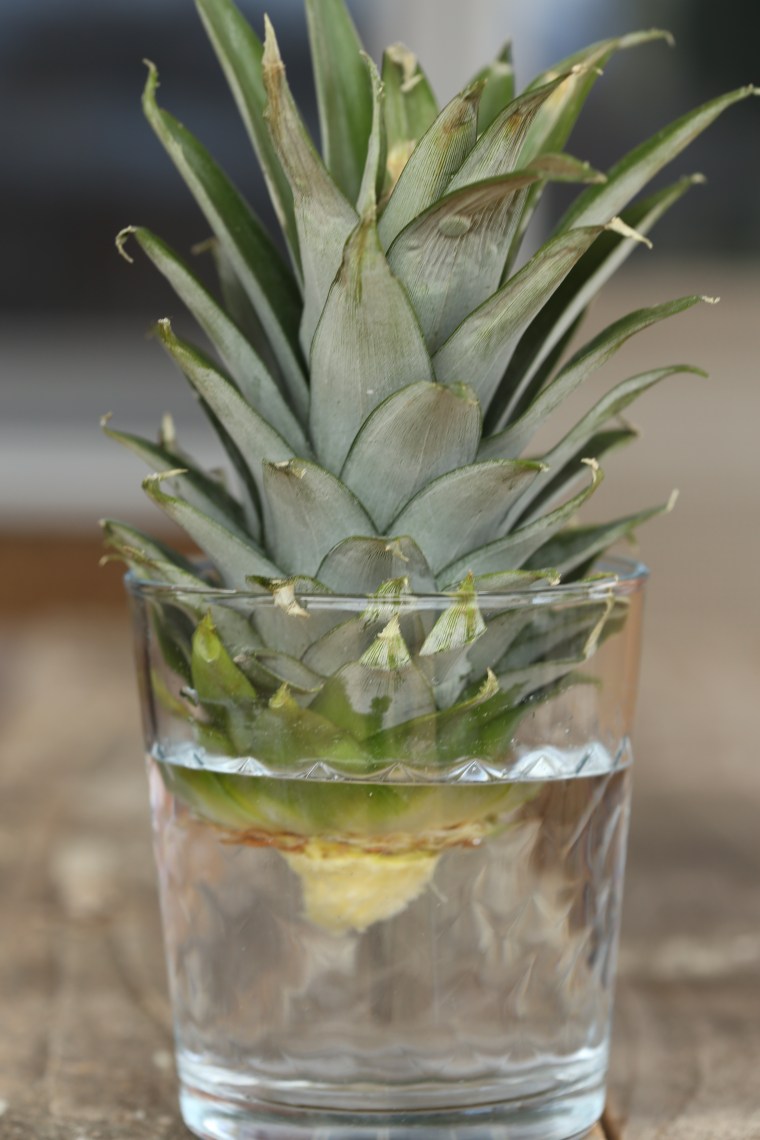 Keep it near a bright window and be sure to change the water frequently so that it does not get moldy or fermented. If all goes well, you will have roots that stretch down into the water and you can plant it in a pot. Use a light soil, one that will not hold water and make sure it is in a warm, sunny spot. It will take a long time to grow a fruit, be patient! For more information, here is a
  When I signed up to attend the hypertufa workshop, read about that
  Late summer is tomato season and if you find yourself with a few too many, consider making a cake with them. Actually, this recipe is versatile enough that you can make it with canned tomatoes, either crushed or puree, or even with tomato juice which means you can have it anytime. If you use a purchased puree or juice, check the ingredient list to make sure that ingredients such as onions or garlic are not included.
 A few things to consider here. Raisins are one of those ingredients that you either love or hate. Personally, I am not a big fan but in this recipe, the golden raisins really work. Just be sure not to skip the step to plump them or they will actually draw moisture from the cake and can make it seem dry. If you use fresh tomatoes, blanch them to remove the skin and then cut each one in half and squeeze out as many of the seeds as you can before pureeing them. The nice thing about using fresh tomatoes, you can mix it up by changing the variety of tomato. Of course, you can just use a can of puree and make it anytime you want a fresh baked spice cake.
 As the summer fades, spice cakes shift to center stage. Slightly denser, jammed full of warm spices, and in this case, loaded with dried fruit and nuts, spice cakes are the perfect pick-me-up as the temperatures finally start to cool off. For this cake, I combined cinnamon, allspice, cloves and freshly grated nutmeg which give the cake a warm, spicy flavor.
 Guess Again Tomato Cake
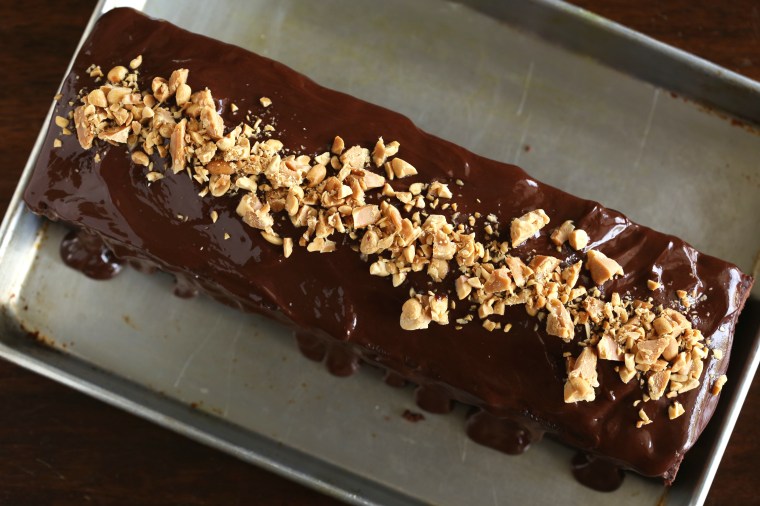 If only I knew what a Sunday in Paris was like; someday… Actually, in this case, it is a reference to a pastry shop in Paris and that is the name of it; Sunday in Paris. This cake is a specialty of theirs and a favorite of Dorie Greenspan’s which is why she developed the recipe for her book, Baking Chez Moi. The Tuesdays with Dorie bakers chose this cake for February and it was a great cake for Valentine’s day, or any day that chocolate and peanut butter are appropriate-otherwise known as everyday in my book!
 Peanut butter is not that popular in Paris where Nutella apparently reigns but here in Tennessee, it flies and fast. We took this cake to a potluck dinner and I came home with crumbs on a dirty tray. The dark, rich cake reminded me of
  This is a recipe I would make again and if you have the book, do not hesitate to try it! To see what the other bakers came up with this week, visit
 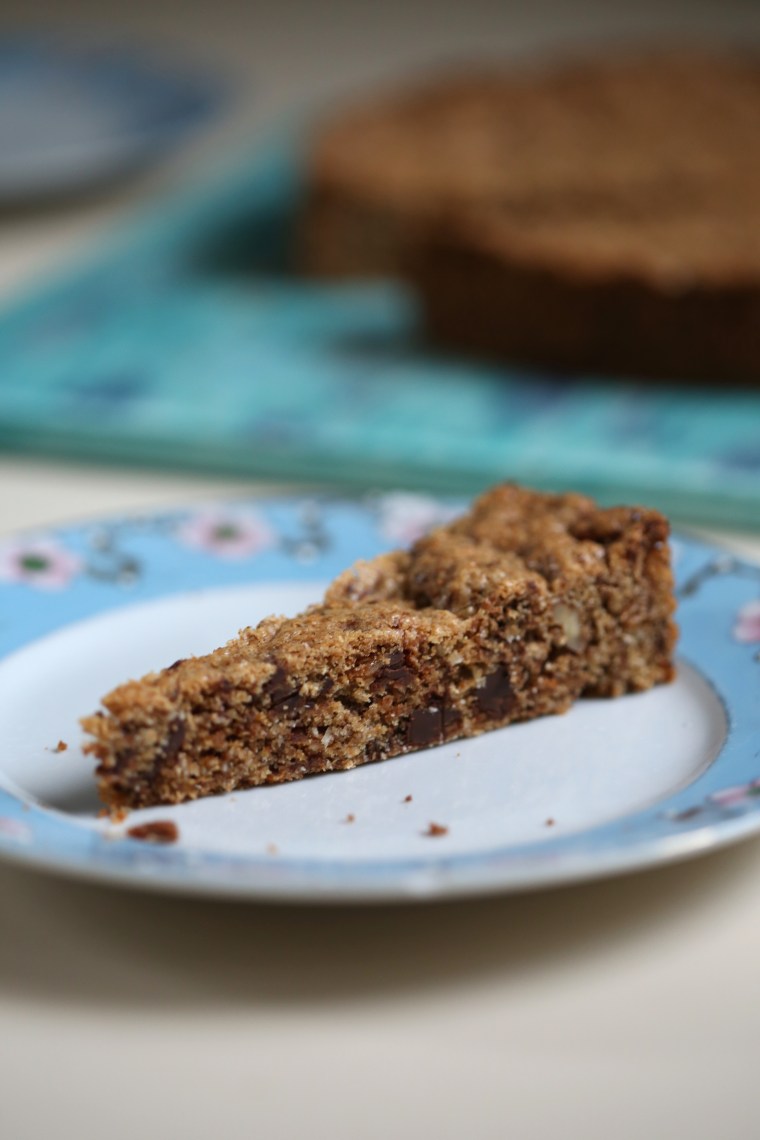 Back in September, I learned we were relocating again. After a few bumps in the road, we have landed back in Nashville and are settling into our new home. During the move, one of the things I missed the most was being able to bake in my own kitchen and now that I have a kitchen again, I am also baking again!
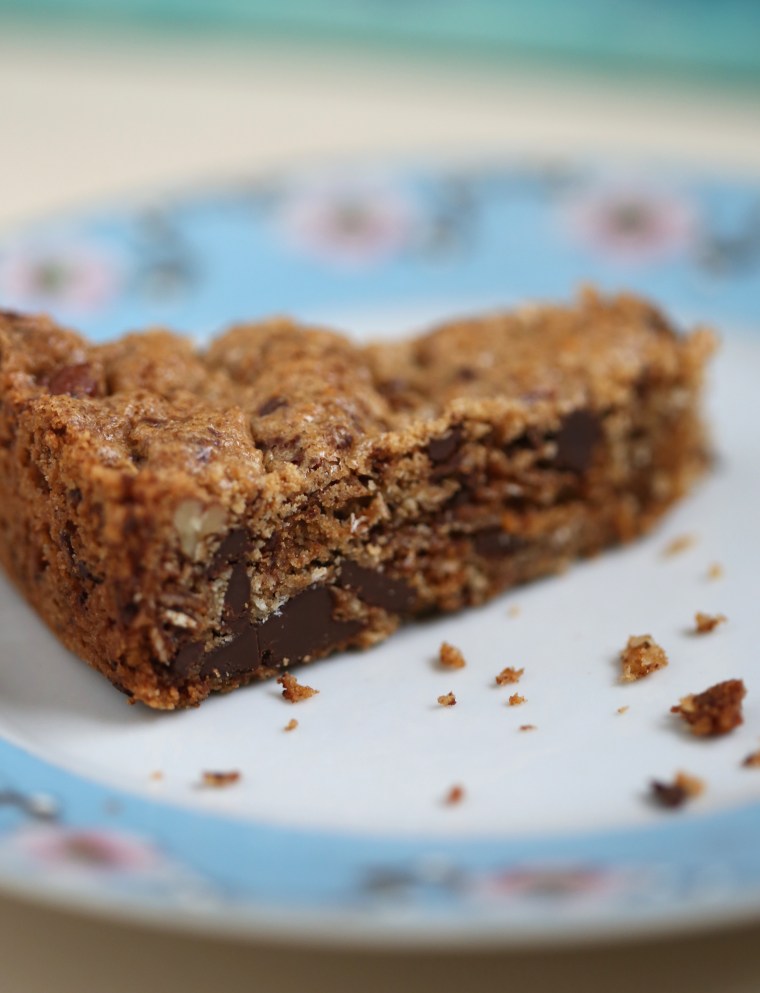 The recipe calls for bittersweet chocolate, shredded coconut and granola which all combine to make the flavor similar to an oatmeal cookie with coconut and chocolate chips. The only thing you need to know, use a good quality granola because it is a large part of the flavor and texture of the cake. With this in mind, I made a small batch of my own granola rather than buy it.
 Granola
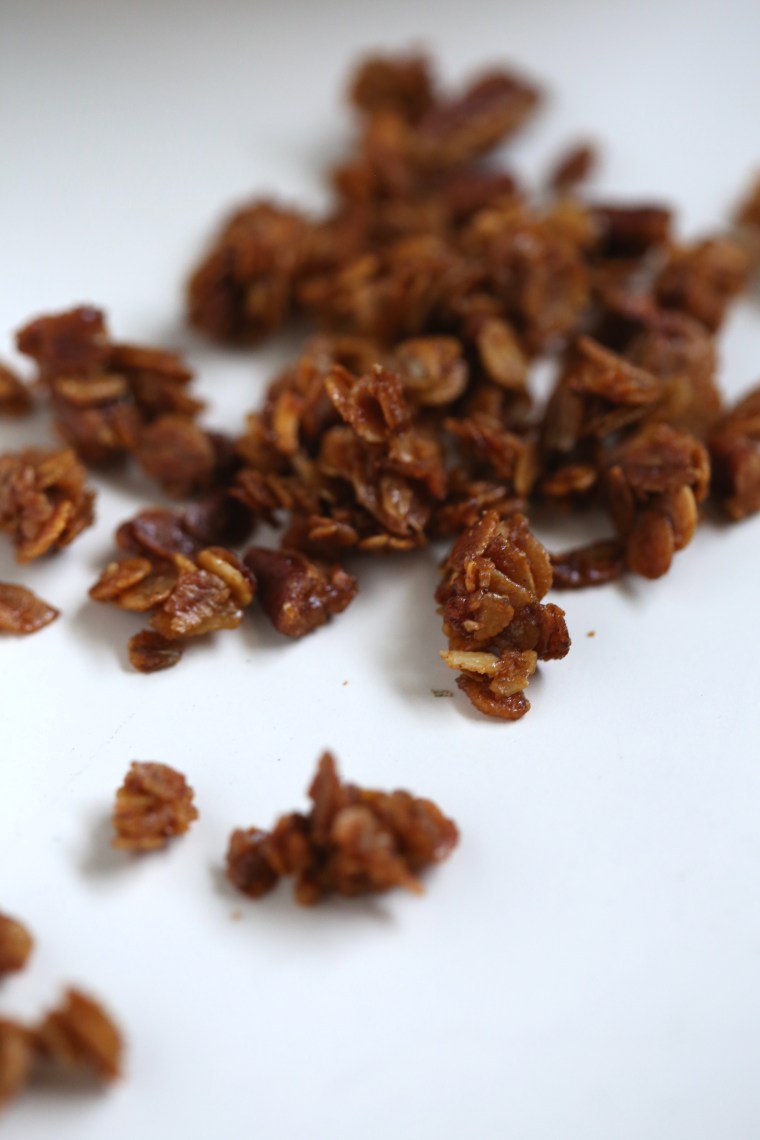 Want to bake along with us? Pick up a copy of the
  A while back, I picked up a little tin of matcha tea so that I could try baking with it. Needless to say, it has been living on the spice rack in the pantry and would probably still be there, unopened, if the Tuesdays with Dorie bakers had not chosen to make matcha financiers this week!
 Since we are trying to lose a little weight here, I only made a third of the recipe which gave me 10 little cakes. My new pan, one I found on my last trip to Pennsylvania, is actually for popovers and for some reason, it only has 7 cups in it which meant I had to use 2 pans. The ones I baked in the muffin pan, a black-nonstick pan, are on the right side of the photo. The look very different from the ones baked in my aluminum popover pan.
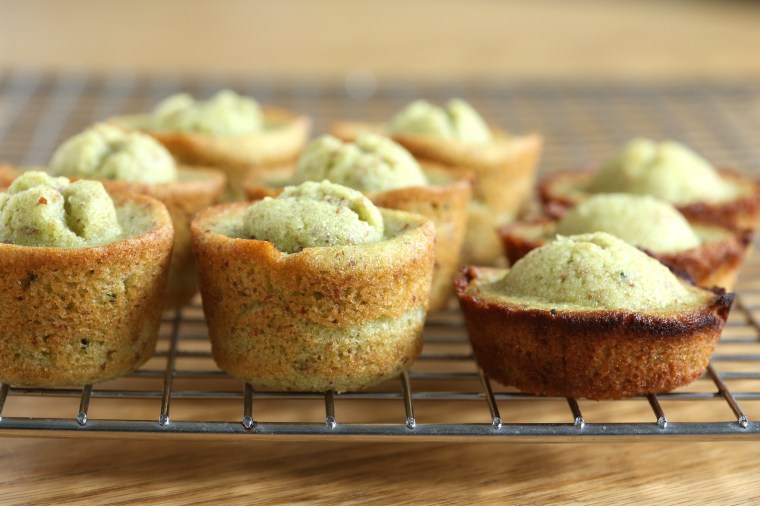 Not only did they look different, they also came out shorter and much darker. Beleive it or not, I used a portion scoop and each one is the same amount of batter-the pans were just so different that it really shows in the baked cakes above.
 Matcha tea is not easy to find and I picked mine up in a
 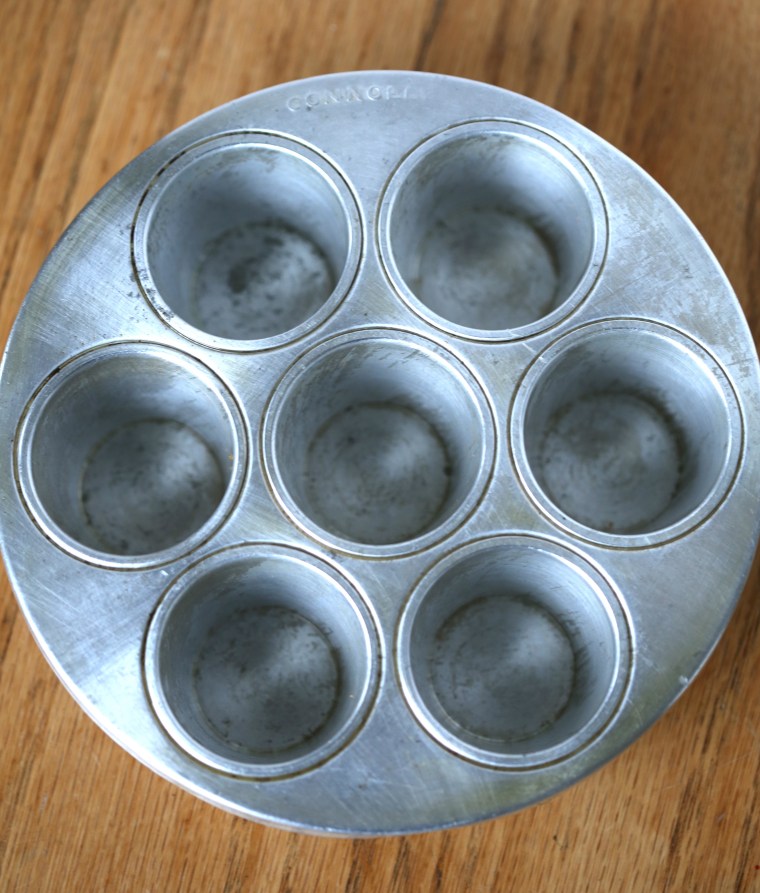 My new, old pan. It is a fairly heavy gauge, aluminum popover pan and the cups are nice and deep. Best part, I think I spent $3.00 for it!
 A side view of the cups-nice and deep
 The photo in the book has very bright green cakes but the recipe tells you that the batter will be a pea green. Mine are definitely pea green which makes me wonder about the photo in the book. The day these were baked, the flavor was a little grassy and I did not care for them but as they aged for a day or two, the flavor improved, a lot. These may make another appearance in our kitchen, but not for a while-we really need to get back on track with the diet!
 It has been a while since I have participated in the Tuesdays with Dorie baking and I decided to get back to it this week by baking Odile’s Fresh Orange Cake. Luckily for me, I happened to have a bowl of Sky Valley heirloom oranges from Trader Joe’s camping out on the kitchen counter and this gave me a way to use them before they went bad.
 The cake for today’s challenge is supposed to be a tangerine-carrot cake but after a quick check in the fridge, I could only find lemons. Then I spied the last lonely parsnip and decided that I should keep going in this direction and change it all up. We have been trying to cut back on snacking and it has been a while since I made a cake. The fresh eggs from our hens are stacking up on the counter and it was a chance to use a couple.
 The change from tangerine to lemon meant that the acid level was increased and I am pretty sure that it changed the texture of the cake and made it a little denser than the description in the recipe. Even so, it was still pleasingly moist and a little firm. The parsnip mellowed during the baking and honestly, you wouldn’t know it was there unless I told you.
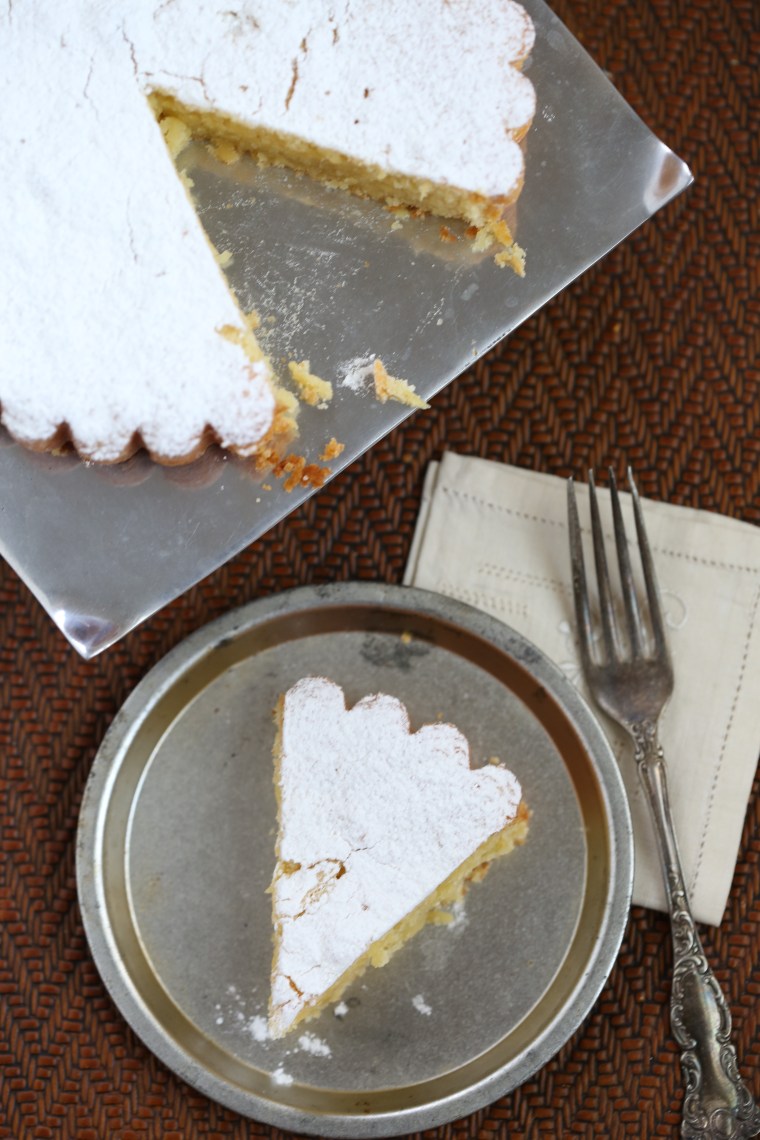 The only other observation I made was that the batter amount baked up just fine in my 8 inch tart pan. After greasing the ring and bottom and dusting it with flour, I set it onto a sheet pan to prevent leakage in the oven. It came out of the pan and off the bottom beautifully. This was such an easy cake to make and honestly, the potential combinations are numerous so I can see myself pulling this recipe out again when I need a quick and foolproof cake!