 Every month, our Master Gardener group has a potluck dinner that precedes our meeting. Each member brings a dish to feed about 8-10 people and I always bring cake. My original plan was to make an apple cake to use a few leftover apples, but when I went to the grocery store, pineapples were on sale. My plans quickly changed.
If you have spent any time on the internet looking at dessert recipes, you have seen recipe after recipe for slab pies. Honestly, I have seen too many. Yes, they are a little easier than a typical pie but I felt it was time for a change. As I planned my dessert for the dinner, I decided to double it and bake it in a roasting pan; an upside-down sheet cake. The result, a big slab of cake to feed a crowd.
One very important note to all of you bakers, this recipe is formulated by weights! Cups are great but can vary from set to set as well as from baker to baker since everybody has their own way of filling them. By using weights, you get exactly what you need! Purchasing a scale is easy, they can be found in most stores that sell baking equipment and are relatively cheap, mine cost me $15 and I use it a lot!
 To make a really good pineapple upside-down cake, you must use a fresh pineapple. While canned fruit will work in a pinch, it just does not have the flavor of a fresh pineapple. If you do not want to mess with cleaning a fresh one, look in the refrigerated section of the produce department in the grocery store. Most stores will stock fresh pineapple that has been peeled and cored, keep in mind that it will also cost at least double the price.
Another reason to buy a whole fruit, the crown. Pineapple tops, if removed correctly, can be rooted and grown and in about 2 years, you will actually get a fruit. Before you cut the fruit, grab the top and twist until it releases and breaks free. You will get a little pointed knob on the bottom. Set it aside for now and carefully trim away all of the skin and eyes using a serrated knife. Cut the fruit in half, from top to bottom, and then cut each piece in half. You will have a somewhat triangular piece of fruit and the core will be at the pointed end. Using your knife, cut the core away in one long strip. Lay the piece down and slice the fruit into 3/8 of an inch thick. Take all of the little scraps and small pieces and chop them up, you will need 5 ounces, about 2/3 cup, for the cake recipe. Be sure to use the ugly pieces for this!
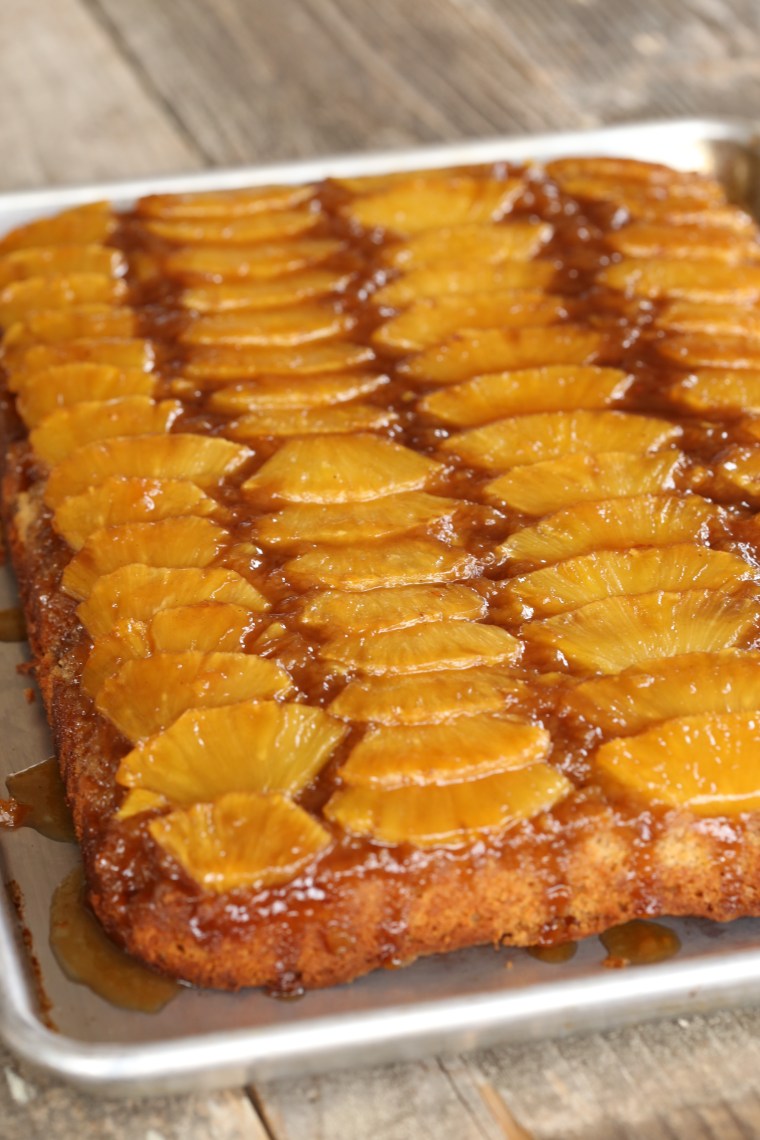
 Use a roasting pan that is 10 inches by 13 inches or use a rectangular cake pan of a similar size as long as the sides are close to two inches high. Grease the pan well and pour in the caramel. Tilt the pan to spread it evenly across the bottom and then layer in the slices in any pattern that suits you. For my cake, I chose rows simply because they would act as a cutting guide for the person who would be slicing the cake and it worked out beautifully.
 When the cake comes out of the oven, it is important that you let it sit for 10 minutes before unmolding it or the fruit will stick to the pan. The caramel is boiling at that point and it needs to cool a bit to form a bond with the fruit and the cake. If you wait too long, you will need to return it to the oven to heat it up again, so this step is not one that you want to lose track of. Set your timer for 10 minutes when you take it from the oven and wait for it! Place a sheet tray or serving platter over the cake and invert it. The cake should release immediately and fall right out onto the platter. Allow it to completely cool off before slicing or the cake will crumble.
 The perfect blend of spice cake and caramelized fruit!
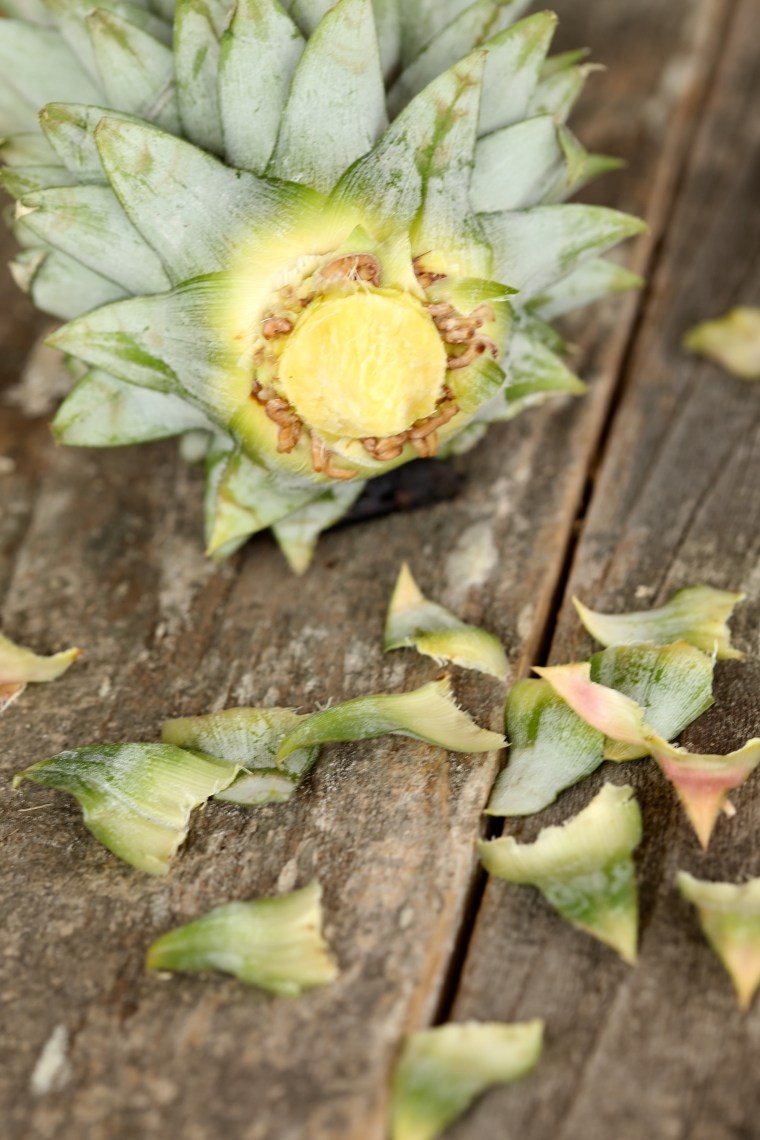 While your cake cools, let’s get that crown taken care of! Gently pull off the leaves of the crown until you reveal what looks like roots. Believe it or not, they are roots! When you have a nice layer of them that goes all the way around the pointed end, place it in a glass of water.
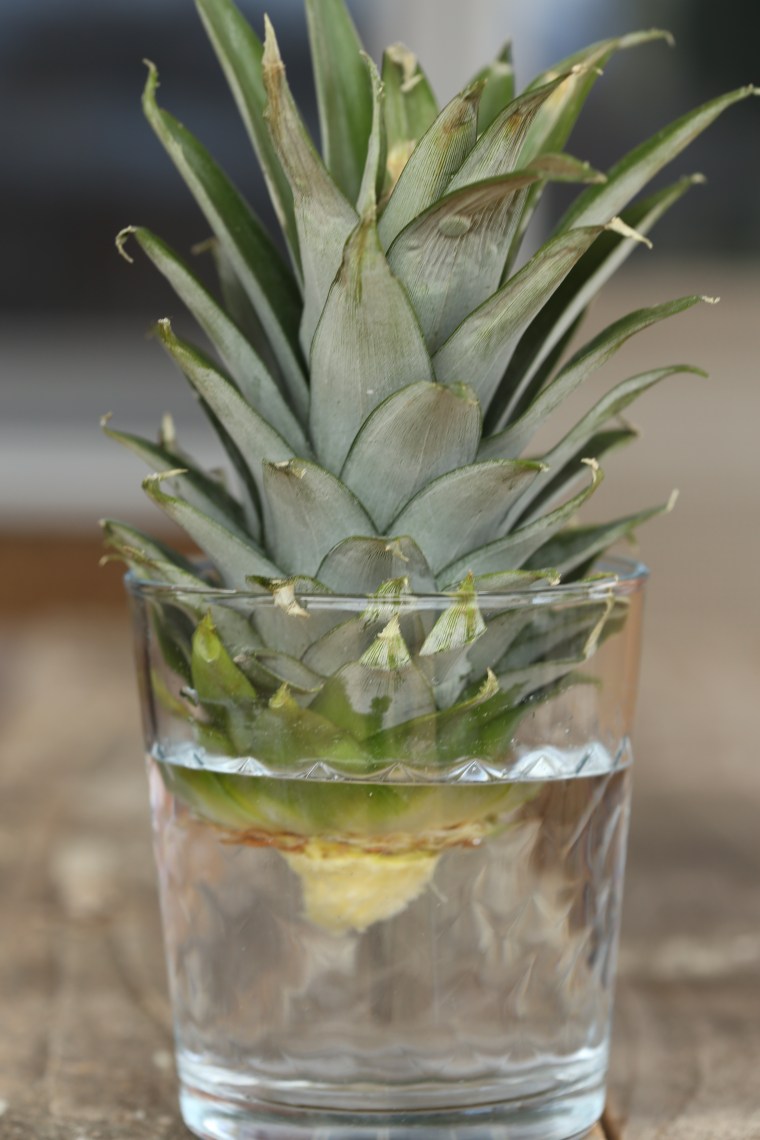 Keep it near a bright window and be sure to change the water frequently so that it does not get moldy or fermented. If all goes well, you will have roots that stretch down into the water and you can plant it in a pot. Use a light soil, one that will not hold water and make sure it is in a warm, sunny spot. It will take a long time to grow a fruit, be patient! For more information, here is a good link on growing pineapples.
This method has worked for me in the past, and it has also failed. The good news is that pineapples are affordable and you can experiment with allowing it to dry out and plant it directly into soil as well as rooting in water! Look for the grocery store to have a sale, this one was $1.89, the peeled/cored ones were $5.99!
Pineapple Upside-Down Slab Cake
serves about 36
Please note, this cake can be baked in one roasting pan, 10″ x 13″ or in two 10″ cake pans or cast iron skillets. The recipe is also easily divided in half since the ingredients are measured by weight! Cup measurements are included but are approximate amounts and may yield slightly different results.
topping
1 ripe pineapple, peeled and sliced as described above
4 ounces unsalted butter
4 ounces dark brown sugar (1/2 cup)
5-1/2 ounces light honey (1/2 cup)
cake
8 ounces unsalted butter, softened to room temperature
11-1/2 ounces granulated sugar (1-2/3 cup)
8 ounces dark brown sugar (1 cup)
1 tablespoon freshly grated ginger
2 teaspoons vanilla extract
1/2 teaspoon salt
4 large eggs
1 pound and 6 ounces all purpose flour (4-1/2 cups)
4 teaspoons baking powder
2 teaspoons ground cinnamon
3/4 teaspoon ground allspice
1/4 teaspoon ground mace
1 cup buttermilk
5 ounces of chopped pineapple (2/3 cup)
Preheat the oven to 325F. To make the topping, prepare the pineapple as directed and set it aside. In a skillet or saute pan, melt the butter over medium-low heat. Add the brown sugar and honey and stir to dissolve it. Bring the mixture to a slow boil and allow it to cook until it thickens a bit, 2-3 minutes. Pour the syrup into the greased pan and tilt it to spread it evenly. Carefully arrange the pineapple slices and set this aside while you prepare the cake.
To prepare the cake, place the butter, the sugars, ginger, vanilla and salt into a mixing bowl. With the mixer on low, combine the ingredients, scrape the bowl well and then allow it to cream until fluffy. Add the eggs, one at a time, and mix well. Be sure to scrape the bowl well to combine it evenly. Place the flour, baking powder and spices into a mesh strainer or sifter and sift it over the bowl, all at once. Fold it by hand a few times, dump the buttermilk in, all at once and fold it completely. Finally, add the reserved pineapple bits and the juice that has accumulated in the cup and finish folding it until no streaks of flour or juice remain. Carefully drop dollops of the batter over the pineapple in the pan and gently spread it out evenly over the surface. Use an offset palette knife along with a gentle hand for the best results, you do not want to disturb the pattern of the fruit!
Bake the cake until a pick inserted in the center comes out clean, about 1 hour. Remove from the oven, allow it to sit for 10 minutes (use a timer for this!) and then invert it onto a serving platter or tray. It is best to wait until it is completely cooled to cut it, you may have to restrain yourself!
