 On my last birthday, my husband gave me a copy of the Tartine Bread book. We were out on a rainy Saturday, wandering through the shops in Merchant Square and I had a chance to look through a copy of the book. The cover shot, the dark loaf with the blistered crust…Yes, it was bread lust at first glance. However, I suspect my husband was also lusting over that loaf of bread and now that I have made the Country Bread, I am sure of it!
Like so many of the popular books on bread available, this one relies strictly on techniques created by the author and many aspects of the methods used seem at odds with traditional bread making. Most notably, the lack of extensive kneading to build structure and instead, the use of an autolyse so the flour can expand and absorb the water and a longer bulk rising to allow the gluten to develop slowly. Now, to be perfectly honest, the first section of the book consists of only one actual bread recipe with sub-recipes that rely on the basic recipe with various additions, but to really understand the technique, you must master the Country Bread. The entire collection of bread recipes in the book rely on the methods outlined in that very first recipe!
What I love most about the Country Bread recipe, simplicity. Especially the equipment list. First of all, you must have a scale that measures in grams. The rest of the list includes a thermometer, bowl, plastic bowl scraper, a bench knife and an oven proof dutch oven or covered casserole dish. The recipe is worked in percentages, called baker’s percentages and the weights are all in grams. The good news is that weighing it all out in grams guarantees consistency.
 The only step I did not follow was creating a starter to leaven the bread because I have a starter that I grew from grapes that were growing in the Demonstration Garden that I worked in when I lived in Tennessee. The starter has been in use since 2009 and when we moved in 2014, it was one of the things I was most worried about losing! We had a 12 hour drive, stopped multiple times for the dog and for the night in the middle of that drive, the entire time the starter was tucked in a cooler with some ice. It made the trip like a champ and nearly 2 years later, I am still using it.
The starter is fed and allowed to develop overnight. If you read the recipe, you will be given many bits of information to help you along and I find that very helpful when using a new recipe. The instructions tell you to measure out the warm water, add the starter to it, and if it floats, it is fully developed and ready to go. As you can see in the photo above, my starter is floating in the water.
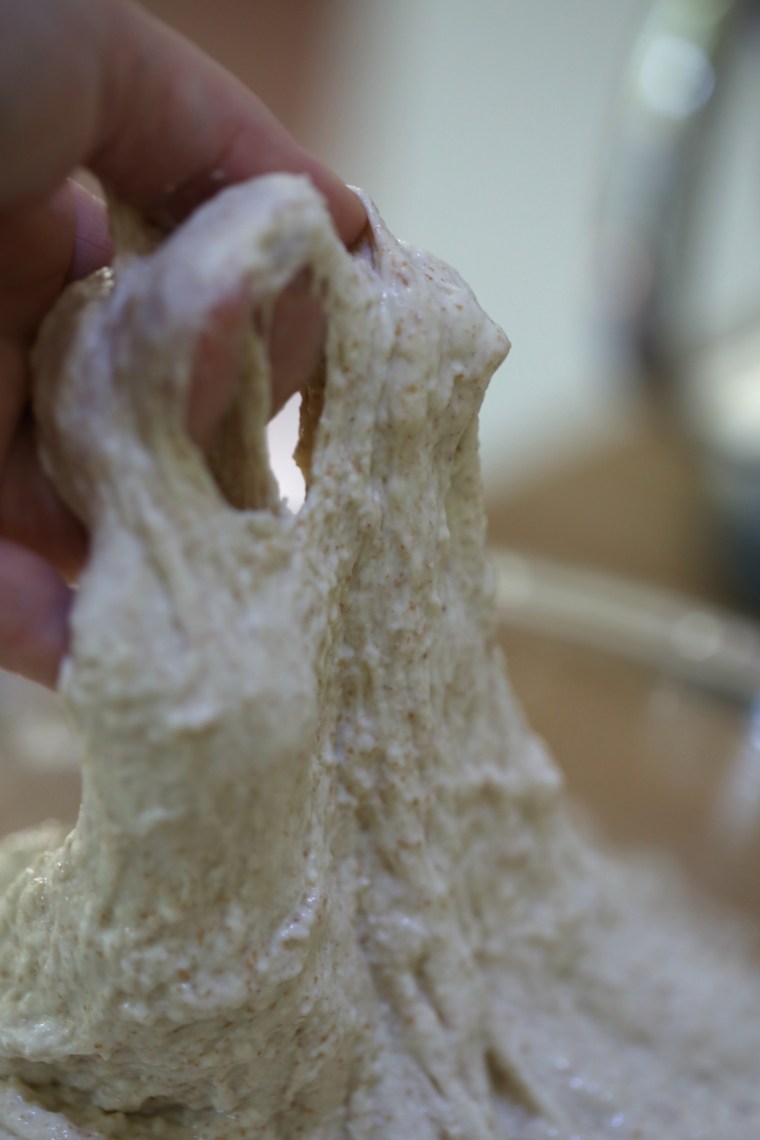 There are two schools of thought on adding salt to flour dough. One says add it to the dough as you add the flour, one calls for holding it back and adding it later because it can affect the structure of the dough. At Tartine, they hold the salt and a small amount of water back and add them after the initial mixing and resting period. The salt is sprinkled over the dough, water is poured on and using your hand, you squeeze and squish and work the dough onto itself to mix it all in.
 As the dough develops during the bulk fermentation, bubbles form around the sides of the bowl. Rather than dumping it onto a table and forcibly kneading it, the dough is “turned” in the bowl every thirty minutes for three hours.
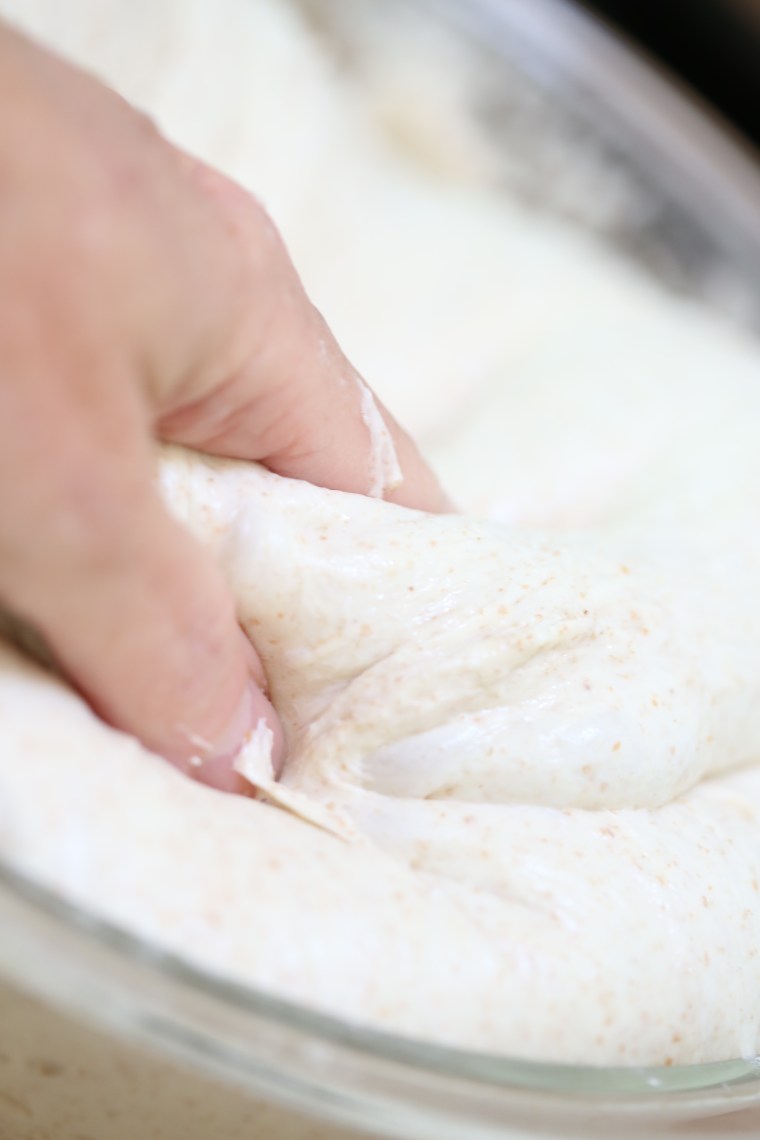 Using a wet hand, the dough is pulled up from the bottom of the bowl and stretched across itself, turning it. This is done 2-3 times each half hour, each time is called a “turn” and it is all the kneading the dough will get.
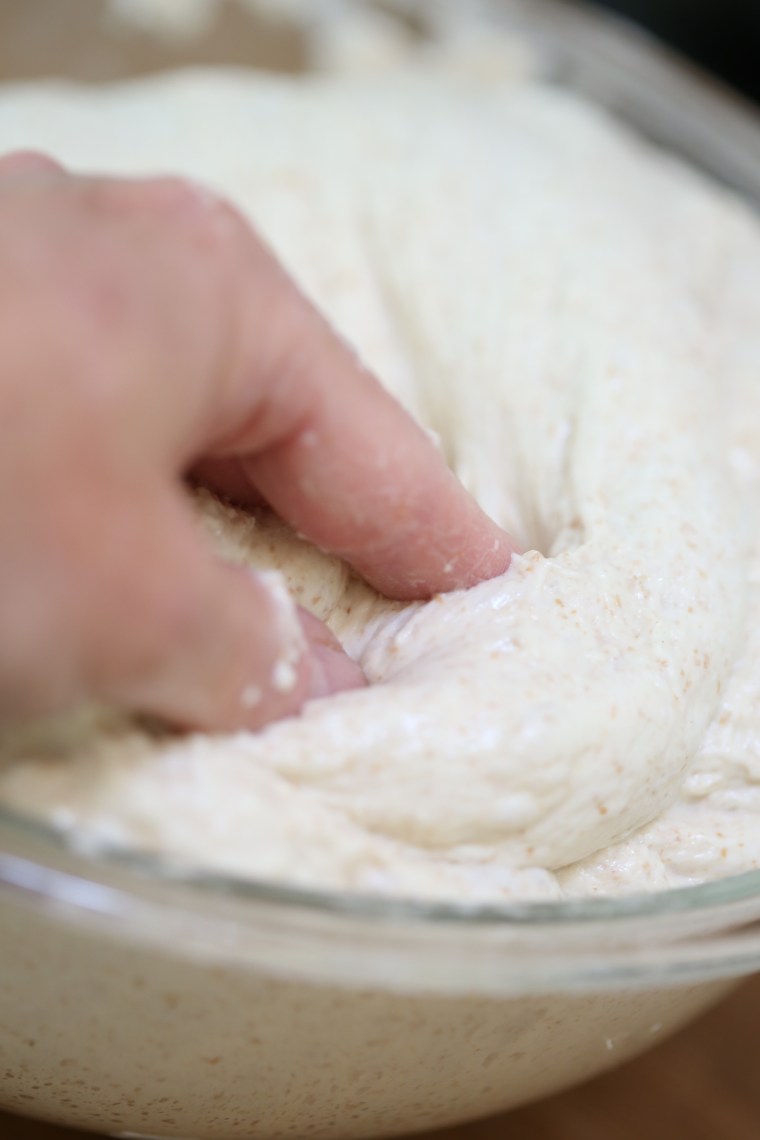 As the dough develops and rises, it gets softer and lighter and you need to take care not to press the air out in the process of turning the dough.
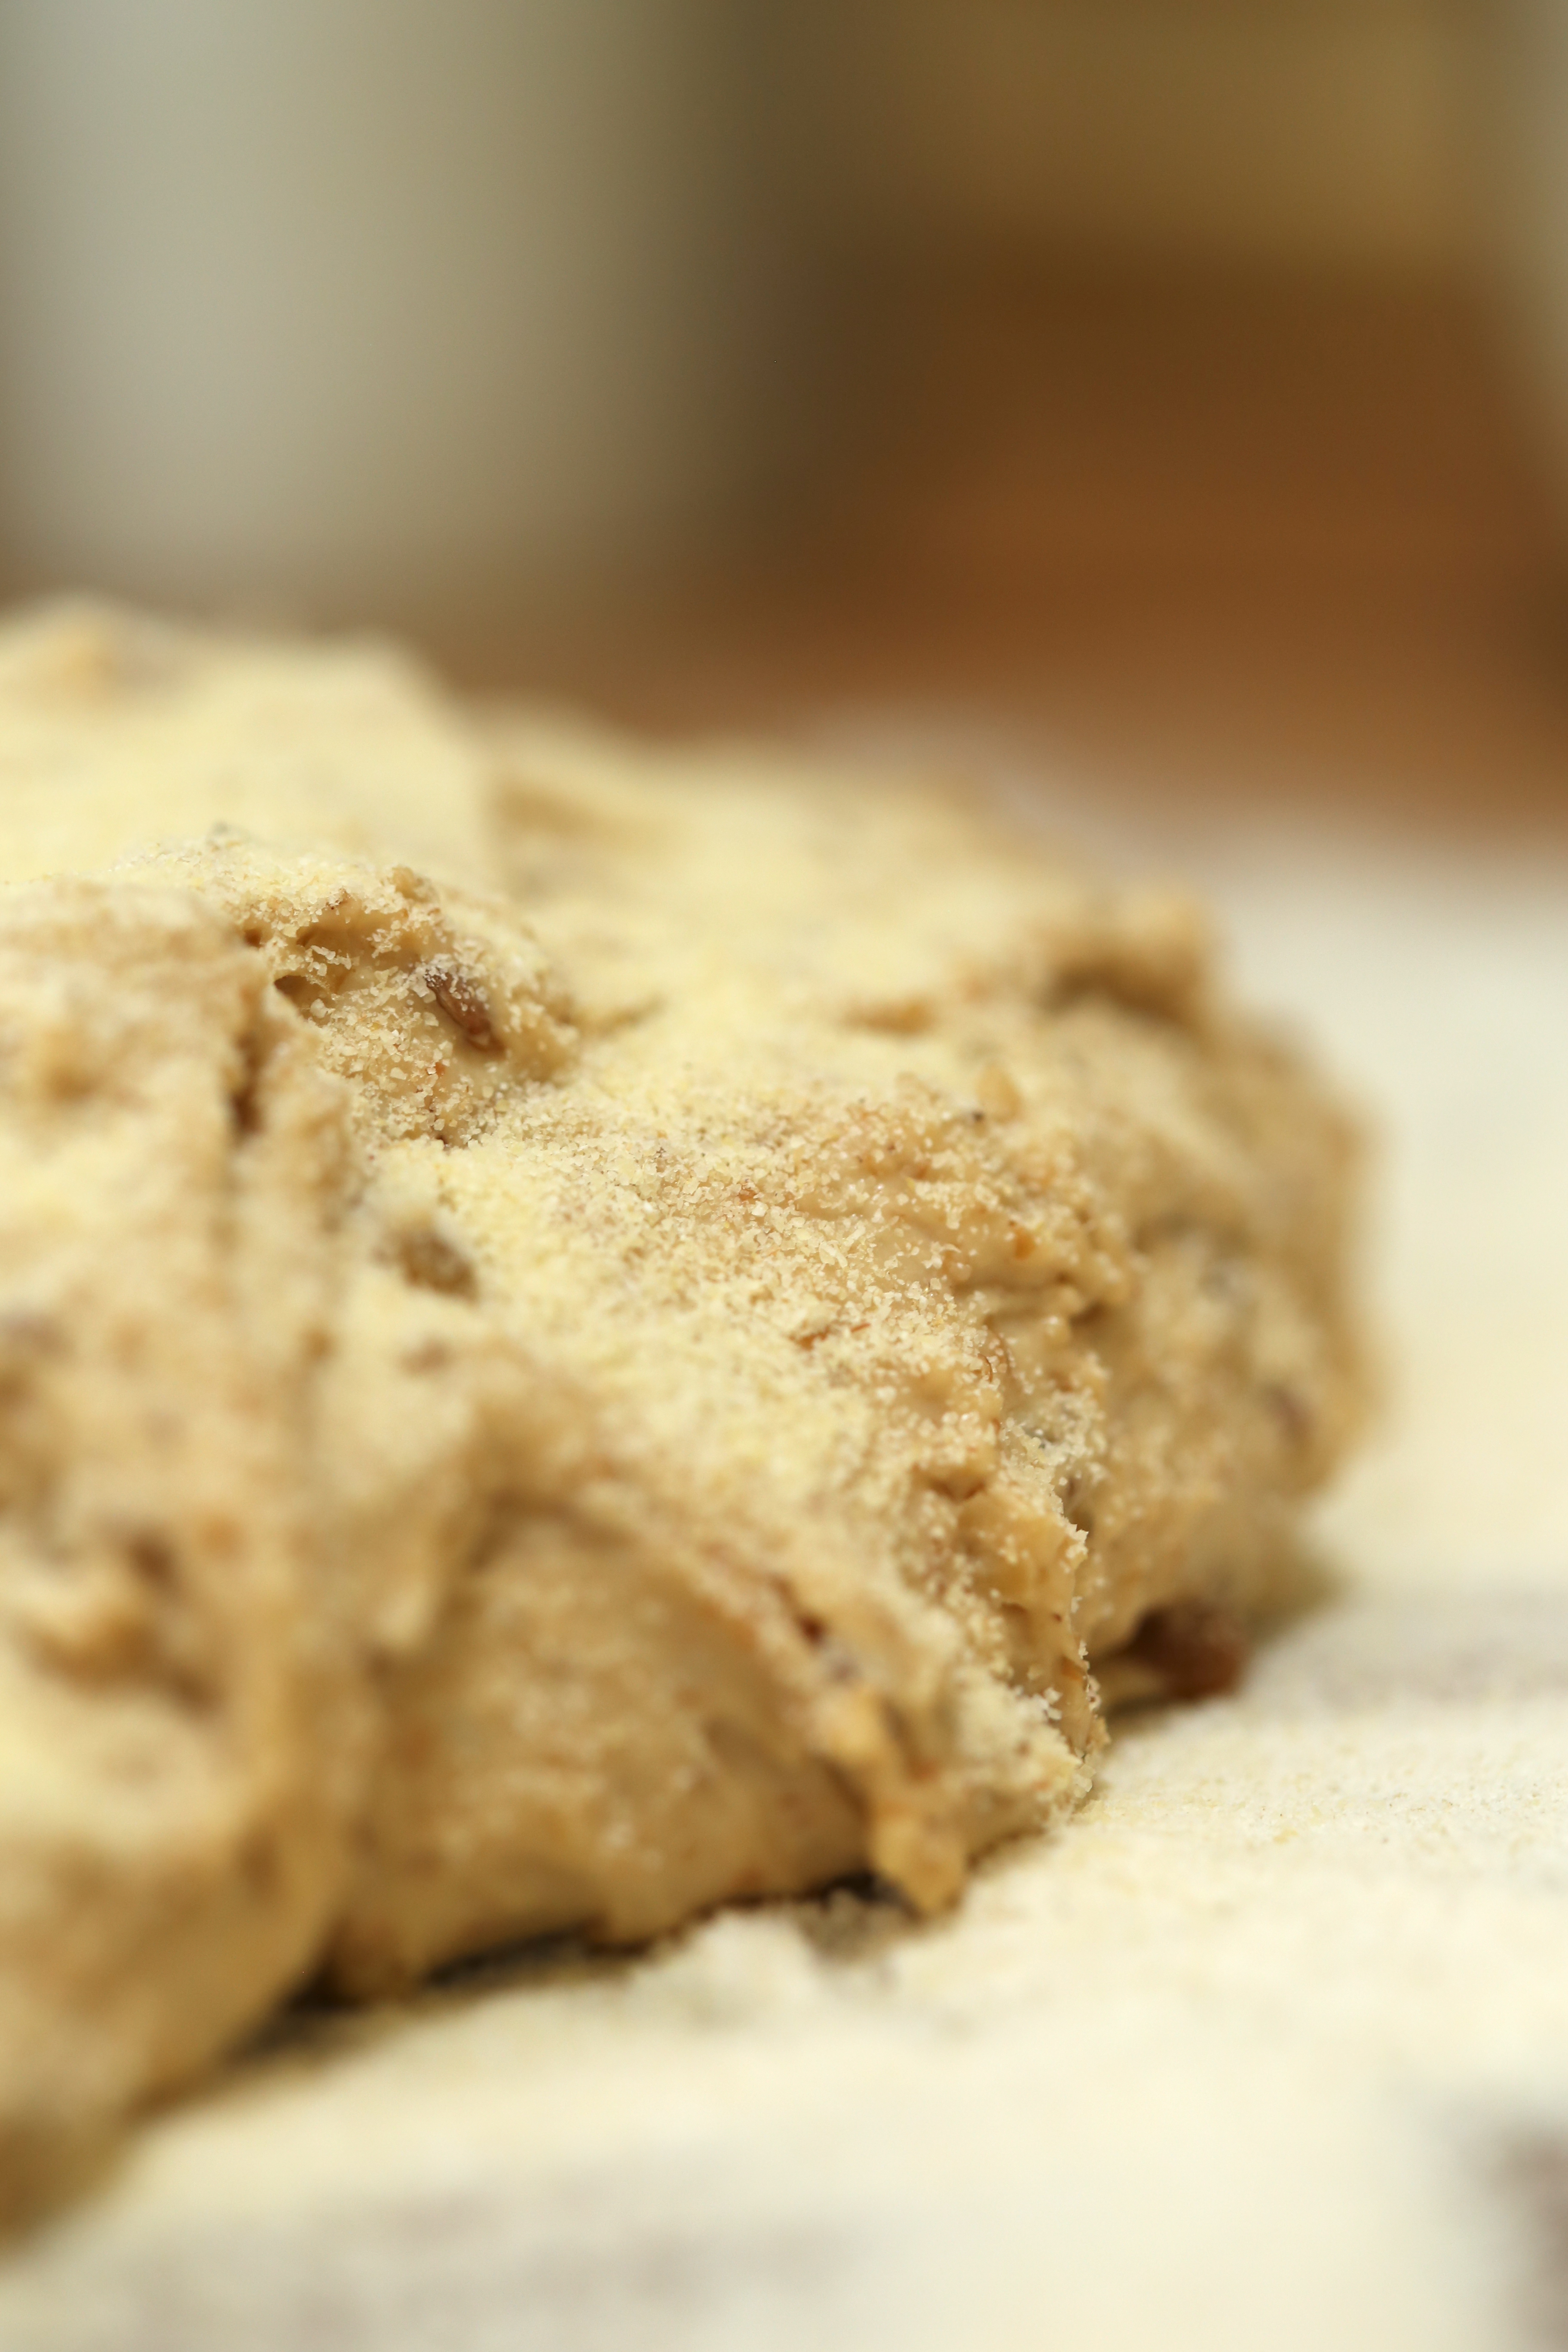
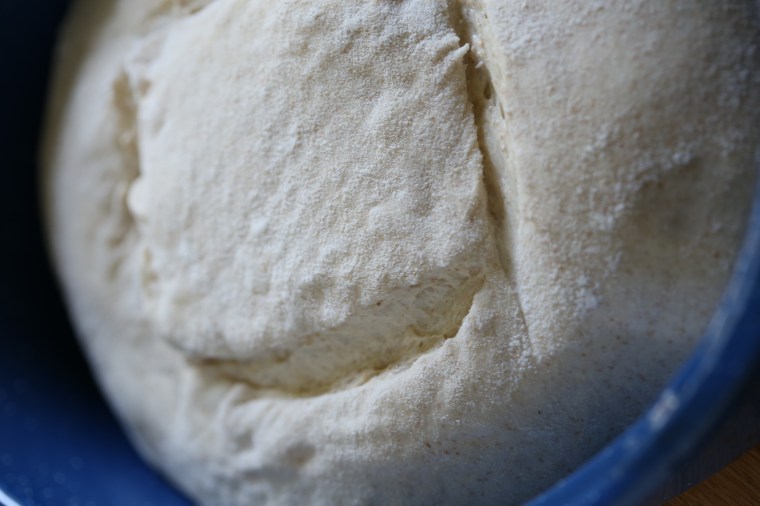
 When it is ready, dumped onto a table and cut in half. A minimal amount of flour is used to help with shaping. The folding and shaping is probably the most complicated step and it is completed with one hand and a bench knife. Lifting and stretching the dough across it’s center, it is carefully shaped so that it is not deflated.
 After shaping, it is allowed to rise in a cloth lined bowl which has been floured.
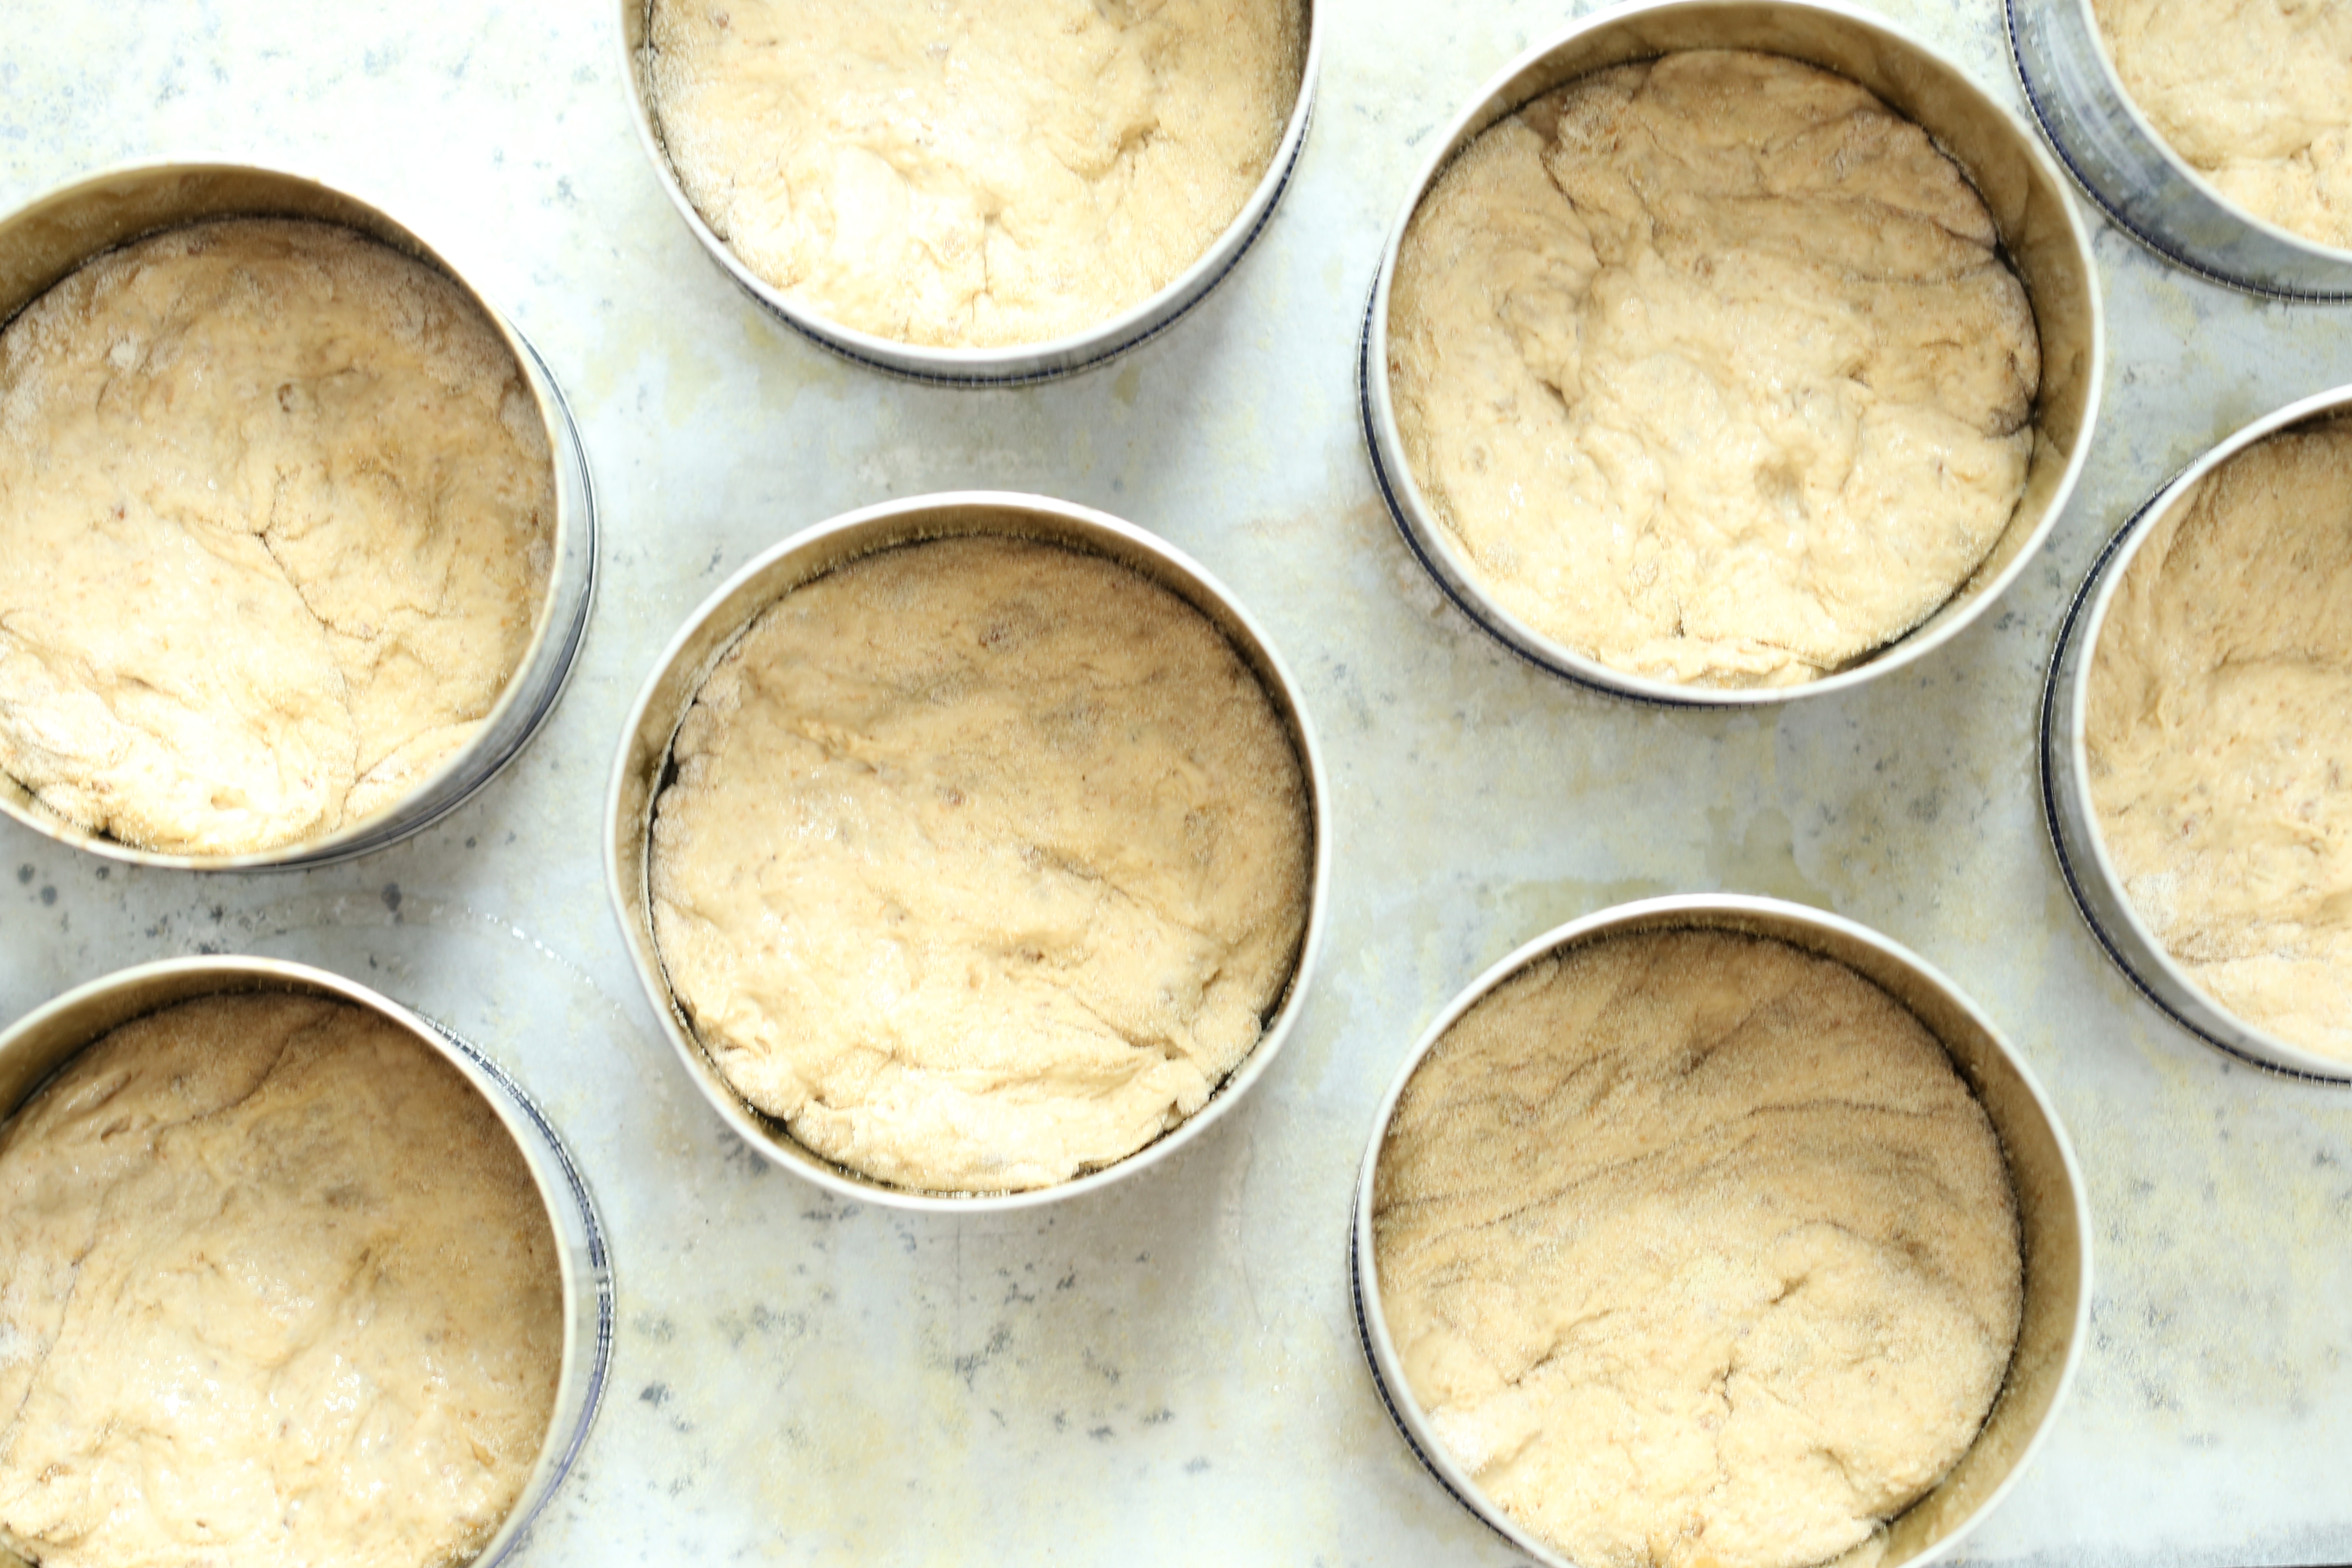
 The loaves rise for about 3 hours and because most of us do not have two dutch ovens or even the ability to bake with two of them simultaneously, you will want to hold one back by placing it in the fridge for a while.
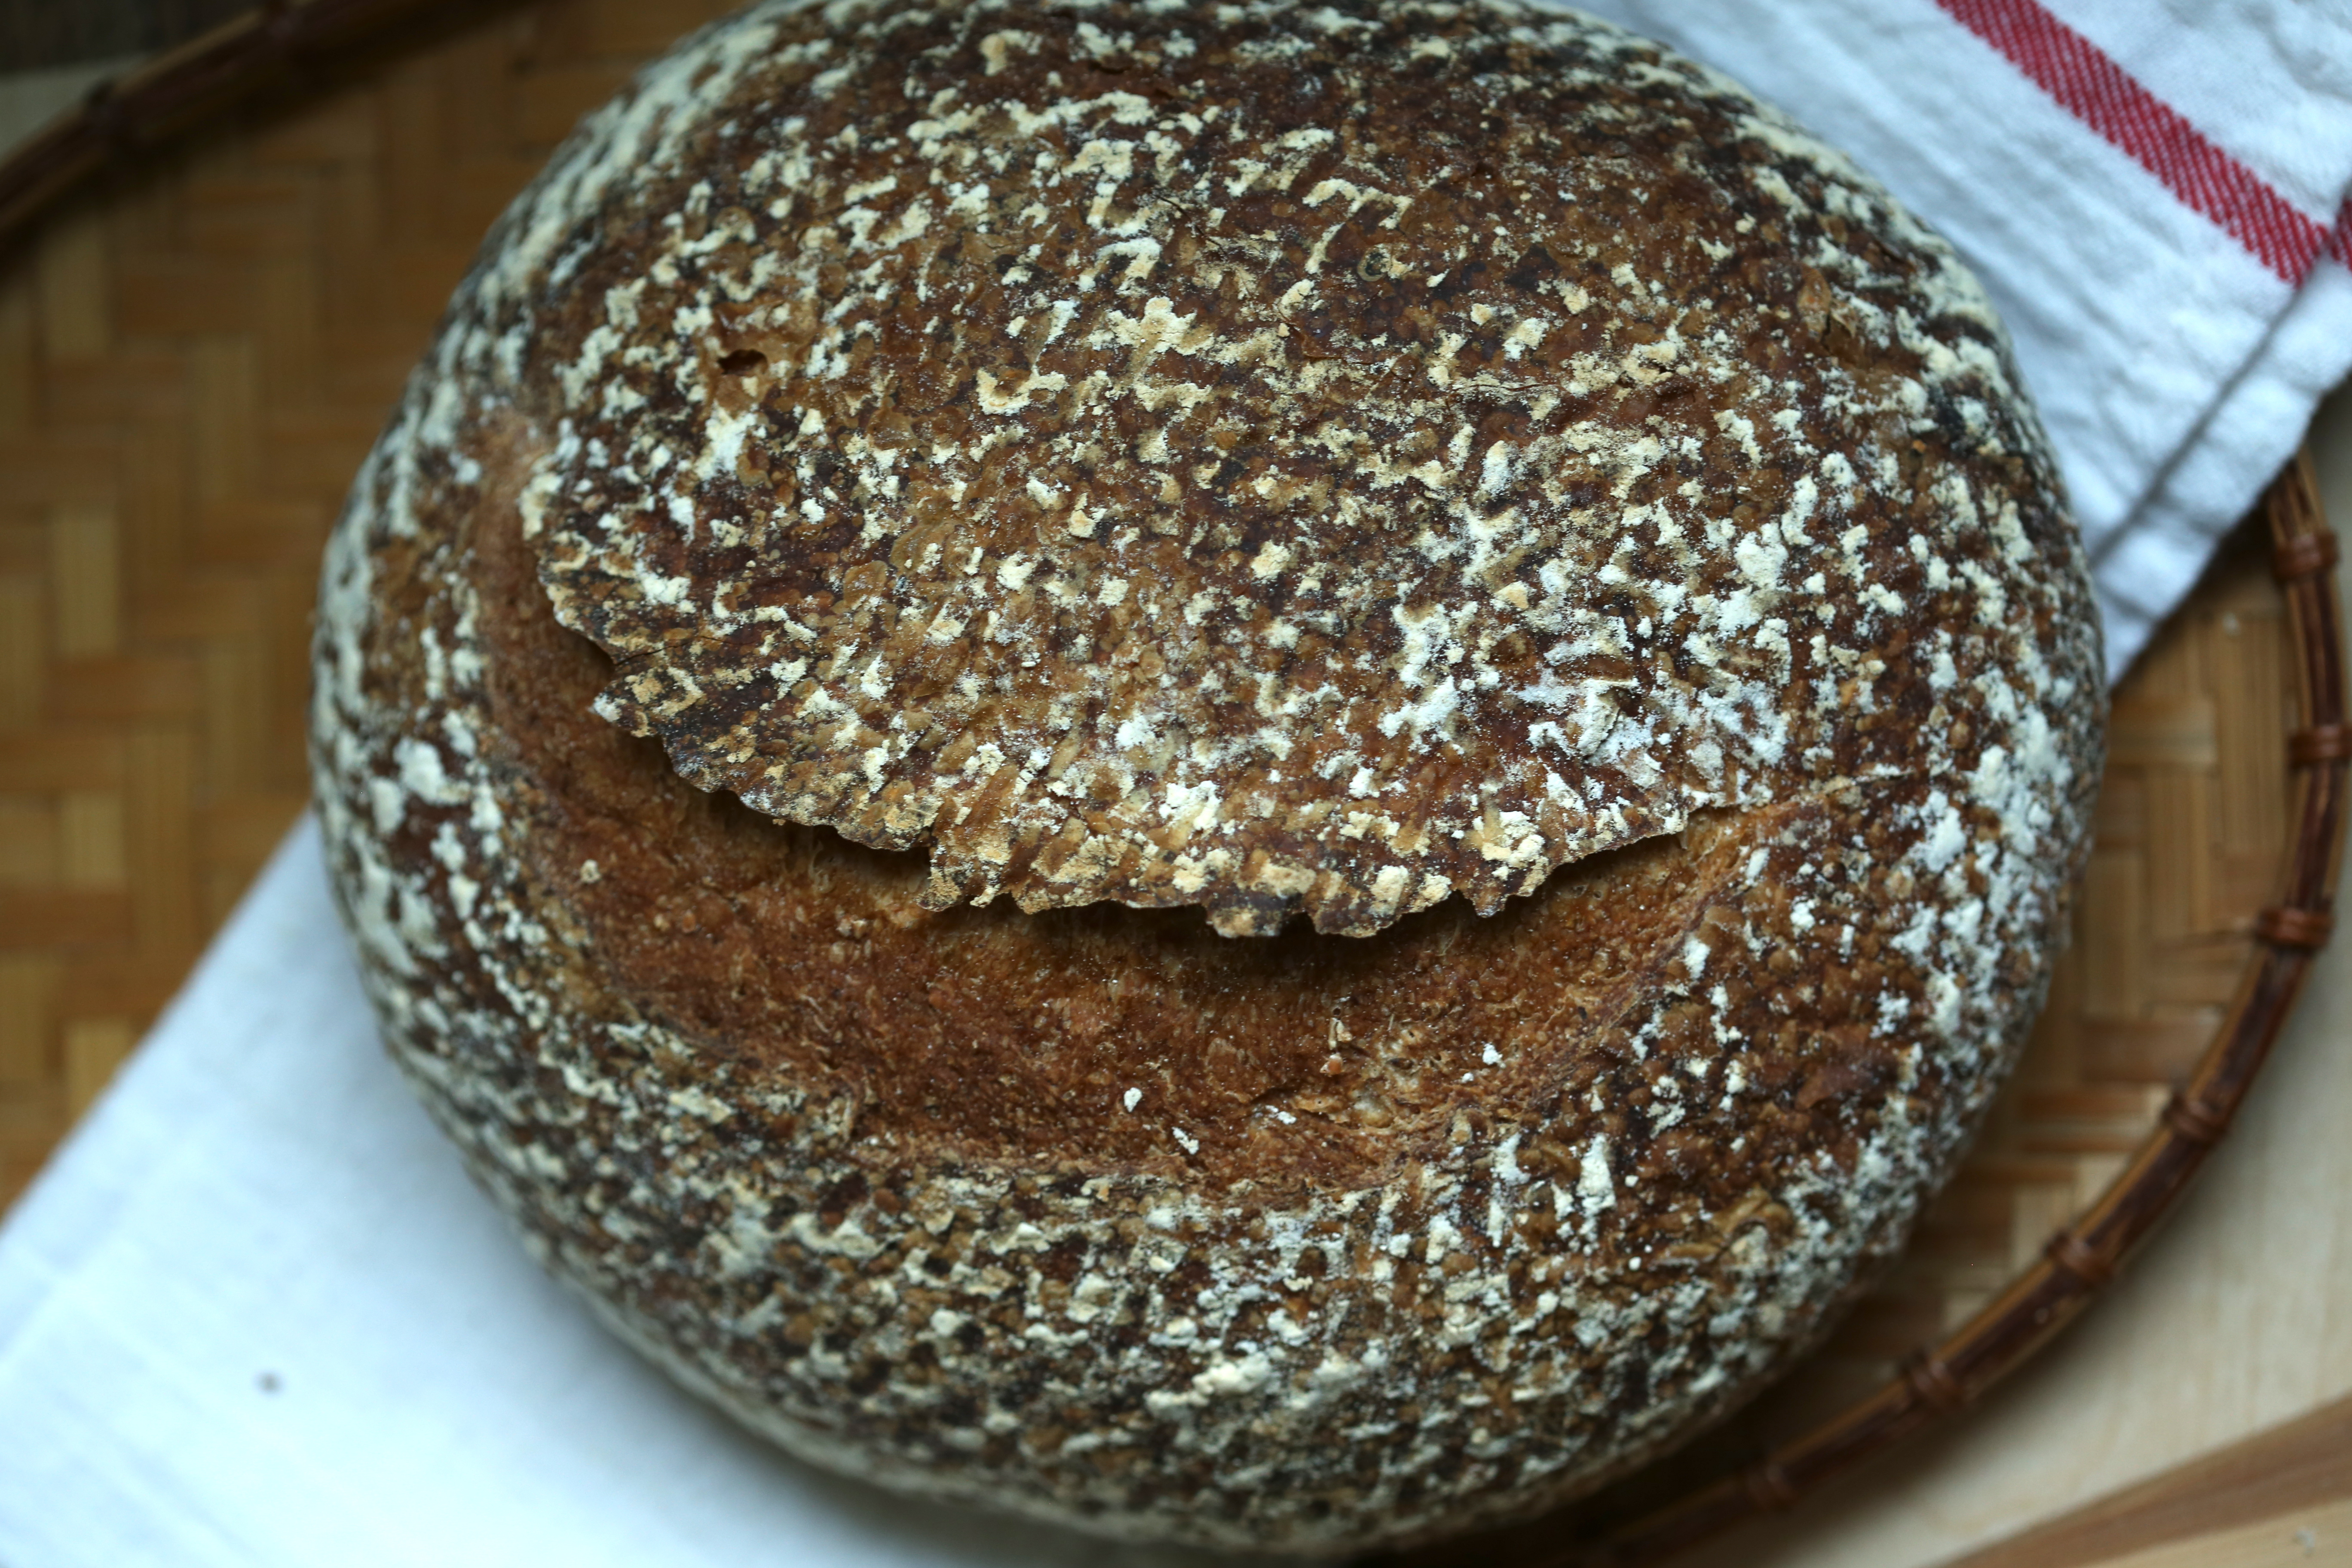
 Once the oven and the dutch oven are heated properly, flour the surface of the dough (do not forget this step-it will not come out of the pan if you do!) and turn it into the hot pan. Using a lame or a very sharp blade, score the dough, cover it and place it in the oven. Twenty minutes covered, twenty minutes uncovered and it will be ready to take from the oven.


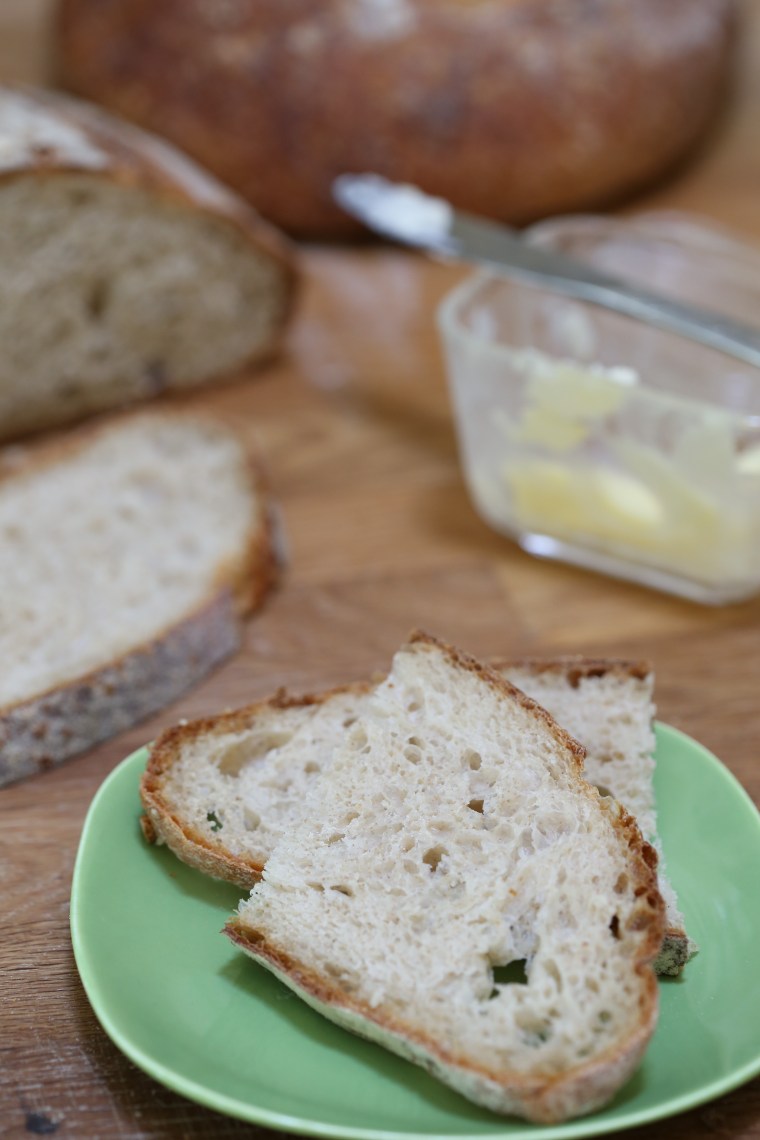
 Beautifully colored, perfectly blistered. Let it cool completely before cutting into the loaf.

To see the recipe, please consider purchasing a copy of the book Tartine or at the very least, borrowing it from a library. There are many great videos of the author as well as other bakers making bread using the technique described in the book and they are worth watching so consider looking them up. The Country Bread recipe is available, reprinted with permission on the New York Times website.
 This week, the recipe was a true challenge that took two weeks to complete. Now if that doesn’t deter you from trying to mix up a batch of this bread, not much will! To make a traditional Pain de Campagne, you have to save a piece of the dough from your batch to act as a starter for your next loaf which means you are always working with a bit of old dough called a chef. If you find yourself without a chef, you have to start one with whole wheat flour and water and pray the yeast feels like cooperating.
 The rye is on the left, the graham is on the right. What a disappointment it was, I had assumed that since I do a fair amount of bread baking here that there would be plenty of yeast to grab and get the starter going.
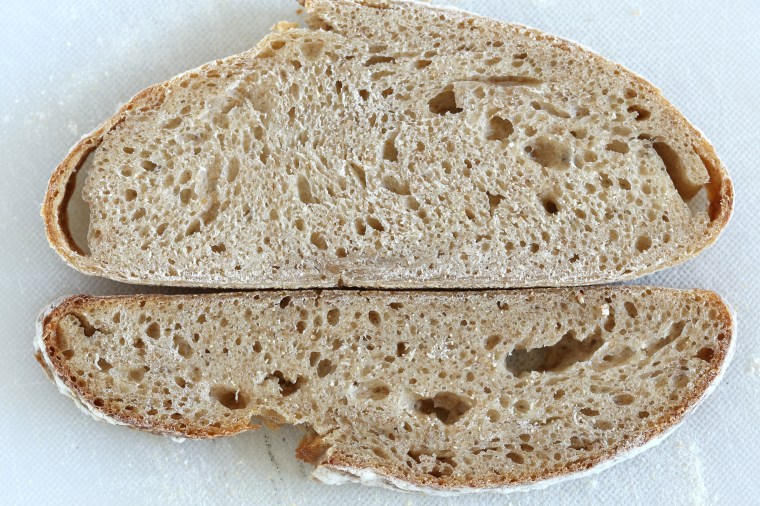 Out of curiosity, I sliced the loaves to see what the interior looked like. It was dense, moist and a bit gummy. Both of them were. It was pretty obvious that there just was not enough yeast in the chef and then the levain to give rise to the bread. Honestly, I was surprised that the graham loaf had a ribbon of raw dough along the bottom crust-it had risen pretty well. The flavor was surprisingly sour, a mild sour but it was there.
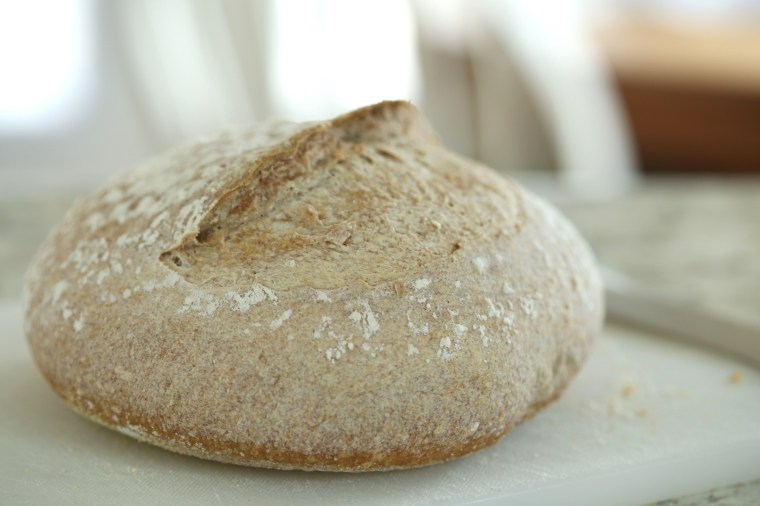 The little ball of dough rose nicely and because I ran out of time, I decided I would put the basket of dough in the fridge to rise overnight. Because I am curious, I pulled off a walnut sized piece and set it aside in the fridge; I was going to use it as a chef for a full batch of dough. The next morning, I pulled the basket out of the fridge and let it sit on the counter to warm up and rise a little more.
 When the time came to bake the loaf, I was excited-this one actually rose! There was oven spring too-it rose more! The only thing I did not understand was the pale color of the crust on the top, it browned nicely on the bottom. The interior looked nice, no stripes and no gummy crumb. It also had a nice sour flavor. As for that piece I set aside, I used it to start a new loaf but this time, I made a full batch.
 The shaping was easy to do and I cannot remember when I did this type of baking last-perhaps at school…My wheat stalks in the bottom of the basket.
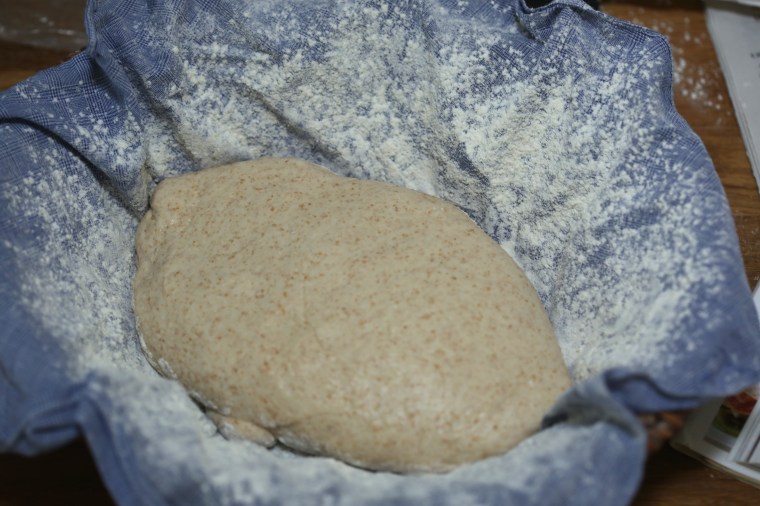 The loaf was placed over the wheat stalks.
 The loaf gets wrapped with a braid of dough and then it is left to rise in the basket. Two hours later, I turned it out onto the peel and let it rise some more. Just before baking, I brushed the loaf with a wash of egg whites and snipped the wheat stalks.
 Fresh out of the oven, my wheat stalks look more like paws.
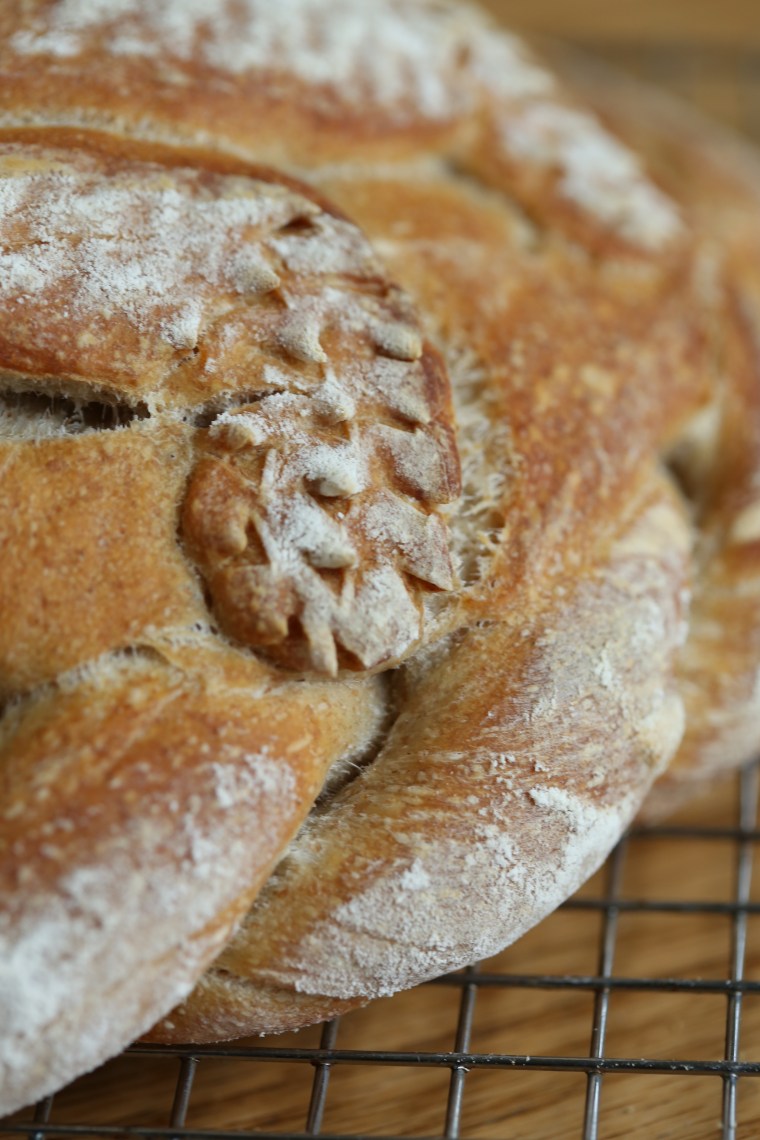 The scissors did a nice job on the stalks. It was fun to make this loaf and now it is sitting on the counter taunting me…
 May have to make another one just so I can make those wheat stalks again! Be sure to visit the
 This recipe is the second bread recipe I have tried from the book, the first being the Country White loaves from the chapter on growing a starter, and it was a true learning experience. As with many of the recipes I have glanced at so far in this book, there is an ingredient list that is longer than you would expect and an equipment list that calls for specialized baking tools. Anyone who has ever been to my home knows that I do not generally shy away from purchasing tools and equipment. On occasion, I will try to use something similar rather than adding to the clutter unless it is a bundt pan or a cookie cutter; a baker can never have too many shapes to choose from. However, a long list of tools and ingredients that I must shop in several stores to find is always a little off putting, even for a dedicated baker like myself.