One of the best decisions I have ever made was to become a Master Gardener. Not only have I learned a lot about the hows and whys of all things gardening, I have had a chance to make wonderful friends! Earlier in the summer, I was talking with a fellow MG member and I mentioned that I really wanted to learn how to make hypertufa pots and that I was more than willing to plan a get together at my home with some of our gardening friends. It was if the walls, or maybe the hostas were listening in on my plans because as quickly as I mentioned this, we learned that one of our fellow MG members was offering a tufa pot workshop in her backyard. Needless to say, I quickly signed up for the class!
Georgeann may be known for her love of hostas and her beautiful garden (watch this episode of Volunteer Gardener for more information) but in our circle, she is well known for her knowledge and craftwork with hypertufa. If you are not familiar with hypertufa, it is a mixture made from peat moss, portland cement and vermiculite and when it is completely cured, it is just as strong and durable as cement but not nearly as heavy.
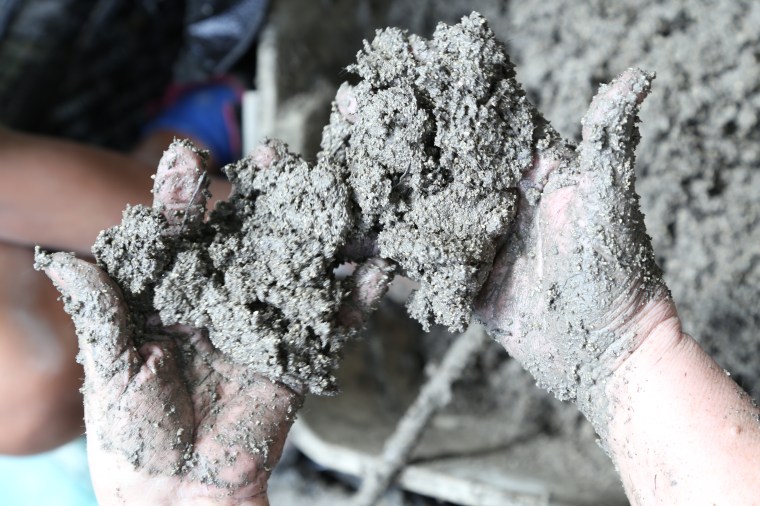
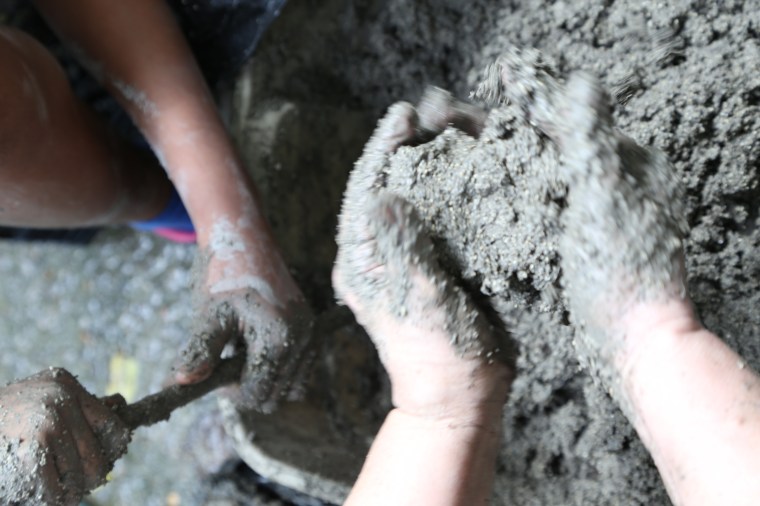

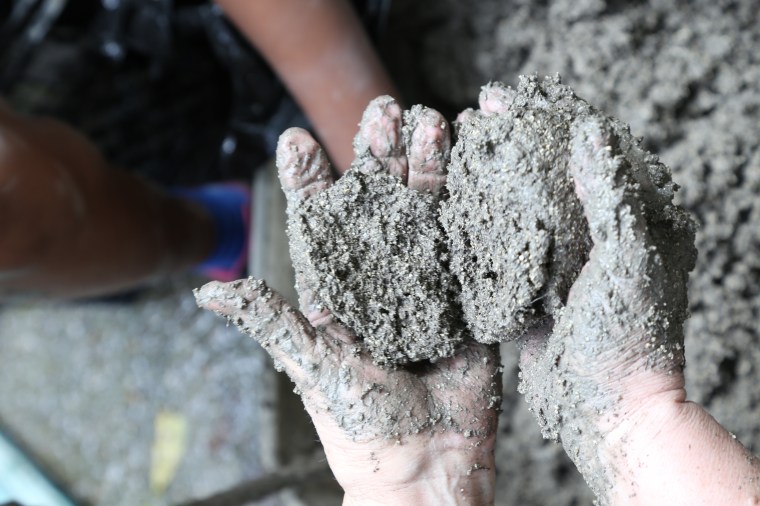 Making the mixture is fairly easy, it takes a little elbow grease but it is not at all difficult to make. In a large container with a wide opening, combine 3 parts peat moss, 3 parts vermiculite and 2 parts portland cement. For extra strength and durability, you can throw a handful or two of fiberglass reinforcing fibers. Add water to the container and mix it until it is moistened but holds its shape-refer to the photos above. Do not do this with bare hands!!! (nevermind Georgeann’s bare hands, she warned us about the consequences) Portland cement can be a bit caustic and it will dry your skin to the point of irritation.
 Select a mold with a wide opening and grease the inside with spray or a thin coat of shortening. Line it with a couple of plastic bags or a sheet of plastic drop cloth. Do not worry about the crinkles and wrinkles, they will add texture to the pot.
 Press handfuls of the mixture into the bottom so that it is at least an inch and a half thick. Using your fingers, make a hole for drainage. Keep building up the sides so that they are at least an inch thick but when it comes to the top edge, make it a little thicker and rounded so that it is stronger. Let it cure, out of direct sun-in full shade, gently lift the plastic sheet to remove the pot from the mold after a day or two. At this point, you can carefully shape the edges or carve designs into the surface of the pot. Use a metal brush or a file to sand the edges and small chisels for the carving. Replace it into the mold to finish curing. You want to do this to ensure that you can get it out of the mold at all-a lesson I learned the hard way!
Allow the pot to dry in the mold for at least a week and then pull it out and peel off the plastic liner. Keep the pot in the shade to finish the curing and it is best to keep it slightly moist and wrapped in plastic. The longer and slower the curing process is, the stronger the pot will be.
 If you walk around Georgeann’s garden, you will find tufa pots. This one is home to just one of many hosta plants.
 The pots are very durable and can even spend the winter outdoors. Even though the cement mixture is on the alkaline side, plants can thrive in them and so can moss.
 The moss is a plus in my opinion, I just love the character it adds to the pots.
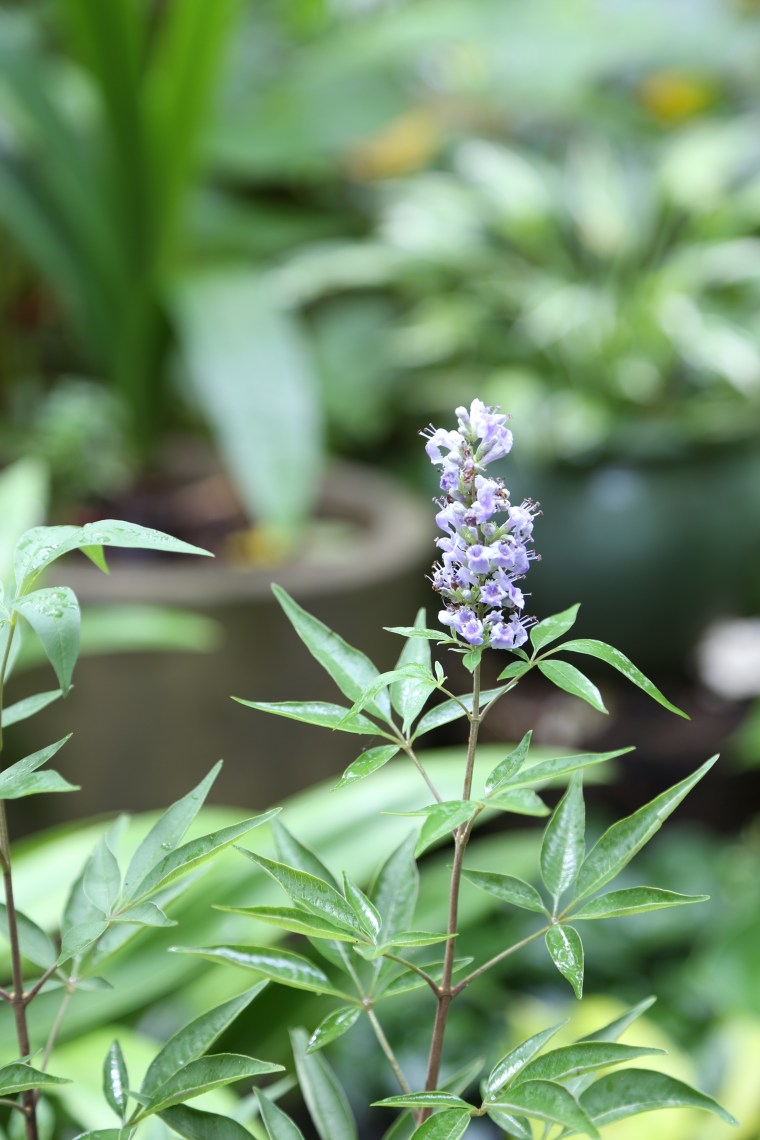 As a beekeeper, I love seeing Vitex (Chaste Tree) in gardens.
 All through the garden, I found little surprises like this mosaic of a Blue Jay.
 And this Earth ball.
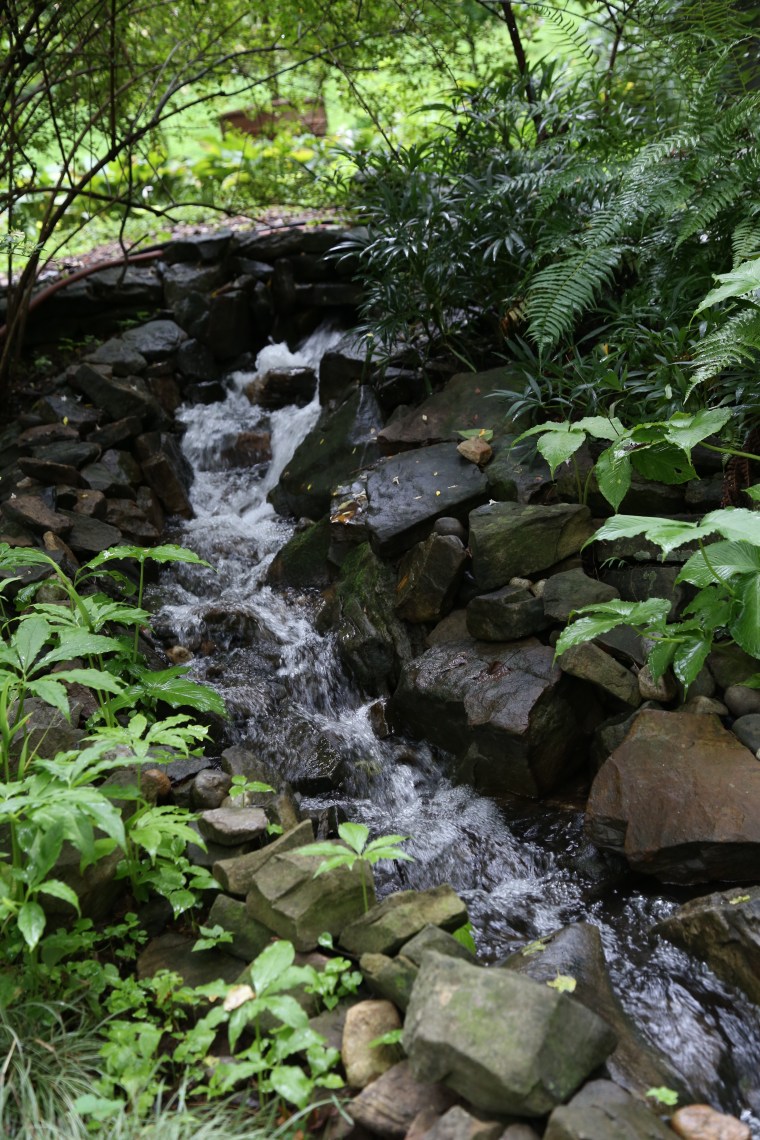 The waterfall is actually a water feature that recirculates but it is no less beautiful than a real stream!
 Of course, there are plenty of Hostas to admire, too!
 As much as I love Hostas, I really love Hydrangeas!
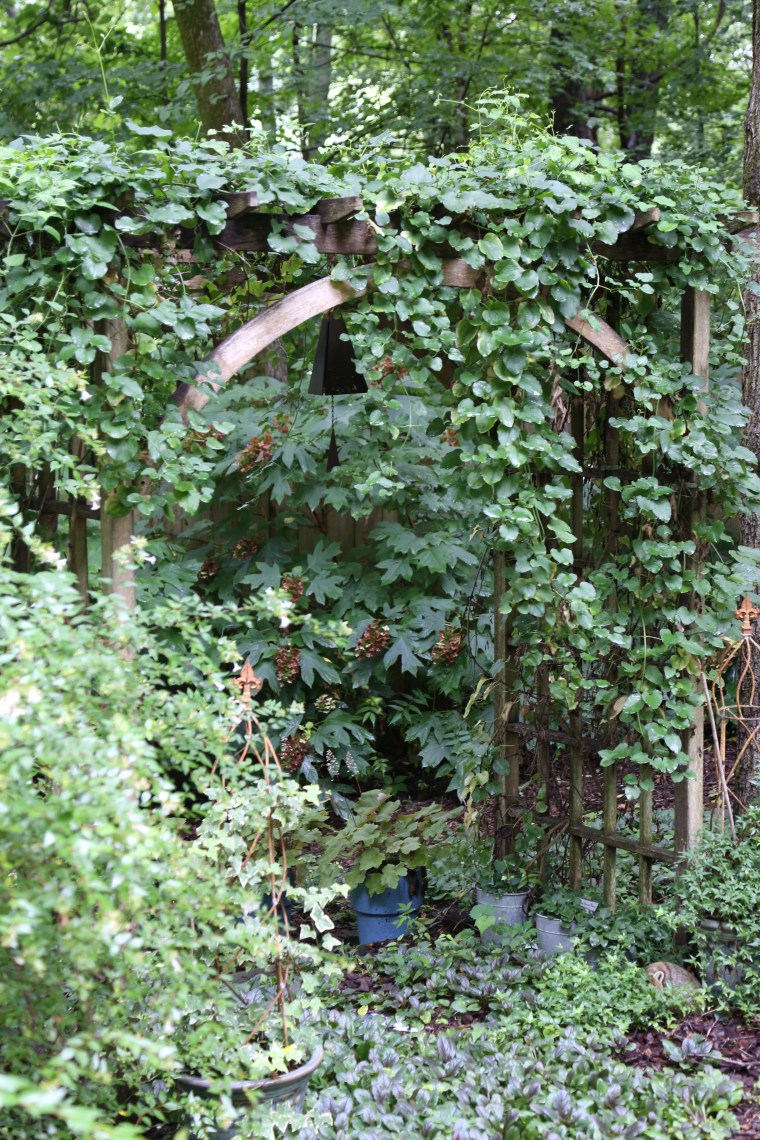 Arbors are everywhere in the garden.
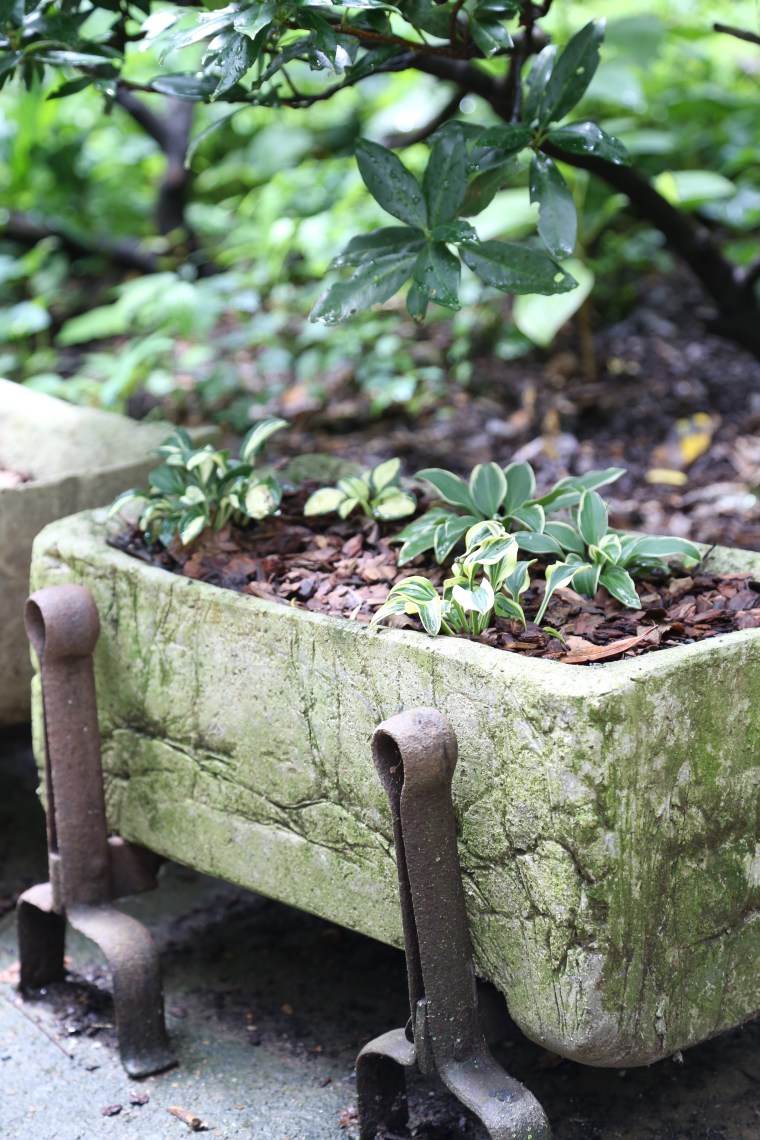 Another of Georgeann’s tufa pots, this time it is a trough. Remember what I said about the crinkles and wrinkles in the plastic liner? They really do add a lovely texture to the finished pot.
  Everywhere you look, there is something to see, and in my case, covet!
 Don’t you just love this little cottage?


 This swing is hidden from view in most of the yard but I was still hesitant to sit on it for fear of acting like a child…
 If this were my garden, I have a feeling that I would be spending a lot of time sitting out in front of the cottage at this table.
 Caladiums are quickly becoming one of my favorite plants to add color to a shade garden.
 This stone sits at the start of the path that leads up to the cottage and if you ask me, it is an accurate description of Georgeann’s garden.
 So the moral of this story; if a Master Gardener opens their home to you, go! You really have no idea what you will discover or learn until you walk through someone’s garden and I am genuinely grateful that I had the chance to spend a morning exploring this beautiful garden. And in case you were wondering, there was definitely cake; I brought my Guess Again Tomato Cake and the recipe will be posted soon!
 About a month ago, our chickens came home from their temporary location. We decided to put the coop within the garden so that they can help us with insect control and composting and more importantly, to keep the dog away from their droppings-we won’t discuss her disgusting taste in snacks…
 The garden itself is approximately 38 feet wide by 94 feet long, which makes it about 3500 square feet. That gave us plenty of room for the coop and pen as well as the tunnels. The first thing I did out there was dedicate an area for composting and it is just behind the wheel barrow.


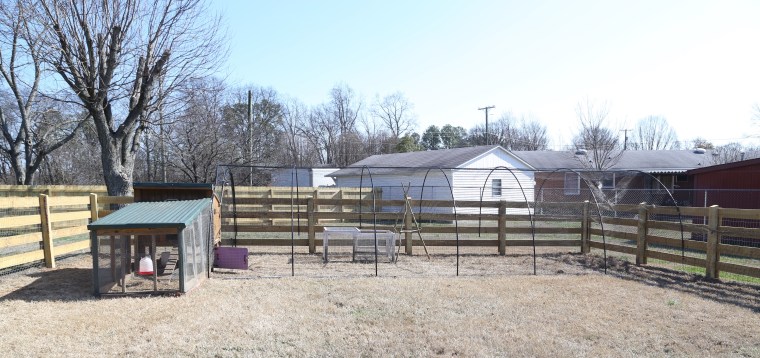 It took us an entire weekend to paint the PVC, build the hoop frame and cover it with the poultry netting. Knowing that we can leave them outside during the day without worrying about hawks. The large pen has another purpose; we will store leaves in there and the chickens will help us compost them. They constantly dig in the leaves which helps break them up and because the leave droppings as they go, the nitrogen in them will also help with the composting process. It takes at least six months to break them down so we will have to be patient.
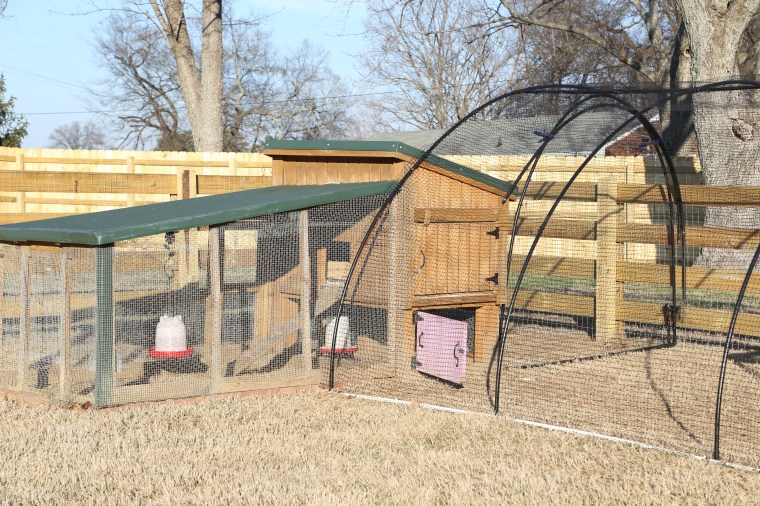 The hoops are attached to the coop so that we can leave their door open to give them access to the pen.
 If the chickens are going to help with insect control in the garden, they need to be able to walk through it but unfortunately, they could run into hawks and more importantly, they would make a mess of the beds. The solution; tunnels. We built them in Williamsburg so that they would have more space to roam and when we moved, we took them apart and moved them with us.
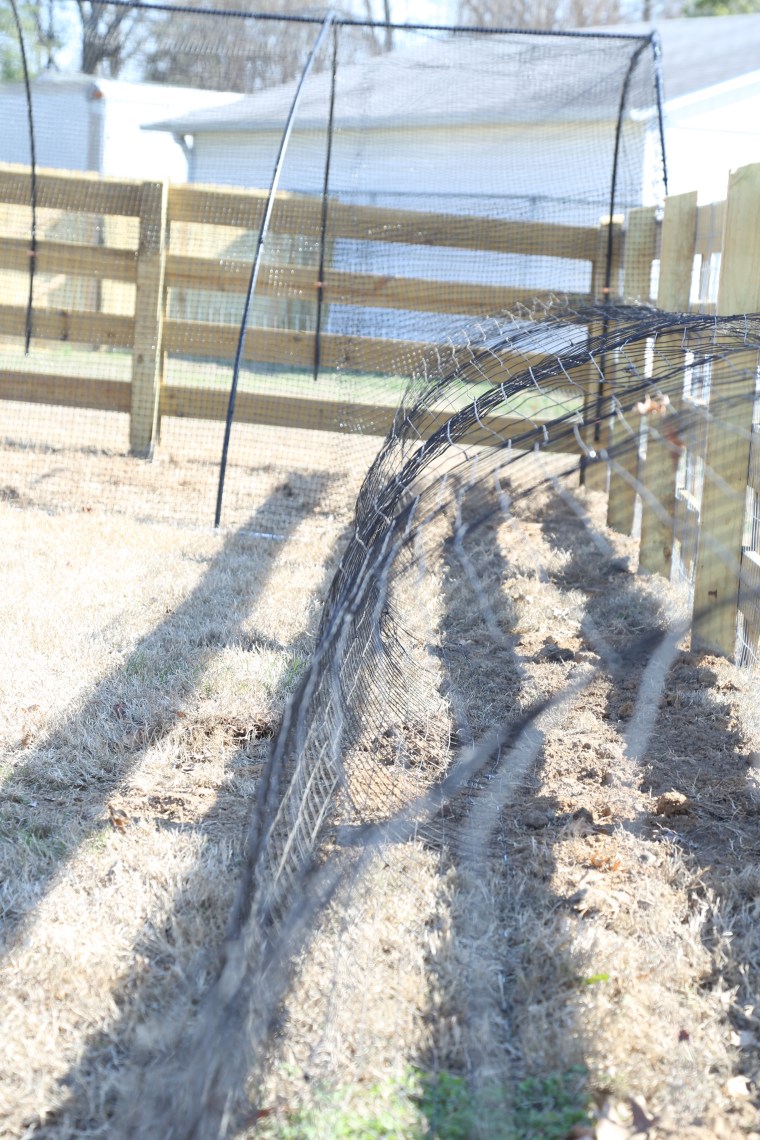 Starting at the far end of the pen, we are running the tunnels down the fence line and around the exterior edge of the garden. We may still let them out into the garden occasionally but not with out supervision.
 We attached the fence hoops to the wire fencing with cable ties.
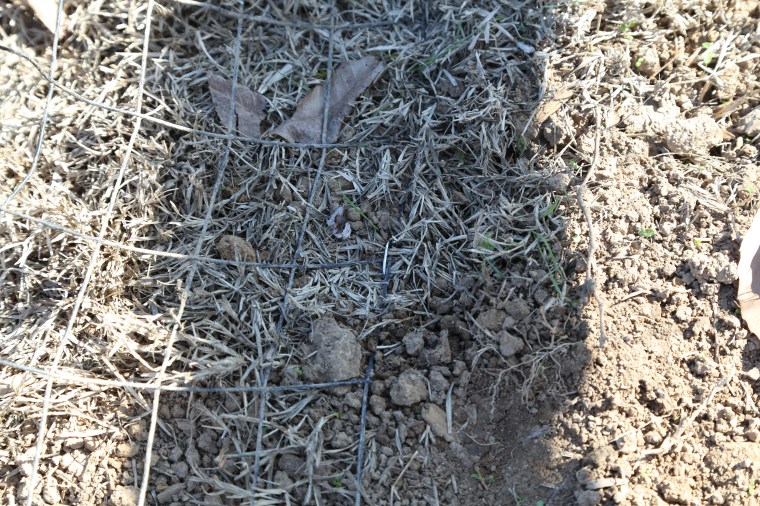 To keep them in place on the ground, we used lawn staples.


 When I was plotting the garden earlier this year, I planned on using a large amount of space for cucumbers because I think nothing beats a freshly picked cucumber when making a salad. Whether it is a bowl of lettuce topped with tomatoes and cucumbers or a bowl of slices in a hot-sweet, vinegar marinade, cucumbers are one of my favorite guilt-free pleasures. This year, I made sure to plant plenty of them so that I could have them all summer long.
 The light in the kitchen is beautiful in the morning. It is one of the things I like most about our home. The windows allow a lot of light in and in the summer, we can go most of the day and into evening without turning on lights in the kitchen.
 These cucumbers have good flavor, soft skin and did not get bitter even when left on the vine too long-a few got missed in the leaves, swelled up and still did not turn bitter. These have been soaked overnight in a brine and are draining while the jars boil and the vinegar mixture is prepared.
 When I make dill pickles, I like to add a few mustard seeds and a pinch of dill seeds. Fresh garlic, crushed red pepper, black peppercorns, dill from the garden are added to a boiled mixture of cider vinegar , water and salt.
 If you like to can, I highly recommend picking up a pot that comes with a basket. It makes putting the jars into the pot and removing them so much easier and safer.
 The other tool I recommend, a pair of canning tongs, seriously, if you do not have them, buy them. Too many times I have tried to use regular kitchen tongs and have scalded my hands on more occasions than I can count!
 The pickles are packed into the jars with the spices and herbs and then the boiled vinegar mix is poured over them leaving about half an inch of space.
 When the tops are put on, be sure not to screw the bands too tightly. Nothing is worse than removing the jars from the water bath only to see that they have crimped and buckled because the bands were too tight! Load them into the basket and then lower it into the boiling water.
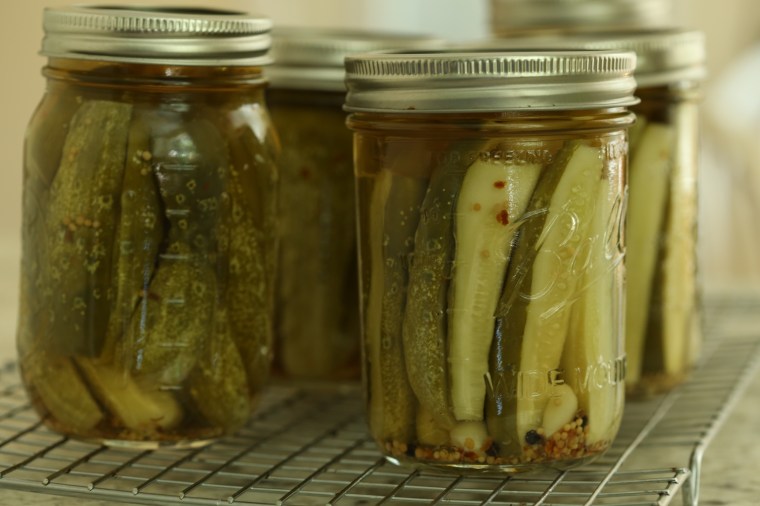 After a boil of 10 minutes, raise the basket and remove the jars to a rack to cool. Listen for the lids to pop as they cool. If you find that some haven’t popped and appear sunken in the middle, put those in the fridge and use them first.
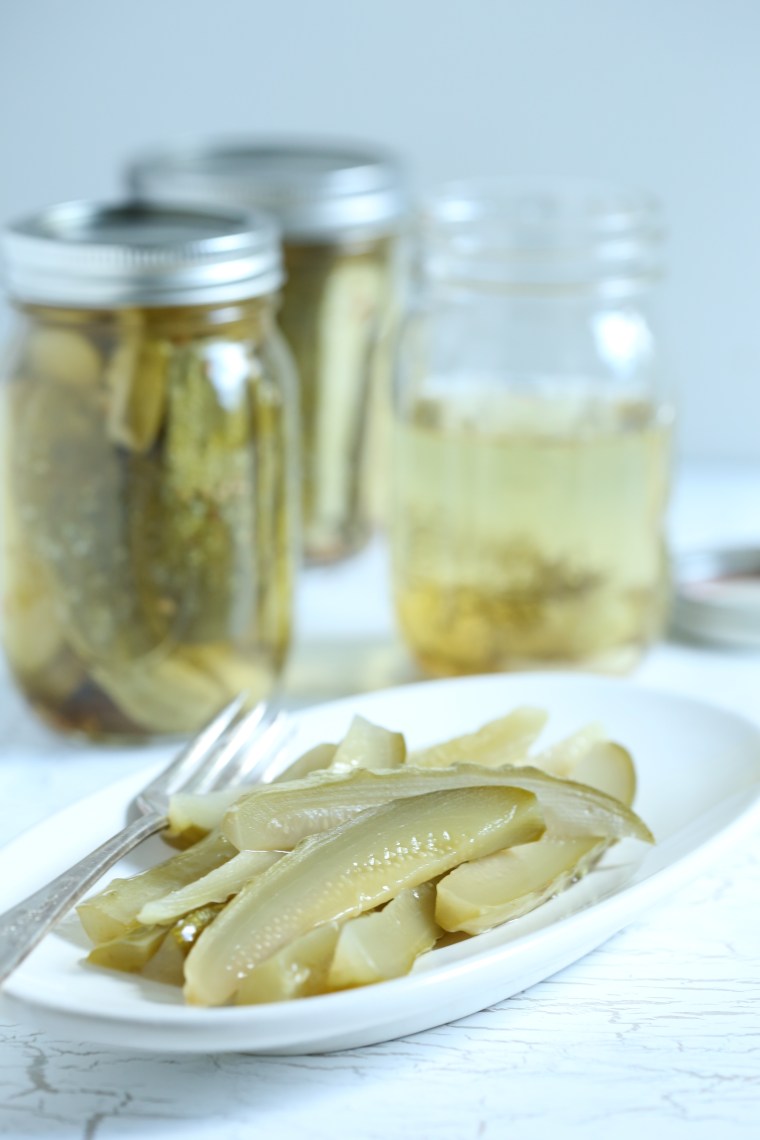 The recipe I used recommended allowing the jars to sit for 3 weeks to age and allow the flavors to develop. Since I have been making these pickles a few jars at a time, I decided to open one today and taste them. They did not disappoint! One thing about this recipe, no alum was used and despite that, they were pretty crispy, for a pickle anyway.
 The color has changed dramatically over the weeks. These will be enjoyed with many sandwiches…
 Sandwich-Sliced Dill Pickles
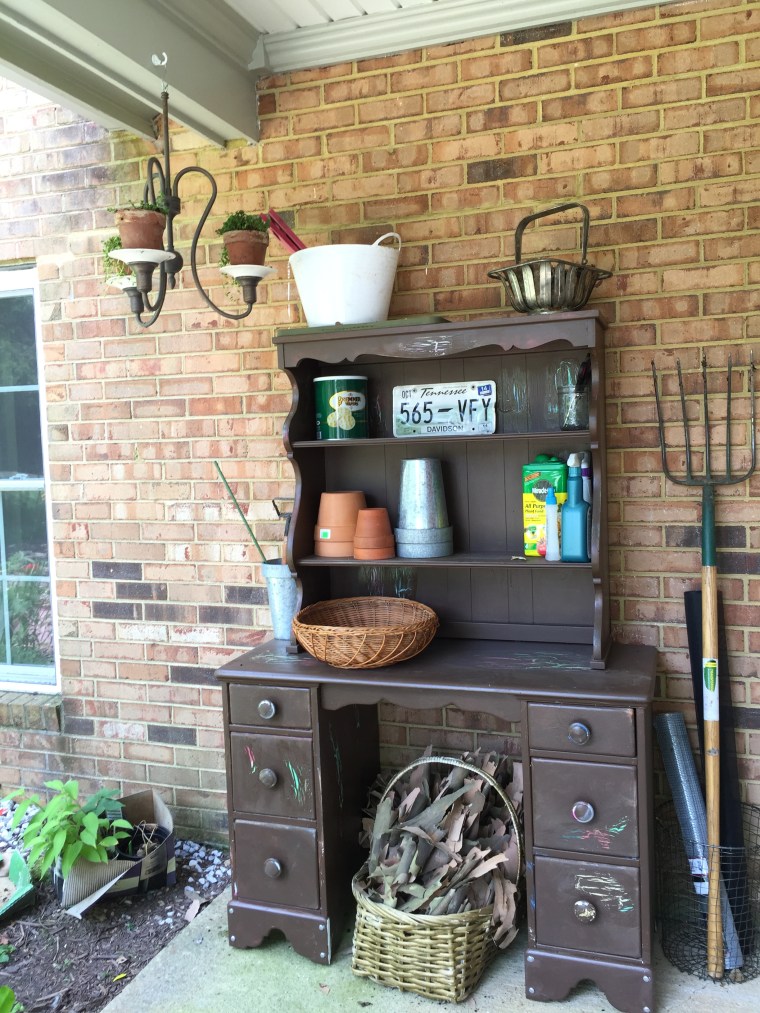
 Apparently, I can Pinterest along with the best of them. Repurposing things has long been a hobby of mine but since Pinterest came along, there are so many people sharing ideas and photos that if you spend some time looking, you can quickly become overwhelmed with photos and tutorials. Unfortunately, for every great step-by- step tutorial, there is a vaguely written and generally poor one to counter it. Having seen so many for turning chandeliers into planters and outdoor lighting, I decided to give it a go when I found this fixture at my local Habitat for Humanity Restore. The painting on the metal made it look a little old and rustic which meant I wouldn’t have to try and paint it but even better was the $5 price tag.
 Knowing that I had to find three plates and cups, I searched in the housewares department and the gardening department. While I could not find plates at the HHRestore, I did find three terracotta pots that were already coated with a nice garden patina. A quick visit to my other favorite thrift store in town, the CHKD store, turned up these nice Pfaltzgraff saucers. At 78 cents a piece, how could I say no?
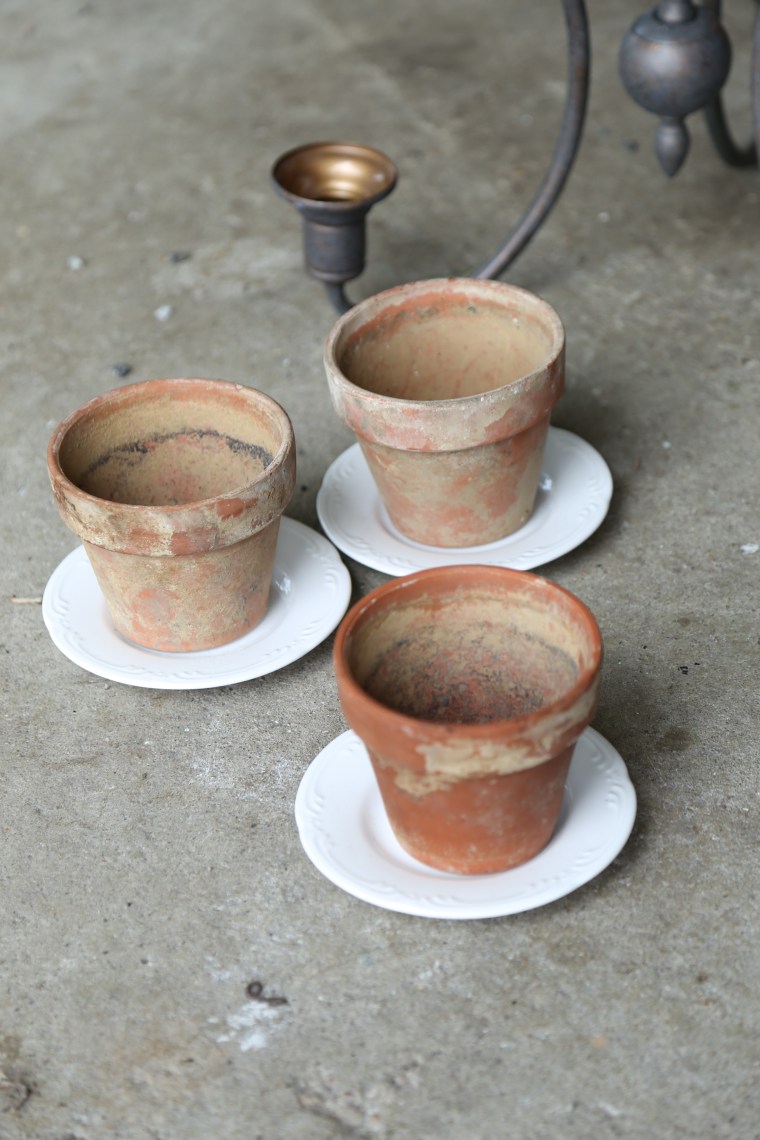 A quick preview of what is to come. If you can, take your fixture with you, it will give you the chance to view the pieces together and make sure they fit. Plates have a ring on the bottom that can make it awkward to assemble the pieces. My plates were not a perfect fit but came close enough that I was able to make them work together with the cups on the chandelier.
 After removing the electrical components and cutting the wires, I was left with the bolt at the bottom and a piece of threaded pipe. To attach the plate and pot, I needed a coupling nut to attach to the pipe that would also be used to secure the plate and pot with a bolt and washer. This is another reason that you need to take your fixture to the store with you; every single fixture has its own sized parts and while some are easy to find, others are proprietary or just not easy to locate.
 After considering that for about 12 seconds, I went off to my local ACE hardware store and told my sad tale to a wonderful salesman. He was intrigued him enough that he and I spent close to 20 minutes tracking down parts. When all was said and done, I placed a coupling nut (that still wasn’t cheap but at least it wasn’t as expensive as the others) in the cup and then I filled the area around it in the cup on the chandelier with quickcrete that we had at home. After letting it cure over night, I assembled the rest of the parts.
 The plates need to be drilled out and you will need to use a special drill bit, a glass and tile bit. Place a couple layers of masking tape over the area to keep the bit from slipping and carefully drill a hole slightly larger than your bolts. If you’re worried that bolting the plate and pot together will cause them to crack, place a rubber gasket or two in between the parts; I did use one but do not think it was necessary. Because I did not take measurements, my piece required a bunch of extra washers, I suggest you buy a couple packs of extra washers so that everything is snug.
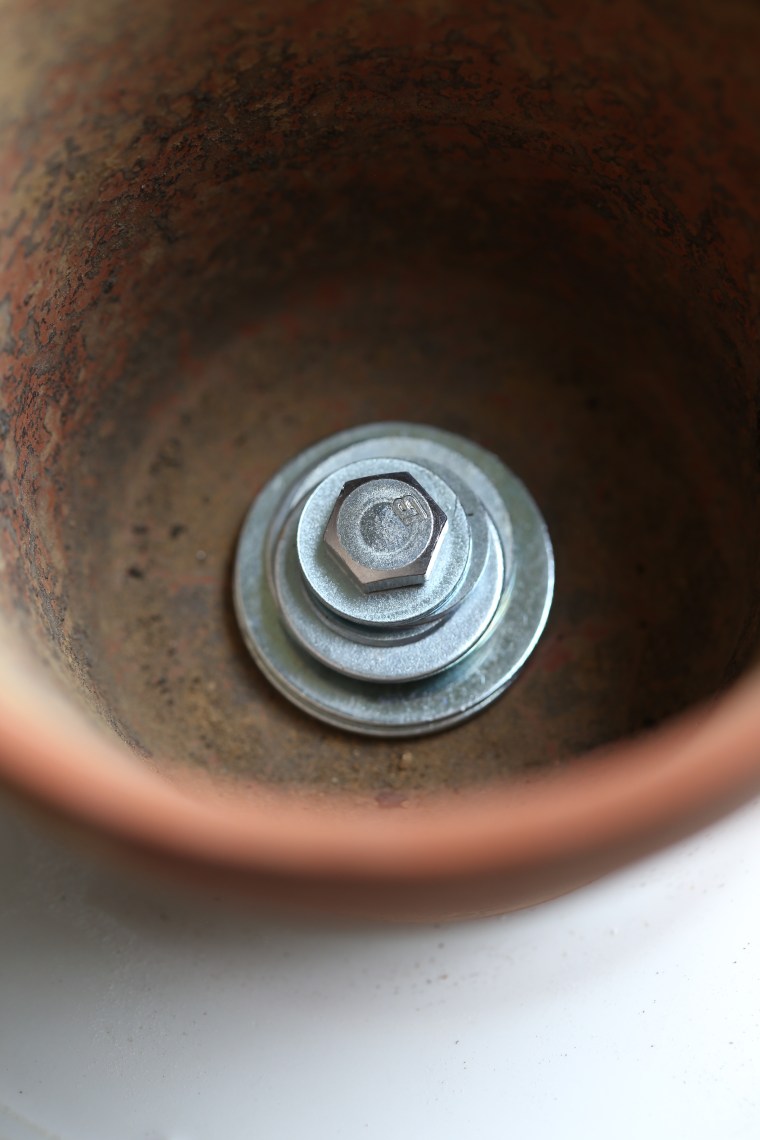 As you can see, I have a small pyramid of washers in there. If I hadn’t put so many in there, my pots would have wobbled and tipped. When I was done, my pots were secured and did not move at all.
 Ready to be filled with plants.
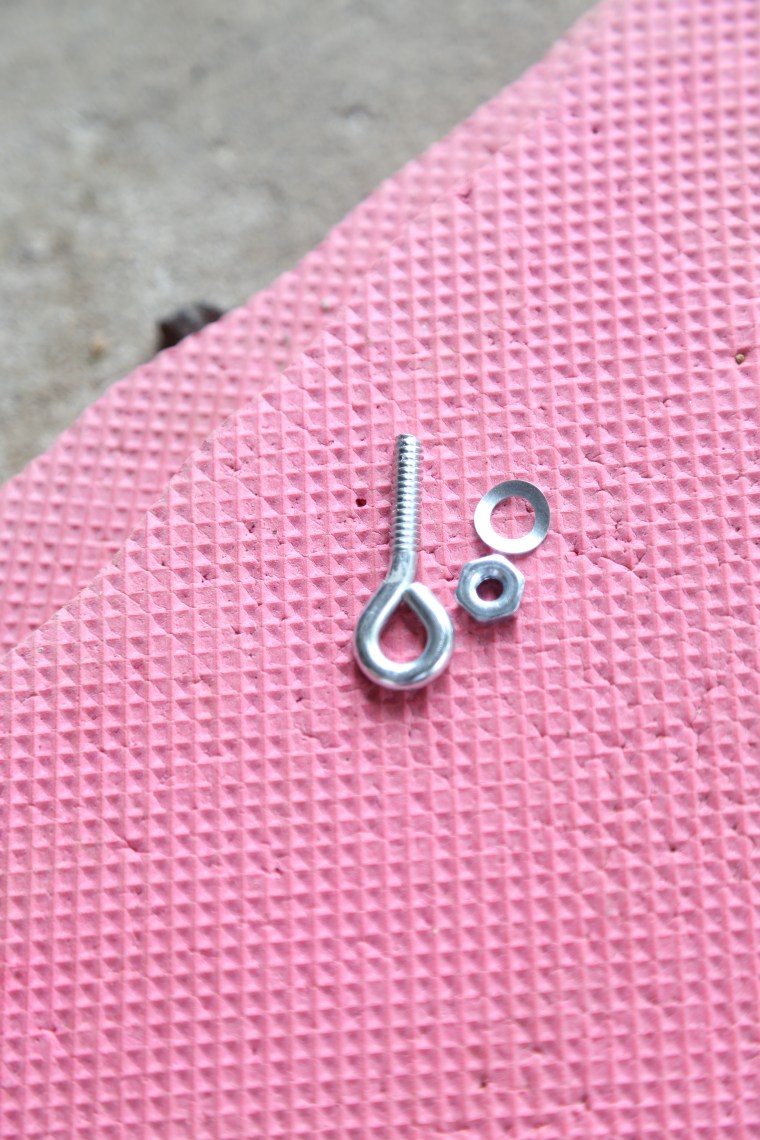 Because this is a chandelier, it needs to hang! While I was at ACE, John, my helpful hardware expert cobbled together a few pieces to create a loop at the top of my fixture.
 The top of the post actually comes off and I removed it and inserted the pieces to create the hanging loop.
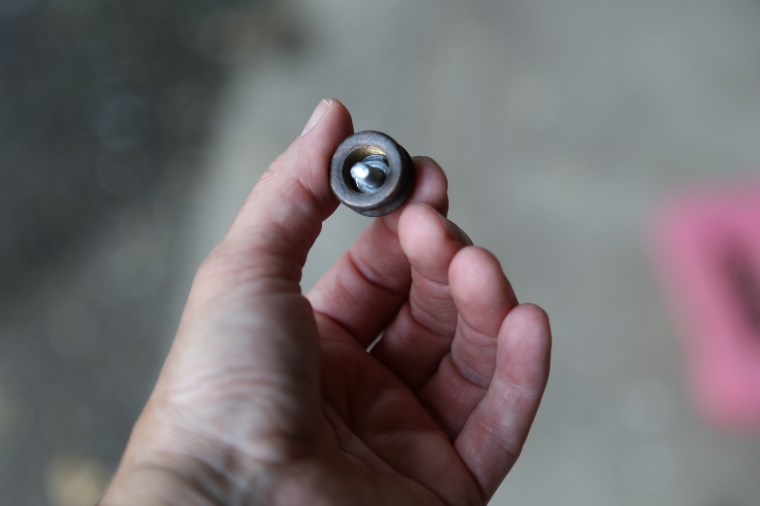 It was a tiny space to work in so I suggest you get a hold of some really narrow and long needle nose pliers if you have a fixture like mine.
 The finished hanging loop is ready to hang!
 The final step is to fill the pots. One thing many folks don’t consider when they arrange plants in hanging planters is that size is crucial. My pots are small, about 2 cups in capacity and that means a plant could quickly out grow the space. To prevent that from happening, I chose plants that I know have shallow growing roots that require little space; sedum and succulents! To fill my cups, I used a sedum v. John Creech and an ice plant. They have a low watering need and will not out grow the cups quickly.