 This update is a little late but if you are wondering how the garden is coming along, here it is! When we finally had our hard frost a few weeks ago, I went out and spent the day cleaning and harvesting what I could.
 In my effort to add visual interest, I have added a bottle tree and the white metal baskets are a project in the works.
 Our hens have really helped us improve the soil and control insects. These are two of our young hens; a Black Australorp and an Americauna, who is also our only green egg layer.
 She really is a sweet bird but she is also a bit shy and the other hens tend to bully her a bit.
 These are a couple of the old girls. We brought our Golden Laced Wyandottes with us when we moved here from Virginia. They aren’t laying much anymore now that they are over 2 years old but they still help out by providing us with manure and by eating insects.
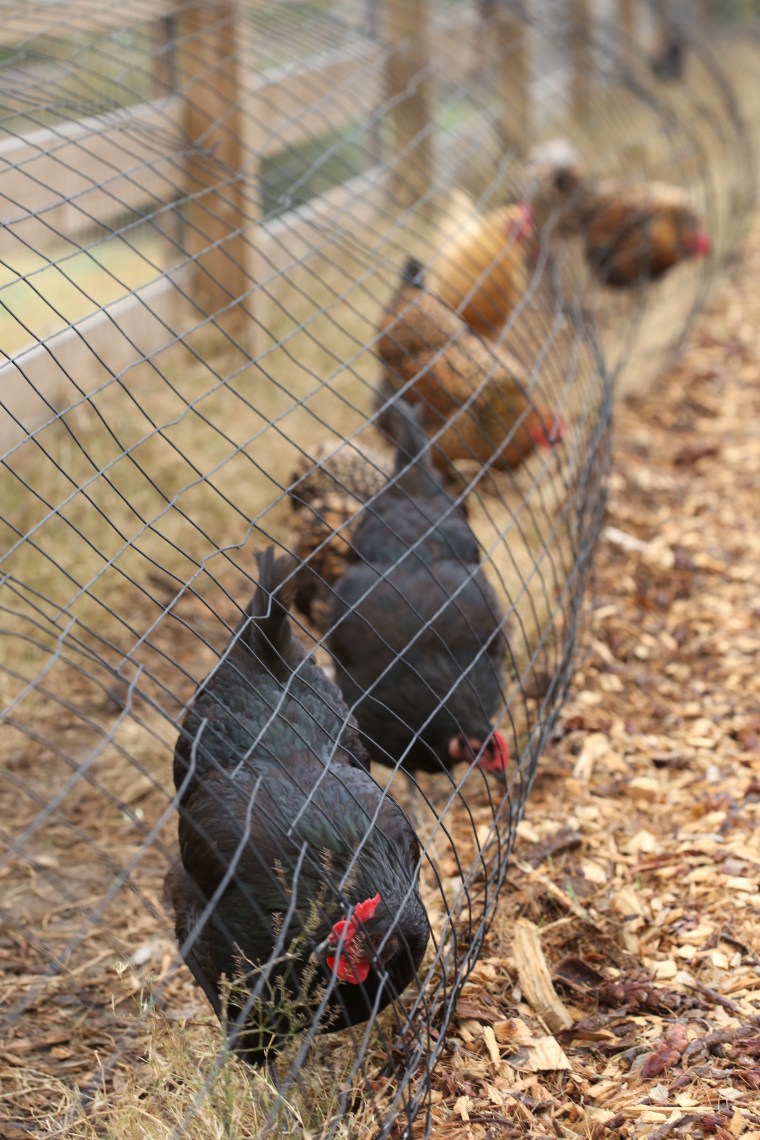 The iridescent feathers on the Australorps are beautiful when the sun hits them. The hens wander the outside of the garden in their tunnels and they are safe from hawks and our plants are safe from the hens!
 This pretty lady, an argiope aurantia or yellow garden spider, was hanging out in the carport until we moved her to the garden. She quickly settled in and stayed out there until the hard frost.
 Because I was curious, I looked up information about her and discovered that this little brown ball is actually an egg sac. Each one can contain about a thousand live babies who will over winter in the sac. As I cleaned up the bed of flowers where she was living, I discovered three of these egg sacs! In the hope of having another spider or two next year, I carefully moved the sacs and placed them in the beds with our fig trees.
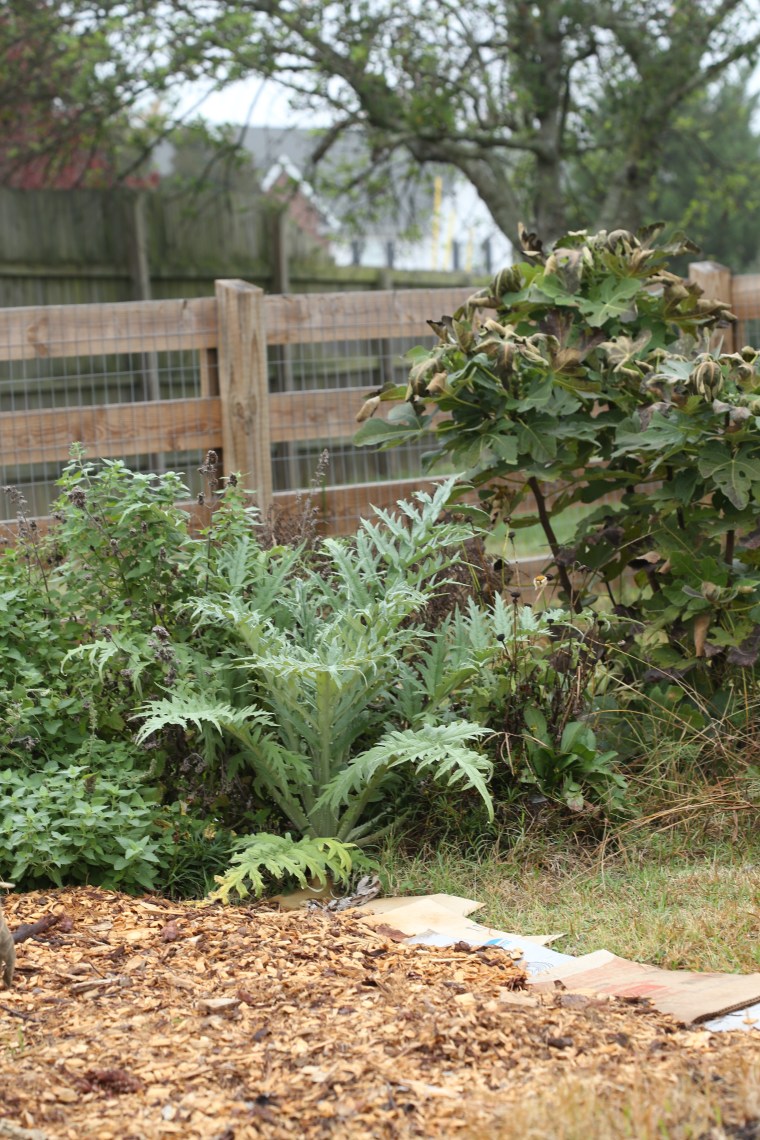 Early in the spring, I planted a number of perennial flowers and herbs around the garden. At that time, I also planted an artichoke. It has gotten large and if it survives the winter, I am hoping for chokes!
 Cabbage heads are looking good.
 We harvested most of the broccoli for Thanksgiving dinner and froze what we did not cook. Because we only cut the top heads off, we left the plants in the ground so that they would produce side shoots of smaller heads. If all goes according to the plan, we will be picking broccoli through the winter.
 When we were in Virginia, I planted Tokyo market turnips for the first time. They are smaller than the typical turnips found in grocery stores. At last check, they were nearing maturity and I am looking forward to roasting a few!
 Cardoon looks a lot like an artichoke. The difference, chokes or the flower, are the only edible part of an artichoke while both the flower and the stalk are edible on a cardoon. Actually, the stalk is more commonly consumed and it requires a long simmer to soften the extremely tough fibers.
 The stalks look like celery on steroids and they are just as tough as you would imagine. And then there are the spines; they are every bit as sharp as they look!
 Handle the stalks with care and be sure to cut them off before you try to cut and cook the stalks.
 All around the garden are little pops of color in the form of violas, one of my favorite plants.
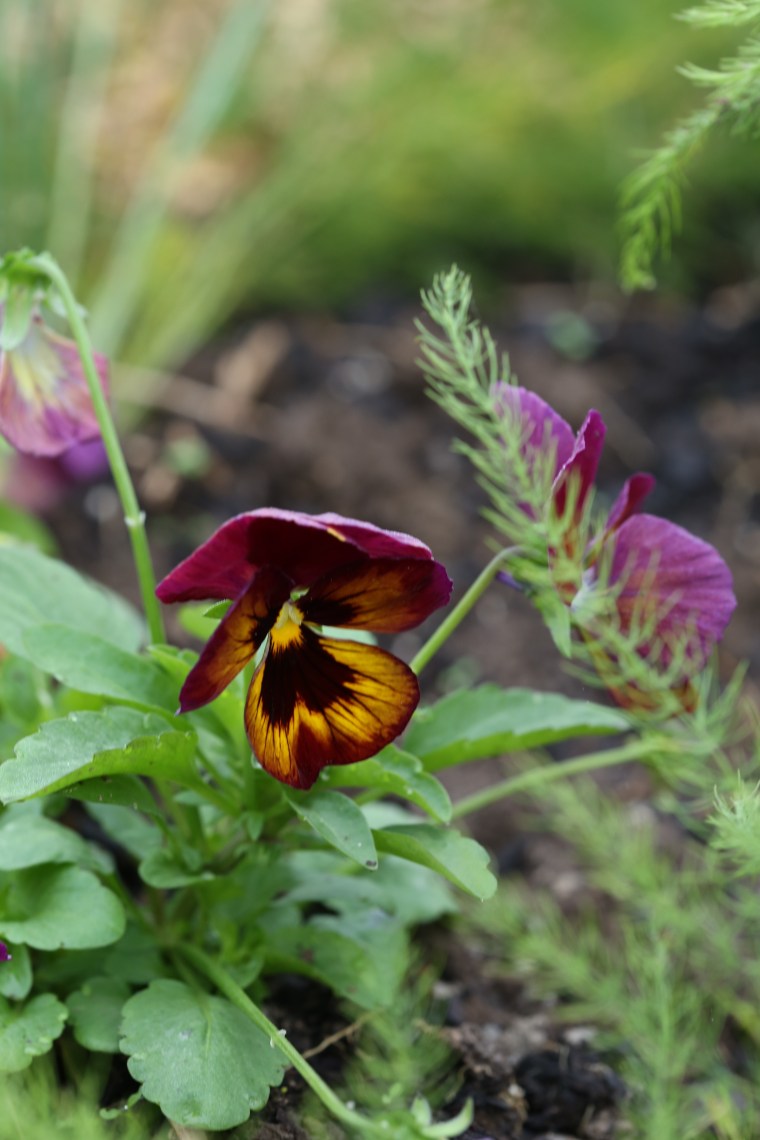 Love this color combination.
 Part of the clean up meant gathering tomatoes, both ripe and green. If you are considering planting tomatoes, give these little yellow gems a try. They are called Barry’s Crazy Cherry and they can be found in the Baker Creek Heirloom Seed catalog.
 Late in spring, we put a watermelon plant into the garden. Hoping for a few melons to share with the hens, we were disappointed by how slowly the plants grew. This was the largest of three melons. The first one that we cut into was white inside, it became some really nice pickles. The other two are still waiting to be cut and we are hoping for better luck!
 About a month ago, our chickens came home from their temporary location. We decided to put the coop within the garden so that they can help us with insect control and composting and more importantly, to keep the dog away from their droppings-we won’t discuss her disgusting taste in snacks…
 The garden itself is approximately 38 feet wide by 94 feet long, which makes it about 3500 square feet. That gave us plenty of room for the coop and pen as well as the tunnels. The first thing I did out there was dedicate an area for composting and it is just behind the wheel barrow.


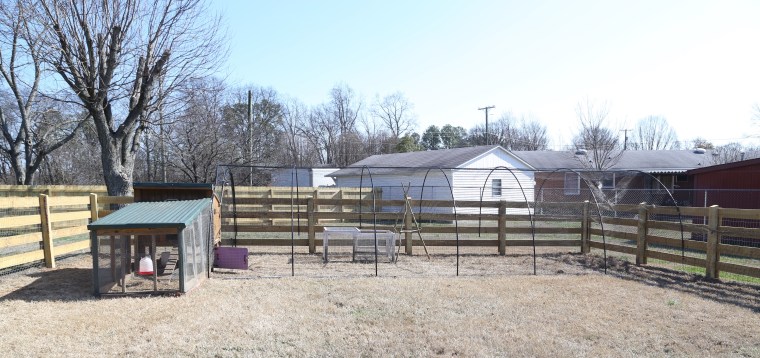 It took us an entire weekend to paint the PVC, build the hoop frame and cover it with the poultry netting. Knowing that we can leave them outside during the day without worrying about hawks. The large pen has another purpose; we will store leaves in there and the chickens will help us compost them. They constantly dig in the leaves which helps break them up and because the leave droppings as they go, the nitrogen in them will also help with the composting process. It takes at least six months to break them down so we will have to be patient.
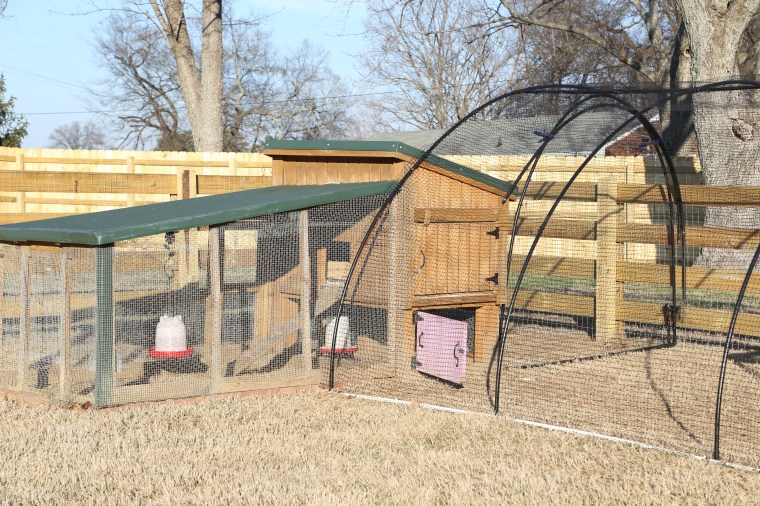 The hoops are attached to the coop so that we can leave their door open to give them access to the pen.
 If the chickens are going to help with insect control in the garden, they need to be able to walk through it but unfortunately, they could run into hawks and more importantly, they would make a mess of the beds. The solution; tunnels. We built them in Williamsburg so that they would have more space to roam and when we moved, we took them apart and moved them with us.
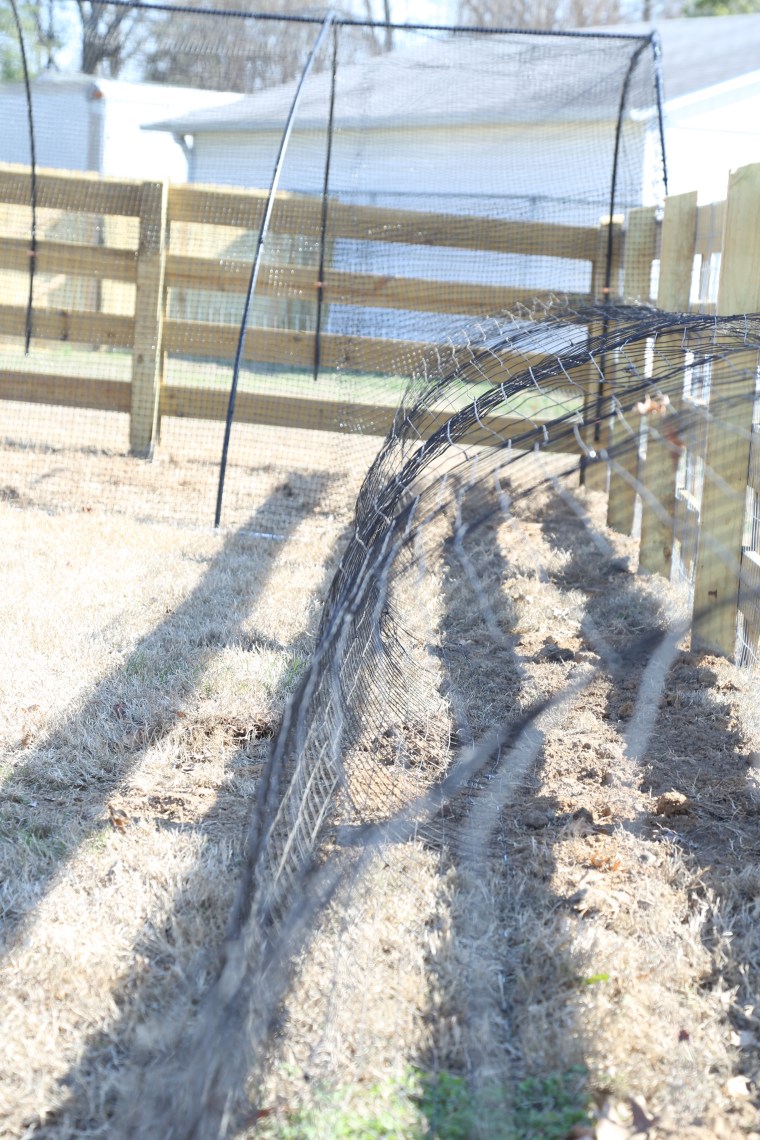 Starting at the far end of the pen, we are running the tunnels down the fence line and around the exterior edge of the garden. We may still let them out into the garden occasionally but not with out supervision.
 We attached the fence hoops to the wire fencing with cable ties.
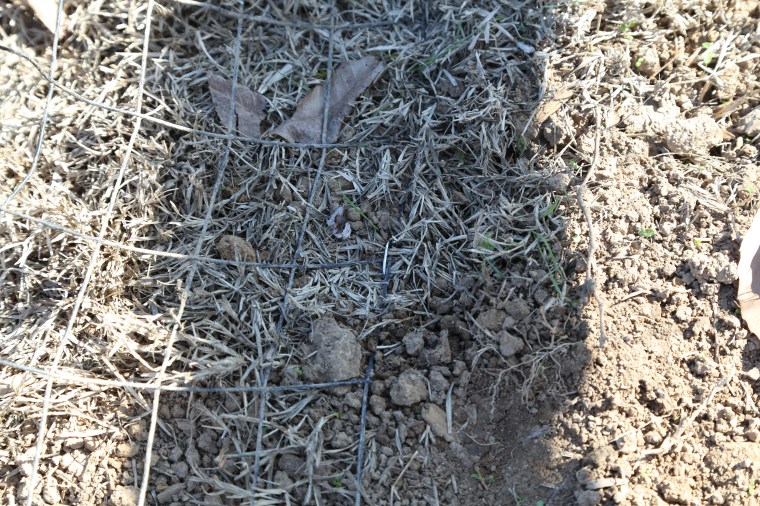 To keep them in place on the ground, we used lawn staples.


