tomato season means blt’s!!!!

this week’s tuesdays with dorie post featured a loaf of freshly baked semolina bread.  it was over 90 degrees, it was too hot and humid to bake bread, but i went ahead and did it anyway.  actually, the day i was baking the bread was rainy and gloomy and the oven didn’t heat up the house too badly for a change.

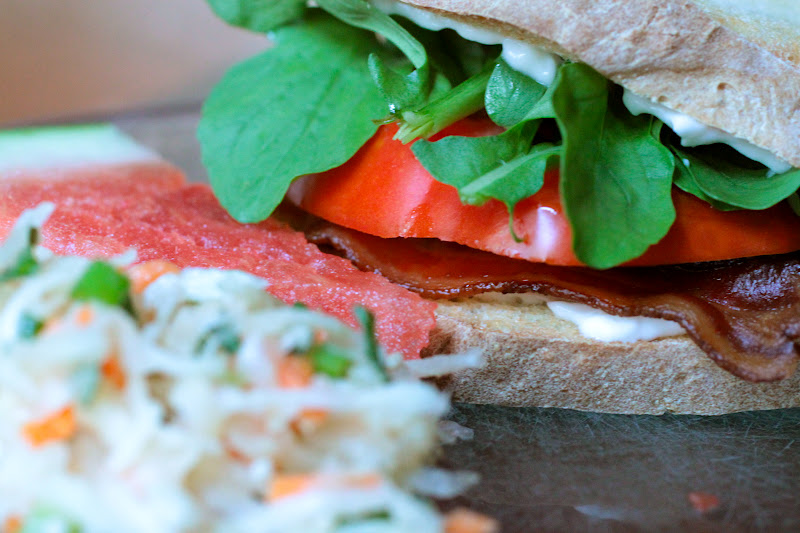
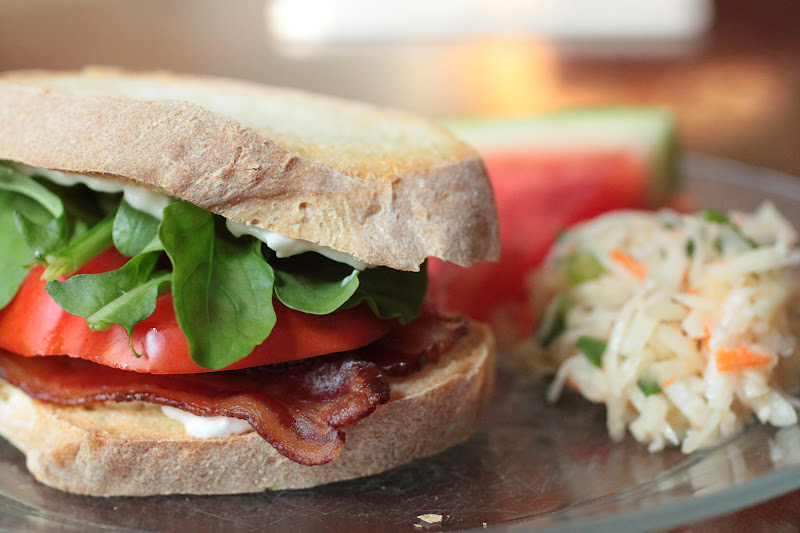
with just the two of us in the house, it can sometimes be difficult to finish a loaf of bread before it becomes a deadly weapon or turns green and fuzzy.  but this is tomato season and the challenge now is to have enough bread and bacon to eat all of the tomatoes we picked from the garden.  i know, it’s a tough job but somebody’s got to do it…

for the last 8 years, i have worked in a restaurant that is famous for its breakfast fare.  needless to say, i am well aware of the best methods for cooking (and burning) bacon.  so how does a busy restaurant cook tons (literally tons each year) of bacon?  they do it in an oven, on a sheet pan and not on a grill or a stove top-that’s too labor intensive.

first of all, start off with a decent bacon.  i use one that is uncured and dry rubbed.  next, line a heavy duty pan (i use restaurant style half-sheet pans) with a piece of baking paper (not waxed paper!) and then i lay out the bacon so that it slightly overlaps.  by shingling the bacon, you slow down the process and allow it to cook without crisping to quickly.

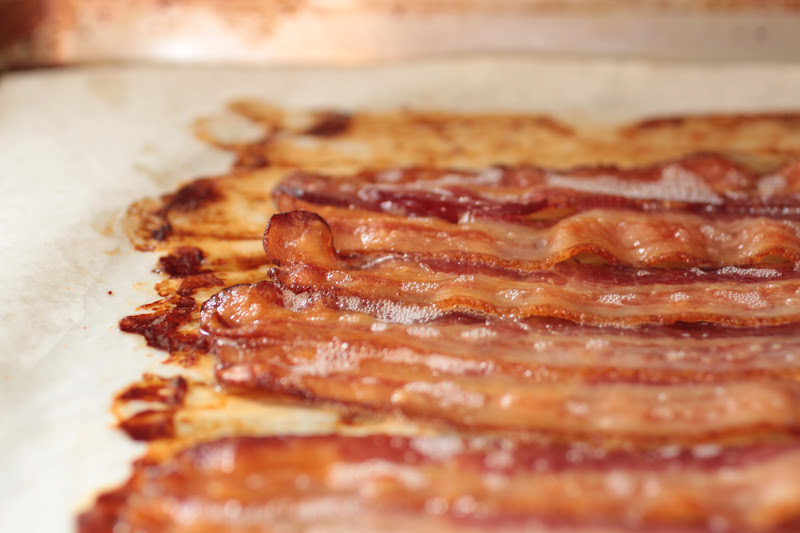
 heat the oven to 350.  if you used a convection mode, you will need to watch it closely, or you can turn down the temp by 25 degrees.  to keep it soft and pliable, you will need to take the bacon out of the oven after about 10-15 minutes and turn it over.  then bake it for about another 10 minutes so that all of the white parts are slightly translucent and just beginning to show signs of caramelizing.  remove it from the oven at that point.  remember that the bacon will continue to cook after it comes out of the oven so stopping here allows for the carryover of heat to finish the job out of the oven.

place a few sheets of paper towel on a clean tray and gently lift some of the warm bacon off the baking tray and place it on the paper to blot the grease.  top it off with more paper and repeat until all of the bacon is blotted dry.  now you have cooked bacon that isn’t greasy and isn’t likely to break into little shards when you bite into your sandwich-nothing worse than hard, crunchy bacon shards falling out all over your lap!

 vine ripened tomatoes…what a concept!  everyone should have a tomato plant or two just so that they can make tomato sandwiches (a true southern obsession) as well as blt’s!

 the spread-we had kohlrabi slaw using freshly picked kohlrabi from our garden.  right now is not the season for lettuces and other salad greens due to the heat but that didn’t stop a few rogue arugula plants from popping up.  needless to say, we ate our sammiches with arugula.

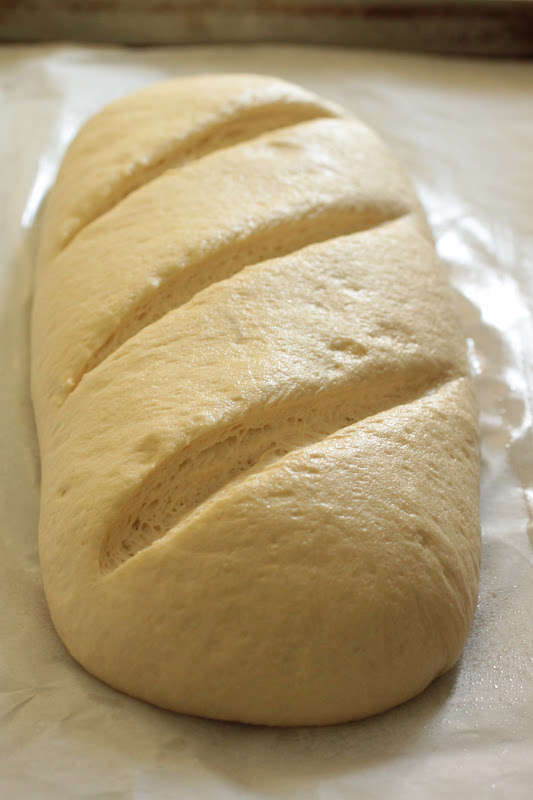
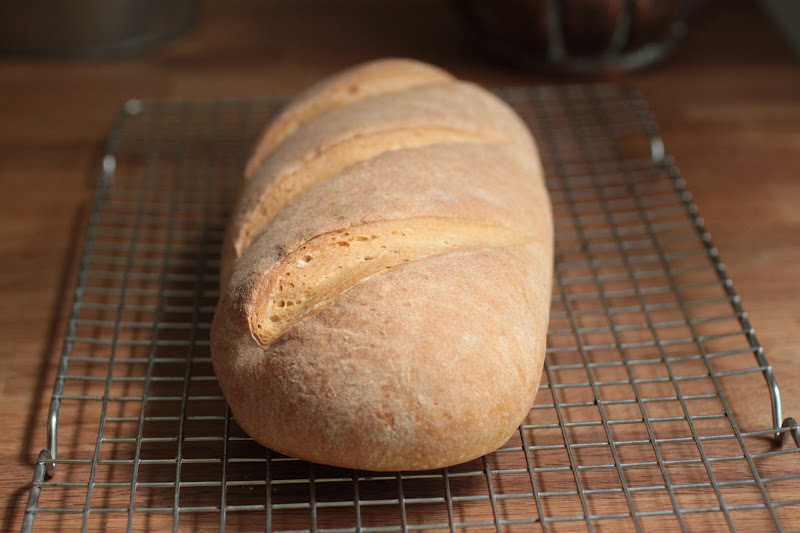
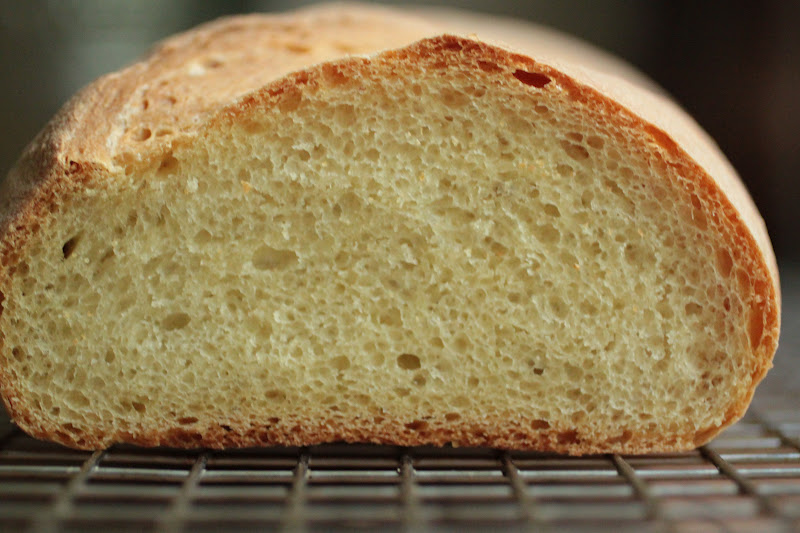
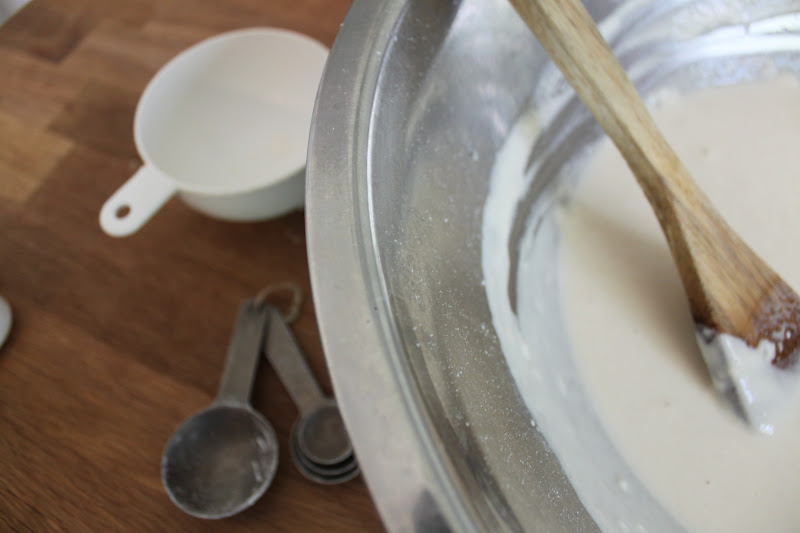
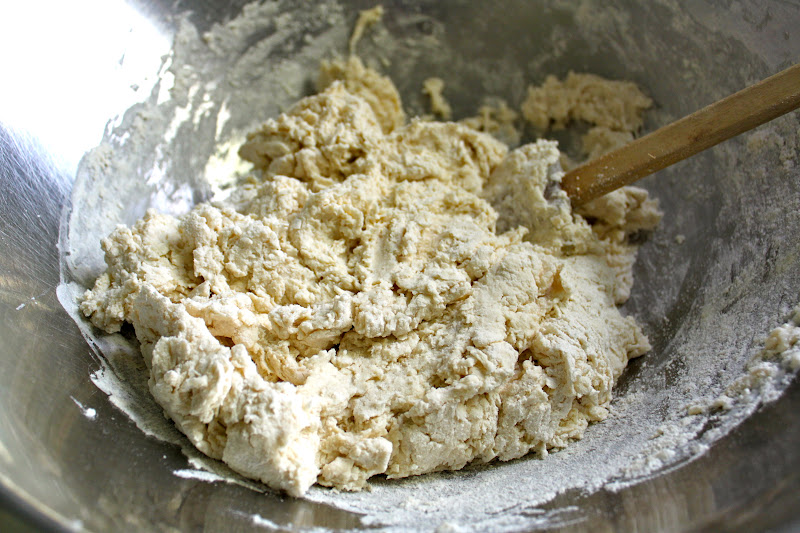
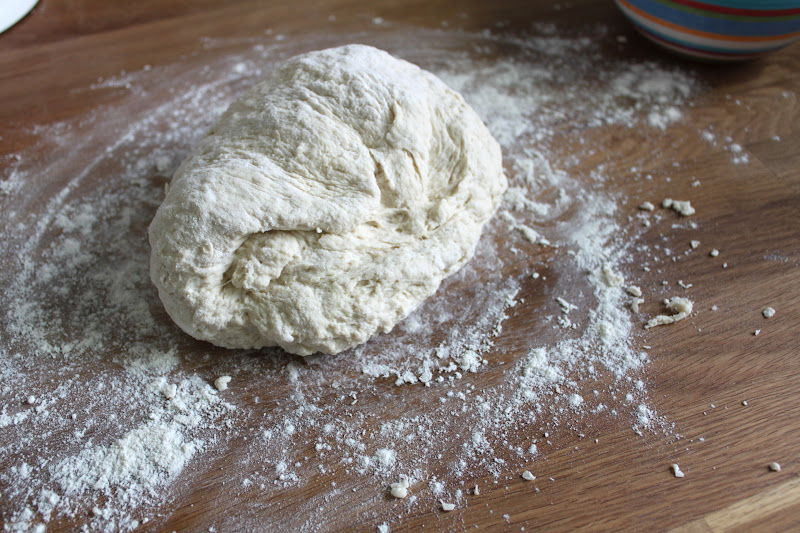
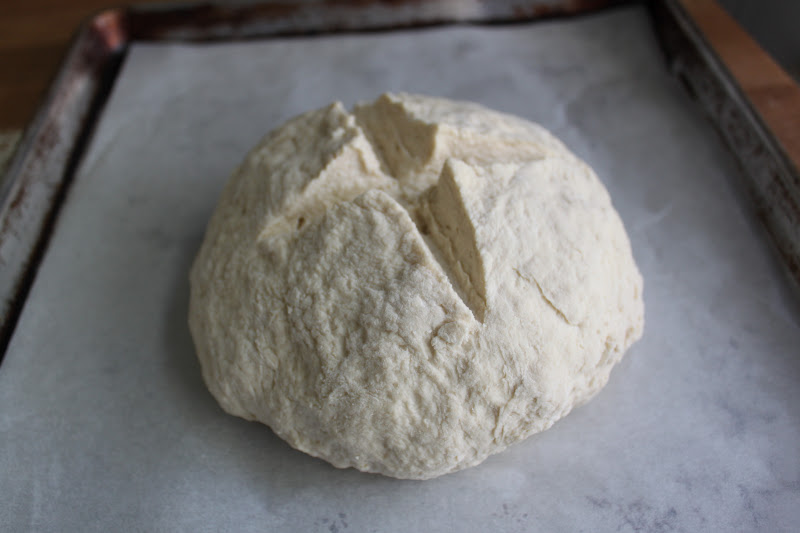
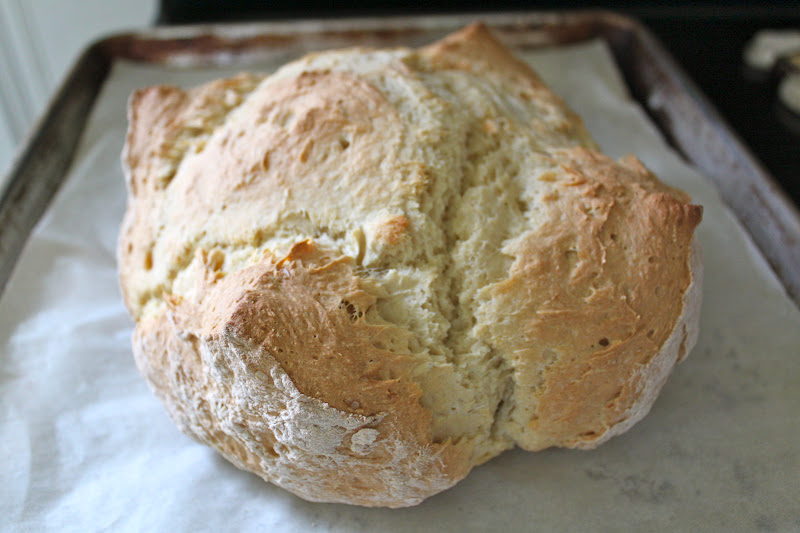
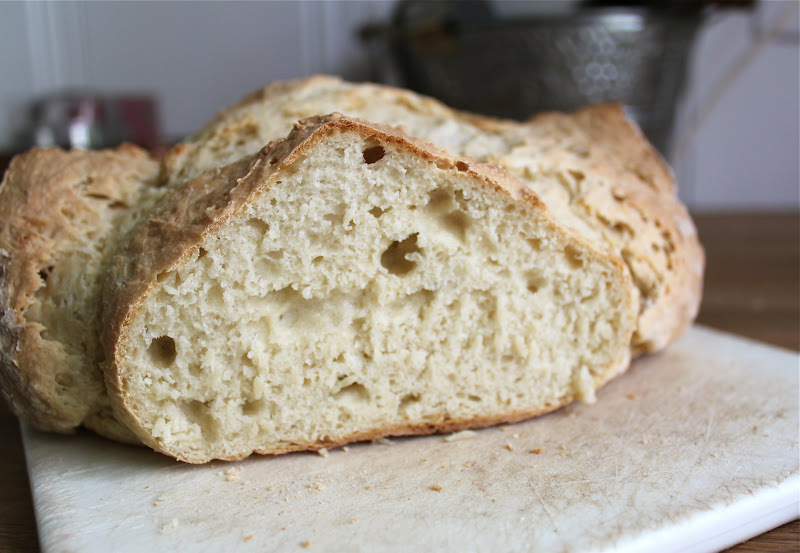
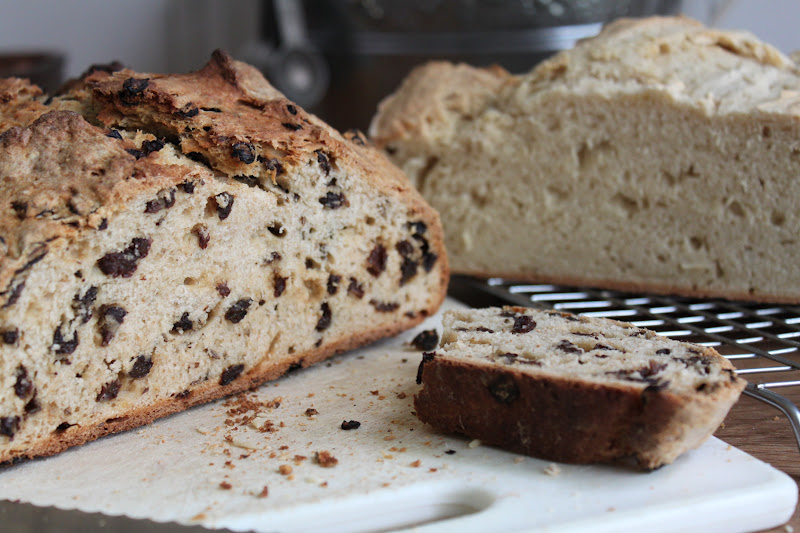
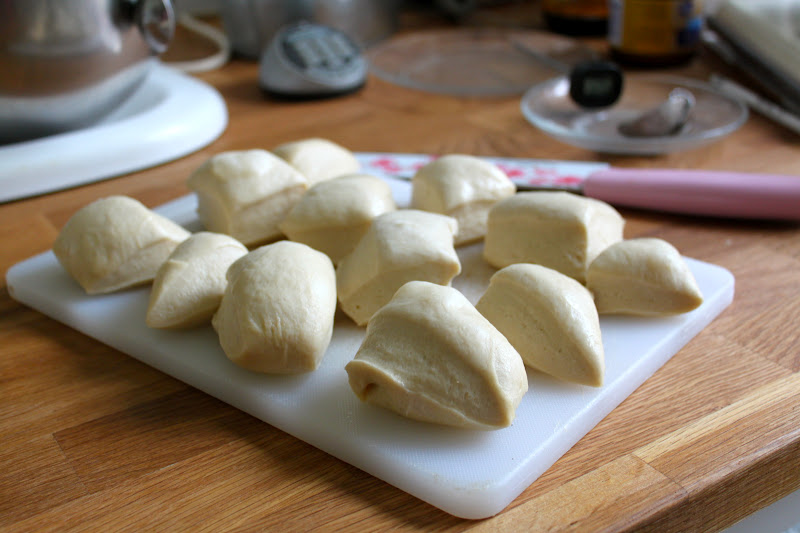
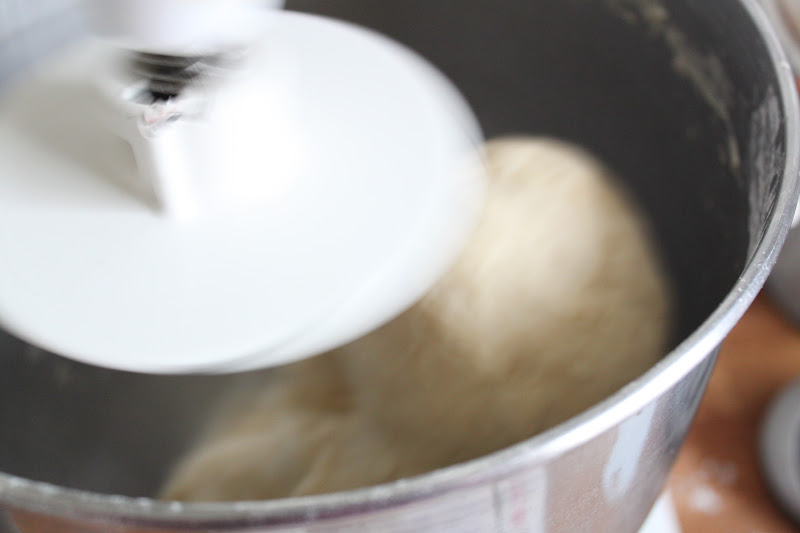
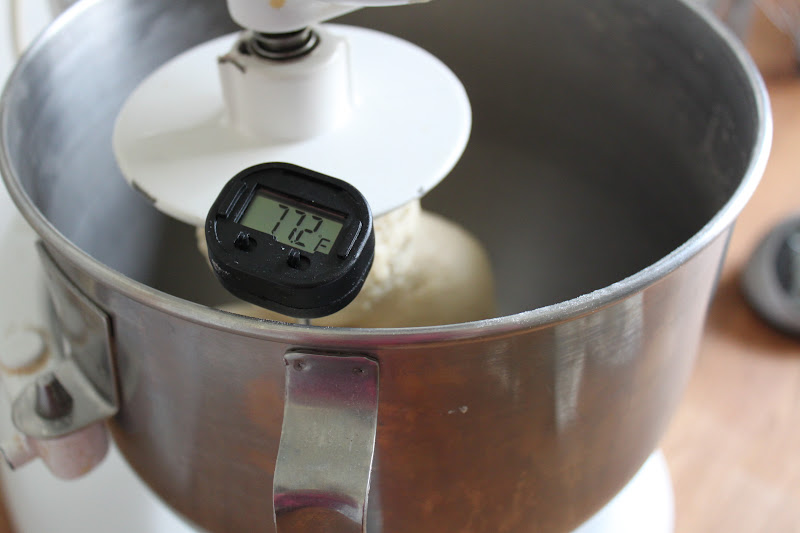
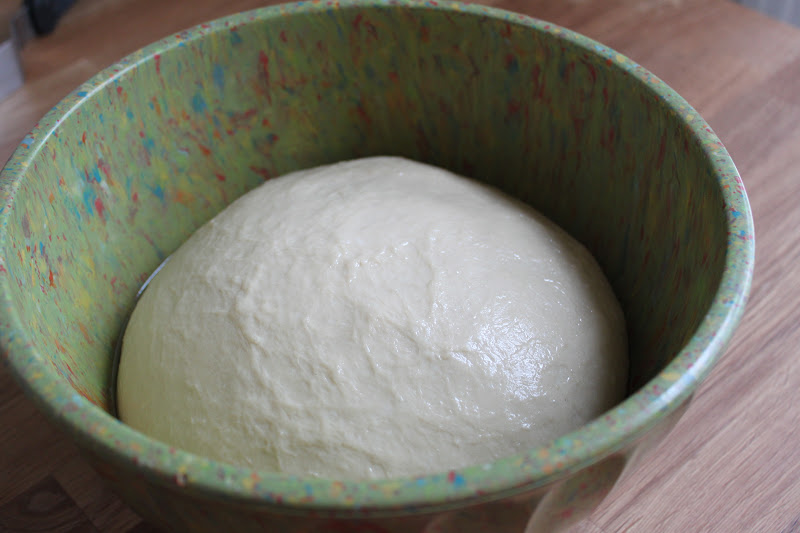
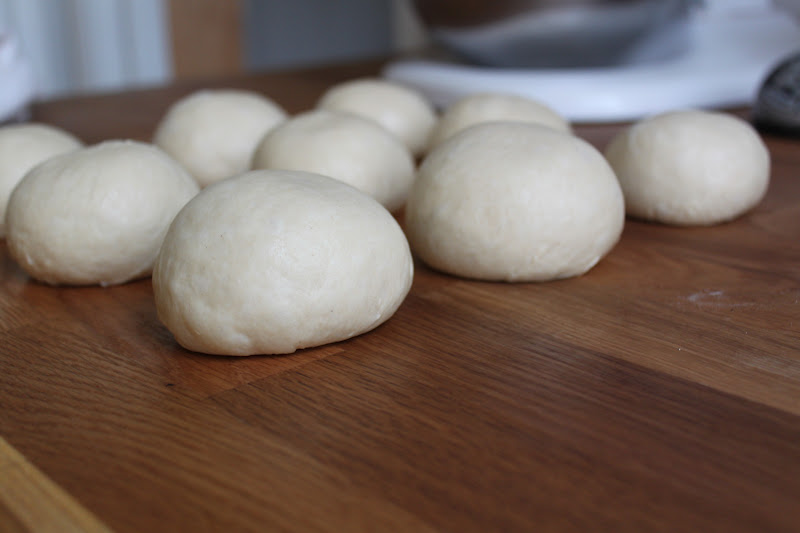
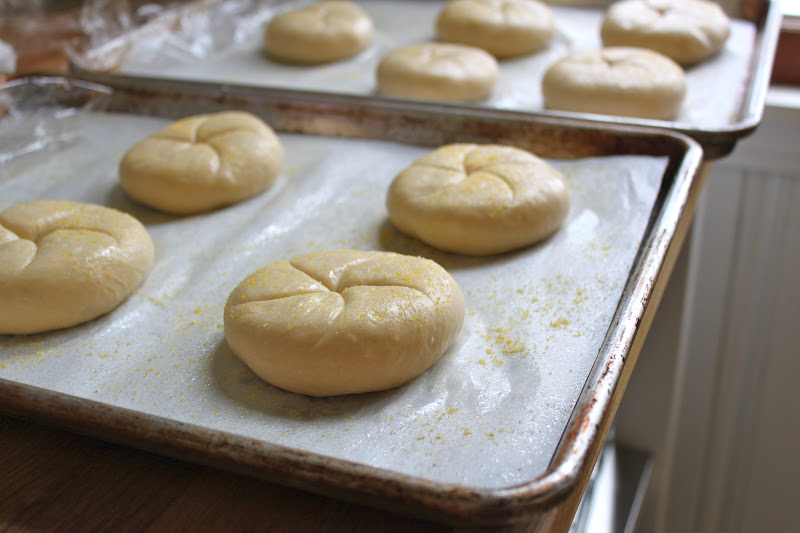
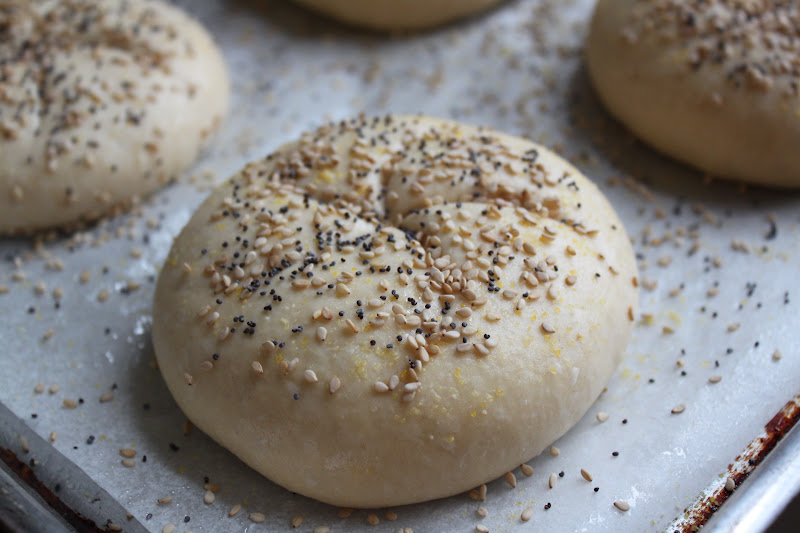
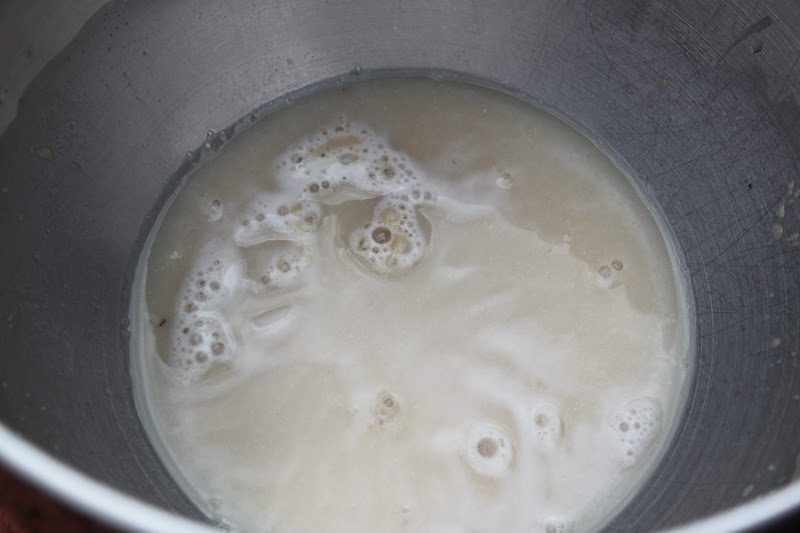
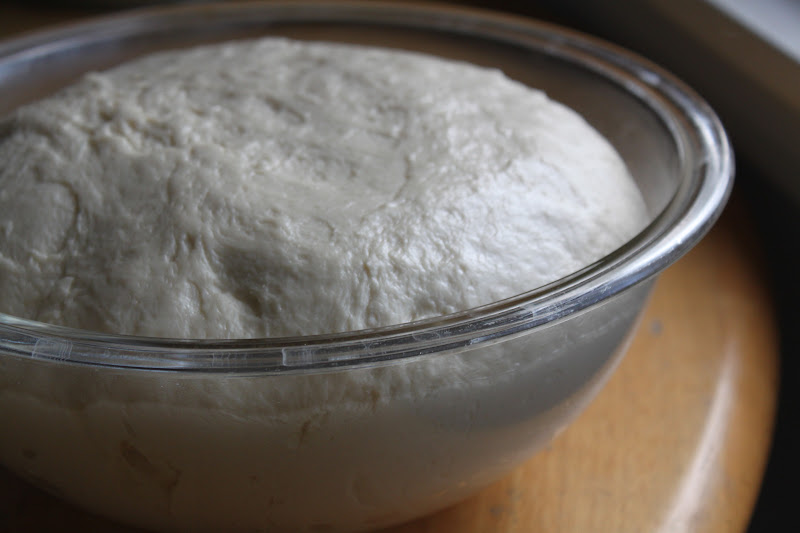
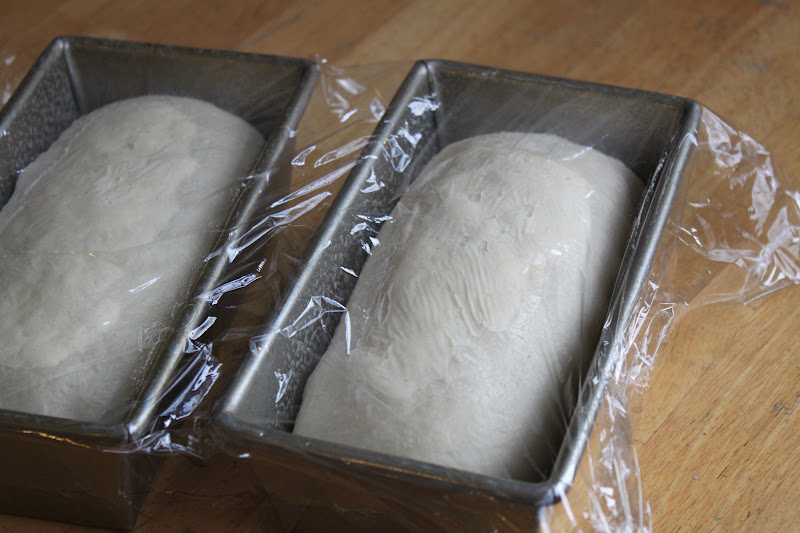
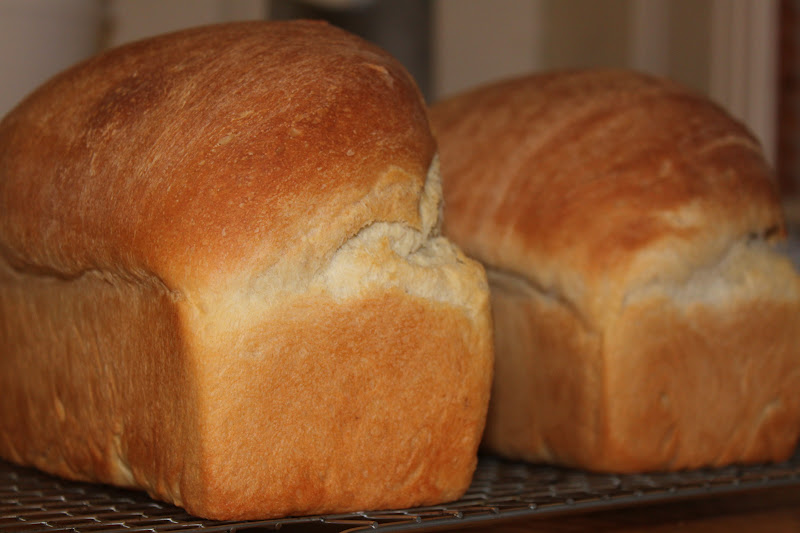
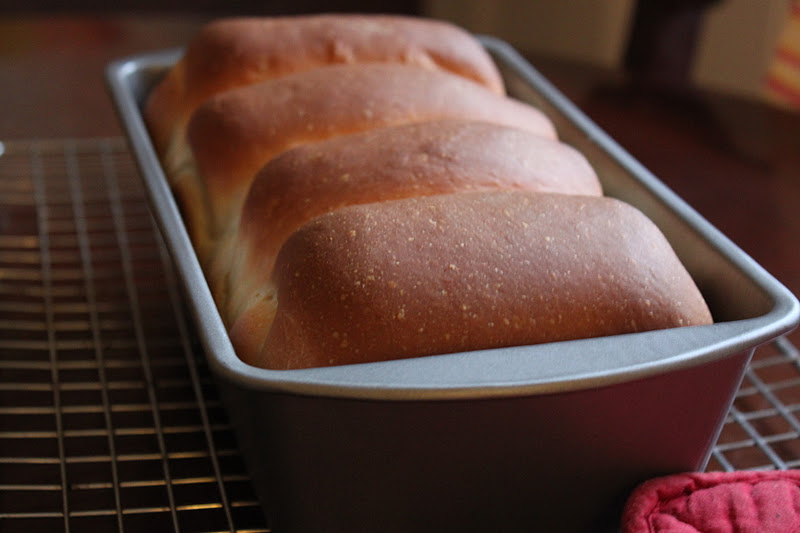
 the bread; a really simple loaf to make, i highly suggest making one.  if you do not have a copy of baking with julia or how to bake, find the recipe here or here(with the nice addition of rosemary)
.

now that’s a sandwich!

semolina bread; tuesdays with dorie

it was such a dreary and cool morning on saturday that i decided to make the semolina bread for this weeks twd challenge.  after the scorching hot weather of june and early july, it was nice to have a break from the heat-now if we could just do something about the rain…

the tuesdays with dorie festivities this week are being hosted by renee of the way to my family’s heart and anna of keep it luce.  be sure to click on those links to see what everybody has baked-there are over 100 of us participating.

semolina bread is a favorite of mine.  something about the color, the golden hue of the bread…the simplicity of the recipe-a definite plus for me.  this recipe is in nick malgieri’s book, “how to bake” as well as baking with julia and i have made it before.  the two recipes are almost identical-the only real difference is how much flour is added to the sponge with the total amount called in the recipe for being the same.  the chatter over on twd was that it was salty-i did cut it back to 1 1/2 teaspoons after reading several comments on the amount being too much.  however, i think that between cutting the salt and the high humidity of the day, my bread was in a hurry even though i wasn’t!

i didn’t quite understand the description for the slashes so i just did 3 on the diagonal with a serrated knife.

a close up of the slash.  there is a fine line between too deep and not deep enough.  either way, you need a sharp knife or you run the risk of deflating the bread.

the finished loaf.  it took at least 15 minutes longer in my oven (i keep a thermometer in it to monitor the temp for accuracy)  to get the internal temp to 207 degrees, i gave up on getting it to 210.

the interior of the loaf-i think i done good this time!  the crust was nice and chewy and like a real artisan bread crust!  we are having the rest with blt’s since it is tomato season…

tomatoes and arugula from the garden, uncured-dry rub bacon from trader joe’s and homemade bread.
droolworthy, isn’t it…

a day late and at least a dollar short; twd-oasis naan

it’s called tuesdays with dorie for a reason, you are supposed to bake a recipe from dories’ baking with julia book and post it on the selected tuesday.  tell that to my computer.  tell that to the folks at the genius bar in the apple store.  just tell it to anyone that will listen.  it won’t make any difference, i promise.  so, here i am, whining on wednesday that i missed tuesdays with dorie.  since i went through the trouble of making the bread and taking photos, i’m posting it a day late.  such is the story of my life…

this week’s recipe challenge was the oasis naan and it was hosted by mary of always add more butter and phyl from the blogpage of cabbages and king cakes.   what many people do not realize is that i live in nashville but more specifically, i live in the middle of the largest kurdish community in the united states.  we frequently visit a middle eastern market in our neighborhood to buy freshly baked naan.  three kurdish ladies make it every morning in the store using authentic tandoor ovens.  they even let me come in and watch once.  that said, i had to try this for myself.

fresh from the oven

 i love recipes that do not call for special equipment.  all you need is a few measuring cups/spoons, a bowl and a spoon.

 the dough mixes up easily
 after kneading it for the 10 minutes suggested in the recipe

 i did not have scallions but i do have a patch of chinese leeks in my herb garden, they worked out rather nicely.

 i found it was easier to shape the dough with my hands.  i pressed it out into a circle and stretched it over the backs of my hands.  then i laid it out on the peel and pricked it with a fork.

 a generous sprinkle of leeks, freshly grated sea salt and cumin seeds
 who can resist bread fresh from the oven?  definitely not me!

 i will make this again but next time, i will knead it less.  10 minutes made a tough bread, i think 5 minutes will do nicely.

for the complete recipe, buy the book or visit the blog pages of mary and phyla.  nicely done ladies!

bread baking day #49-grissini

it’s spring, the weather is just warm enough and the garden is bursting with lettuce and greens.  for tonights dinner, i chose to make a salad using the different lettuces and spinach from my garden.  the best part of the dinner, the grissini, or bread sticks if you prefer, to go with the salad.  when i checked out the challenge for this month’s bread baking day, i was thrilled to see that it was simply to bake a pizza or an italian bread.  so simple that it took me over a week to decide!

the challenge for april is being hosted by manuela of cravo e canela and there is still time to submit a bread if you want to participate.

when i would like to bake authentic italian style breads, there are only a couple of books i reach for.  while trying to find some inspiration, i pulled my copy of the modern baker by nick malgieri off the shelf and opened it to a random page.  it just so happens that the recipe i turned to was for grissini.  not just grissini but the easiest and most fool proof recipe for grissini i have ever tried.
the dough is mixed up in less than 5 minutes by using a food processor.  after letting it rise for an hour, the dough is deflated and allowed to rise again for as little as an hour or as long as 24 hours.  after sitting in the fridge for about 18 hours, i took it out and began the process of shaping the grissini.
first the dough is deflated and shaped into a square on a floured surface.  

 the dough is then cut into evenly sized pieces

 the sticks are shaped by rolling them with your palms as if you were making play-dough snakes.  so easy, too easy really, and fast.  with a recipe like this, you have no excuse not to make a batch.

sesame grissini
adapted from the modern baker by nick malgieri
makes about 24 (15″) bread sticks
2 cups unbleached all purpose flour
1 teaspoon salt
3 1/2 tablespoons olive oil
1 tablespoon sesame seeds
2 1/2 teaspoons active dry yeast
1/3 cup warm water-110F
1/3 cup cold water
cornmeal for dusting
place the flour, salt, oil and sesame seeds in the bowl of a food processor.  pulse it to combine and distribute the oil evenly.
whisk the yeast into the warm water and add to the flour mix.  pulse it 2 to 3 times.  add the cold water and pulse the dough until it forms a ball.  continue pulsing for 10 seconds.  remove the dough and place it in an oiled bowl and cover it with plastic.  allow it to rise until doubled, about 1 hour.
scrape the dough out of the bowl on to a floured surface and fold it over on itself a few times to deflate it.  once again, place it in an oiled bowl, cover it with plastic and place it in the fridge to rise for as little as 1 hour or as long as 24.  
preheat the oven to 325.  line two baking sheets with paper and dust with cornmeal.  place the dough on a lightly floured surface and flatten it into a square with an even thickness.  use a knife to cut the dough into quarters.  take each of the quarters and cut it into 6 pieces by first cutting it in half and then by cutting each half into thirds.  you should have 24 pieces in all.
place one piece of the dough on the table and using your palms, roll the dough back and forth to make a rope.  keep rolling it and using gentle pressure to make each one as long as the baking pan-about 15″ in length.  carefully lift and place the stick on the pan.  
place the two pans in the oven and bake(no rising needed) for 10-12 minutes.  rotate the pans and continue baking the sticks until they are golden brown and crispy, about 10-15 minutes.  this took a little longer in my oven so keep a close eye on them to ensure that they are not over baked.  
this is a simple recipe that proves things do not need to be complicated to be tasty!  here’s to you nick for a recipe well done!!!  be sure to try baking a bread or a pizza and joining us.  thanks to manuela for giving me an afternoon filled with yeasty goodness.

twd: irish soda bread

every march, i make at least one batch of irish soda bread with my aunt’s recipe; it is a bittersweet ritual that usually causes me to tear up at least once.  i have blogged about it before, and if you follow that link, you will see why it can bring me to tears.  baking irish soda bread is a tradition that has been part of my life-my aunt made it every year and so did an elderly neighbor.  one thing about coming from the new york city area-there are lots of irish neighborhoods and lots of irish families and plenty of soda bread to go around.  my mother (who is irish) also has a thing for soda bread and although she does not bake it, she will send me recipes for the true bread-without the raisins and caraway, because that is how they make it in ireland.  the addition of currants and caraway is an american tradition.
for this weeks challenge, we turn to hosts cathy of my culinary mission and carla of chocolate moosey and they have posted the recipe on their blogs if you would like to try baking a loaf.  better yet, buy a copy of the book or borrow it from the library and try baking along with us some time.

 this simple bread consists of 4 ingredients; flour, buttermilk, salt and baking soda.  it mixes up easily and quickly.

 a minute of kneading will give the bread just enough structure to retain its shape and rise a little.

 a simple x on top is all that it needed
 fresh from the oven-it smells heavenly and rather like a biscuit and it tasted like a buttermilk biscuit to me

 the crumb is on the small side with a few holes so that it mimics a loaf of yeasted bread

along side a loaf of american soda bread using my aunt’s recipe-twice the joy!  thanks to our hosts cathy and carla for a lovely start to my week!  to see what everyone came up with, check the leave your link page on the tuesdays with dorie blogpage

kaiser rolls-a work in progress

i’ve come to realize that my sanity may depend on securing another book deal…but, i digress.  my new found freedom (read that as kids out of the house and husband working insane hours) has left me with time to try new things.  so what do i do with this freedom?  why, i bake of course-what did you think i would do???  kaiser rolls have always been something that i love-the thin, crispy crust and the fluffy, light bread…mmmmmm…then again, cookbooks are a bit of an obsession too.  i went onto the public library’s website and secured myself a copy of peter reinhart’s book, the bread baker’s apprentice and decided to try my hand at kaiser rolls.  luckily for all of us, the recipe was posted by the gang that blogged their way through the book and can be found here.  i say luckily because none of the recipes in this book are short-all are extremely detailed and take a lot more time than you would expect.  this recipe spanned two days and honestly, i wasn’t happy with the results, but that is probably my inexperience and not the recipe at fault.

a preferment-or a batch of “old” dough is mixed and allowed to rest overnight in the fridge.  on baking day, it is cut up and allowed to come to room temp so it can be incorporated into the dough.

my old mixer got the workout of a life time!!!

if you read this book, you will see that temperatures are just as important as measuring and mixing.

the dough after mixing
after the first rise
yes, i have had lots of practice shaping rolls-old habits die hard…

i tried the stamp this time, next time i will try the other two methods; tying a knot and folding the petals to the center.

they rise upside down and then you turn them over
mmmm……seeds
not bad for this attempt but definitely not the rolls of my youth!  i will work on these again because i love kaiser rolls and good ones are impossible to find here in nashville.  that and the fact that mine looked nothing like all the ones i looked at from the bloggers group!

baking with julia: white loaves

way back when, at the beginning of my blogging days, i discovered the tuesdays with dorie group.  they were hard at work on their mission to bake every recipe from baking: from my home to yours and they did.  just before christmas, they posted their final challenge.  and then the whole bunch of them found themselves with a little time on their hands-whatever would they do with tuesdays?  luckily for everyone, and folks like me who missed out on the first run, the decision was made to do it again but this time with julia child too.

in 1996, dorie greenspan wrote the companion book to the julia child pbs series, baking with julia.  it is a large book with wonderful photos, many of which are step by step process shots, that give the user a complete idea of what things should look like as you prepare the recipe.  as a cookbook author, and more importantly a cookbook user, those are the most important parts of a recipe.  nothing is worse than choosing a recipe that is new to you, it includes unfamiliar techniques and absolutely no photos.  frustrating!!!

having borrowed the book from a friend long ago, it was always on my wish list but as a mom (with 2 kids) the priority list always placed the book way down near the bottom.  then, several years ago, my mom and i were wandering through a flea market in saylorsburg, pa and i happened to see it lying on a blanket with several other cookbooks.  i immediately snatched it and when i saw the $3 price tag, yes $3, i nearly yelled out and did a stupid fist pump.  however, i contained myself and just paid the nice lady and quickly wandered off before she realized what she just sold me and how much she should have asked me to pay.  needless to say, i have enjoyed using the book.  and now, i get to use every recipe in it, something i have never done with a cookbook before.

so, the way this works, we will post the results on tuesdays, every other tuesday to be exact but in respect for cookbook authors, the members will not post the recipes-only the host will do that.  we want you to buy a book and keep cookbook authors and publishers working.  you can check the tuesdays with dorie website to see what the next challenge is and follow the links to see the results of all of the participants.

with my baking assistant, twitch, i got to work on my bread loaves
white loaves
allowing the yeast to activate in warm water with sugar
 the kneaded dough rising in my kitchen
 after shaping the loaves, they rise until they are just above the tops of the pans
 warm from the oven….nothing comes close to the aroma of bread, warm from the oven

quite possibly the best loaf of white bread i have ever made.  it made incredible sandwiches and toast too.

what a great way to start the challenge.  the technique of adding soft butter to a dough that is already mixed is a little different but experienced bakers will recall that brioche is mixed in the same manner.  this step makes  the mixing process a little nervewracking but the results are amazing.  so follow the links and see the results of all the participants then buy the book and make some bread!

what are we baking next???  i has cookbook, i will bake kitty treats…

tangzhong style bread, wishful thinking and bread baking day #46

it has been way too long since i participated in a bread baking day challenge.  each month, a host is selected and a theme is announced.  this month, the challenge is being hosted by noor of ya salam cooking and when i read it, i couldn’t wait to bake a loaf of bread.  i know, what a party animal; she bakes bread for fun.  no really, i am but the theme for this month is to bake a loaf of bread from a place you would like to visit.  so if you want to go to france, bake a croissant.  if you want to go to italy, bake a loaf of pannetone.  you get the idea, i know you do.  so did i and i finally had a reason to try the recipe i had bookmarked for tangzhong bread.  tang-what?  it is the most unusual bread technique i have encountered and it comes from a place i hope to visit some day; china.  the technique is credited to a  chinese woman, yvonne chen, who wrote a book titled 65c bread doctor.  in this book the technique of making a “water roux” starter is demonstrated.  while the technique is attributed to the chinese, it is apparently very popular in japan too.  so either way, my bread is a nod to a place i would like to visit, and if somebody wants to buy me a ticket, i’ll go to either china or japan, i’m not that picky!

i discovered the technique by accident.  i was trying to find a conversion table for ingredients so that i could convert a recipe in ounces to grams when i stumbled upon the website christens recipes.  while looking at some of her recipes, i found the tangzhong recipes and bookmarked the page for a day when i had the time to test the recipe.  for all of you that know me, you know that i can bake-i do it for a living but bread is not my specialty and as much as i have worked with bread, it still intimidates me.  well, after making two loaves with this technique, i may not ever be scared again!

 my first batch of tanzhong bread, hokkaido milk bread using the recipe 
found on kirbie cravings
 my second batch was a multi grain loaf from une-deux senses

 look at the beautiful crumb of this bread!  so light and moist and easy to slice.  wait until the next day and you will get picture perfect slices-no one will believe you made this at home!  the best part, no chemicals, no stabilizers or conditioners and nothing artificial!  the extra boost in moisture from the tangzhong helps to keep the bread fresh.  the only thing i would suggest, if you do not like your bread to taste sweet, cut the sugar.  for the multi grain loaf, i reduced it from 3 tablespoons to 2 and i like it much better than the white loaf.  the white loaf is still very good, just not my first choice for a savory sandwich but i bet it would make great french toast!

the two loaves side by side.  i will make this again and i hope to find the book someday-reading it will be a challenge though…

since there are several important steps to take when making this style of bread, i am not printing the recipes here but rather including the links to the websites i used.  on all of these pages, you will find valuable information along with detailed step by step photos that would do so much better than anything i could post here so i encourage you to use these sites and make a batch of wonderful bread!

kirbie cravings-milk bread
une deux sensés-multi grain bread
christine’s recipes-bacon and cheese bread
65c bread doctor by yvonne chen

a big thanks to noor for such a wonderful way to spend an afternoon.  feeling brave, bake a loaf and head over to ya salam cooking and join in on the fun!