buttermilk crumb muffins

what a week it has been!  hopefully, everyone is recovering from the monster storm that ate the jersey shore.  for those of you affected by the flooding-i feel your pain.  it has been 2 years since the big nashville flood of may 2010 but the memory is still with us.  the power of water is like none other.

since i live in nashville and was not affected by the storm, i was not only able to bake the muffins but also serve as hostess with the mostest this week’s tuesdays with dorie/baking with julia challenge.  how about a big happy birthday to me?  yup, it’s my birthday, but there will be no crying at this party, just muffins!

as hostess, it is my job to post the complete recipe.  for those of you with the book, it can be found on page 207.  for those of you without the book, let me suggest that you buy a copy; it is worthy of the space on your bookshelf!

special note to vegan bakers; the recipe can easily be converted to yield vegan muffins.  scroll through the recipe to the bottom of the post to see a photo and the conversion notes.

buttermilk crumb muffins
from the book, baking with julia, by dorie greenspan
published by william morrow
makes 14-16 muffins

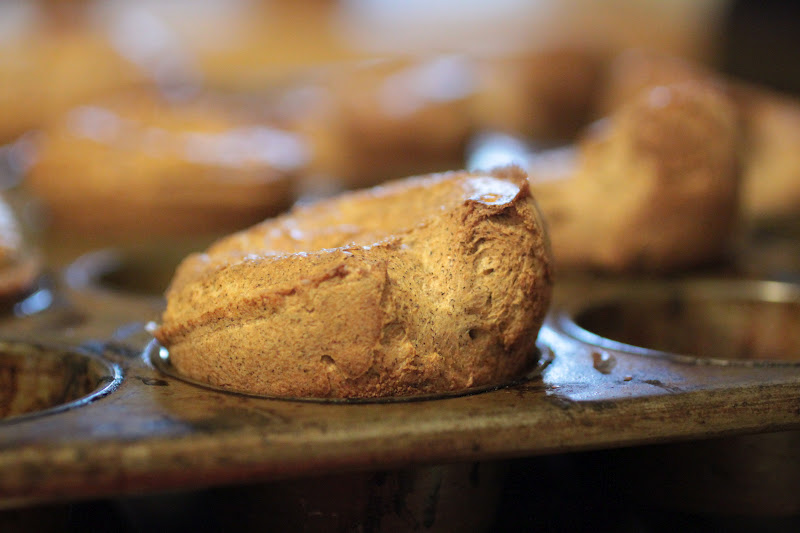
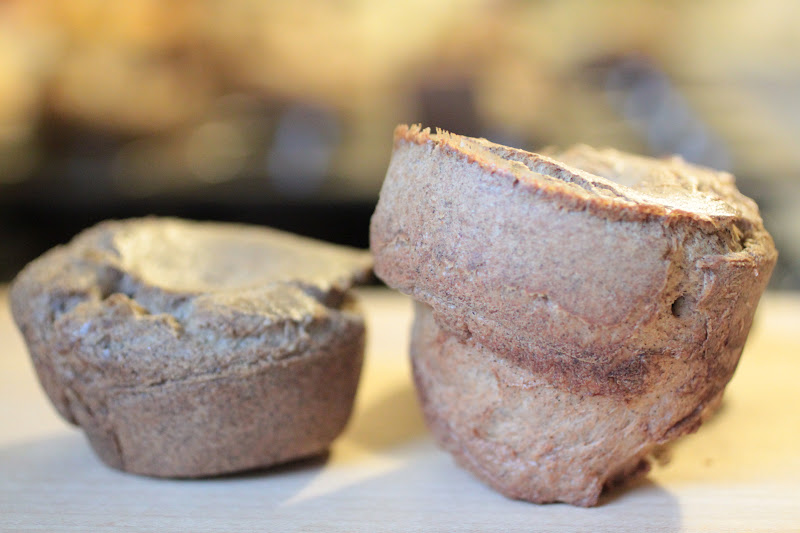
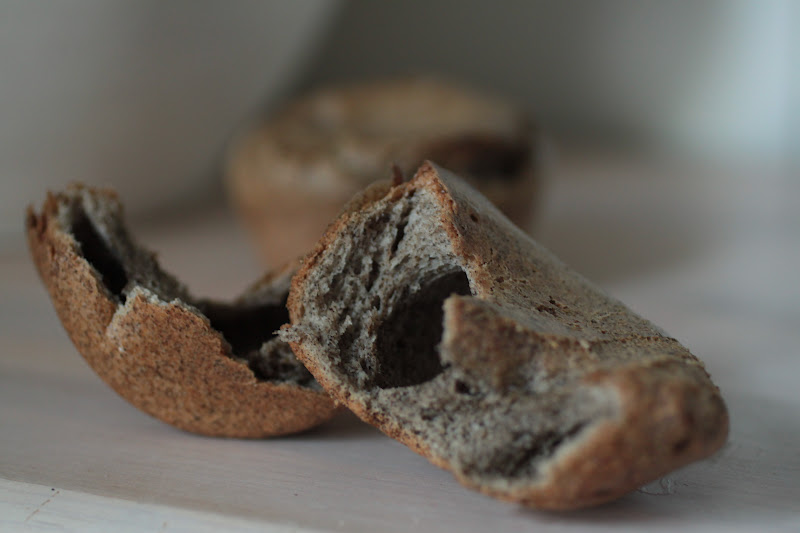
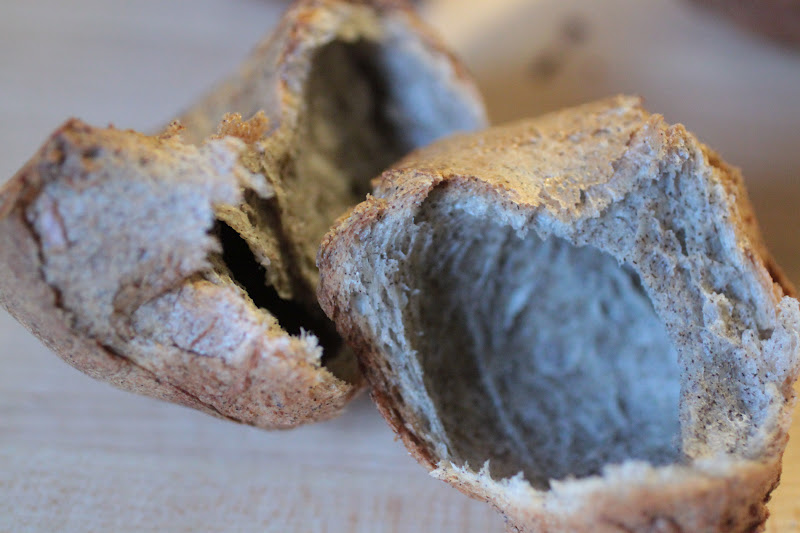
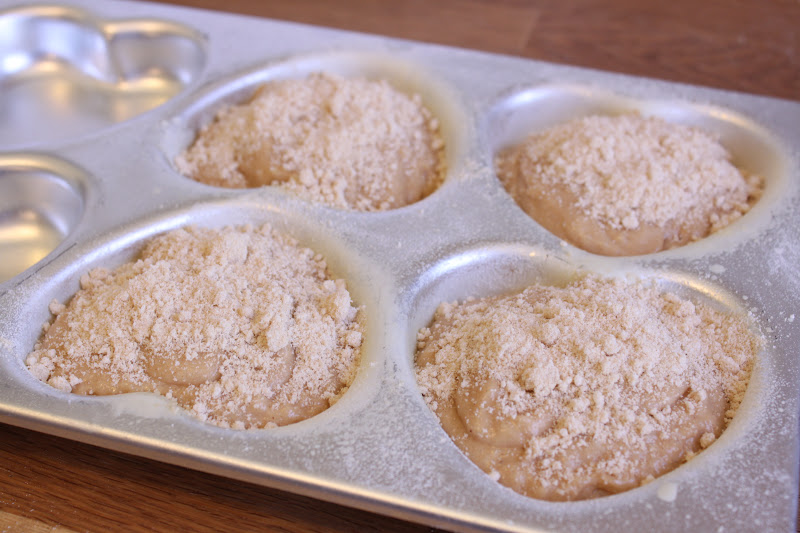
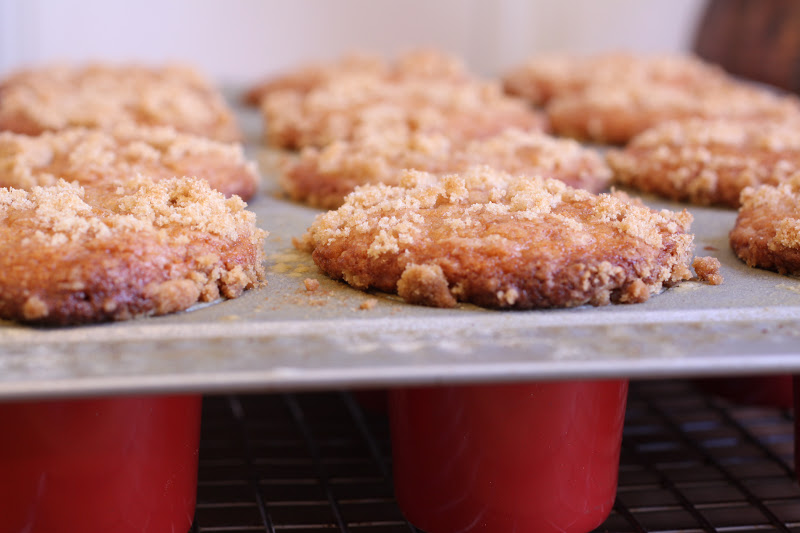
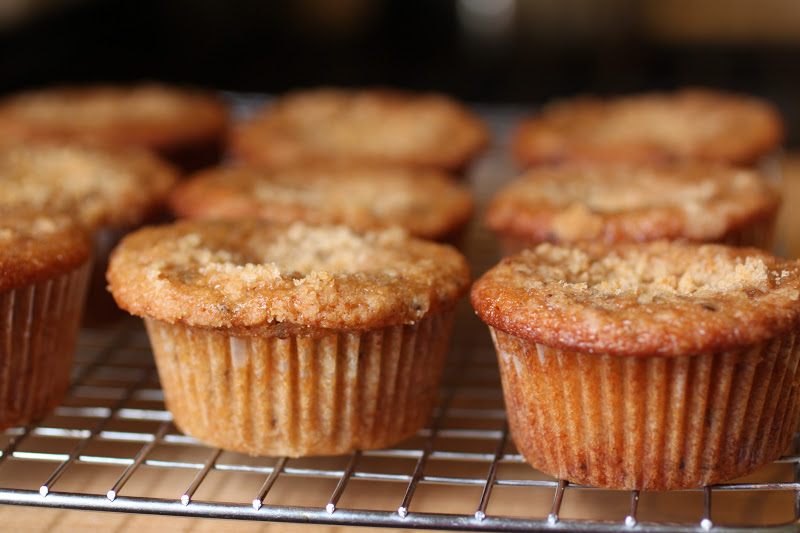
a few notes before we begin.  first of all, i do not like to use hydrogenated shortening, it adds no flavor and isn’t a good idea for someone with high cholesterol, like me.  that said, i used virgin coconut oil in place of the shortening.  not only is it non-hydrogenated, it adds wonderful flavor to the muffins.  second, i do this sort of thing for a living and have a hard time adapting to typical home kitchen methods.  what that means is that i use portion scoops whenever i make muffins or cookies.  for this recipe, i used a #16 (blue handled) scoop.  in my fancy ikea muffin pan, this made them mushroom out a bit.  since the yield is more than 12, i baked the rest in a little heart muffin pan.  if you do this, do not put more than a flat #16 scoop in each heart or you will lose the heart shape like mine did.  the last note, my muffins baked up quickly-25 minutes and they were done.

2 1/2 cups unbleached all-purpose flour
2 cups light brown sugar, packed
2/3 cup solid vegetable shortening
2 teaspoons baking powder
1/2 teaspoon baking soda
1/2 teaspoon cinnamon
1/4 teaspoon grated nutmeg
1/2 teaspoon salt
1 cup buttermilk
2 large eggs, well beaten

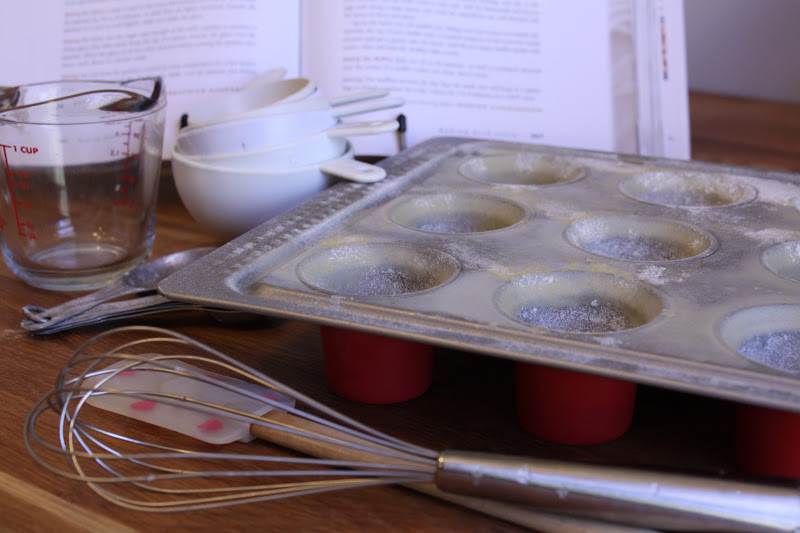
position a rack in the center of the oven and preheat the oven to 350F.  Spray or grease two 12-cup muffin tins, or if you have them, use a 12-cup and a 6-cup tin.

mixing the batter and topping

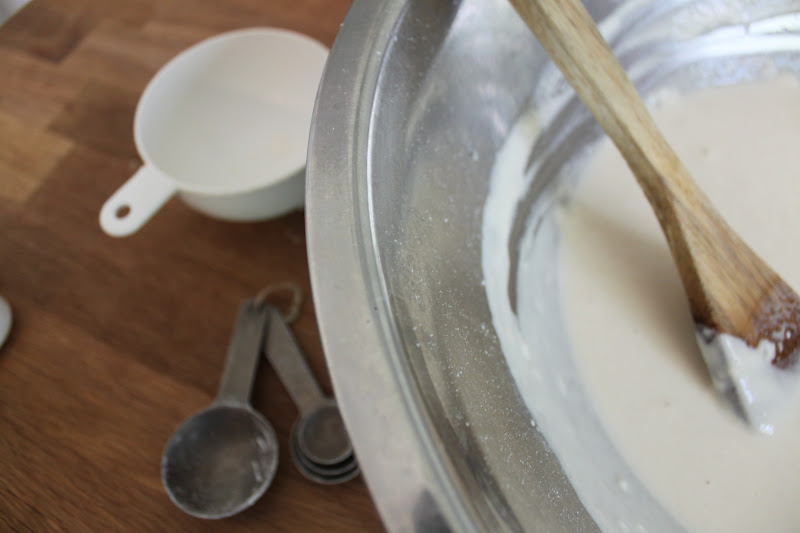
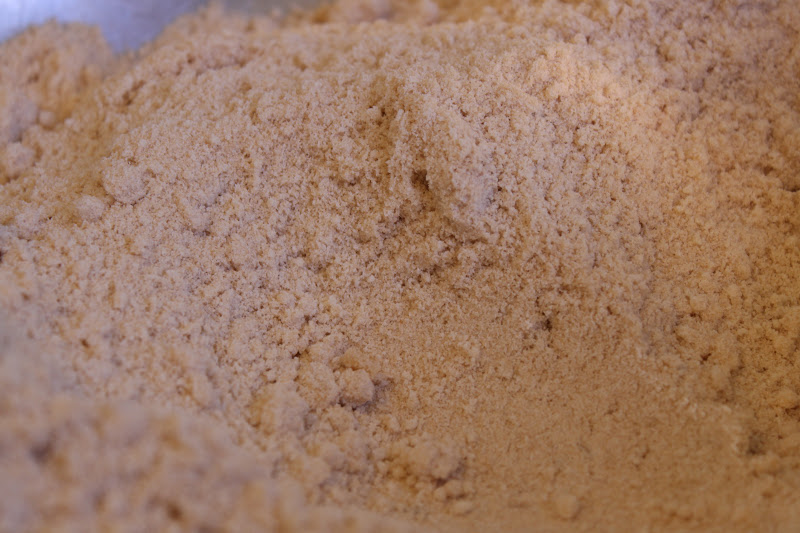
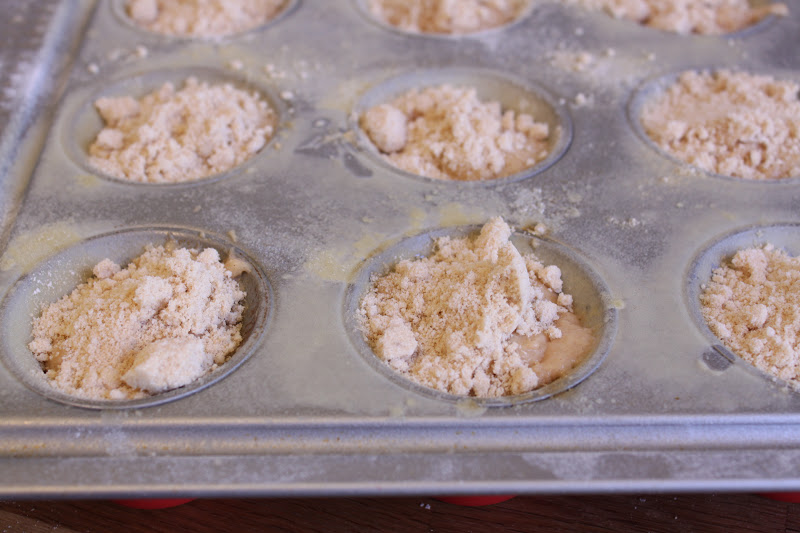
put the flour and brown sugar into a large bowl and stir with your fingers or a fork to mix well.  break the shortening into a few pieces, drop them into the flour mixture, and, using your fingertips, lightly rip the shortening and flour together.  when the mixture looks like coarse bread crumbs, you’ve mixed enough-don’t worry about any little lumps.  measure out 1/2 cup of the mixture and set it aside to use later as the crumb topping.

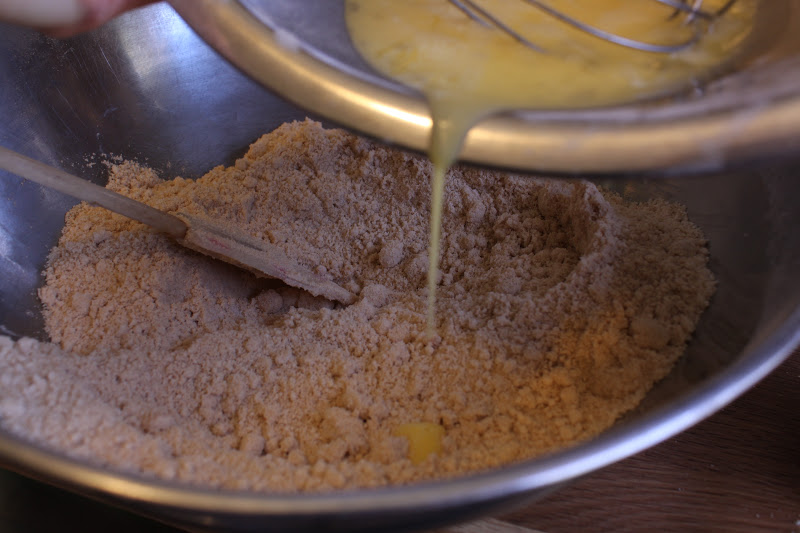
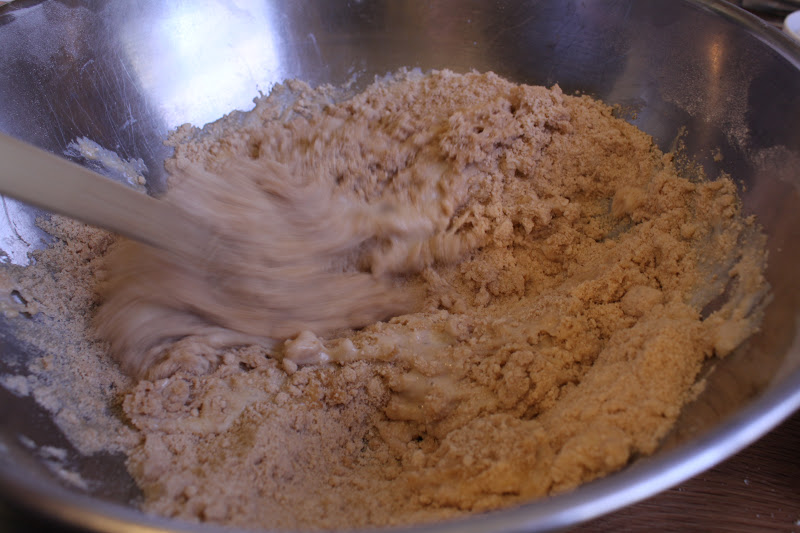
add the baking powder, baking soda, cinnamon, nutmeg and salt to the flour mixture and stir with a fork to mix well.  add the buttermilk and beaten eggs and, using a large spoon, mix until the ingredients are well blended and the batter is thick and shiny.

spoon the batter into the muffin tins, filling each cup at least two-thirds full.  sprinkle the top of each muffin with a rounded teaspoon of the reserved crumb mixture and pat it gently onto the batter.  half-fill any empty muffin molds with water-this will help the muffins bake evenly.


baking the muffins
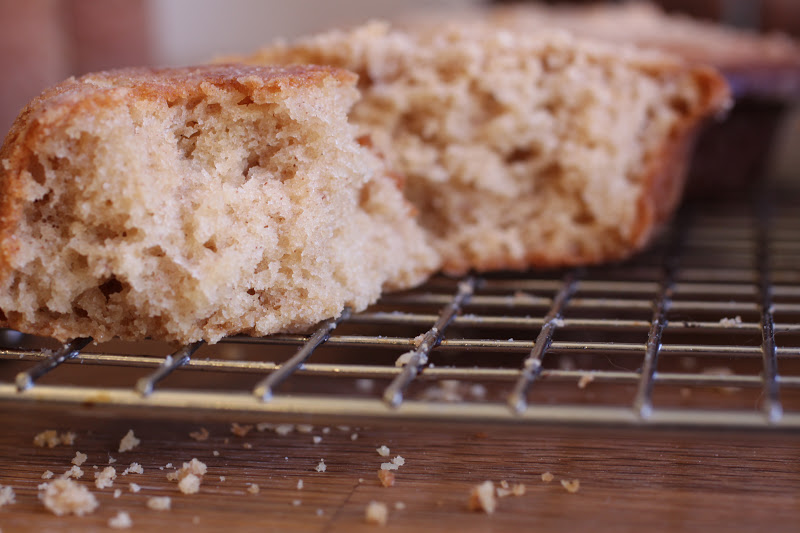
bake for 25 to 30 minutes, or until a toothpick inserted into the center of a muffin comes out clean.  serve warm.

storing
the muffins are best the day they are made, but will keep in a plastic bag or closed container for a day; reheat for 5 to 8 minutes in a 350F oven.
contributing baker, marion cunningham

vegan muffins with cocoa nibs

to make a vegan version of the muffins, use the following substitutions:
1.  for the 2/3 cup shortening, use virgin coconut oil not only for the fact that it is a much healthier plant fat that is not hydrogenated but also because it is full of flavor and will give the muffins a nice coconut aroma.
2.  for the 2 eggs i used ener-g brand egg replacer according to the recipe on the box which is 2 ounces warm water and 1 tablespoon of the mix.
3.  for the 1 cup buttermilk, i used 1 cup of unsweetened, plain soy milk.  this is an acceptable substitution but it would be a good idea to reduce the amount by a tablespoon or two since it is thinner than buttermilk; the higher moisture content makes a thinner batter and moister muffins that sink slightly in the center.
4.  i added 3 tablespoons cocoa nibs but you can add nuts or other crunchy items, but i would avoid fresh fruit unless you reduce the milk as suggested.
5.  using the blue handled #16 scoop and paper muffin cups yielded 18 muffins that baked off in 20-23 minutes.

be sure to check the tuesdays with dorie page to view the links to all of the participants.  thanks for the party!  now to have cake and watch the election results!!!

onion-poppy seed bagels; twd/bwj

there is a bit of excitement and suspense for those of us who participate in the tuesdays with dorie/baking with julia challenges.  each month, we nominate possible recipes from the book and then we wait to see what our challenges will be.  for me, this weeks challenge of bagels, hosted by heather of heather’s bytes was one i looked forward to.  as a jersey girl(originally), i have a certain fondness for true new york bagels.  then i read the recipe…so many steps, so much to coordinate, so many factors to alter the outcome of said bagels.
to say that the recipe was a little daunting is an understatement.  mix the dough, let it rise, deflate it, refrigerate it for a few hours or a couple of days and then move on to the shaping/baking process.  all the steps to coordinate along with floured towels and extra pans and boiling water and an oven at 500 degrees while shaping the dough and boiling the dough and glazing the dough…definitely not a recipe for an impatient or inattentive baker-there are too many things to do.  
first thing i did, cut the recipe in half.  with just two of us in the house, i didn’t need much less want 10 large bagels.  for the sugar called for in the dough, i simply used malt syrup.  then i added a generous tablespoon of dried onions.  since my favorite bagels are ones with seeds, i chose to add poppy seeds to the outside since they blend so well with onions.  

 the dough is easy to mix and next time(if there is a next time-the jury is still out on this one), i will add two tablespoons of the onions and a little extra salt.  i used my scale to weigh out 8 (3)ounce pieces of dough and began the shaping process.  it was a sticky process and i used very small amounts of flour on my fingers and the table to make it manageable.

 they do look like big rings while they are shaped but as soon as you set them onto the floured towel, they contract and fatten up a bit.  i did them 4 at a time so that they would fit in the pot with room to spare.

 they boiled up easily and i did not pay enough attention to the time on the first batch so i was sure to set the timer for the second batch.

 out of the water bath and onto the prepared peel for the glaze and seeds.  the cornmeal did nothing to stop them from sticking; i had to lift each one and place it on my stone in the oven.

 my oven needs to be calibrated.  the setting of 500 ended up at nearly 600 and the bagels came out a little crispy.  the process of baking for 25 minutes, oven off with door closed for 5 minutes and then door open for 5 minutes was enough to make that first batch really crispy-artisan bread crispy!  for the second batch, the shaped bagels rested in the fridge for at least 30 minutes and i skipped the 5 minutes with the door closed and 5 minutes with the door open.  i simply baked them for 25 minutes and pulled them out.  the reduced size should have triggered a response in me-they needed less time, but i was so caught up in all of the steps that it did not occur to me until just now…

they baked up an interesting ivory almost beige shade on the inside and had just a hint of onion flavor.

many thanks to heather for hosting this weeks bakefest!  to try this at home, visit heather’s bytes for the complete recipe or better yet, buy a copy of baking with julia.  and if you want to watch the process, look it up on you tube-the video is split into 2 parts and full of hints and tips, look for it under baking with julia, bagels-lauren groveman parts 1 and 2.

persimmon bread with cranberries

this recipe came up just in time for one of the best persimmon crops we’ve ever had.  last year was such a disappointment because there just wasn’t any fruit on our tree or any of the other trees nearby.  when we started finding the ripe fruits on the ground last week, we were surprised; our first frost is still several weeks away.  we can only assume that the early spring and the month long drought had something to do with them ripening so early.

lucky for me, this weeks baking challenge for tuesdays with dorie/baking with julia is a loaf of bread that calls for pumpkin puree.  with all of these persimmons just begging to be run through the food mill, i couldn’t help but substitute the persimmon pulp for the pumpkin puree called for in the recipe!

native persimmons are small, about the size of a walnut in its shell or smaller.  they are also full of large seeds.  they can only be eaten if they are dark orange and squishy soft otherwise, they are so astringent you will literally feel the insides of your cheeks seal onto the surface of your teeth.  the best thing to do with them is to wash the fruit you find on the ground under the tree-those will be so ripe that they have fallen from the branches.  drain the fruit and run it through a food mill, it will take a lot to get any kind of volume.  i collect them through the season, puree the fruit and store it in sandwich bags in the freezer.  then i can take it out and thaw it as i need to.

as with any heavy, sweet dough, this one took a long time-easily double the time called for in the directions.  it took at least 8 hours to come to 64 degrees and about 3 hours for the loaves to rise in the pans.  honestly, they didn’t do much in the oven.  it seems to me that there is just too much in there to make it light and rise quickly.

 i didn’t have any small pans so i used two 8x5x3 loaves.  they baked up in about 45-50 minutes, i used a thermometer and waited until the internal temp came up to 200 degrees.

this cheery loaf of bread brightened up a dark and dreary, rainy monday.  it was so dark that i couldn’t get a nice color balance in the photo, my bread isn’t nearly that orange!

special thanks to our hostess with the mostess, rebecca of this bountiful backyard!  bake on, may the force be with you…

pear upside down cake; tuesdays with dorie/baking with julia

for this weeks baking with julia challenge, we turn to our hosts, marlise of the double trouble kitchen and susan of the little french bakery .  summer may be quickly coming to a close but the nectarines called for in this recipe are still easy to find in grocery stores and farmers markets making this a great dessert for any picnic or barbecue.  unless of course you have just spent the last month making all things peach in honor of national peach month.  and before you go on about the differences between peaches and nectarines, be honest, once incorporated into a cake like this, who will actually be able to tell the difference?  not my husband and as far as he is concerned, a cooked peach is not one that he will eat.  that said, i grabbed a large, ripe bartlett pear and got to work.  knowing that we wouldn’t eat a tall 10″ cake by ourselves, i cut the recipe in half and used an 8″ cake pan.  even though it was only 2″ tall, the batter filled the pan completely and did not run out onto the tray while baking.

 one difference between most upside down cakes and this one is the choice of cake.  most recipes call for a rich but simple butter cake while this recipe utilizes a lighter chiffon cake.  the other difference, a crunchy streusel that is baked until golden before being layered into the cake.  the recipe called for almonds and the need to toast them before adding them to the streusel.  feeling a bit lazy, i grabbed my bag of dry roasted pistachios and omitted that step.

 butter melted in the bottom of a cake pan, dark brown sugar patted down in an even layer and pear slices arranged over the soon to be caramel layer.  the bottom of the pan now but it will be the top of the cake after baking so it is important to make it look pretty.  try to keep the center of the pear on the inside so that the top of the cake looks nicer.

 prebaking the streusel made it seem like a layer of granola so i am now wondering if you might not just skip that step and sprinkle a good granola into the cake-surely that could work.

listen to the warning to serve the cake immediately, it really does not hold up well for more than a day.  the moisture in the fruit makes the cake gummy and gives it an unpleasant texture.

thanks to marlise and susan.  buy the book and bake with julia!

buckwheat popovers; tuesdays with dorie

welcome to the learning curve…this week’s lesson is brought to you by tuesdays with dorie/baking with julia and is hosted by none other than paula of vintage kitchen notes and amy of bake with amy.  the subject of this week’s lesson is popovers.  sounds simple enough but don’t let that cute name fool you; many cooks and bakers have been schooled by these seemingly easy to bake puffs of crispy deliciousness.  and it looks like i am just another name on that list…

a quick note from one of our sponsors:  to find the recipe, please consider buying the book, baking with julia.  consider it a way to keep her memory alive after all, it would have been her 100th birthday last week!  if not, visit either paula’s or amy’s blog page to find the complete recipe and then bake a batch in memory of julia!

first of all, let me say that i didn’t want to make just plain white flour popovers, i wanted to add a whole grain to the mix since i have a fridge full of flours to choose from, literally.  and i also have a husband wanting me to use up said flours in the fridge-not sure why he is in such a hurry, what could he possibly want with the space???  anyway, i grabbed the buckwheat flour and was off and running.  next came the realization that i had absolutely no milk in the house other than unsweetened soy milk, it was that or nothing.  i don’t own a popover pan although i would love to have a large one and a small one (because if you are going to go for it, go all the way! who’s with me on that?)

batch number 1:  can you say disaster?  i can only say it sounds more like “$#*@, i’m going to have to make another batch!”  all the while my husband rolls his eyes and walks out of the room muttering his fool proof methods and the “i never heard of using soy milk” comments(what do you expect from a chef?)  i used a 50-50 split on the flour and soy milk for the whole milk.  i also placed my muffin pans on sheet pans and heated them first; one of those “fool proof methods” my husband swears by and another is to use the fat of the animal you are serving them with-beef, pork, etc.  we were having them with salad, i used cooking spray.

batch number 2:  wow, look at the difference.  this time around, i used a ratio of 2 parts white flour to 1 part buckwheat (2/3 cup white, 1/3 cup buckwheat)  and for the milk, i used 1/4 cup half and half and 3/4 cup soy milk.  this time around, i used a heavy duty muffin pan that has 24 cups in it and i did not heat it; it went into the oven cold and filled with room temperature batter.

 look at the difference between the batches.  number 1 on the left, number 2 on the right.  the ratio of whole grain makes a difference as does the heat.  so forget about preheating the pans, don’t bother with placing them on sheet pans (unless you are using individual cups) because it prevents good heat circulation and place the oven rack in the top third of the oven.

 inside view of batch number 1; the walls are thick and sections were not even hollow but rather cake-like, dense and rubbery and eggy cake, um, eeww.

 inside view of batch number 2; thinner, crispier walls with less eggy-cakey parts in the middle.

can you tell which ones were part of batch number 1?  just look for the hockey pucks.  they will be going out to the possums tonight.  as for batch number 2, they were individually wrapped and frozen for the next time i am in need of a little something to fill a menu.  and if you must know, i left them sitting on the counter unwrapped all night and they didn’t get soft-they were still crispy in the morning!

and so ends this week’s lesson.  yes, i have been schooled on popovers and i am now eager to move on to something less complicated…many thanks to this week’s hosts, paula and amy and a big round of applause to this weeks newest sponsor-my new oven!  and last but certainly not least, happy birthday to julia!

fig and peach galette; tuesdays with dorie

ordinarily, i have my act together; i don’t miss appointments, i am usually early so that i am not late, i remember things.  not this week.  instead of being on the ball, i have been hit by it.  somehow, i managed to miss, and i mean completely miss, this weeks challenge for tuesdays with dorie.  i read the post, i knew it was coming.  i just assumed it was next week.  time to get my head out of my (insert the noun of your choice here) and get to work.
the challenge this week is the berry galette and it is hosted by lisa of tomato thymes in the kitchen and andrea of the kitchen lioness.  to read the full recipes, visit either of their sites and to see the entries from the other members, visit tuesdays with dorie.
i love to make galettes.  they are easy to assemble and they aren’t supposed to look picture perfect.  how can you not love that?  the dough is quickly mixed up in the food processor.  the recipe called for 1/4 cup of cornmeal and i immediately went to the freezer and pulled out the bag of blue cornmeal that i keep stashed in there.  blue cornmeal gives doughs and odd shade of grey but the nutty flavor and slight crunch it adds make it a wonderful addition to any recipe calling for cornmeal.
blue cornmeal

 the instructions for using a food processor tell you to pulse it to a consistency of moist curds and that is just what it looks like when it is properly mixed.  according to those instructions, you can use it without a resting period but are cautioned to use ample flour to prevent sticking.  that sounded like work and a set up for failure to me.  needless to say, i chilled the dough by setting it in the freezer while i made the filling.

 our fig tree was producing figs like crazy two weeks ago but it has slowed down considerably.  i found  a flat in the fridge that had been forgotten and decided to use them.  since it was only about 3/4 cups, i threw in some chopped up peaches too.  a little lemon zest, vanilla bean and cardamom finished it off.

 the chilled dough rolled out easily with absolutely not sticking.  to eliminate the flour, brush off the top of the dough.  turn it over onto the baking pan and then brush the flour off the other side-this can be done easily if the dough is chilled since it will not tear and stretch as much.
 look at the blue cornmeal flecks in the dough

 once the filling is on the dough round, you are instructed to sprinkle sugar and honey over it.  well, i skipped the sugar and used a double dip of the honey from our bees.

 ready to go into the oven…
beautiful!
a special thanks to our hostesses with the mostesses-truly a job well done!

blueberry-nectarine pie

this month, good things come in threes, as in three things made using the book “baking with julia” for the tuesdays with dorie challenge.  this week, we made blueberry-nectarine pie and the event was hosted by hillary of manchego’s kitchen and liz of that skinny chick can bake .  be sure to visit either of their websites to see the recipe or buy the book!

first step was to mix the pie dough.  the recipe gives three methods for mixing the dough; by hand, by mixer or by food processor.  i chose to mix mine in the food processor.

the recipe is pretty simple but it does something most recipes do not, it calls for a combination of real butter and shortening.  most importantly, it calls for chilling the shortening and cutting it into neat little cubes.  it also requires a somewhat lengthy chilling time(several hours) for the dough and a short chill time for the completed pie prior to baking.  i didn’t adhere to the chilling times and can honestly say, the soft dough was easy to work with and the baked pie looked fine.  perhaps i should also mention that making and baking pies is a large part of my job and maybe this is easy for me since i am accustomed to working with pie dough.  maybe, but it could also be that this time, i was lucky.

so there i was shopping in trader joe’s with the husband as i picked up two baskets of blueberries, selected half a dozen white nectarines all the while hoping that there would be extra fruit for me…

 white nectarines are very delicate in flavor, kind of like a washed out peach but they are still tasty.

 the recipe calls for cooking the filling prior to making the pie.  knowing how much the blueberries would color the filling, i doubled up the amount of flour, actually i think i may have added more than double, and just gently tossed the filling and then scraped it into the pie shell.  i wanted to preserve the color combination that you see above; pale slices of nectarines swimming in a purple blueberry pool.

i remember reading the recipe and the author states to use only 2 teaspoons of lemon juice so that the pie isn’t tart.  this perplexed me.  two teaspoons surely wouldn’t have the power to do that.  and no, it didn’t.  to add more flavor, i also included some cardamom and vanilla bean paste.

 when the pie was finished in the oven, it was obvious that it was a blueberry pie.  despite my efforts, the nectarines lost their battle with the blueberries since it dominated both the color and the flavor profile of the pie.  next time, i would reverse the proportions and use 2 cups blueberries with 3 cups nectarines or better still, 3 cups peaches (or apricots, just throwing that out there).

love the color of the filling, the pie tasted pretty good too…

semolina bread; tuesdays with dorie

it was such a dreary and cool morning on saturday that i decided to make the semolina bread for this weeks twd challenge.  after the scorching hot weather of june and early july, it was nice to have a break from the heat-now if we could just do something about the rain…

the tuesdays with dorie festivities this week are being hosted by renee of the way to my family’s heart and anna of keep it luce.  be sure to click on those links to see what everybody has baked-there are over 100 of us participating.

semolina bread is a favorite of mine.  something about the color, the golden hue of the bread…the simplicity of the recipe-a definite plus for me.  this recipe is in nick malgieri’s book, “how to bake” as well as baking with julia and i have made it before.  the two recipes are almost identical-the only real difference is how much flour is added to the sponge with the total amount called in the recipe for being the same.  the chatter over on twd was that it was salty-i did cut it back to 1 1/2 teaspoons after reading several comments on the amount being too much.  however, i think that between cutting the salt and the high humidity of the day, my bread was in a hurry even though i wasn’t!

i didn’t quite understand the description for the slashes so i just did 3 on the diagonal with a serrated knife.

a close up of the slash.  there is a fine line between too deep and not deep enough.  either way, you need a sharp knife or you run the risk of deflating the bread.

the finished loaf.  it took at least 15 minutes longer in my oven (i keep a thermometer in it to monitor the temp for accuracy)  to get the internal temp to 207 degrees, i gave up on getting it to 210.

the interior of the loaf-i think i done good this time!  the crust was nice and chewy and like a real artisan bread crust!  we are having the rest with blt’s since it is tomato season…

tomatoes and arugula from the garden, uncured-dry rub bacon from trader joe’s and homemade bread.
droolworthy, isn’t it…

a tale of two biscotti’s-tuesdays with dorie

i must have blinked; somehow, it is suddenly tuesday and time for the next (tuesdays with dorie) post from baking with julia. even better is the fact that this month, we will do 3 recipes.  first up is the hazelnut biscotti recipe hosted by jodi of homemade and wholesome and katrina of baking and boys! be sure to visit either of their blogs for the complete recipe or better still, buy a copy of the book baking with julia and bake along with us.

baking biscotti is something special for me.  years ago, i developed a series of recipes for biscotti and we actually opened a small wholesale bakery that specialized in biscotti.  we baked more than 20 flavors and had about 40 wholesale accounts as well as a small mail order business.  fast forward 15 years and i have moved on; i no longer operate my own baking business.  however, i still get requests for biscotti and bake them as gifts for friends and family.  in my current baking job, i make them just to grind them into crumbs and make cookie crust pie shells with them.  suffice it to say, i was curious to try this recipe.

upon reading the recipe, i realized that i had the option to change the nuts used.  that was a good thing since i had a severe shortage of hazelnuts (none actually) and in the 105 (no not kidding) degree heat, no desire to go out to the store.  i chose pistachios and lemon zest to flavor mine since that is one of my favorite biscotti combinations.

first step was to measure out all of the ingredients.  since my pistachios were already skinned and toasted, i eliminated the blanching and toasting step from the recipe.  actually, whenever i make biscotti, i always use untoasted nuts.  the reason behind this is that they have the potential to become over toasted in the second bake and that can give the biscotti a bitter and burnt taste.

this is a very lean recipe.  by lean i am referring to the fact that the only fat in the dough is what is present in the egg yolks and the nuts.  low fat isn’t a bad thing unless you have dental issues because lean biscotti are hard biscotti.

the instructions for shaping the logs suggests flouring your hands.  with the number of logs i have baked, i can tell you don’t use flour, use a little water instead.  a small amount of moisture on your hands will allow you to quickly shape the logs without the dough sticking to them.

out of the oven, i let them cool completely before slicing them.

be sure to use a very sharp serrated knife for clean cuts.
pistachios add nice color to the slices

since i am also working on what i hope will be my next book, i mixed up a batch of my own recipe.  these are chocolate with almonds and coffee beans.  the biggest difference from the twd recipe and mine (besides the chocolate) is that these have a little less egg and a generous amount of butter.  that difference results in a lighter, softer crunch.  one guaranteed to be friendlier to your smile!

be sure to check out the tuesdays with dorie page to see the biscotti’s from all of the participants!

a day late and at least a dollar short; twd-oasis naan

it’s called tuesdays with dorie for a reason, you are supposed to bake a recipe from dories’ baking with julia book and post it on the selected tuesday.  tell that to my computer.  tell that to the folks at the genius bar in the apple store.  just tell it to anyone that will listen.  it won’t make any difference, i promise.  so, here i am, whining on wednesday that i missed tuesdays with dorie.  since i went through the trouble of making the bread and taking photos, i’m posting it a day late.  such is the story of my life…

this week’s recipe challenge was the oasis naan and it was hosted by mary of always add more butter and phyl from the blogpage of cabbages and king cakes.   what many people do not realize is that i live in nashville but more specifically, i live in the middle of the largest kurdish community in the united states.  we frequently visit a middle eastern market in our neighborhood to buy freshly baked naan.  three kurdish ladies make it every morning in the store using authentic tandoor ovens.  they even let me come in and watch once.  that said, i had to try this for myself.

fresh from the oven

 i love recipes that do not call for special equipment.  all you need is a few measuring cups/spoons, a bowl and a spoon.

 the dough mixes up easily
 after kneading it for the 10 minutes suggested in the recipe

 i did not have scallions but i do have a patch of chinese leeks in my herb garden, they worked out rather nicely.

 i found it was easier to shape the dough with my hands.  i pressed it out into a circle and stretched it over the backs of my hands.  then i laid it out on the peel and pricked it with a fork.

 a generous sprinkle of leeks, freshly grated sea salt and cumin seeds
 who can resist bread fresh from the oven?  definitely not me!

 i will make this again but next time, i will knead it less.  10 minutes made a tough bread, i think 5 minutes will do nicely.

for the complete recipe, buy the book or visit the blog pages of mary and phyla.  nicely done ladies!