blueberry muffin cake and welding; a perfect saturday morning

now that the kids have ditched us, i have found myself looking for new things to do.  sure, i spend lots of time in the garden but when my husband is working late-and that happens frequently, i need something to keep me busy.  the perfect solution has been to take classes at watkins college of art, design and film.  they have a fantastic community education program and i have taken several classes there and am signed up to take several more.

in the spring, i looked through the class schedule and saw a workshop on welding.  it was strictly for beginners and it sounded like a lot of fun.  my friend shirley, who is also a master gardener, was quick in agreeing to attend the class with me.  girls and power tools; a perfect match.

we learned how to weld using oxyacetylene, mig and arc methods.  above, the method being used is oxyacetylene which is why they are not wearing the shields on their faces.

 oxyacetylene welding is easy to do and it was a lot of fun.  i could easily see myself doing this again.

 this was my favorite piece of equipment!  it is a throatless shear, which cuts sheet metal-sort of a big paper cutter on steroids.  to make my project, i cut each piece using this simple machine.

 this was the other fun part; curving the metal with rollers.  shirley is putting part of her project through the rollers to curve them.  i also curved a lot of my project with that roller.

and my finished project.  when i told everyone i was making a flower, they looked at me a little funny.  they looked at my skimpy little curvy pieces and told me, “sure you are making a flower, sure you are…”  they were all a little shocked when i finished it and it looked like a flower!  after a couple more coats of clear finish, it will live out in the garden.

and as always, if i go to the garden, i bring cake.  yes, i know this was a college, not a garden.  but shirley and i went to this class with the idea that we could learn a skill that might be useful for gardening.  gardening with sculpture, that is.

this cake is a bit of a mash up.  halfway to vegan, there are no eggs and several ingredients could be replaced to make it vegan if you like-or throw caution to the wind and make it ovo-lacto.

blueberry muffin cake
1 (10″) bundt cake serving 12-16
ener-g egg replacer for 3 eggs (or 3 large eggs)
2/3 cup butter (or coconut oil or any combination of the two)
2 cups sugar
1/2 teaspoon salt
3 cups unbleached all purpose flour
1 tablespoon baking powder
1 1/2 cup fresh blueberries
1 cup buttermilk (or a nondairy milk such as coconut or soy)
preheat the oven to 350.  grease and flour the pan and set it aside.  if you are using the egg replacer, mix it according to the directions and while it sits, cream the butter with the sugar and salt until it is fluffy.  add the egg replacer and mix it just to combine.  place the flour and baking powder into a sifter or mesh strainer and sift it over the batter in the bowl.  pour in the blueberries and fold the mixture a few times to coat the berries.  add the buttermilk and fold completely until no streaks of flour or butter are visible.  scrape the batter into the prepared pan and bake until a cake tester comes out clean when inserted into the deepest part of the cake, about 1 hour.  allow the cake to cool on a rack for 20 minutes.  turn the cake out onto the rack and allow it to completely cool-if you can…

blueberry muffins

sometimes, simple is best and blueberry muffins are about as simple as it can get.  making a cake to take out to the garden each week means i need think about what i will to make, get the needed ingredients and hope that the recipe works.  it’s been too hot!  i made muffins instead.  then it poured rain and i couldn’t go to the garden, i stayed home and ate muffins instead.

a few notes; i prefer fresh blueberries for this recipe but it works great with frozen berries too.  just take care not to let them thaw or they will turn the batter grey.  for best results, i prefer to grease and flour the pan rather than use paper liners but you can use them if you wish.  for the most consistent size, i use portion scoops.  not only will the muffins bake evenly, it will make quick work of portioning them out which is always a plus when working with frozen fruit.  for the large, texas style muffins, i find a #6 or white scoop will work, for standard sized muffins, a #12 or green scoop will work.  specialty pans may take some experimenting.  any ikea shoppers out there?  i used their pretty red muffin pan with the tall narrow cups to make the muffins in the photo and to fill them, i used a #20 or yellow scoop.

for those of you not familiar with portion scoops and their sizes, the system is quite simple.  way back when, the size referred to the number of scoops to fill a quart sized container.  a white (#6) scoop would mean 6 scoops to make a quart, the green (#12) would take 12, and so on.  today, the sizes still stand but many more sizes have been added and you will find them as small as a #100 scoop.  to find the best selection, visit a restaurant supply.  while they may seem pricey, they last a long time if used properly.  we have using the ones in our home kitchen for about 15 years.

blueberry muffins
6 texas size or 12 standard size muffins

4 ounces unsalted butter, softened
1 cup sugar
1/4 teaspoon salt
1 teaspoon vanilla
2 eggs
2 1/3 cup flour
2 teaspoons baking powder
1 1/3 cup blueberries
1/2 cup buttermilk
cinnamon sugar or plain sugar for the tops of the muffins

preheat the oven to 375.  prepare the muffin tin by either greasing/flouring it or with paper muffin cups.  place the butter, sugar, salt and vanilla into the bowl of a food processor.  pulse to combine and with the motor running, add the eggs one at a time.  allow the batter to process until glossy and smooth.  scrape the batter into a bowl.  place the flour and baking powder into a sifter or mesh strainer and sift it over the batter.  dump the blueberries over the top of the flour and fold it a few times.  sprinkle the buttermilk over the batter and fold together gently.  the more you mix, the more the berries will color the batter so only mix enough to completely combine.  use a scoop or a spoon to divide the batter between the cups. sprinkle the tops of the muffins with cinnamon sugar or plain sugar and bake.  the smaller muffins will take about 20 minutes, the larger ones, closer to 30.  using frozen berries can extend this.  check them a little early to be safe and then keep an eye on them.  they are done when a cake tester comes out clean.  allow them to cool in the pan for a few minutes and then turn them out on to a rack to cool.  they are tasty when warm but those hot blueberries can be like lava pockets so be careful!

blueberry-nectarine pie

this month, good things come in threes, as in three things made using the book “baking with julia” for the tuesdays with dorie challenge.  this week, we made blueberry-nectarine pie and the event was hosted by hillary of manchego’s kitchen and liz of that skinny chick can bake .  be sure to visit either of their websites to see the recipe or buy the book!

first step was to mix the pie dough.  the recipe gives three methods for mixing the dough; by hand, by mixer or by food processor.  i chose to mix mine in the food processor.

the recipe is pretty simple but it does something most recipes do not, it calls for a combination of real butter and shortening.  most importantly, it calls for chilling the shortening and cutting it into neat little cubes.  it also requires a somewhat lengthy chilling time(several hours) for the dough and a short chill time for the completed pie prior to baking.  i didn’t adhere to the chilling times and can honestly say, the soft dough was easy to work with and the baked pie looked fine.  perhaps i should also mention that making and baking pies is a large part of my job and maybe this is easy for me since i am accustomed to working with pie dough.  maybe, but it could also be that this time, i was lucky.

so there i was shopping in trader joe’s with the husband as i picked up two baskets of blueberries, selected half a dozen white nectarines all the while hoping that there would be extra fruit for me…

 white nectarines are very delicate in flavor, kind of like a washed out peach but they are still tasty.

 the recipe calls for cooking the filling prior to making the pie.  knowing how much the blueberries would color the filling, i doubled up the amount of flour, actually i think i may have added more than double, and just gently tossed the filling and then scraped it into the pie shell.  i wanted to preserve the color combination that you see above; pale slices of nectarines swimming in a purple blueberry pool.

i remember reading the recipe and the author states to use only 2 teaspoons of lemon juice so that the pie isn’t tart.  this perplexed me.  two teaspoons surely wouldn’t have the power to do that.  and no, it didn’t.  to add more flavor, i also included some cardamom and vanilla bean paste.

 when the pie was finished in the oven, it was obvious that it was a blueberry pie.  despite my efforts, the nectarines lost their battle with the blueberries since it dominated both the color and the flavor profile of the pie.  next time, i would reverse the proportions and use 2 cups blueberries with 3 cups nectarines or better still, 3 cups peaches (or apricots, just throwing that out there).

love the color of the filling, the pie tasted pretty good too…

two for one: butterscotch pie and blueberry pie with almond crunch topping, pies #46 & 47 of 52

for months, my husband has been asking me to make a butterscotch pie.  personally, i like fruit pies better.  so, rather than try to figure out how to make a fruity butterscotch pie, i went ahead and made two pies.  luckily, we had some visitors and they helped us eat the pies!
butterscotch is a tricky flavor to achieve.  many recipes simply expect the use of butter and brown sugar to give the flavor.  that’s a start but not likely to give you that buttery caramel flavor found in the little yellow hard candies.  to really get that flavor, you need to caramelize some brown sugar and combine it with dark rum and a pinch of salt.  caramelizing brown sugar is very tricky; it can quickly go from slightly colored to black and bitter.  with that in mind, i opted to go with plain granulated sugar since it is easier to see the color gradations.  
on the blueberry pie, i didn’t have fresh berries on hand so i used some frozen berries and if you ask me, that is just fine.  if you are lucky enough to pick your own fresh berries, do you let them go to waste?  i’m thinking not and that what isn’t consumed quickly, is frozen for later use.  yes i know that there are purists out there that will scoff at the idea of using frozen berries, but i am not one of them.  sometimes, you have to use what is available and at this time of year, those frozen berries will have much more flavor than anything fresh coming to us from the other side of the world.  if you do use frozen berries, just be sure to let them thaw completely before baking and to add the juices to the pie.  baking a pie with frozen berries in the filling will add a lot of time to the baking and it could mean a burned crust or topping!  to make this pie a little different, i decided to give it a crumb topping made with almond paste and toasted sliced almonds.  blueberries and almond go together very nicely.  and for those of you, like myself, that do not have a kitchen scale handy, purchase the almond paste in the can.  you can remove both ends of the can push out the paste, cut the cylinder of paste into half and then cut each half into 4 equal pieces and get your 1 ounce of almond paste.  don’t worry, you can freeze the extra and then anytime a recipe calls for almond paste by the ounce, you will just need to thaw the required number of 1 oz. wedges.
butterscotch pie
blueberry pie with almond crunch topping
each recipe yields 1 (9″) pie serving 8
butterscotch pie
1 (9″) pie shell, fully baked (can be any kind you like, even graham cracker)
1 1/4 cup sugar
3 tablespoons water
1 tablespoon corn syrup
3 tablespoons corn starch
2 cups half and half
3 egg yolks
1″ piece of vanilla bean, split open
1/4 teaspoon kosher salt
3 tablespoons dark rum
place the sugar, water and corn syrup in a sauce pot (at least 2 quart capacity) with a heavy bottom.  cover the pot and place over medium heat until it boils for about 1 minute.  remove the lid and check to see that there aren’t any sugar crystals on the sides of the pot.  if any crystals are present, use a wet brush to wash them away.  allow the mixture to boil until it begins to color.  while this is boiling, place the corn starch in a heat proof bowl with about a 1/4 cup of the half and half and whisk it smooth.  add the egg yolks to this mixture and whisk together.   place the remaining half and half in a pot with the vanilla bean and the salt and heat over medium low heat but do not allow it to boil-just get it hot.  when the sugar begins to color, gently swirl the pan to color it evenly.  when it is a nice amber color, carefully pour in a small amount of the hot half and half-THIS WILL BOIL UP AND RELEASE LOTS OF STEAM!!!  this step can be dangerous if you are not paying attention or if you try to pour it all in at once, so please, do this in batches and with caution.  when all of the half and half is in the pot with the caramel, stir over medium heat to dissolve any sugar that has settled to the bottom.  when this reaches a boil, pour a small amount into the egg yolk mixture and whisk it smooth.  replace the hot half and half on the burner and carefully whisk in the tempered egg yolks.  continue to cook, stirring gently, until it reaches a boil.  boil the mixture for a full minute to cook the cornstarch and thicken the mixture.  remove the pot from the heat, stir in the dark rum and pour the hot mixture through a mesh strainer right into the baked pie shell.  spread the filling out evenly, press plastic wrap to the surface and refrigerate it until it is cold.  to serve, top with whipped cream or serve it with whipped cream on the side.  
for the whipped cream topping in the photo, i whipped 1 1/3 cups heavy whipping cream with 2 tablespoons of sugar and 1/4 teaspoon of vanilla extract until it was stiff and then spread it over the cold filling.
blueberry pie with almond crunch topping
1 (9″) pie shell, home made or purchased
1/2 cup sliced almonds
3/4 cup sugar
2 tablespoons cornstarch
1/2 teaspoon ground ginger
zest of 1 lemon
1 pound of blueberries-can be fresh or frozen (and thawed)
3/4 cup all purpose flour
1/2 cup dark brown sugar, packed
1/4 teaspoon baking soda
1 ounce almond paste, cut into small pieces
preheat the oven to 350.  place the pie shell on a sturdy baking sheet that is lined with parchment paper and greased.  toast the almonds on a separate tray until slightly browned and fragrant, about 5-7 minutes, cool them completely.  in a mixing bowl, rub the sugar with the cornstarch, ginger and lemon zest until it is combined.  add the blueberries and toss them to coat them (include the juices too if you are using thawed berries).  pour the filling into the pie shell.  to make the topping, place the almonds, flour, brown sugar and baking soda into the bowl of a food processor and pulse a few times to combine.  sprinkle the pieces of butter and almond paste over the top of the mixture and pulse it until it looks sandy and it begins to clump.  spread the crumb topping evenly over the pie filling and bake it until the fruit filling is bubbly and the topping is browned, about 1 hour to 1 hour and 15 minutes.  cool completely before cutting or the filling will not hold it’s shape and will run out.
may the force be with you…and as always, make one and take a photo and i will share it here!  bakinbabe116@aol.com

summer berry pie, #38 of 52 pies

in what is quickly becoming a never ending game of catch-up, i am trying to get all of the pies posted…wish me luck, please!!!

on that note, i also found myself trying to keep the pie simple.  that is not hard to do when berries are in season.  a quick trip to the store and i had plenty of blueberries, raspberries and blackberries to make a pie that was as delicious as it was easy to prepare.  by not stressing over the crust and just folding it in towards the center, the result was similar to a rustic galette but with a lot more fruit.  one more note, if you find yourself with frozen berries (whether you picked them or bought them), go ahead and use them in this recipe.  measure the fruit while it is still frozen and then let it thaw before using it-frozen fruit will drastically increase the necessary baking time and can mean a burned crust.

summer berry pie
1 (9″) pie serving 8
pie dough for a single (9″) pie shell
2 cups blueberries
1 cup blackberries
1 cup raspberries
3/4 cup sugar
3 tablespoons cornstarch
2 teaspoons lemon zest
2 teaspoons rosewater
crystal sugar
preheat the oven to 350.  roll out the pie crust so that is it about 1-1/2 to 2 inches larger than needed to line the pie plate.  place the crust into the plate and allow the excess to hang over the edge.  combine the berries in a bowl.  in a separate bowl, rub the sugar, cornstarch and lemon zest together with your fingers and completely combine them.  toss the berries with the sugar mixture taking care not to mash them and then scrape the filling into the pie shell.  gently lift the excess dough up and drape it on top of the fruit pleating it as needed to make it fit.  sprinkle crystal sugar over the pie crust and bake until it is bubbly in the center, about an hour and 15 minutes.
as most berry pies are, this will be runny while it is hot.  be sure to let it cool to room temp before trying to cut it.  and as always, bake one and send me a photo i will post it here.  bakinbabe116@aol.com

black and blue rhubarb pie, #28 of 52 pies

there is something special about a freshly baked berry pie.  a little sweet-a little tart and a deep rosy hue that draws the eyes, makes the mouth water and has the hands reaching for a knife and plate.  trying to develop an original recipe is a challenge on it’s own but when you limit the categories to one and complete the task weekly…well, let’s just say this isn’t always as easy as it should be.  add a family that isn’t always receptive to the chosen flavors and you can end up repeating the theme easily.  those of you who have followed this endeavor will no doubt find yourselves saying “hmm, she already used that ingredient” and you would be right!  my husband loves fruit pies as long as they aren’t peach (go figure) and when i was pondering the choice of fruits, he wanted rhubarb.  since he will likely eat most of it, i decided to indulge him and make a rhubarb pie but rather than pair it with strawberries (as well as raspberries which i did for #18), i chose to go with blueberries and blackberries since they are both coming into season in the garden.

since not everyone has a freshly picked supply of blueberries and blackberries, buy them fresh or frozen.  you will need a total of 3 cups of berries which is a pound.  using frozen berries will make it possible to serve this pie even when the berries are not in season.

i am hoping to get some rhubarb crowns into the garden so i can harvest my own stalks.  believe it or not, my local supermarket has bags of sliced rhubarb available with the frozen fruits which means we can have a rhubarb pie anytime!  using purchased pie dough will save some time but for those of you not willing to compromise, make enough dough for a double crust pie using your favorite recipe or this one from pie #18

black and blue rhubarb pie
 1 (9″) lattice topped pie serving 8-10

dough for a double crust, 9″ pie
1 to 1 1/4 cup sugar
4 tablespoons cornstarch
zest of 1 orange or 3 mandarins (i chose mandarins!)
1 1/2 teaspoons apple pie spice (or cinnamon if you do not have any)

1 pound berries, about 3 full cups of blackberries and blueberries
1 pound of rhubarb slices, about 3 full cups

preheat the oven to 350.  grease a sturdy baking sheet, line it with parchment or foil and grease that as well.  line the greased pie plate with the bottom crust.  a whole lot of greasing going on?  this makes a sticky pie if the juices spill over during the baking and it will not be easy to remove from the baking sheet without the grease!  trim the excess dough so that only about 3/4″ of dough hangs over the edge.  roll the excess dough under and flute the edges.  place the prepared pie crust on the baking sheet.

in a large bowl, rub the sugar, cornstarch, zest and spice together.  add the fruit and toss together.  scrape the filling into the pie crust and top it all off with lattice strips.  sprinkle some coarse sugar crystals over the strips and bake until it boils in the center, about 1 hour 15 minutes.   let it cool completely, about 4-6 hours, before cutting or you will have a never ending pie; no matter how many slices you cut, the filling runs out and fills the plate again!

so go forth in the world and bake a pie.  send me a photo and i will post it here!  bakinbabe116@aol.com

blueberry cheesecake pie, #26 of 52!

26 of 52 pies completed, 26 more to go.  that puts me at the halfway point.  from here, the number of pies left to bake will be smaller than the number of pies already baked.  so, the question is, will i make it to the goal?  i’m keeping my fingers crossed and hoping for the best.

this last “catch-up” pie was baked while my mother was still visiting-she came for the graduation and spent nearly 2 weeks with us.  it was fun, i never realize how much i miss hanging out with my mom until she arrives for a visit.  we spend lots of time wandering through antique shops and thrift stores and chattering about everything.  when it was time to bake this last pie, we chose blueberries as a theme and took mom (and our daughter and her boyfriend) to the demo garden(where we work as master gardeners) to pick some fresh blueberries.  we only ended up with about 2 cups of rather tart berries so making a pie with them was out of the question.  but i remembered my mothers love of cheesecake and decided to improvise.

a thinner more liquid cheesecake custard is garnished with a swirl of blueberry coulis before baking.   be sure to use a small spoon and pour in the coulis slowly (to prevent it from sinking) into the pie in random lines.  use a bamboo skewer to swirl the coulis around the top of the pie.  one hint, skip the fancy name brand cream cheese (you know the one named after the city of brotherly love) because it makes a custard that is runny like water!

after baking in a slow(300 degrees) oven, the pie is thoroughly chilled before serving.  use a knife that has been dipped in hot water to get clean cuts and be sure to wipe it off between slices.  the blueberry coulis can easily be doubled and the remaining coulis can be used as a sauce for the plate.

blueberry cheesecake pie

1 (9″) pie that serves 8-10
coulis
don’t forget, if you want extra sauce, double the coulis recipe but use only half of it to marbleize the top of the pie.
3/4 cup blueberries
1/3 cup sugar
crush the blueberries breaking all of them.  place them into a small saucepot with the sugar and over low heat, bring the mixture to a boil.  continue to boil for 5-10 minutes.  strain the sauce into a heat proof bowl and chill until no longer warm but do not let it get too cold-it will become gelatinous and hard to work with.
crust
purchase or make a cookie crumb crust in a 9″ pie pan using the recipe in pie #16.  place the pie pan on a  sturdy baking sheet that will not warp in the oven.
cheesecake custard
12 ounces cream cheese-not the fat free stuff!
3/4 cup sugar
2 tablespoons flour
1/4 of a vanilla bean
zest of 1 lemon
3 eggs
1/2 cup sour cream
preheat the oven to 300.  this is mixed quickest in a food processor-fast and smooth.  place the cheese, sugar, flour, vanilla bean and lemon zest in the bowl of the processor and pulse to combine.  With the machine running, add the eggs, one at a time, and scrape the bowl thoroughly.  add the sour cream and pulse to mix, scrape the bowl and pulse a few times more.  pour the filling into the pie dish and bake until it is almost firm in the middle, about 40 minutes.  turn the oven off, prop the door open slightly and leave the pie in there for another 15 minutes.  remove the pie from the oven and chill completely before serving, about 4 hours.
and once again, if you bake one, send me a photo and i will post it here.  bakinbabe116@aol.com

pie #19-homemade blueberry toastries

a day late and a dollar short-the summary of my life lately.  no matter how hard i try, i am perpetually scrambling to meet a deadline and not always successfully.  it is spring and that means i have work to do in the garden; at home we have a vegetable garden, an herb garden and many other separate beds of flowers, plants, shrubs and trees.  then there is the demo garden where i do my volunteer hours for the master gardeners-too much to type, just look at it here.  did i mention the bees?  we have one colony and they need our attention on occasion.  then there is the house, the girls-they both graduate this year, the herd (too many cats and a dog) and did i mention my full time job?  at a busy restaurant? which makes coming home and baking seem like too much some days?  oh and there was that big birthday for my husband last week-he’s 39 again…

is it any wonder that i decided to make pop tarts for last week’s pie?  comfort food, a return to carefree childhood days and nothing more important than the lunch menu in the middle school cafeteria or maybe this week’s spelling test on my mind.  i tell both of my girls regularly that they will long for the days of high school-no worries more importantly, no bills, just school.  they don’t believe me now, but we all know that someday, they will and i doubt they will ever tell me so.

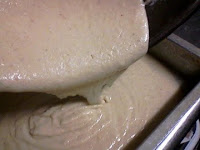
i experimented with two different doughs and settled on the second one.  it is more like a tart dough and has sugar, egg and buttermilk in it.  in the end, it was easy to work with-even the scraps.  it held the jam without bursting and after almost a week, the toastrie dough was still tasty with a nice texture.  they never had the cardboard snap of the commercially produced tarts and remained a little on the softer side but even so, everyone who ate one, reached for a second.

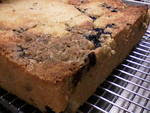
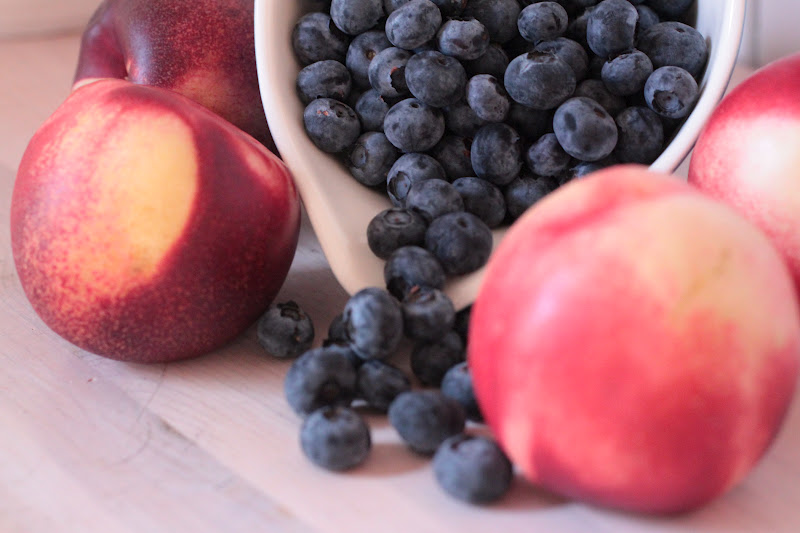
one thing to keep in mind, you can use any flavor filling you like.  i happen to like blueberry and made a quick batch of jam with just a one pound bag of frozen blueberries from the grocery store.  you could use raspberry, blackberry, rhubarb or pineapple-all of those are available frozen which makes them a little more affordable than fresh fruit.  if you have a surplus of apples or pears-try those.  and while i did not experiment with things like nutella or lemon curd, i am pretty sure that either one would be pretty tasty.

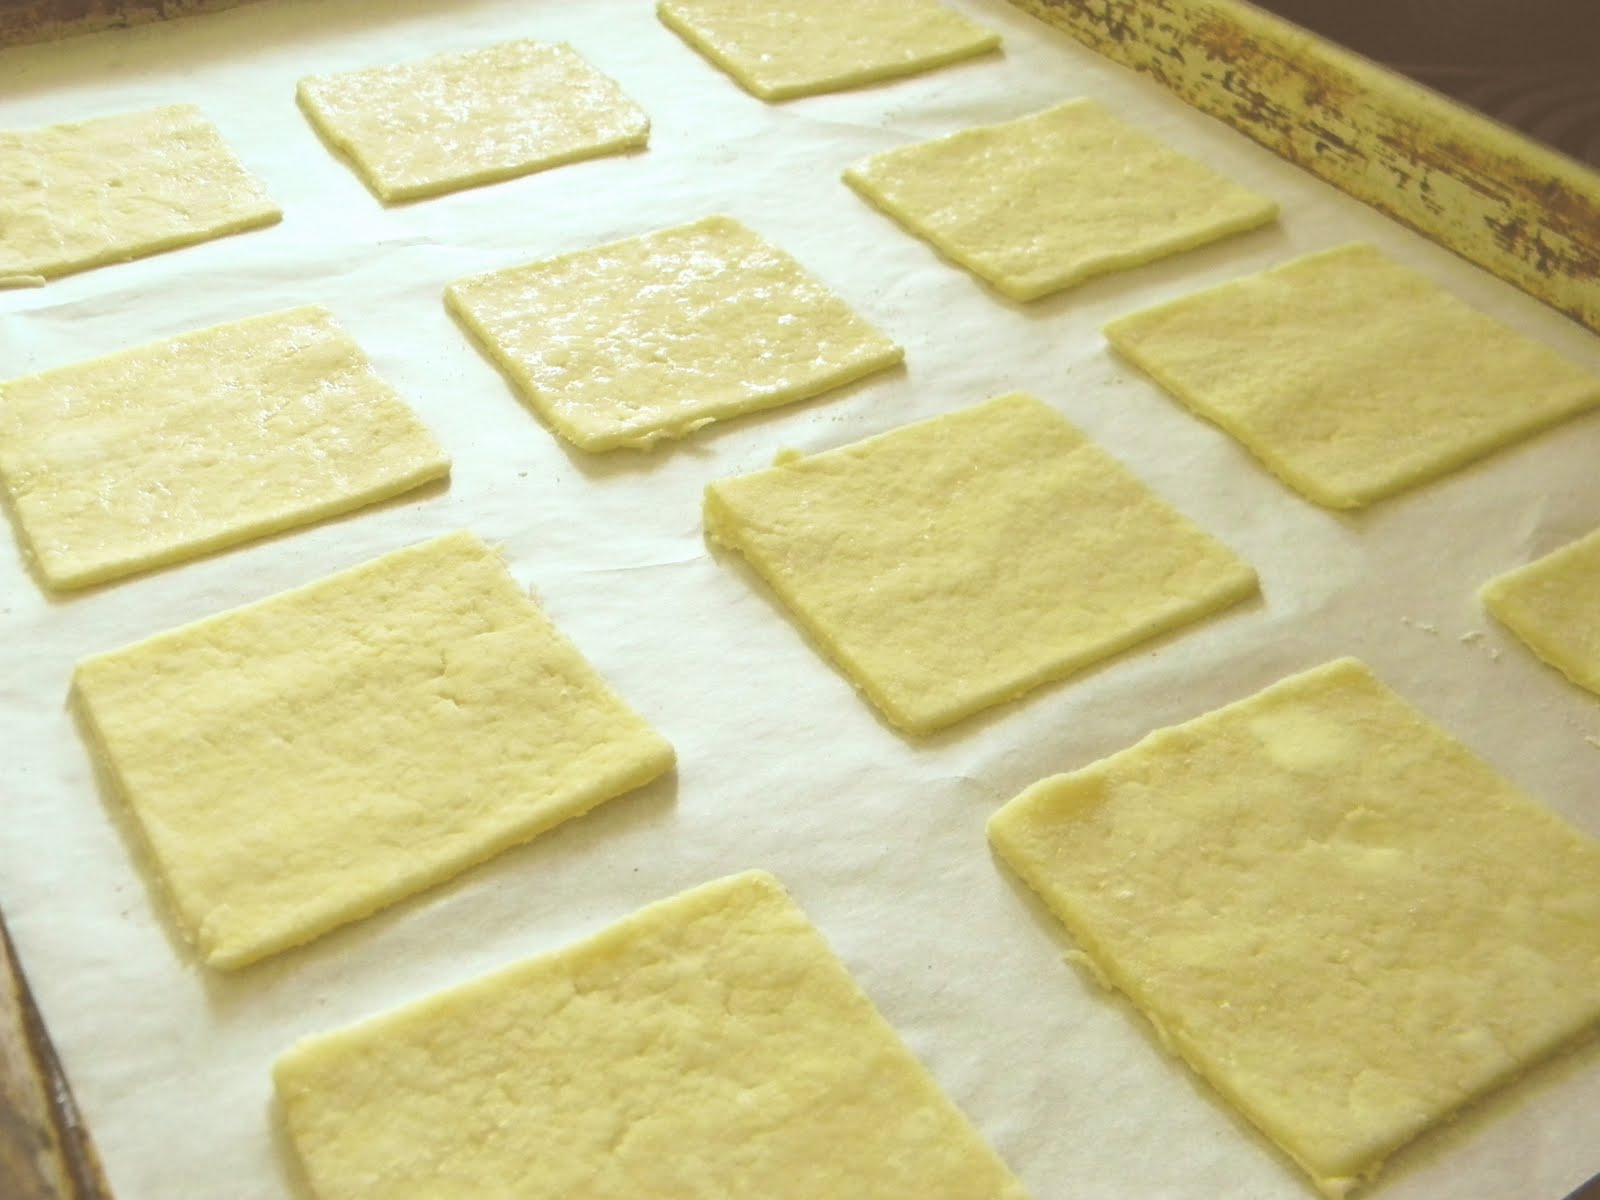
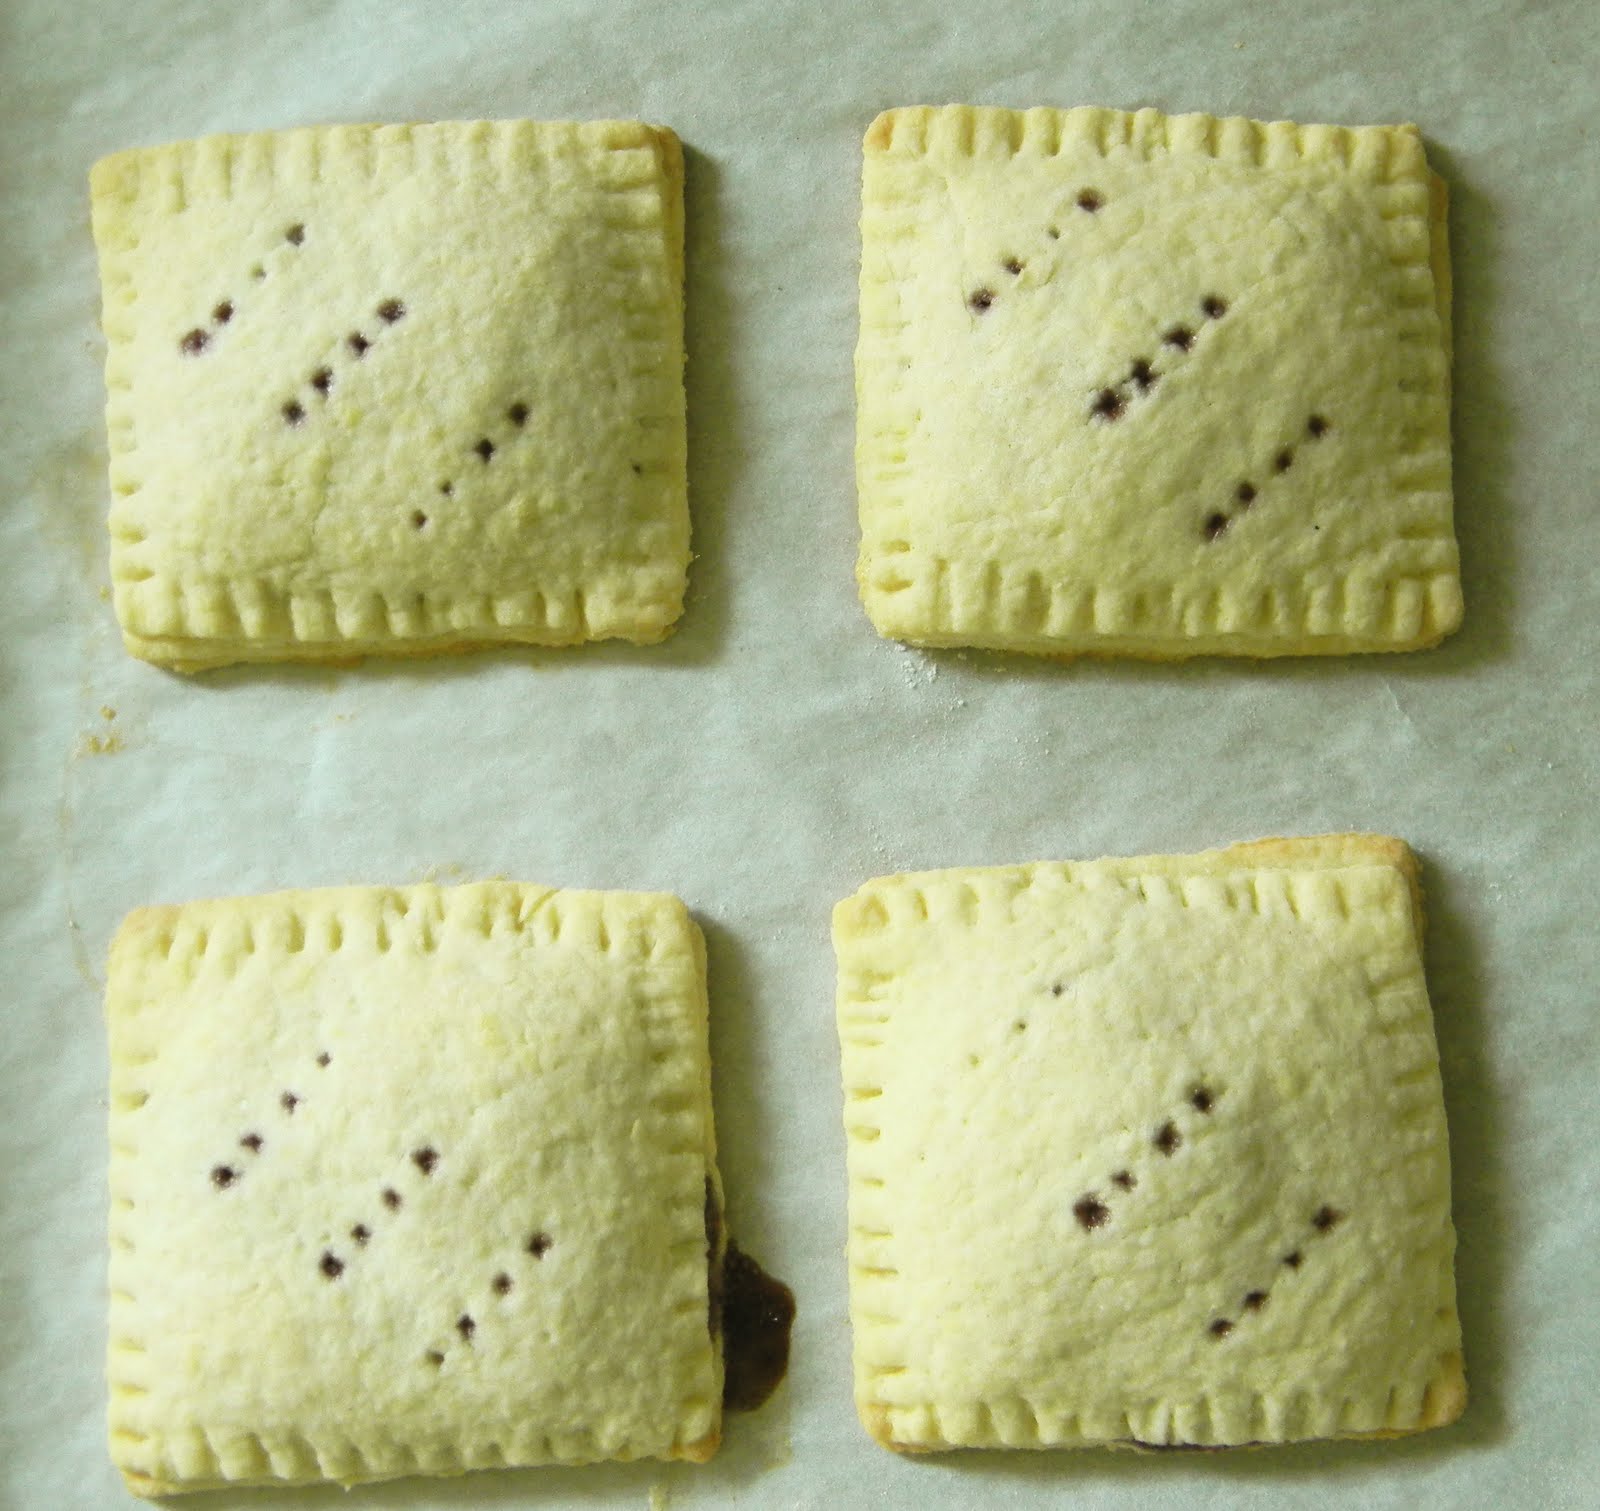
i didn’t need any special equipment either.  armed with a set of square cutters that range in size from 1 3/8″ to 2 5/8″, i chose the largest cutter but you could do this just as easily with a ruler and a pizza cutter.   to make the fluted edges and to prick the tarts (to allow the steam to escape during baking) i reached into the silverware drawer and used a regular fork.

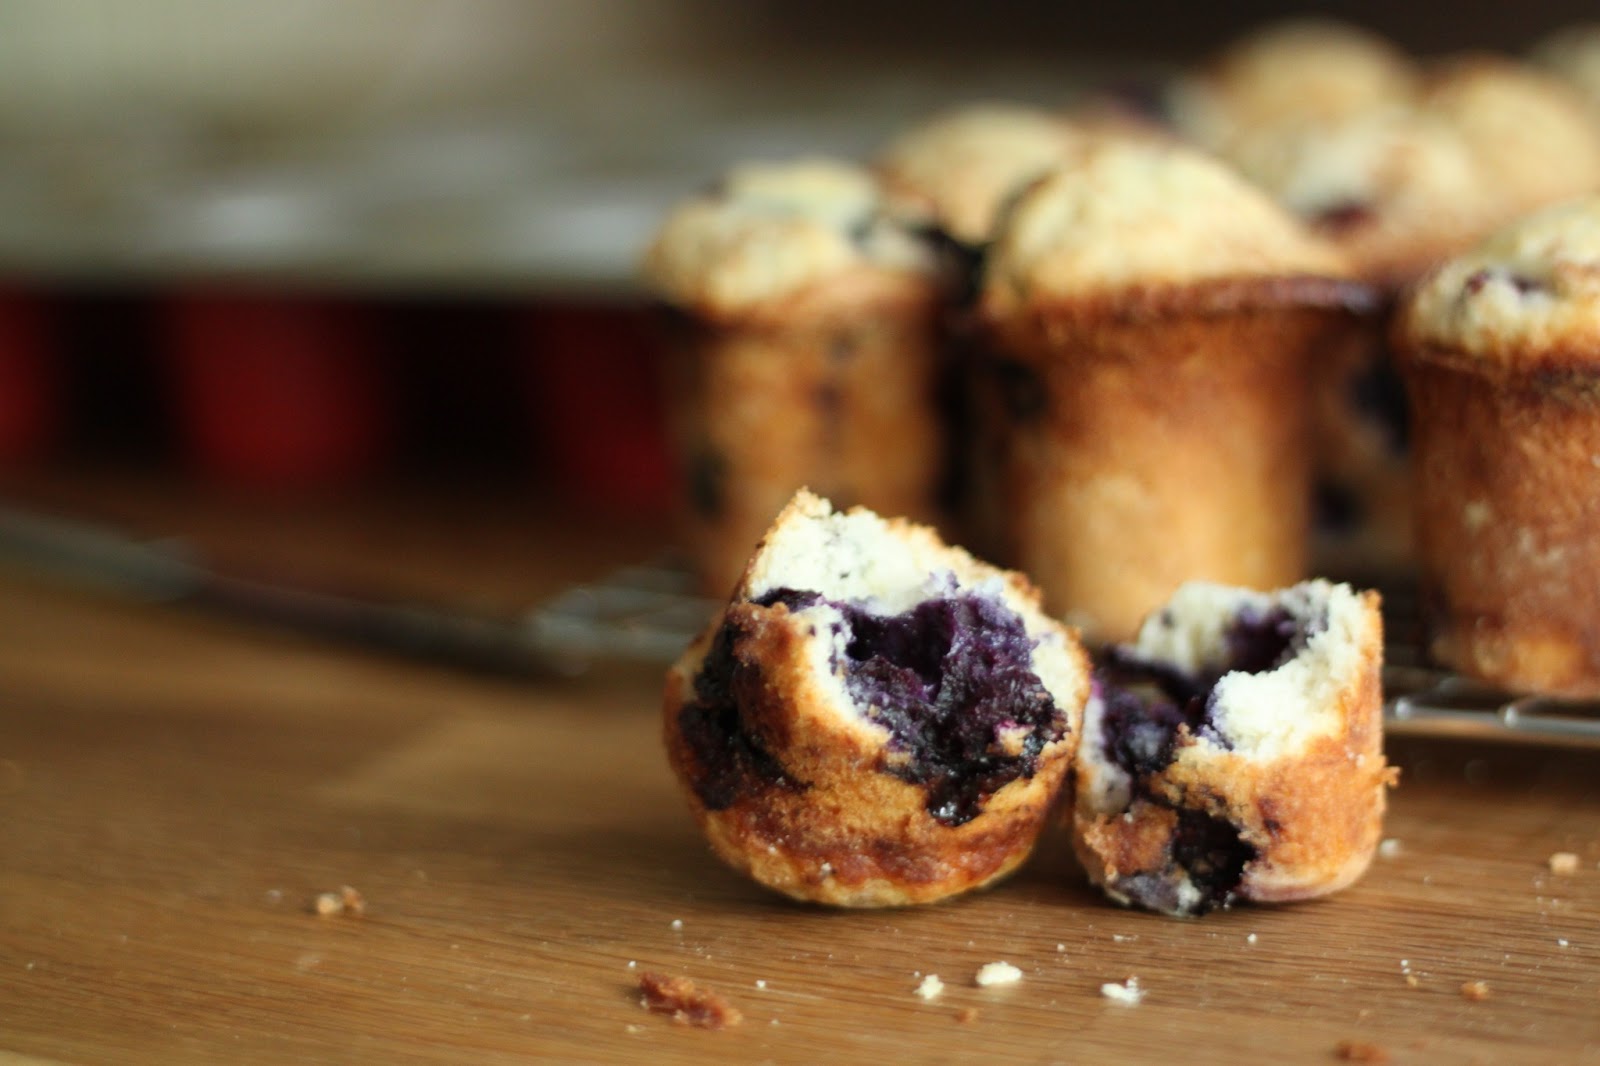
lined up on a tray, they baked up quickly.  this was a quick treat to make and one of those things i hope to add to my list of things to make at home myself from now on.  just as soon as we move to a 36 hour day and my new clone arrives.  i really need to simplify my life-eliminate and reorganize the excess-now, to find the time to do that…

homemade blueberry toastries

yields 16 small treats-each one is about 2 1/2″ square
toastrie dough
1 1/2 cups all purpose flour
1/3 cup sugar
1 teaspoon baking powder
3/4 teaspoon salt
8 tablespoons unsalted butter, cold and cut into cubes
1 egg
2-3 tablespoons buttermilk
egg wash (1 egg and 1 tablespoon water)
jam filling-recipe follows
in a mixing bowl, stir together the dry ingredients to combine them.  cut in the butter until it is in small pieces and is beginning to resemble a coarse meal.  add the egg and 2 tablespoons of the buttermilk and mix gently to combine and only until it comes together.   add the additional tablespoon of buttermilk only if the dough seems a bit dry or crumbly.  you want a soft and pliable dough but not a wet and sticky one.  wrap the dough in plastic and chill it for 30 minutes to make it easier to work with.
preheat the oven to 350.  on a large, floured surface, roll the dough 1/8″ thick.  i did this in two batches to keep the dough from getting too soft as i worked.  cut the squares and place half of them on a lined baking pan-paper or silpat will make it easier to work with if any of the jam leaks out.  brush the edges with a light coating of egg wash and place a dollop (about 2 teaspoons) of jam in the center of the square.  add the top square and gently press the edges with your fingertips to seal.  using a regular fork, press the edges to make a decorative seal and prick the center of the toastrie several times to make steam vents.  do not egg wash the tops or you will seal the vents and the toastries may burst.  
homemade blueberry jam filling
makes about 1 2/3 cup
1 pound blueberries-i used frozen
1 cup sugar
zest of one lemon
piece of vanilla bean pod (i always save the scraped out pods to use for things like this)
1-2 tablespoons all purpose flour
thaw the berries and place them and the juices into a blender.  with the lid securely fastened (does this sound like experience talking???) blend them lightly just to chop them coarsely-do not puree them!  place the berries into a pot with the remaining ingredients and bring them to a slow boil.  allow this mixture to boil gently for about 15 minutes.  remove the vanilla pod and pour into a heat proof bowl.  chill completely before using-several hours or overnight.
when you are ready to make the toastries, measure out 1 cup of jam and reserve the rest for another use (homemade scones, anyone?).  if the jam seems thin and a little runny, stir in the 2 tablespoons of flour.  otherwise, if you were able to release lots of pectin and your jam is thick and gelled while it is cold from the fridge, just stir in 1 tablespoon.  mine was a little on the thin side so i used the full amount.
and look for me to have this weeks pie up soon-i am working on that today along with another loaf of salt rising bread.  and as always, bake it and send me a photo-i will post it here!  bakinbabe116@aol.com.  happy baking!!!

ain’t that just peachy? ttb 7/16

i have spent my week looking at a large basket of peaches and many little baskets of blueberries. the peaches are starting to ripen-perfectly. slightly firm but bite into one and the juices run. they are also full of flavor and hard to resist even if they are a bit on the fuzzy side. earlier in the week i made a peach brown betty with biscuits but today, i made one of my favorite recipes from the book, blueberry peach cornbread buckle. the cake goes together like so:

peeled and diced peaches
toss them with blueberries, lemon zest and sugar-let them macerate
mix up some cornbread, slightly sweet, and pour it into the pan
spread the macerated fruit and juices evenly over the top then sprinkle the crumb topping over the fruit. into the oven she goes
fully baked and out of the pan-waiting to be cut into squares
some of the fruit sinks, some stays at the top-it buckles, get it?
cake for breakfast-what more could you possibly need?