chocolate-mascarpone cheesecake; a tuesdays with dorie post

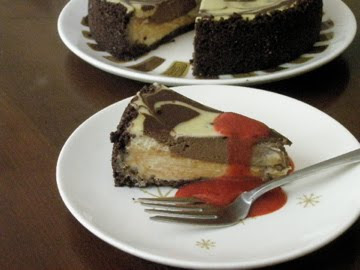
nothing says valentine’s day more than chocolate so the timing perfect was perfect for the tuesdays with dorie bakers to mix up a chocolate-mascarpone cheesecake.  my only wish was that i would actually enjoy it.  sadly, i am one of those people that just does not like the combination of chocolate and cream cheese and this cheesecake did little for me.  to compound matters, my husband has to limit his intake of dairy products because despite how much he loves them, they do not like him much at all!  the good news, we were attending a white elephant/pot luck lunch and this was the perfect treat to bring along to share.

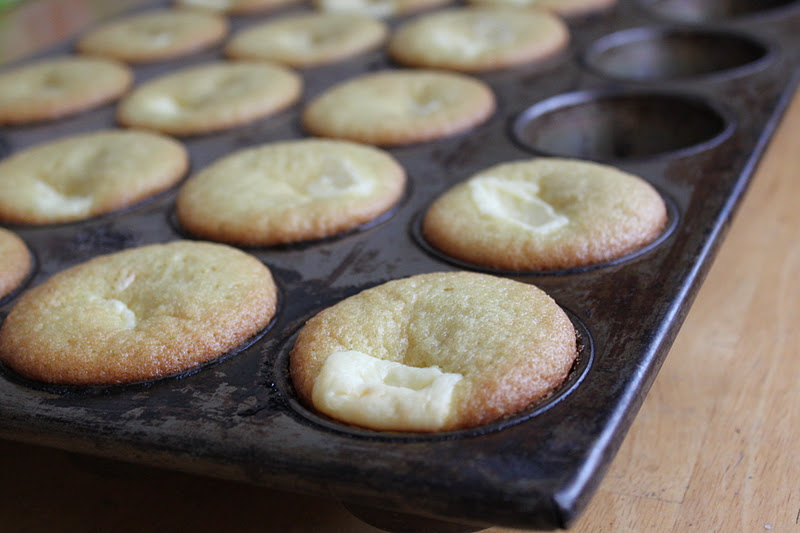
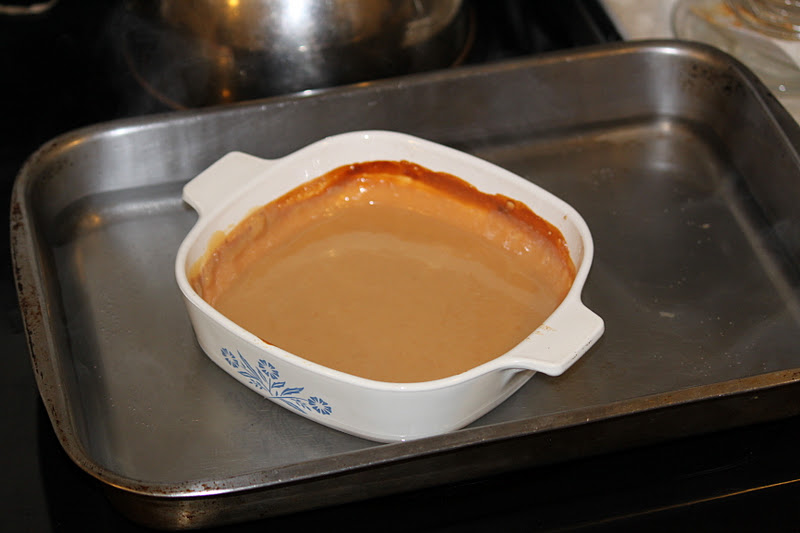
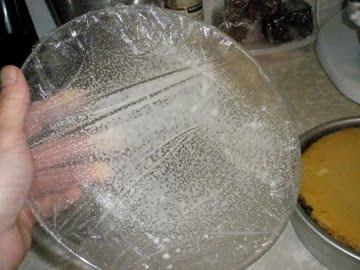
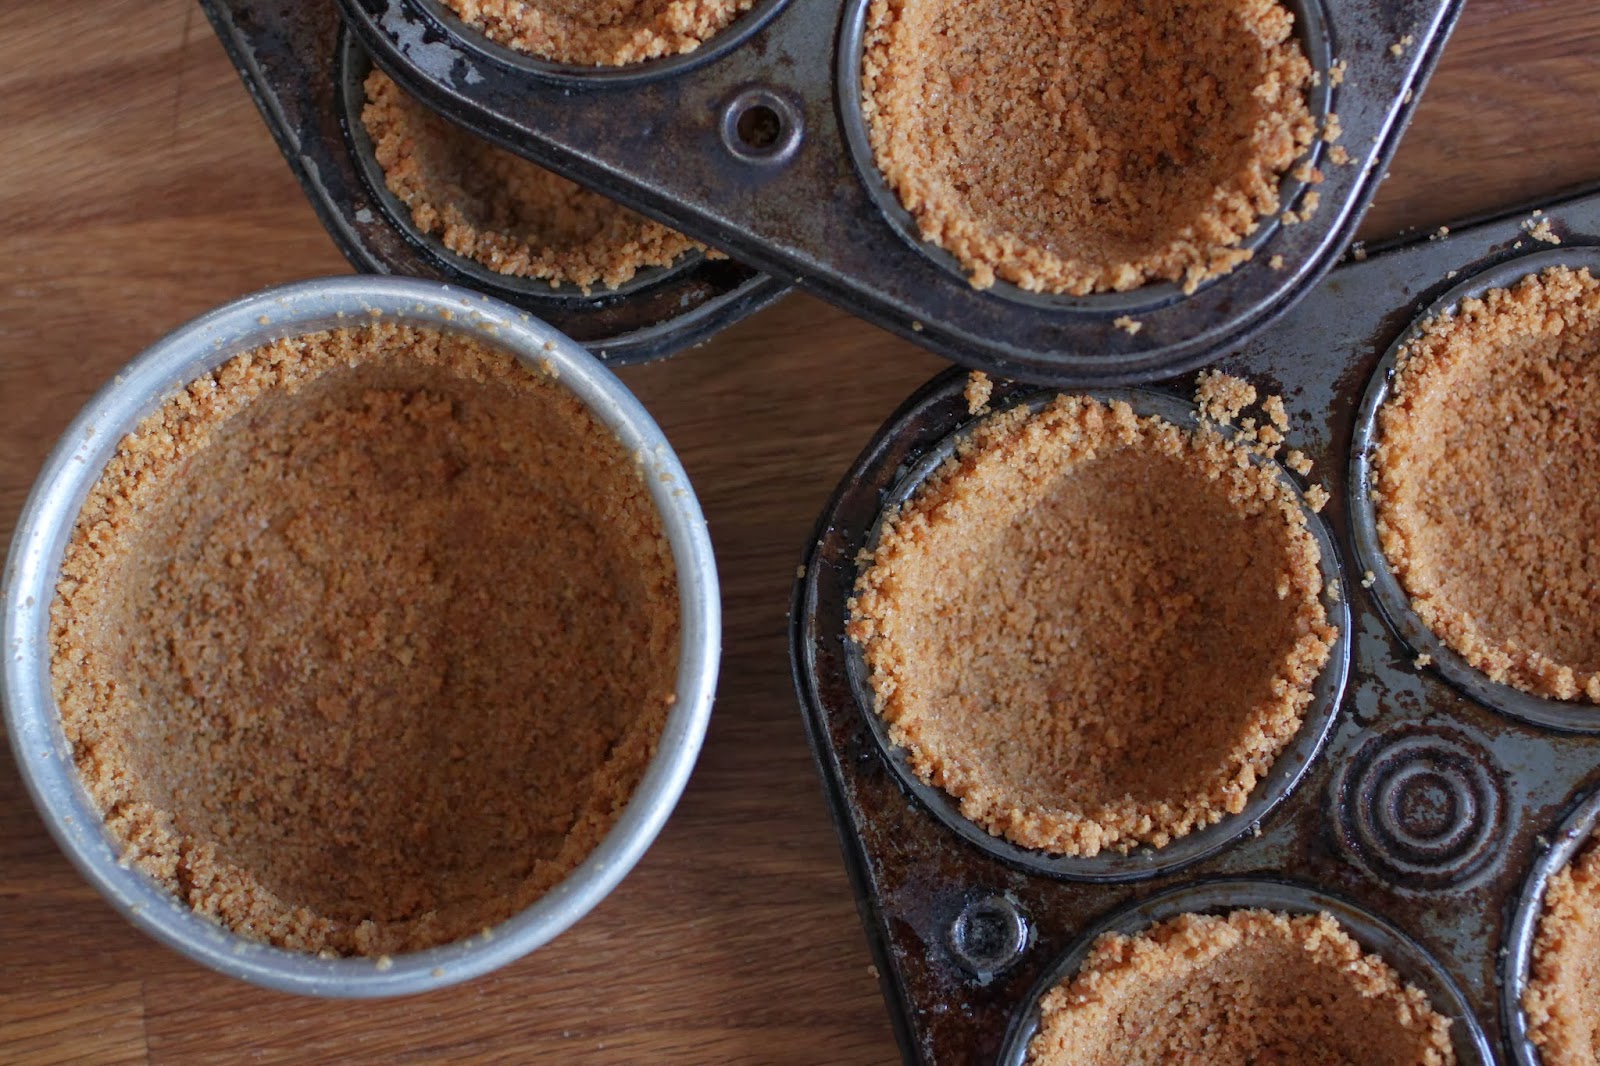
to make the cakes so that serving them at a potluck would be easy, i filled muffin tins with a crumb crust and baked little individual cakes.  the recipe called for using cookie crumbs to coat the bottom of cake after it is baked and turned out of the pan.  this idea sounded a little wacky to me, actually it sounded like a lot of work that just wasn’t necessary.  but this is the sort of thing you will encounter every time you bake a cheesecake in a water bath while using a springform pan or one of those specialty cheesecake pans with a removable bottom.  a very long time ago, i abandoned this method because water baths are a pain in the…well, you know what i mean.

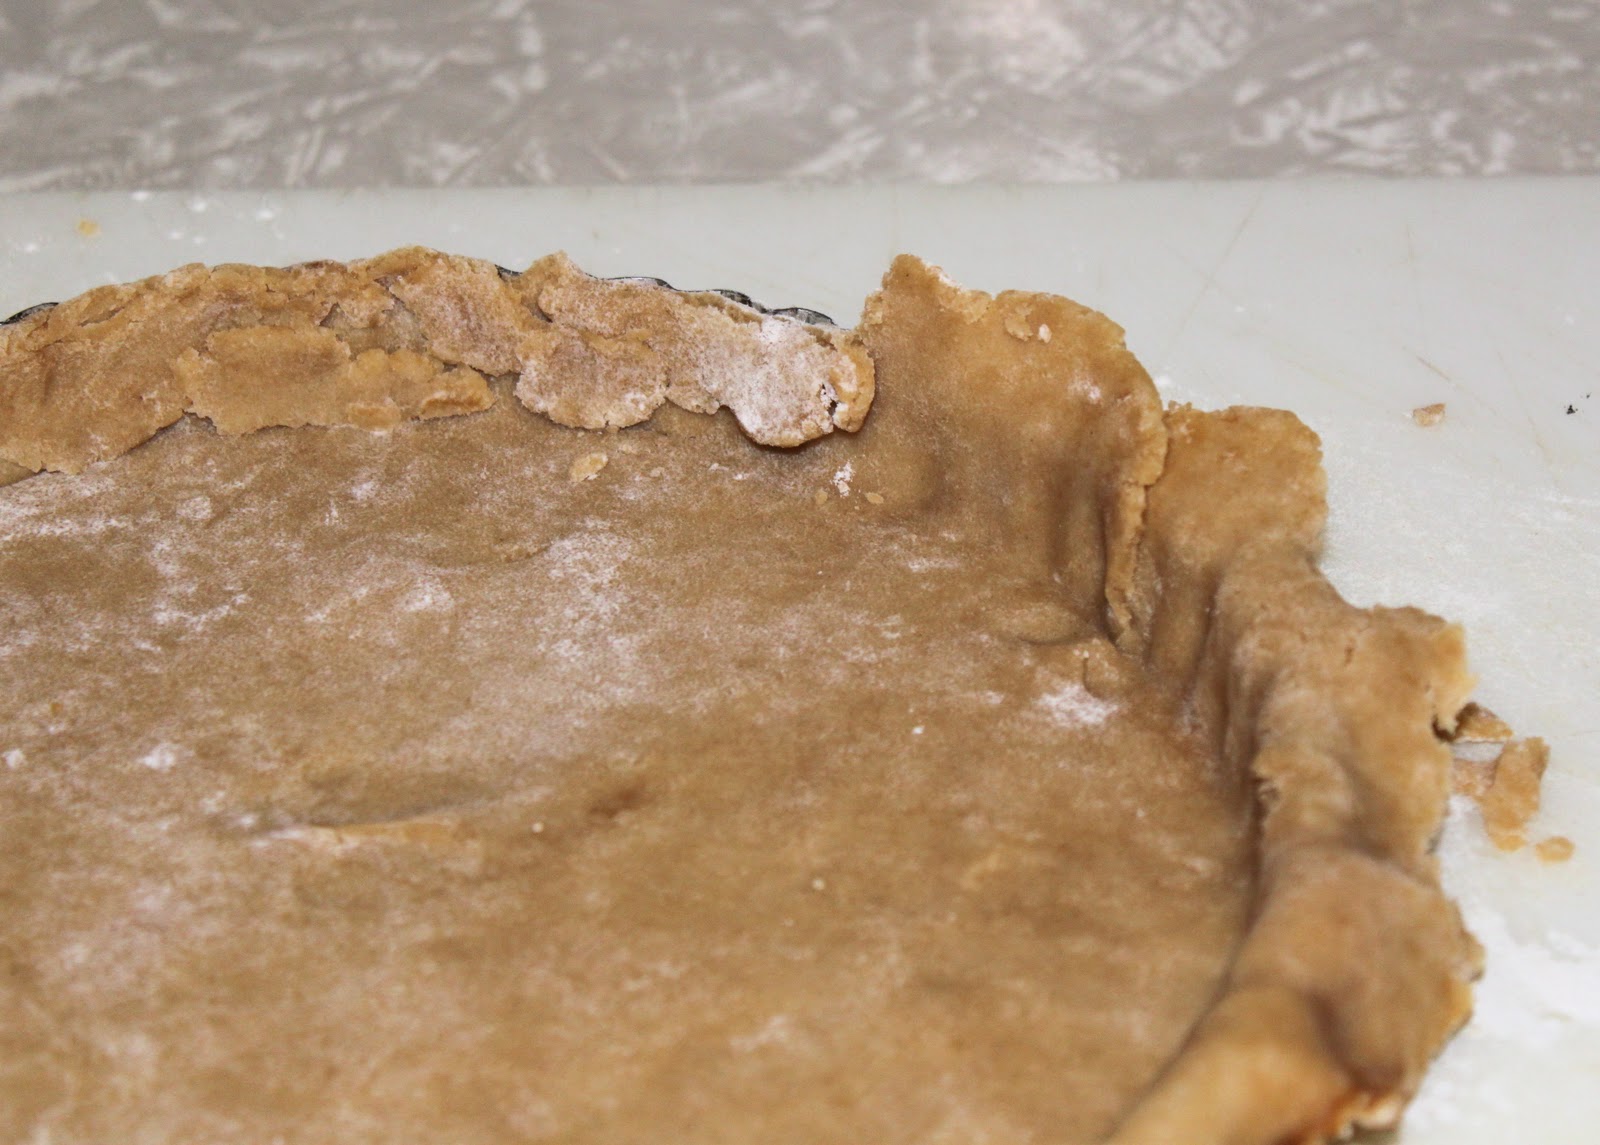
on more than one occasion, i have listed my fool proof hints for baking a perfect cheesecake and you can read some of them here or read the entire article here-i apologize in advance for the commercial.  but if you read them, they will help you reach cheesecake nirvana.  one of my rules for cheesecakes is to bypass the graham cracker crumbs.  they are an awful addition to a cake that you have just invested a bit money on-chocolate and cheesecake are not necessarily cheap.  my preference is to use my own cookie crumbs made from my biscotti recipe.  by mixing up a batch of my own cookies, i can flavor them how ever i see fit and i can tailor the crust to the cake.  biscotti crumbs also keep well in the closet.  if you are not inclined to mix up a batch, buy some that have not been dipped in chocolate so that they are not oily after you grind them up.

air is the enemy.  it is so easy to over mix a cheesecake batter and if you incorporate a lot of unneeded air, your cake will souffle and could crack.  it will also sink as it chills and it can kill the texture.  to prevent this, your food processor is your best friend.  it will do a much better job of incorporating the ingredients, especially the chocolate without aerating the custard.  no, i am not mistaken, cheesecake is a custard that is treated like a cake.  think about it for a moment; large quantities of cream cheese mixed with sugar, eggs, more dairy products and chocolate with a tiny bit of flour make it more like a baked custard.  if you approach the recipe with this attitude, and treat it like you would a baked custard, it is suddenly so much easier to understand and succeed.

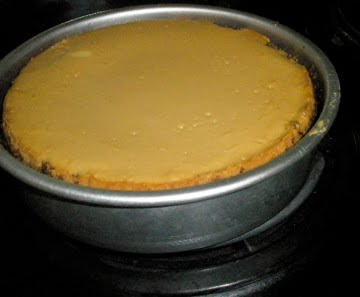
to fill the cups, i used a portion scoop, a #20 scoop which usually has a yellow handle.  the recipe made 18 muffin sized cakes and a 4″ cake that my husband thoroughly enjoyed.

for standard size muffins, they did not take much time in the oven, maybe 20 minutes.  i hate to say this but i didn’t really time them, i just watched them like a hawk and when i saw the tops getting a little “dry and blistery”  across the top and a little puffy, i pulled them out of the oven.  they cooled just as quickly and i popped them out of the pans.

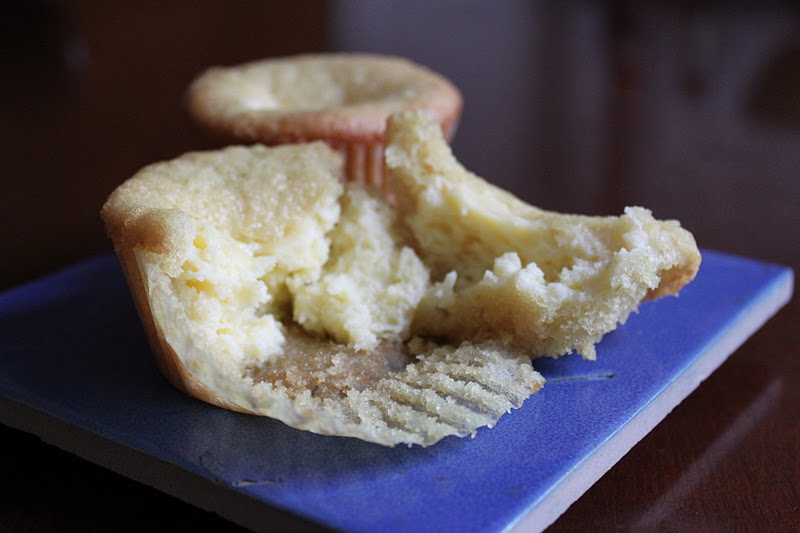
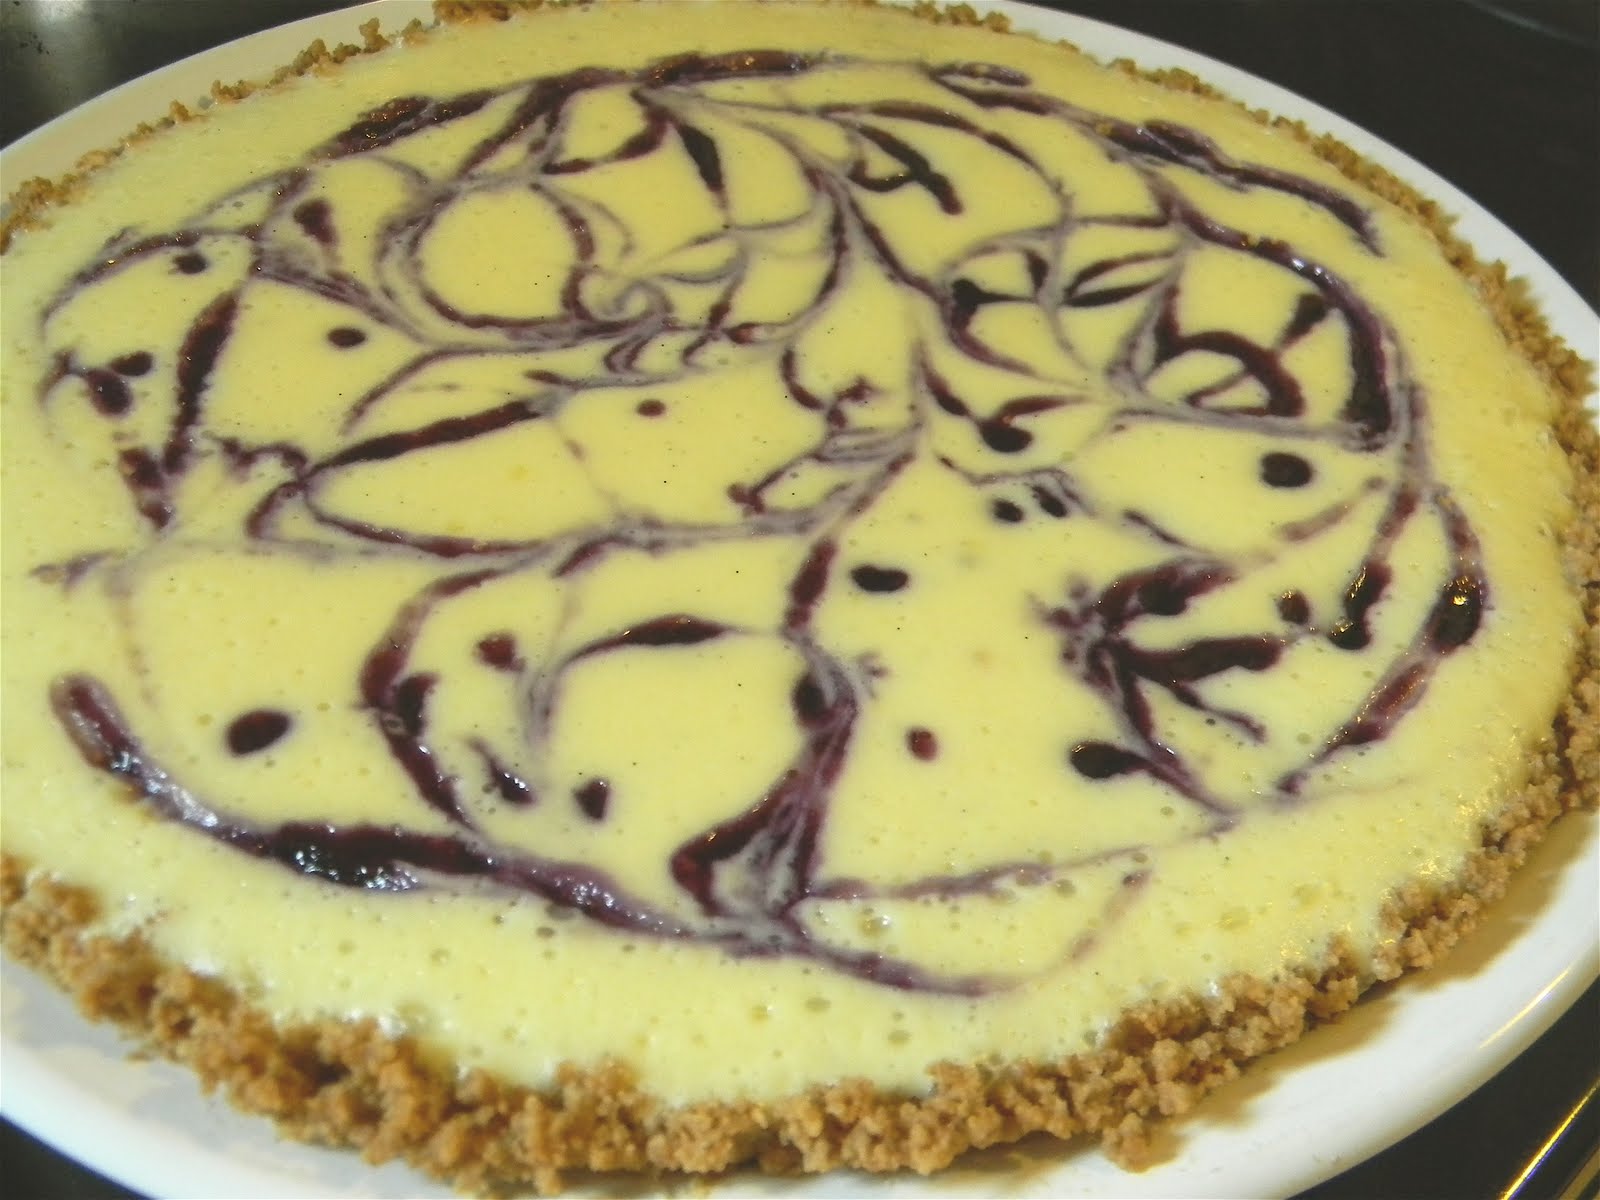
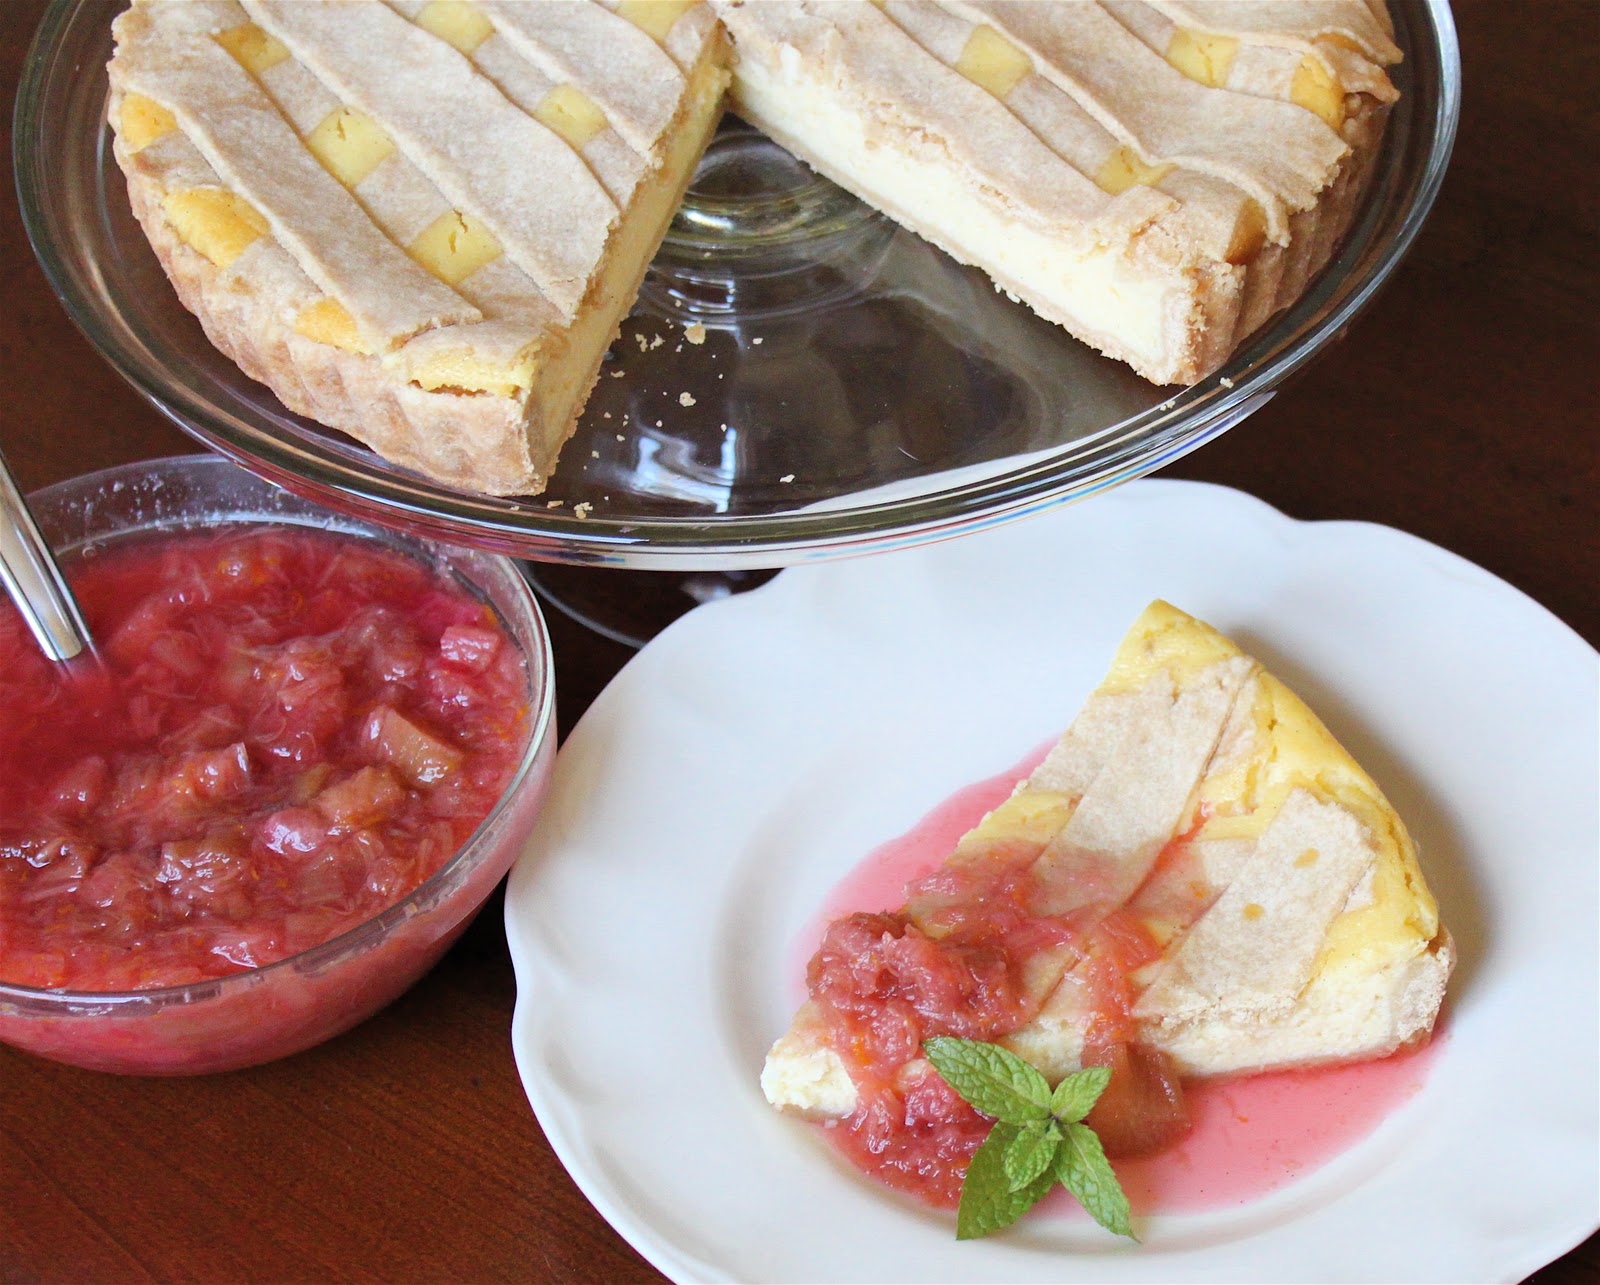
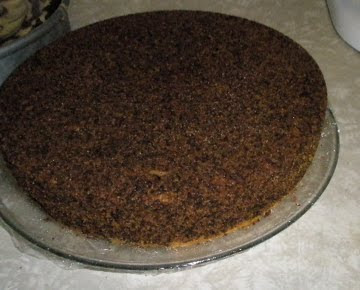
because a cheesecake by itself almost seems criminal, i cooked up a batch of cherry topping to go with it.  this is the little 4″ cake that my husband and i shared.  well, i tasted it, he ate the rest.  to be honest, i did not get any flavor from the mascarpone-the chocolate completely overpowered it.  if i were to use the recipe again, which is not likely, i would omit the mascarpone and use more sour cream; it would give more flavor and cost a lot less.  the texture of the cake was simply too dense for me, i like my cheesecake to be more on the creamy side.

with a generous helping of cherries and syrup, the cake was pretty good, but if i had my choice, it would not have had any chocolate in it!  however, my husband disagreed, whole heartedly-he enjoyed it with and without the cherry topping.

to see what the other bakers came up with, be sure to visit the tuesdays with dorie page.

raspberry swirl cheesecake

people ask me how i manage to stay thin when i bake so many sweets.  it’s easy, i make it a point to not bake the sweets i find impossible to pass up.  that folks, is why i very rarely make a cheesecake!  but every now and then, i bake one just so i can have a sliver or two.

when i had my bakery, i made lots of cheesecakes; we sold them wholesale and had several clients that would order them in quantity.  with as many as i was making, i perfected my technique and learned just what it took to make a cheesecake with out a crack in the middle.  my list of rules isn’t too long but if it is followed exactly, i can pretty much guarantee that your cheesecake will not crack.

1.  reach over the name brand cheese-the one named for that yankee city and grab the full fat store brand because believe it or not, it makes a better cream cheese.

2.  throw away the springform pan-yes, that’s right, throw it away.  grab a heavy duty cake pan.  the thicker the gauge, the better, because it will insulate the cake more as it bakes.  springform pans are made from a thin gauge metal and they allow the cake to over bake more easily.  the best part, a cake pan will not leak-another check in the plus column.

3.  never mind the water bath.  again, you heard that correctly.  it isn’t necessary and it can be dangerous.

4.  combine your ingredients(softened at room temp first) in a food processor-it will not incorporate air like a mixer will and air is your enemy.  air expands when it is heated and when you incorporate lots of it into a cheesecake, the cheesecake expands and souffles when it bakes.  and what do souffles do when they get to hot?  they collapse and crack and look awful.

5.  here is the tricky part-keep in mind that a cheesecake is not a cake, it is a custard that is treated like a cake.  when the cake is about 3/4 of the way into the baking process, take it out of the oven and run a knife all the way around the edge to release the cake from the pan.  only insert the knife about 1/2 to 3/4 of an inch down the side of the pan.  why do this?  if you don’t, the cake will not be able to shrink after baking-remember that first part, it’s a custard and not a cake.  custards need to shrink and contract a little after baking.  if you don’t release it from the pan, the only thing it can do is crack down the center-the sides are stuck to the pan and the middle is the only part that “gives”.

6.  lastly, cheesecakes baked in a cake pan need to chill for about 8 hours before you unmold them.  to do this, wrap a flat plate with plastic wrap and spray it with grease.  heat the bottom of the pan over the burner on your stove-it should be a little warm, not hot.  gently give it a side to side shake to loosen it.  place the plate on top and invert-the cake should slide out.  place your serving plate on the cake and invert it again.   

 perfect raspberry swirl cheesecake
1 (8″) cheesecake that serves about 10
crust
1 1/2 cups cookie crumbs-i like to use something lowfat like biscotti
3 tablespoons sugar
5 tablespoons unsalted butter, melted and a little on the hot side
cheesecake
1 pound cream cheese-full fat, soft and at room temp
2/3 cup sugar
2 tablespoons unbleached all purpose flour
1 teaspoon vanilla
1 teaspoon lemon zest
1/3 cup sour cream
4 eggs
1/4 cup seedless raspberry puree
preheat the oven to 300.  grease or butter the pan.  combine the cookie crumbs and the sugar.  add the butter and with your fingers, mix to combine.  dump the crust into the bottom of the pan and spread it 2/3 of the way up the sides and across the bottom so that it is an even thickness.  set aside.
to make the cheesecake.  place the cream cheese, sugar, flour, vanilla, lemon zest and sour cream into the bowl of a food processor.  pulse to combine.  add the eggs, one at a time and process to combine.  scrape the bowl after each egg is mixed in.  pulse it a few times to be sure it is evenly combined.  reserve 1 cup of the cheesecake batter and pour the rest into the prepared pan.  mix the raspberry puree into the reserved batter and drizzle this over the top of the cake.  gently swirl it using the handle of a spoon or your finger tip.  
to bake, place it in the center of the oven for for 45 minutes.  remove the cake from the oven and release it by running a knife around the edge as described above.  return the cake to the oven, turn off the heat and let it stand in the oven for 15 minutes.  to check it for doneness, the cake should be firm around the edges when you touch it gently but still seem a little jiggly in the middle.  it should not look liquid in the middle and if you touch it gently, it should not stick to your fingertip.  if you have followed the directions and your oven temp is accurate, the cake should be perfectly baked at this point.  allow the cake to cool on a rack for an hour and then chill it for at least 6-8 hours.  unmold the cake according to the instructions above.

lemon-lime cheesecake muffins

 citrus fruits are at their peak during the dreary months of winter.   many desserts made around this time of year are flavored with lemons, limes and oranges.  but there is something comforting about cheesecakes and pairing it with lemons and limes makes these little muffins an irresistible treat.

quick and easy to mix up, you will have many little treats in no time.  i doubled the recipe and you can too if you want more than a dozen.

 fresh from the oven.  the topping sinks during the baking and creates a pocket of rich citrusy cheesecake filling

 remove them from the pan after 10 minutes or they will be soggy on the bottom.

now brew a cup of tea or coffee and indulge!  this is my entry into the food52.com contest of the week and you can use my original recipe by viewing it here.  and if you do, send me a photo, i will post it here!

it’s a pie, it’s a cheesecake, no wait! it’s both, pie #51 of 52

so it was the week before thanksgiving and all through the house…wait, wrong story…well, it was the week before thanksgiving and i got completely derailed from my plan of posting this before the holiday.  it ultimately ended up being done in time for thanksgiving but sadly, not in time for anyone to see and attempt it.  hopefully, you will forgive me and then run out and buy the ingredients to try and bake one for the next big holiday celebration.

remember last year’s big thing-cherpumple cakes?  when i saw them posted all over the internet, i wanted to try one.  then i saw the recipe-frozen pies and cake mix…major disappointment! no time to play with that many scratch recipes this week.  instead i decided to bake my own version based on things my family enjoys.  there was one holiday season that after baking about a bejillion pies in the cafe, i refused to make any for our annual thanksgiving trash can turkey extravaganza.  needless to say, even though they enjoyed the pumpkin cheesecake i baked, they missed having a pie on the table.  this year i decided to combine two pies with a cheesecake and see what would happen.

word of warning, this is not a quick dessert.  to do it right, right meaning so that it doesn’t fall apart, it will take you more than a day to complete, possibly 2 to 3 evenings if you have limited time to work on it.  another important note, i never use springform pans or a water bath to bake cheesecakes!!!  this recipe uses heavy gauge cake pans and if you follow the directions, the cake will work just fine.  you may even want to consider baking your cheesecakes in a cake pan all the time; it is so much easier to use than a springform pan and a water bath!

first step was to make half of a pecan pie in a 6″ cake pan.  it was so cute!  after baking it, i chilled it completely so that i could take it out of the pan without destroying it.  by gently warming the bottom over very low heat on the stove, i was able to turn the cold pecan pie out in one piece.  since the crust stood a little taller than the filling and got a little dark, i carefully cut it off using a serrated knife.

the cheesecake filling was quickly assembled in the food processor.  the cookie crust was pressed into a 10″ cake pan.  i set the pecan pie in the center of the crust and carefully ladled in the cheesecake filling.  it was baked and then completely chilled overnight before i set out to make the turtle pie topping.

the cheesecake is removed from the pan using the same method as the pecan pie.  cover a flat platter with plastic wrap and lightly spray it with pan spray.  gently warm the bottom of the cake pan, place the prepared platter upside-down over the cheesecake and invert it.  the cheesecake should slowly slide out of the pan.  then you can place your serving plate onto the bottom of the cake and invert it again.  sounds tricky but it works!

the turtle pie topping is made from a single can of sweetened condensed milk that has been baked to caramelize it.  on the left, straight out of the can and on the right, after two hours of baking. 

neatly spread the hot caramel over the cheesecake portion of the cake.  spread it out evenly.  then back into the fridge to chill it so the chocolate topping can go on.  the chocolate topping is made very quickly in the microwave and is easily applied to the pie with a piping bag.

pecan pie in a pumpkin cheesecake
1 (10″) cheesecake serving about 14
pecan pie
6 tablespoons cold unsalted butter
1 cup all purpose flour
1/4 cup powdered sugar
1/4 teaspoon salt
1 egg yolk
1 tablespoon liquid-i used buttermilk
1/4 cup brown sugar
1/2 teaspoon vanilla
1/8 teaspoon cinnamon
2 tablespoons unsalted butter, melted
2 eggs
1/2 cup corn syrup
1 cup pecan pieces
preheat the oven to 300.  cut the cold butter into small cubes.  place the flour, powdered sugar and salt into the bowl of a food processor.  sprinkle the butter cubes over the top of the dry ingredients and pulse together until it resembles a coarse meal.  add the egg yolk and the liquid and pulse until it forms a soft dough.  using your fingers, carefully press the dough into a greased 6″ cake pan.  line the crust with paper and fill with weights and bake until it is no longer glossy on the bottom and it barely shows any color, about 30 minutes.  
while the shell partially bakes, make the filling by mixing the brown sugar, vanilla and cinnamon in a bowl.  whisk in the butter and mix until smooth.  add the eggs, one at a time and mix each one in completely.  finally, whisk in the corn syrup.  when the crust is ready, remove from the oven, turn the oven temperature up to 350 and carefully remove the weights and the paper from the pan.  place the pecans in the crust and pour in the custard filling.  return the pan to the oven and bake it until it is set all the way across, about 40 minutes.  allow the pie to cool and then chill it until it is completely cold and unmold the pie as described above.
pumpkin cheesecake
2 cups cookie crumbs
4 tablespoons sugar
6 tablespoons unsalted butter, melted
1 pound cream cheese, softened
2/3 cup pumpkin puree
1/2 cup dark brown sugar
2 tablespoons all purpose flour
1 1/2 teaspoon pumpkin pie spice
4 eggs
1/3 cup sour cream
preheat the oven to 300.  make the crust by combining the cookie crumbs, sugar and butter.  carefully press the mixture into a greased 10″ cake pan.  to mix the filling, place the cream cheese, pumpkin, brown sugar, flour and spice into the bowl of a food processor.  pulse to combine and be sure to scrape the bowl at least once.  with the machine running, add the eggs 1 at a time.  scrape the bowl again and add the sour cream.  pulse it, scrape it and pulse it again.  
to assemble, place the cold pecan pie in the center of the cheesecake pan.  carefully spoon the filling around it without getting any on top of the pecan pie.  bake the cake for 45 minutes then carefully run a knife around the edge of the cake to release it from the pan and prevent cracking.  turn the oven off and leave the cake in the oven with the door just slightly open for 15 minutes.  remove from the oven, the cheesecake should be slightly puffed and feel almost firm to the touch.  let it cool and then chill it overnight before proceeding with the turtle pie topping.
turtle pie topping
1 (14) ounce can sweetened condensed milk
4 ounces bittersweet chocolate
1/4 cup half and half
heat the oven to 350.  pour the sweetened condensed milk into a small covered casserole dish.  place the dish in a pan of water so that the water comes up to the same height as the milk.  carefully place in the oven and bake.  every 30 minutes, remove the pan from the oven and whisk the milk completely to ensure even caramelization.  this will take about 2 hours and during that last 30 minutes, you may have to do this a little more often to prevent scorching.  using the photos above as a guide, top the cheesecake portion (after you have taken the cake out of the pan!!!) with the caramel.  chill completely before topping it with the chocolate mixture.

break up the chocolate and place in a microwave safe bowl.  add the half and half and using 15 second intervals, heat on the lowest setting until the chocolate melts.  stir it until smooth.  place in a piping bag with a small (#4 to #6) straight tip and make the lattice top by using a quick back and forth motion.  turn the cake a 1/4 turn and repeat the action to get a chocolate lattice design.  allow the cake to chill for about 30 minutes to set the chocolate.

and now that my food coma is lifting, bake one and send me a photo-i will post it here!  bakinbabe116@aol.com

blueberry cheesecake pie, #26 of 52!

26 of 52 pies completed, 26 more to go.  that puts me at the halfway point.  from here, the number of pies left to bake will be smaller than the number of pies already baked.  so, the question is, will i make it to the goal?  i’m keeping my fingers crossed and hoping for the best.

this last “catch-up” pie was baked while my mother was still visiting-she came for the graduation and spent nearly 2 weeks with us.  it was fun, i never realize how much i miss hanging out with my mom until she arrives for a visit.  we spend lots of time wandering through antique shops and thrift stores and chattering about everything.  when it was time to bake this last pie, we chose blueberries as a theme and took mom (and our daughter and her boyfriend) to the demo garden(where we work as master gardeners) to pick some fresh blueberries.  we only ended up with about 2 cups of rather tart berries so making a pie with them was out of the question.  but i remembered my mothers love of cheesecake and decided to improvise.

a thinner more liquid cheesecake custard is garnished with a swirl of blueberry coulis before baking.   be sure to use a small spoon and pour in the coulis slowly (to prevent it from sinking) into the pie in random lines.  use a bamboo skewer to swirl the coulis around the top of the pie.  one hint, skip the fancy name brand cream cheese (you know the one named after the city of brotherly love) because it makes a custard that is runny like water!

after baking in a slow(300 degrees) oven, the pie is thoroughly chilled before serving.  use a knife that has been dipped in hot water to get clean cuts and be sure to wipe it off between slices.  the blueberry coulis can easily be doubled and the remaining coulis can be used as a sauce for the plate.

blueberry cheesecake pie

1 (9″) pie that serves 8-10
coulis
don’t forget, if you want extra sauce, double the coulis recipe but use only half of it to marbleize the top of the pie.
3/4 cup blueberries
1/3 cup sugar
crush the blueberries breaking all of them.  place them into a small saucepot with the sugar and over low heat, bring the mixture to a boil.  continue to boil for 5-10 minutes.  strain the sauce into a heat proof bowl and chill until no longer warm but do not let it get too cold-it will become gelatinous and hard to work with.
crust
purchase or make a cookie crumb crust in a 9″ pie pan using the recipe in pie #16.  place the pie pan on a  sturdy baking sheet that will not warp in the oven.
cheesecake custard
12 ounces cream cheese-not the fat free stuff!
3/4 cup sugar
2 tablespoons flour
1/4 of a vanilla bean
zest of 1 lemon
3 eggs
1/2 cup sour cream
preheat the oven to 300.  this is mixed quickest in a food processor-fast and smooth.  place the cheese, sugar, flour, vanilla bean and lemon zest in the bowl of the processor and pulse to combine.  With the machine running, add the eggs, one at a time, and scrape the bowl thoroughly.  add the sour cream and pulse to mix, scrape the bowl and pulse a few times more.  pour the filling into the pie dish and bake until it is almost firm in the middle, about 40 minutes.  turn the oven off, prop the door open slightly and leave the pie in there for another 15 minutes.  remove the pie from the oven and chill completely before serving, about 4 hours.
and once again, if you bake one, send me a photo and i will post it here.  bakinbabe116@aol.com

warming up with #9 of 52 pies in 52 weeks

this winter has been colder and snowier than usual.  around here, just about everyone has had their fill of snow and the hassles that come along with it.  today, the temperature broke 50 and it was sunny.  it was a taste of what lies ahead and i can’t wait.   the chance to weed the garden and sow seeds.  to watch sleeping plants slowly reappear.  to see the bees flying around in search of blooms.  for the first harvest of fresh greens.  but for now, it is all a lovely vision of what isheaded our way and that means i must content myself in the kitchen.  in honor of the coming season, i have chosen two things that make me think of spring.  easter pie is a popular italian pastry and depending on which version you make, it can either be a ricotta cheese cake studded with candied citrus fruit or a savory pie filled with meats and cheeses.  since spring generally means a new growth of rhubarb in the garden, i chose the cheesecake.  to incorporate the rhubarb, i made a compote to serve over the slice.

lurking in my refrigerator are many different flours and for the crust, i chose semolina-after all, this is inspired by italian cheesecakes and the sandy texture of semolina seemed like a good choice.  the dough is a little sweet due to a generous addition of brown sugar which also helps give the dough some extra color.

many italian style cheesecakes call for candied citron and orange peels.  since they are hard to come by once fruitcake season over, i decided to use the fresh grated zest of an orange and a lemon along with some vanilla bean seeds.

the filling, which was mixed up quickly by hand, was poured into the prebaked tart shell and then topped off with a non-woven lattice top.  the rhubarb compote was served chilled and added to each slice as it was served.  surprisingly enough, everyone has a generous slice with the compote when i serve it-even the kids!  the compote tastes a little like cranberry sauce-the kind made with fresh berries but that could also be because the flavorings added to it can always be found in the cranberries i cook for thanksgiving dinner each year.

lattice topped ricotta cheesecake with rhubarb compote  
makes 1 (9″) serving 8-10  
semolina crust
makes enough dough for two 9″ tart shells or one tart shell with a lattice top
1 cup all purpose flour
1 cup semolina flour
1/4 cup brown sugar
1/2 teaspoon salt
2/3 cup shortening (i used spectrum brand mechanically pressed organic palm oil-non hydrogenated shortening)
4-5 tablespoons cold water
place the flours in a bowl with the brown sugar and the salt.  using your fingers, rub the mixture together to completely incorporate the brown sugar.  using a pastry blender, two forks or your fingers, cut in the shortening until it is in small peas sized pieces.  add the water, first the 4 tablespoons, and mix until it comes together and forms a soft dough.  add the extra tablespoon of water slowly and only if needed.  form the dough into a thick disk, wrap it in plastic and chill for several hours.  can be made 2-3 days ahead.
to make the tart shell, allow the dough to soften a bit at room temperature.  it should be soft enough that it yields to gentle pressure.  grease a 9″ tart pan with a removable bottom and place it on a sturdy baking sheet.  preheat the oven to 325.  take a piece of dough that is slightly less than half of the disk and form it into a round patty.  on a floured surface, roll out the dough so that it is larger than the pan; it will need about 2 inches of surplus around the entire pan.  carefully place the dough in the pan and referring to the photo above, fold the extra dough in to make the sides a double thickness.  line the tart shell with a piece of parchment or coffee filters and fill it with weights.  prebake the crust until it is no longer shiny and translucent on the bottom but it should not have gained much color, about 20 minutes.  for more hints on prebaking pie shells, refer to this previous post.  while the crust bakes, mix the filling.  pour the filling into the prebaked pie shell and top it with lattice strips if desired.  bake the tart on the sheet pan at 325 for about 325 until it is firm and the top crust has baked, about 50 minutes.  chill the tart before serving.  cut into edges and serve with a dollop of the rhubarb compote.
ricotta cheesecake filling
3/4 cup sugar
2 tablespoons all purpose flour
1 teaspoon finely grated zest from 1 orange and 1 lemon-2 teaspoons total
seeds from half of a vanilla bean, reserve the pod for the compote
1 (15oz) container of part skim ricotta (i chose this because it was the only one without additives)
2 eggs
2 egg yolks
2/3 cup heavy cream
in a bowl, rub the sugar with the flour, zests and vanilla beans until it is all combined and the vanilla beans are dispersed evenly.  using a spatula or wooden spoon, mix in the ricotta and blend it well.  whisk in the eggs and the yolks, scrape the bowl well and carefully whisk in the cream.  it is a custard filling and is best not to add too much volume so only whisk to combine.  
rhubarb compote
makes about 2 cups 
2 cups rhubarb, sliced 1/2″ thick (i used frozen rhubarb which is sold with the frozen fruit in the supermarket where i shop)  if using frozen, allow it to thaw and include the juices that collect.
1/2 cup sugar
1/2 cup water
1 teaspoon freshly grated orange zest
combine all of the ingredients in a small sauce pan and slowly simmer until the rhubarb begins to break up and it turns a light rosy shade.  remove the vanilla pod and the star anise pod and chill completely before serving.

flood waters recede and baker is left with a mountain of cheesecakes

last sunday was a day like no other. while i have lived through more than a few really rainy days, never have i experienced rain like this. i was awakened by the sound of my husbands voice telling me to get out of bed now! he was already awake because of the awful thunderstorm we had earlier and according to the weather report, the straight line winds headed our way were too dangerous for me to be lollygagging in bed any longer. that scraggly old locust tree just might fall this time and if it did, the chances of it landing on the roof above the bedroom were pretty good. now in my own defense, i was tired; we had spent about 4 hours on saturday bailing out the basement from the first 6+ inches of rain that fell. sunday wasn’t going to be any better with the forecast of at least another 6+ inches of rain to come. and come it did. the official measurement at the airport was a bit lower than what we had in our part of town. we had somewhere between 16 and 18 inches of rain in that 48 hour period.

we spent much of the early morning glued to the tv weather report. we sat there sipping coffee and staring at the images on the screen and worrying about our own house and the damage that was being done by the water seeping in. as we sat, darry worried about getting the water out and i could not convince him to wait for it to stop falling to bail it out. what was the point of doing all the work if it was only going fill right back up? no matter what i said, i lost the battle and darry wandered down to the basement, push broom in hand, and he began his half day of sweeping the water out through the carport doors. not me, i stayed upstairs and reveled in the fact that we still had electricity, cable tv and internet service. so i decided to keep busy and work on a few recipes. cheesecake recipes to be specific and the result was a trio of cheesecakes worthy of a golden girls reunion show. dorothy, blanche, rose and sofia would be so proud…
perfect cheesecakes are easy to bake. forget about using the name brand cream cheese, you know the one named for some yankee locale. it may be creamy but it liquifies when you mix it up with other things and it just isn’t a good texture. use a food processor to mix the batter because it will not incorporate air and excess air is what makes a cheesecake that soufflees and cracks. and last but not least-throw away your springform pan and the stupid water bath!!! those pans leak, they make a mess in the oven and they are a thin gauge which makes it easy to overbake the cake. and that water bath-just plain crazy as well as unnecessary. what kind of pan should you use? a heavy gauge aluminum cake pan, trust me on this. just bake the cake the day before you need it, let it chill over night and then follow these easy steps to unmold the cake.

take a flat tray or plate and wrap it with plastic and grease it.
place the pan on the burner of the stove for a minute on low heat. the idea is to gently warm the cake bottom to loosen it. then give it a side to side shake to make sure the cake has released from the pan.
place the greased tray over the top of the cake with the grease touching the top of the cake.
invert the pan and the cake should just slide out. sometimes you may need to shake it a bit but it will slide out easily.
and here it is, out of the pan and upside down. put your serving tray over it and invert it again. voila, cheesecake!
(sorry but the photo of that last step looked a little like one that a tipsy cake would have taken and i just couldn’t use it
what kind of cakes did i make? these are some that i feature at the cafe from time to time. this one is banana split. banana cheesecake with a chocolate cookie crust and a chocolate swirl with strawberry sauce. you could easily add more fruit; bananas, pineapple or strawberry slices.
key lime in a gingerbread crust with a white chocolate whipped cream topping.
last up is turtle. caramel cheesecake in a mixed nut cookie crust with chocolate topping and pecans. for this one, you can make your own caramel sauce and use some in the cake and some for garnish or you could buy some cajeta.
the storms have passed and we will recover. we are fortunate when compared to so many others, including several of my loveless coworkers. if you want to help, check out the community foundation to make donations or hands on nashville if you want to volunteer.
one other bit of information:

National Telethon to Aid Nashville Flood Victims

Music City Keep on Playin A Benefit for Flood Relief

May 16 on Great American Country Television

NASHVILLE, TENN. (May 6, 2010) – The first national telethon and concert event to raise money to aid victims of last weekend’s flooding disaster in middle Tennessee has been announced by Great American Country Television (gactv.com), the Nashville Convention & Visitors Bureau (visitmusiccity.com) and Gaylord Entertainment (gaylordentertainment.com). Music City Keep on Playin A Benefit for Flood Relief will air commercial-free on GAC, Sunday, May 16, 8:00 – 10:00 p.m. Eastern.

so if you are looking for ways to donate, there are several options. thanks, we appreciate the help!