It has been a while since I have had the time to join in with the TWD members. There are so many reasons that I haven’t participated, from the fact that I am not happy with my tiny oven (so tiny that I can only bake 2 quarter sized sheet pans at a time and they do not bake evenly), to the complete lack of light in my house (natural light that flows in, not actual lights), so let’s just say that I haven’t really felt like joining in on the fun. After fighting with it all for 2 years, I have figured a few things out and I finally found my spot in the house for photos; of course, this could all change if I make the changes here that I am hoping to make.
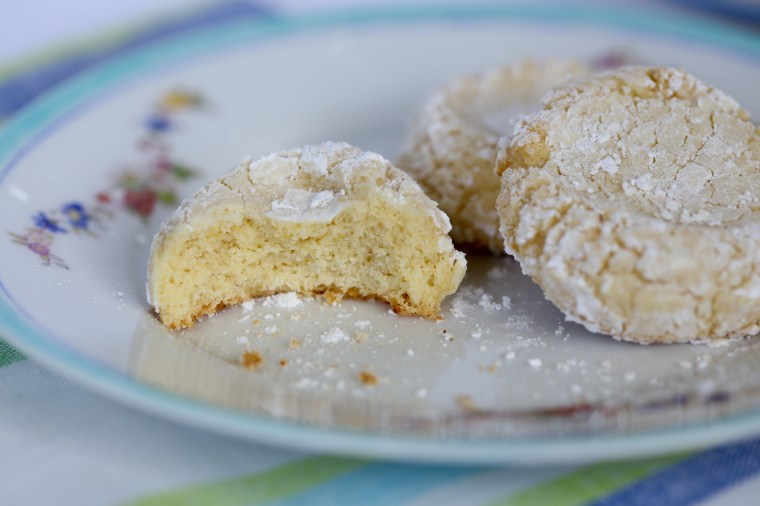
So how do they taste? The flavor is slightly floral from the use of vanilla and orange blossom extract but while the lemon zest still stands out, it is a bit more subtle than I expected. Semolina is the key to the sandy texture but not quite as obvious flavor wise, just be sure to use the right one! The almond flour is used raw rather than toasted and while it added a bit of texture and a slightly nutty flavor, it really wasn’t very obvious so I might try toasting it a bit first next time, and there will be a next time! Overall, this would not be my first choice but I was surprised and I can see making these again.
 But enough about me, let’s talk about these cookies! What I love most about the book Dorie’s Cookies is the size of the recipes. It may sound like an odd thing to say but large recipes are really inconvenient in my kitchen. My oven is so small that I cannot put anything larger than 15 inches in it; 15 inches wide or 15 inches deep. This means that most standard sized cookie sheets will not fit and that leaves me with few options. What does fit is quarter sized sheet pans and then, only 2 at a time with about a dozen cookies on each pan. If I make a large number of cookies, I can spend an hour or more just baking them. This book eliminates that problem since most of the recipes are so small that I find I can usually get them baked in only two batches.
There is another advantage to small recipes, and not just the eating them all part; ingredients. It is a relatively small investment in the ingredients if the recipe is small and the ingredients are expensive. A huge plus in the “make these” column for me. It can also leave room for experimentation, something I think this particular recipe would be perfect for.
First, let’s talk about semolina. This flour is usually found in pasta and bread recipes and there are different types available. The one I keep in my freezer is a finely ground semola, imported from Italy and perfect for making semolina bread. It is not perfect for these cookies, it is so fine that it made the cookies a little denser than I would have liked. Purchase the semolina found in the imported food section or in a Middle Eastern market; it is slightly coarser and perfect for this recipe because it is a large part of the sandy texture that the cookies have.
Next, use a scoop to portion the dough; it will save you a bunch of time. The scoop I used was a #50 and it made 48 cookies which were slightly smaller than the recipe called for but I wanted them small. A #40 scoop would probably be the perfect size to reach the yield listed in the recipe.
Lastly, this recipe is one I like to call a blank slate or a jumping point. It is wonderful as is but easy to change. Not a lemon fan, use orange zest. Don’t have orange flower water, use vanilla or even rosewater. Want a different flavor altogether, sub hazelnut meal for the almond meal. The combinations go on and on. The point here, do not be afraid to make these with the ingredients that the recipe calls for but if you need to substitute ingredients, it will work-with the exception of the semolina; that goes a long way towards the final texture of the cookie and should not be changed.
 The bottom line, buy the book and make the cookies, seriously, you won’t regret it. And if you are wondering, we never publish the recipes out of respect for the author, so you will need to buy or borrow the book to get it!

 How time flies…We have been so busy here; the garden takes so much of our attention and leaves little time for anything else. The space the garden occupies is the footprint of the garden that was maintained by the man who once lived here but has since passed away. Funny coincidence, he too was a member of the master gardeners and more than one of my fellow members remembers him and stranger still, several of them would come here to help him in the garden. It has been interesting to learn about him and the methods he used here.
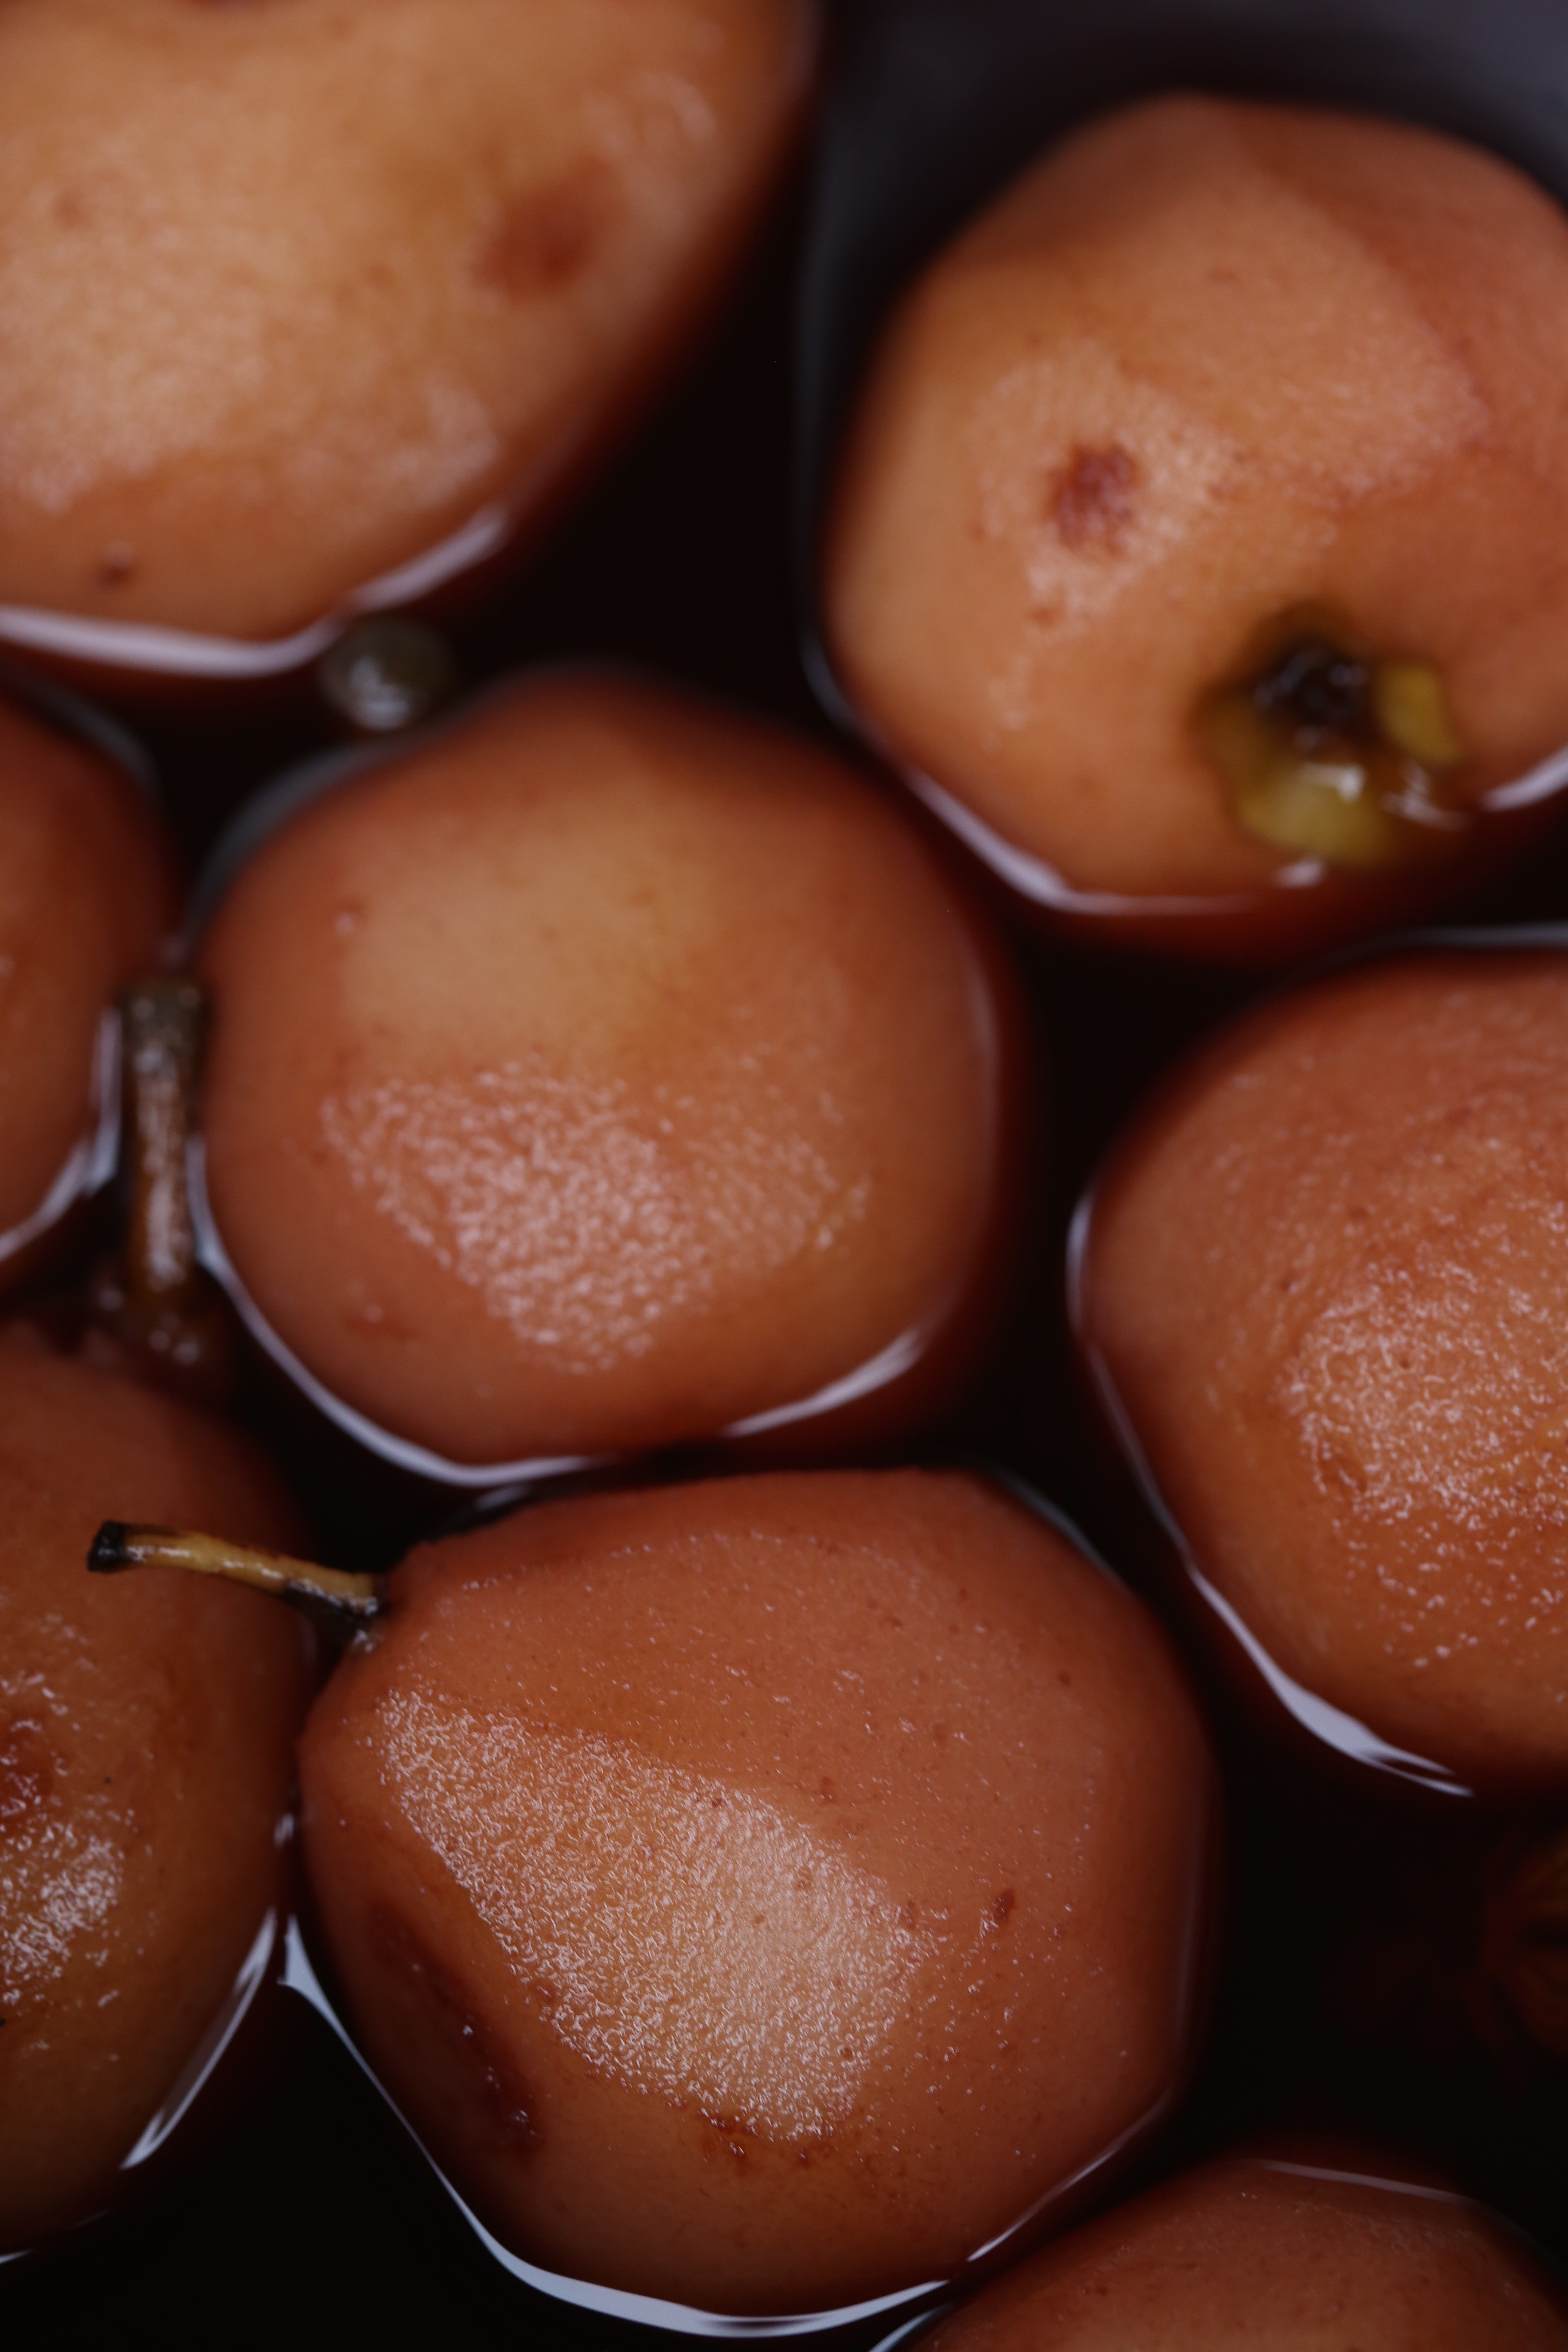
 The recipe calls for golden syrup, a traditional British and Australian favorite but I used wildflower honey; it tasted awesome in the cookies. Oatmeal and coconut are the other predominant flavors but the surprise is that the cookies contain no eggs!
 Crispy and chewy at the same time. These went fast at the potluck and I received many compliments. The verdict; must make these again! May even pick up some golden syrup just to see if it makes a difference.
 To see how the other bakers did, check out
  Isn’t it wonderful when several of your favorite things come together? Everyone who visits this blog knows I love to garden and that baking is what I do professionally. But I am betting that not many of you know that I have a thing for hibiscus plants, specifically, Hibiscus sabdariffa. More commonly known as Roselle, this is the variety of hibiscus used to make tea. Just look at that bloom; how could you not love it?
 While the flower is pretty, and edible, it is a day flower which means it opens for a day and then dies. As soon as the bloom withers, the plant begins producing seeds in the calyx. To make tea, you must gather them before the pod swells with immature seeds. It takes quite a few to make a pot of tea! Because of this, I generally plant 3 or 4 of them around the garden and yard. They can get quite large if the conditions are right; lots of direct sun, plenty of moisture but not soggy.
 If you are looking at this plant and are thinking that it looks like okra, you are right! Hibiscus is also related to cotton and if you spend time in garden centers, you will find that there are lots of perennial and annual varieties of hibiscus. Unfortunately, this variety will not survive a freeze which means you must overwinter it indoors or start over each spring which is what I do. The seeds need heat and will not germinate until the soil is warm. Start them indoors or wait until about May to plant seeds outdoors.
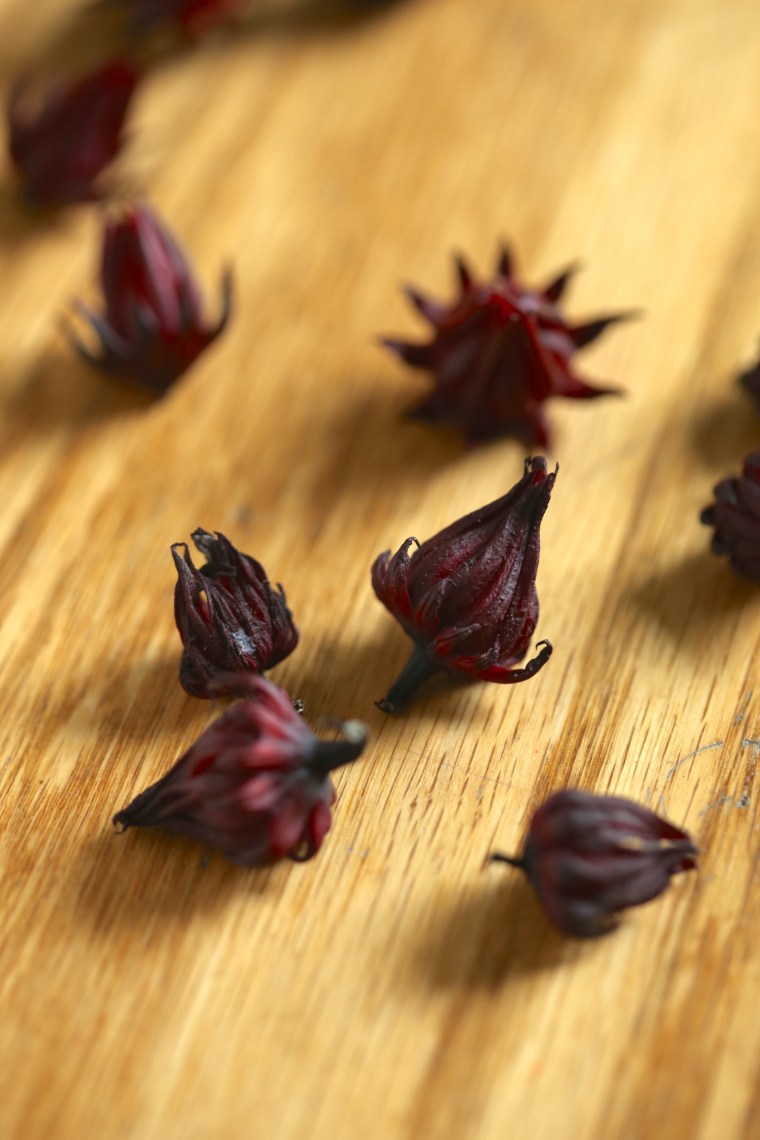 They will begin blooming in late summer and that is when you will have calyxes to collect. Spread them out and dry them completely, I do it in the oven with just the light on. Then when dry, you can store them in a glass jar.
 So what does this plant have to do with baking? This week’s recipe from Baking Chez Moi calls for hibiscus tea! This recipe mixed up quickly and easily and when it was all said and done, I sent these, along with the Valentine’s Share-A-Heart cookies to my girls for Valentine’s Day. They loved them!
 Devon called hers a little pink pizza and looking at that shot, I can see why. However, they tasted like no pizza I have ever eaten! Crispy and flaky and full of vanilla(I was out of rose water) and with just a hint of tangy, floral notes from the hibiscus tea.
 The recipe does not call for much tea so I only used a few calyxes-whizzed them in the spice grinder. My thought is that next time, and there will be a next time, I will use double the amount. After all, summer is coming and I will have more plants in the garden!
 Join us sometime! We love the company. Pick up a copy of Baking Chez Moi and bake along with us. To see how the rest of the bakers did, visit
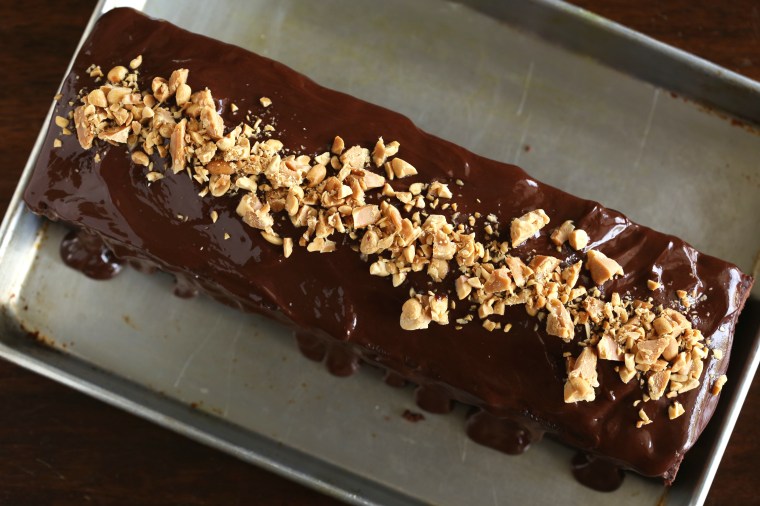 If only I knew what a Sunday in Paris was like; someday… Actually, in this case, it is a reference to a pastry shop in Paris and that is the name of it; Sunday in Paris. This cake is a specialty of theirs and a favorite of Dorie Greenspan’s which is why she developed the recipe for her book, Baking Chez Moi. The Tuesdays with Dorie bakers chose this cake for February and it was a great cake for Valentine’s day, or any day that chocolate and peanut butter are appropriate-otherwise known as everyday in my book!
 Peanut butter is not that popular in Paris where Nutella apparently reigns but here in Tennessee, it flies and fast. We took this cake to a potluck dinner and I came home with crumbs on a dirty tray. The dark, rich cake reminded me of
  This is a recipe I would make again and if you have the book, do not hesitate to try it! To see what the other bakers came up with this week, visit
  It is so nice to be back to baking with the Tuesdays with Dorie gang! Especially when it means baking cookies, lots of cookies! If you recall my post from earlier this month, Dorie Greenspan recently began a
  Do not be intimidated by the call for rolling out the cookies with parchment paper. Over the years, I have rolled out thousands and thousands of cookies and one issue I have always encountered, the added flour from rolling out the cookies can change the consistency of the dough. If you have read any of my posts on rolling cookies, I have always instructed that you brush off as much of the flour as possible to prevent the dough from changing. Dorie has a brilliant suggestion in her recipe; place the dough between two sheets of parchment paper and skip the flour! For small quantities, this is absolutely the way to go and it is definitely a technique I will use again. The parchment paper takes the place of the flour and the consistency of the dough remains the same from start to finish. Keep in mind, repeatedly rolling out the dough will toughen it as the gluten becomes developed but for small quantities like this, you won’t have to worry about that happening.
 If you enjoyed this post, think about baking along with us. Pick up a copy of Dorie’s Cookies and bake cookies to share! Sweeten the world one cookie recipe at a time! To see what the rest of the gang did with their cookies,
 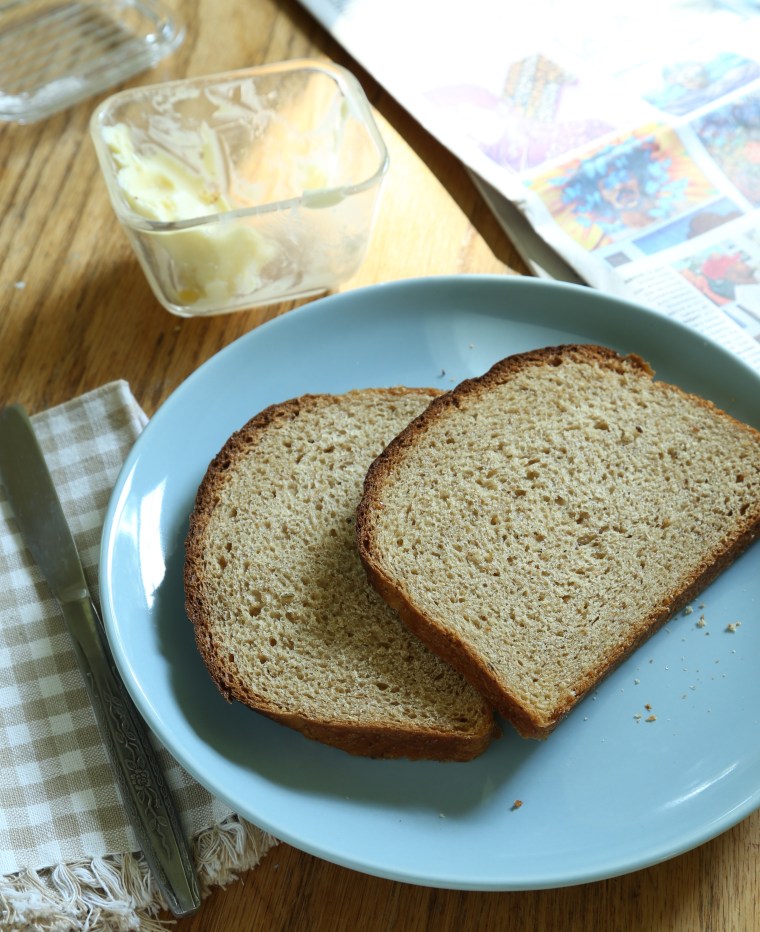 It has been quite a while since I have participated in the Tuesdays with Dorie baking. What can I say, life gets in the way? Partly, the other angle; having a pile of sweets in the house for just two of us means we eat way more than we should! When I saw the choices included a bread recipe this month, I decided to get in gear and give it a go.
 Rather than bake it in the round 9 inch pans the recipe calls for, I used 6 inch square pans. They made the most perfect cube shaped loaves and the slices were just large enough that two thin slices of toast were more than filling.
 My rye flour was stone ground and it added a nice texture to the crumb. Little flecks of rye and seeds, this one is a keeper. Since the recipe made two loaves, I froze one for later.
 Late last month, I made a loaf of the buttermilk bread from Baking with Julia. It was the challenge for the week chosen by the Tuesdays with Dorie bakers and despite baking it on time, I never posted my photos.
 One of my favorite types of bread is Japanese Hokkaido Milk Bread. The tall loaves are actually made of smaller loaves placed side by side in the pan. Once baked, you can separate them into smaller pieces. Because there is just the two of us here, I chose to make my loaf into three smaller loaves.
 After the loaf cooled, I pulled it apart and froze two pieces for later. The texture was so nice and fluffy and it had wonderful flavor. We ate it all pretty quickly, it made fantastic sandwiches! This is definitely a loaf worth making again and if you haven’t made it yet, I highly recommend giving it a go-just add the flour cautiously, you may not need it all.
 The day I made the loaf was one of those days that I had a list of things to do that was as long as I am tall. Taking a lot of photos was not an option and I had to make do with what was in front of me rather than styling the photo. Rather than drag bounce cards and tripod out, I took an empty box of cereal and clipped a binder page to it to reflect the light.
 This week, the recipe was a true challenge that took two weeks to complete. Now if that doesn’t deter you from trying to mix up a batch of this bread, not much will! To make a traditional Pain de Campagne, you have to save a piece of the dough from your batch to act as a starter for your next loaf which means you are always working with a bit of old dough called a chef. If you find yourself without a chef, you have to start one with whole wheat flour and water and pray the yeast feels like cooperating.
 The rye is on the left, the graham is on the right. What a disappointment it was, I had assumed that since I do a fair amount of bread baking here that there would be plenty of yeast to grab and get the starter going.
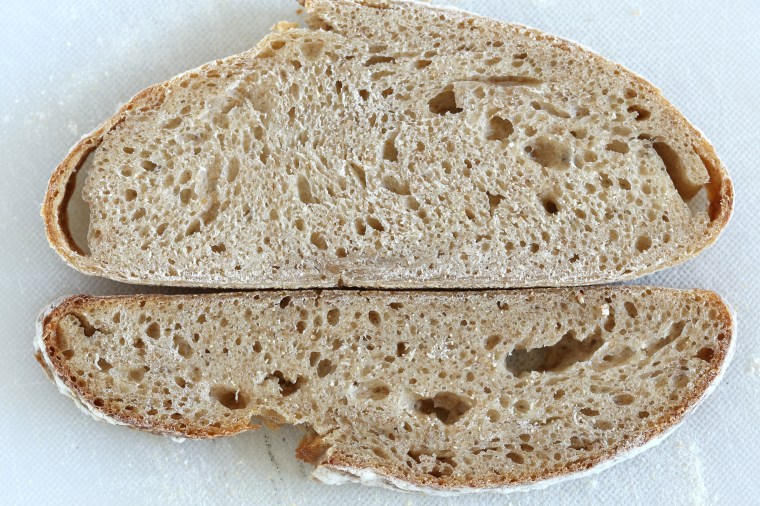 Out of curiosity, I sliced the loaves to see what the interior looked like. It was dense, moist and a bit gummy. Both of them were. It was pretty obvious that there just was not enough yeast in the chef and then the levain to give rise to the bread. Honestly, I was surprised that the graham loaf had a ribbon of raw dough along the bottom crust-it had risen pretty well. The flavor was surprisingly sour, a mild sour but it was there.
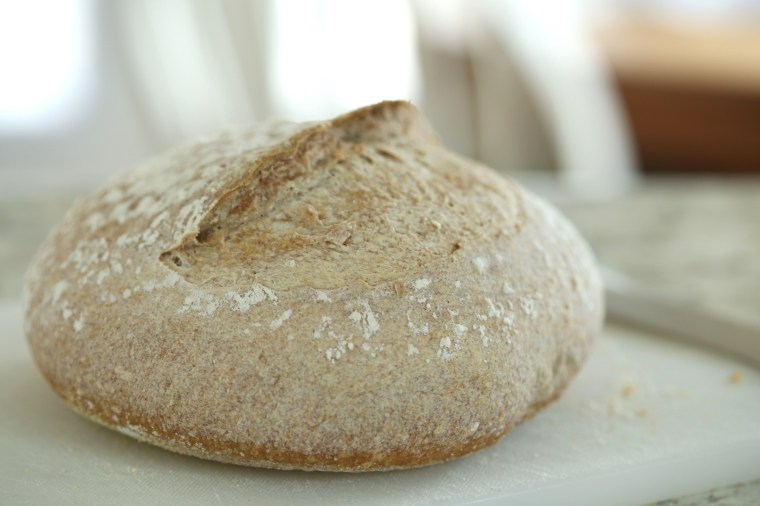 The little ball of dough rose nicely and because I ran out of time, I decided I would put the basket of dough in the fridge to rise overnight. Because I am curious, I pulled off a walnut sized piece and set it aside in the fridge; I was going to use it as a chef for a full batch of dough. The next morning, I pulled the basket out of the fridge and let it sit on the counter to warm up and rise a little more.
 When the time came to bake the loaf, I was excited-this one actually rose! There was oven spring too-it rose more! The only thing I did not understand was the pale color of the crust on the top, it browned nicely on the bottom. The interior looked nice, no stripes and no gummy crumb. It also had a nice sour flavor. As for that piece I set aside, I used it to start a new loaf but this time, I made a full batch.
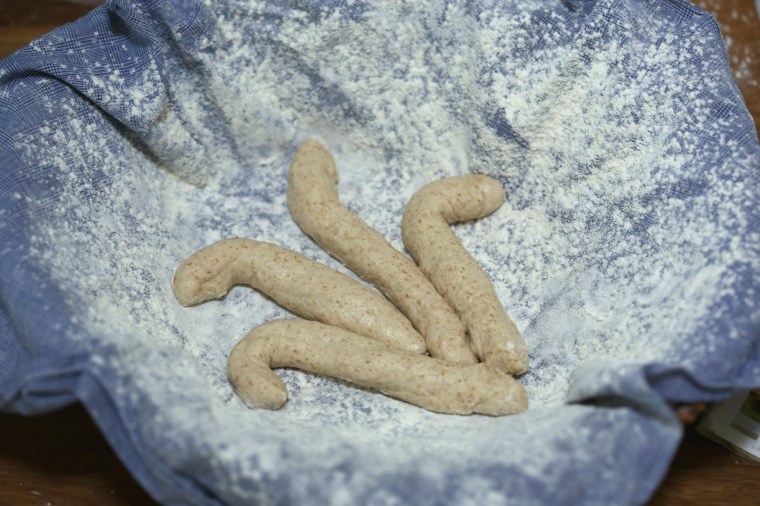 The shaping was easy to do and I cannot remember when I did this type of baking last-perhaps at school…My wheat stalks in the bottom of the basket.
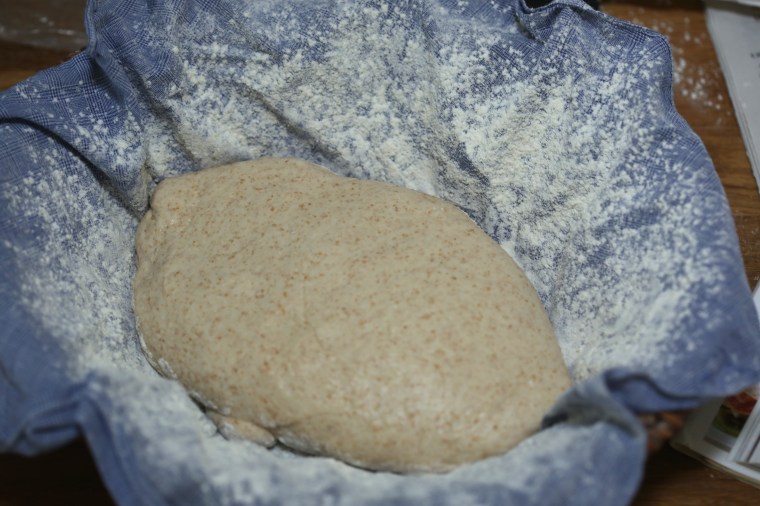 The loaf was placed over the wheat stalks.
 The loaf gets wrapped with a braid of dough and then it is left to rise in the basket. Two hours later, I turned it out onto the peel and let it rise some more. Just before baking, I brushed the loaf with a wash of egg whites and snipped the wheat stalks.
 Fresh out of the oven, my wheat stalks look more like paws.
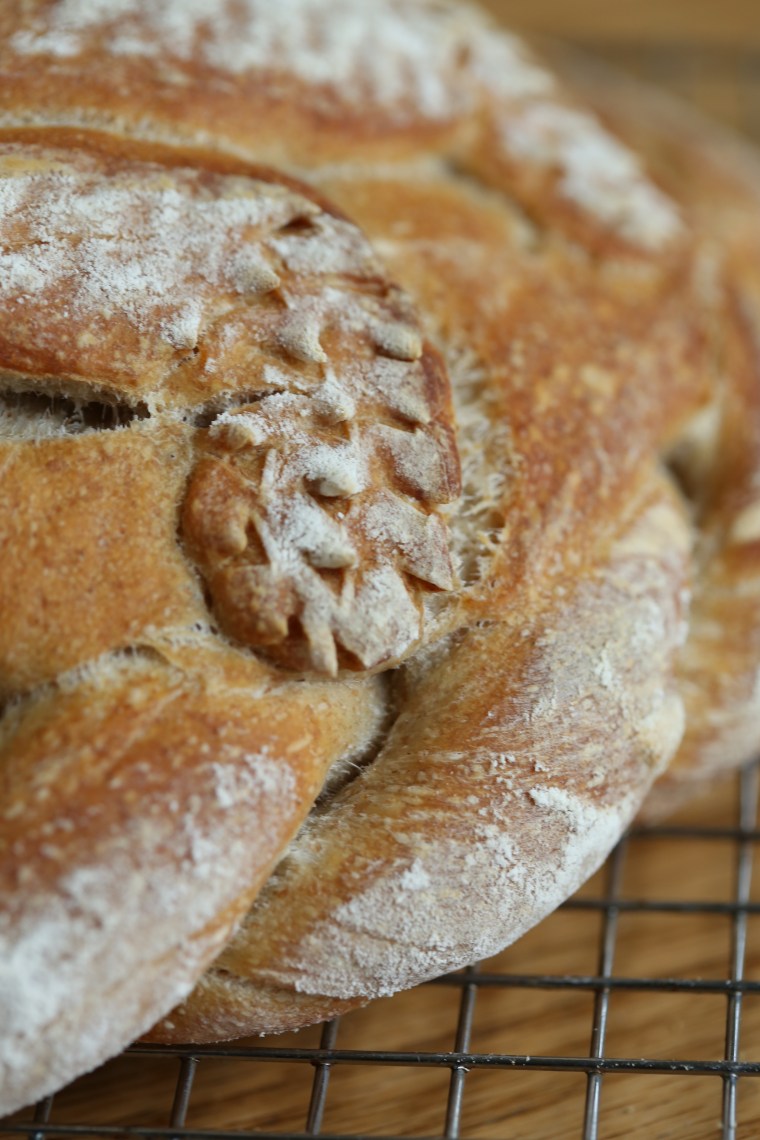 The scissors did a nice job on the stalks. It was fun to make this loaf and now it is sitting on the counter taunting me…
 May have to make another one just so I can make those wheat stalks again! Be sure to visit the
  The cake for today’s challenge is supposed to be a tangerine-carrot cake but after a quick check in the fridge, I could only find lemons. Then I spied the last lonely parsnip and decided that I should keep going in this direction and change it all up. We have been trying to cut back on snacking and it has been a while since I made a cake. The fresh eggs from our hens are stacking up on the counter and it was a chance to use a couple.
 The change from tangerine to lemon meant that the acid level was increased and I am pretty sure that it changed the texture of the cake and made it a little denser than the description in the recipe. Even so, it was still pleasingly moist and a little firm. The parsnip mellowed during the baking and honestly, you wouldn’t know it was there unless I told you.
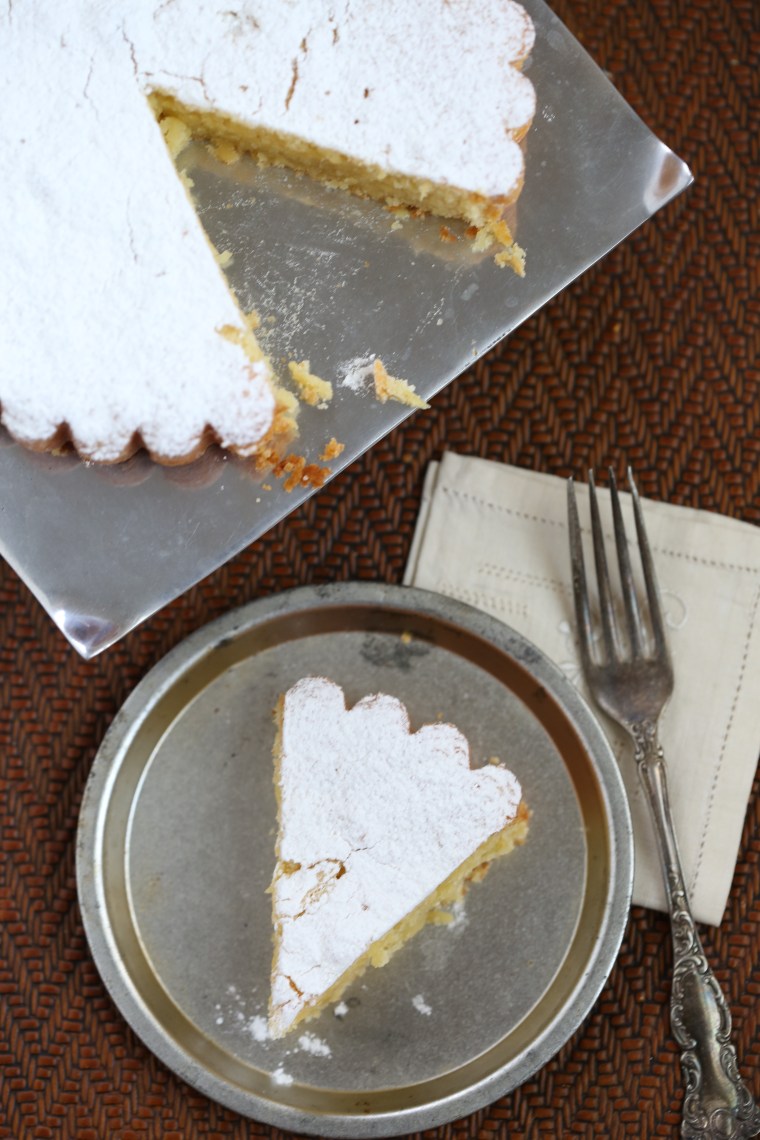 The only other observation I made was that the batter amount baked up just fine in my 8 inch tart pan. After greasing the ring and bottom and dusting it with flour, I set it onto a sheet pan to prevent leakage in the oven. It came out of the pan and off the bottom beautifully. This was such an easy cake to make and honestly, the potential combinations are numerous so I can see myself pulling this recipe out again when I need a quick and foolproof cake!