 This update is a little late but if you are wondering how the garden is coming along, here it is! When we finally had our hard frost a few weeks ago, I went out and spent the day cleaning and harvesting what I could.
 In my effort to add visual interest, I have added a bottle tree and the white metal baskets are a project in the works.
 Our hens have really helped us improve the soil and control insects. These are two of our young hens; a Black Australorp and an Americauna, who is also our only green egg layer.
 She really is a sweet bird but she is also a bit shy and the other hens tend to bully her a bit.
 These are a couple of the old girls. We brought our Golden Laced Wyandottes with us when we moved here from Virginia. They aren’t laying much anymore now that they are over 2 years old but they still help out by providing us with manure and by eating insects.
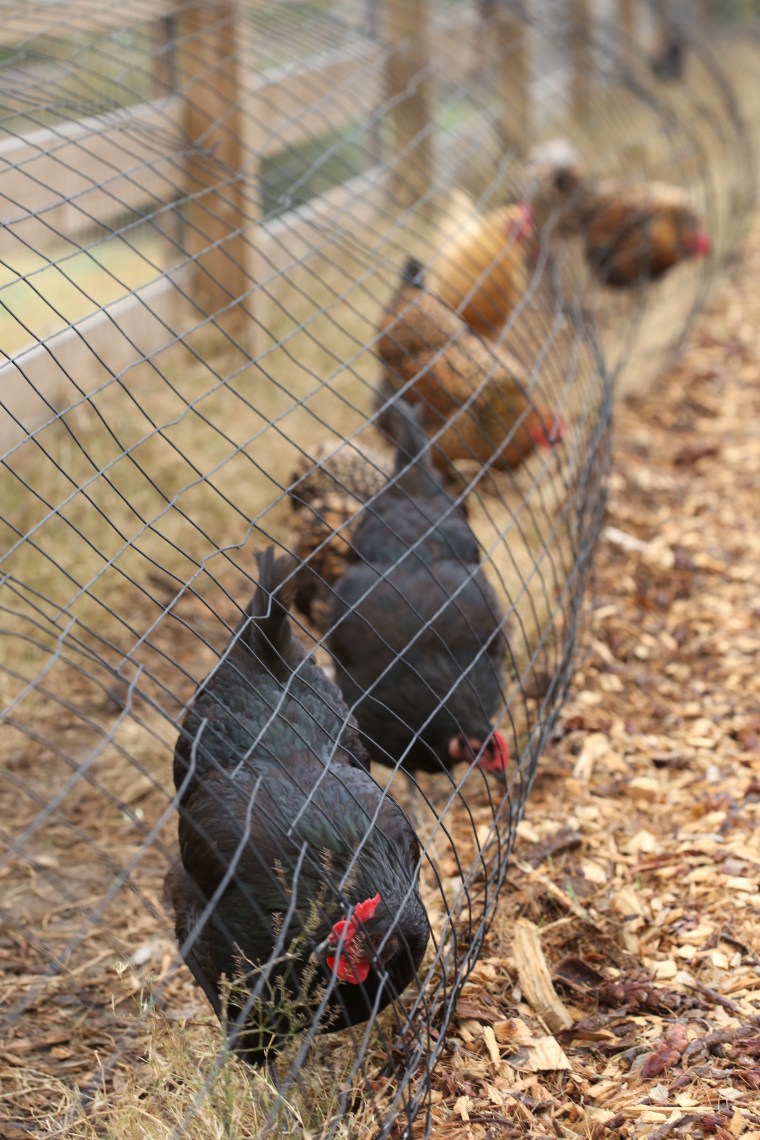 The iridescent feathers on the Australorps are beautiful when the sun hits them. The hens wander the outside of the garden in their tunnels and they are safe from hawks and our plants are safe from the hens!
 This pretty lady, an argiope aurantia or yellow garden spider, was hanging out in the carport until we moved her to the garden. She quickly settled in and stayed out there until the hard frost.
 Because I was curious, I looked up information about her and discovered that this little brown ball is actually an egg sac. Each one can contain about a thousand live babies who will over winter in the sac. As I cleaned up the bed of flowers where she was living, I discovered three of these egg sacs! In the hope of having another spider or two next year, I carefully moved the sacs and placed them in the beds with our fig trees.
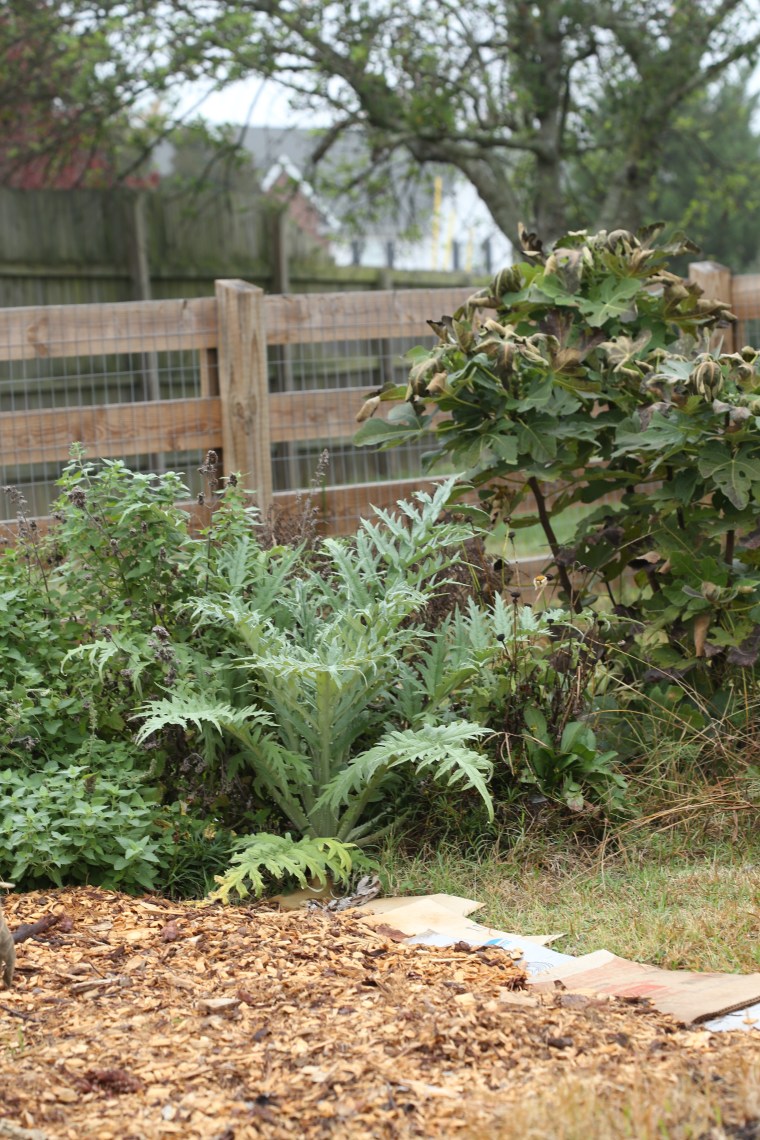 Early in the spring, I planted a number of perennial flowers and herbs around the garden. At that time, I also planted an artichoke. It has gotten large and if it survives the winter, I am hoping for chokes!
 Cabbage heads are looking good.
 We harvested most of the broccoli for Thanksgiving dinner and froze what we did not cook. Because we only cut the top heads off, we left the plants in the ground so that they would produce side shoots of smaller heads. If all goes according to the plan, we will be picking broccoli through the winter.
 When we were in Virginia, I planted Tokyo market turnips for the first time. They are smaller than the typical turnips found in grocery stores. At last check, they were nearing maturity and I am looking forward to roasting a few!
 Cardoon looks a lot like an artichoke. The difference, chokes or the flower, are the only edible part of an artichoke while both the flower and the stalk are edible on a cardoon. Actually, the stalk is more commonly consumed and it requires a long simmer to soften the extremely tough fibers.
 The stalks look like celery on steroids and they are just as tough as you would imagine. And then there are the spines; they are every bit as sharp as they look!
 Handle the stalks with care and be sure to cut them off before you try to cut and cook the stalks.
 All around the garden are little pops of color in the form of violas, one of my favorite plants.
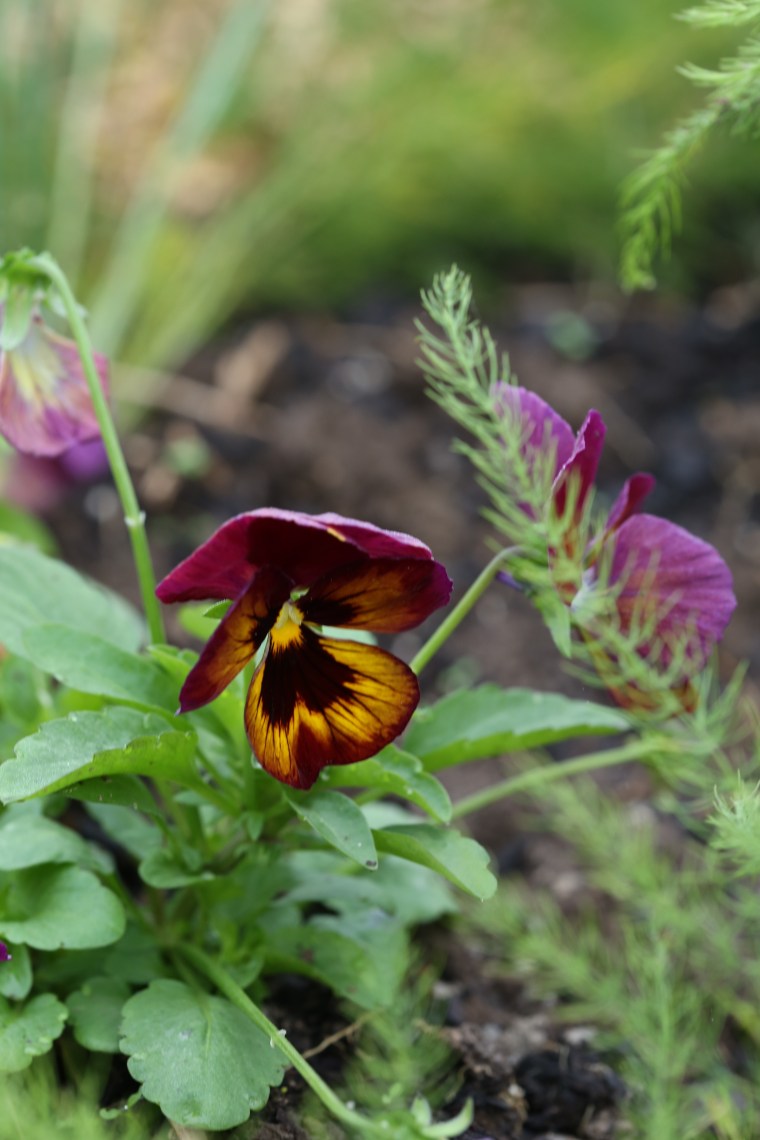 Love this color combination.
 Part of the clean up meant gathering tomatoes, both ripe and green. If you are considering planting tomatoes, give these little yellow gems a try. They are called Barry’s Crazy Cherry and they can be found in the Baker Creek Heirloom Seed catalog.
 Late in spring, we put a watermelon plant into the garden. Hoping for a few melons to share with the hens, we were disappointed by how slowly the plants grew. This was the largest of three melons. The first one that we cut into was white inside, it became some really nice pickles. The other two are still waiting to be cut and we are hoping for better luck!
 Entering a competition at the State Fair is as American as an apple pie, much like the one in the photo above. And while I realize that the 2017 Tennessee Fair is old news, I really wanted to share these photos. Actually, I have been missing in action (blame it on the job) and thought I should get my act together and start posting some of the photos that I have taken.
 Dusk is the best time to visit the fair. It is not as busy and the lighting is perfect, even when you are taking photos of lights.
 As members of the Master Gardeners, we always find ourselves at the fair and working in the MG booth but we make time to walk around and see as much as we can. This year, we did not work the booth but we spent some time there with friends who were visiting from Germany.
 As adventurous as I am, and I am-I love a good roller coaster, this ride terrifies me. The thought of dropping like a rock, straight down to the ground…If you need me, I will be out here with a camera, watching you drop like a rock.

 This type of ride doesn’t thrill me either-too intense and too much round and round and round…
 Ferris wheels can be fun, guarantees a great view of the fair.
 This one made me dizzy just watching it.
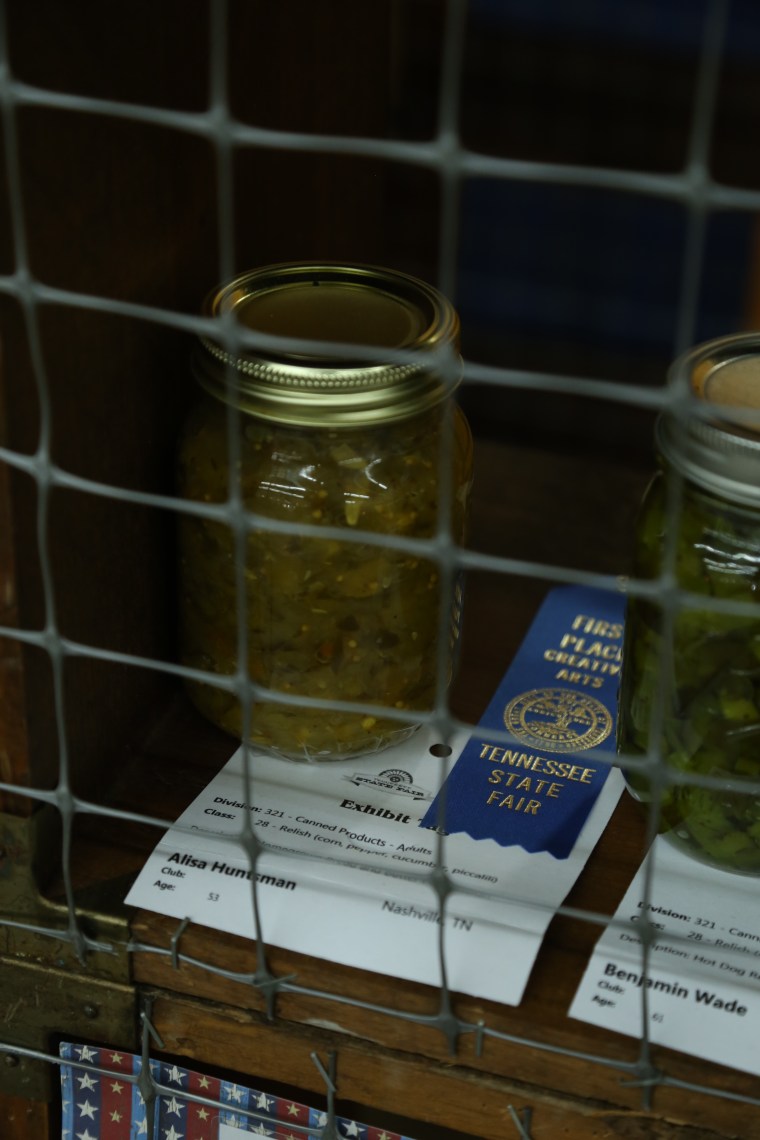 And then there is the real reason I was at the fair. On a whim, I decided to enter several competitions. This was the first time I entered a canning competition and I entered a jar of my
  Another competition I entered was the chess pie contest, this one, a
  Here are the judges tasting my apple pie. Long story short, I didn’t win, place or show. At the end of the day, I have a pretty good idea of what is expected and I will be better prepared for next year.
 By now, I am sure you are ready for me to move on from my summer vacation photos but considering the hurricanes that have blown through that part of the world, I had to post this last group of photos. While we were on Sanibel Island, we found a walking trail by accident. We had left our hotel room, on foot, and walked to a nearby restaurant for dinner. As we approached the front of the building, we realized that it was not open. Since we were set on having dinner, we turned around and began walking back to go somewhere else and that is when we saw a small sign for the Pond Apple Trail. And yes, we also saw signs for alligators-this little guy did not pose much of a threat but everybody knows that small alligators are the result of big alligators…
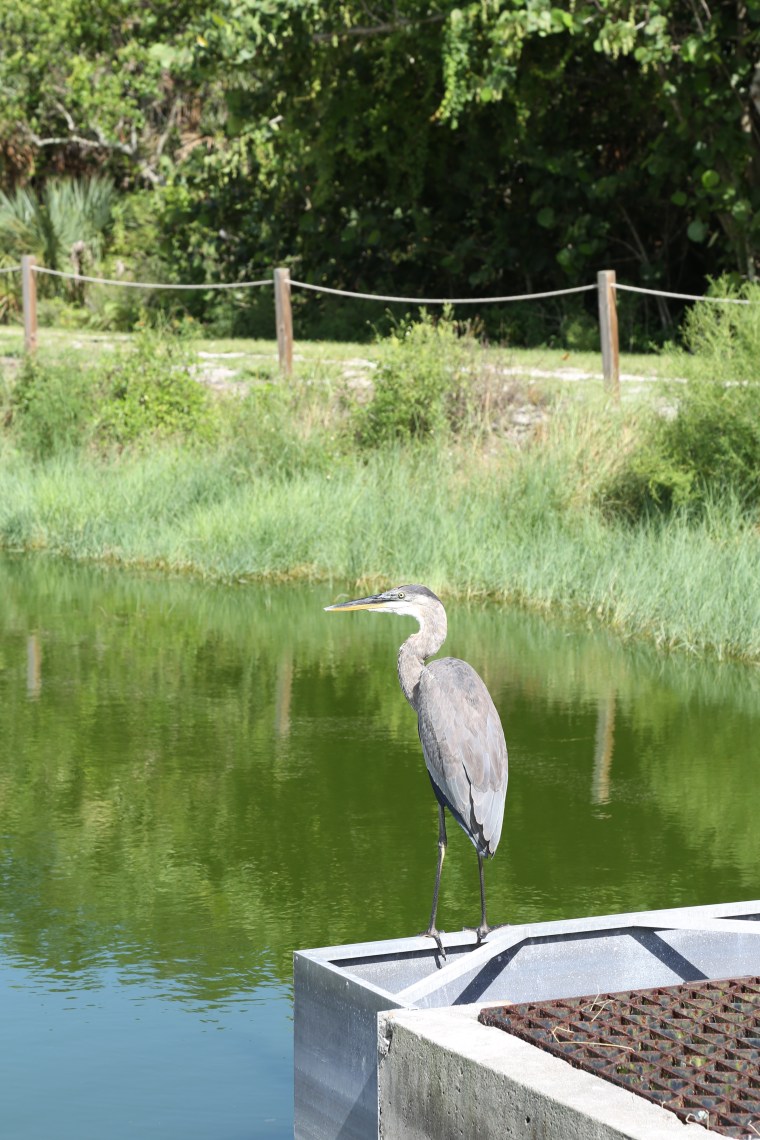 We didn’t walk the trail that evening but we did go back one afternoon while we were out riding bicycles. A portion of the trail winds around several square ponds that are part of a stormwater remediation program for the island. This handsome fellow was watching over the water for possible snacks.
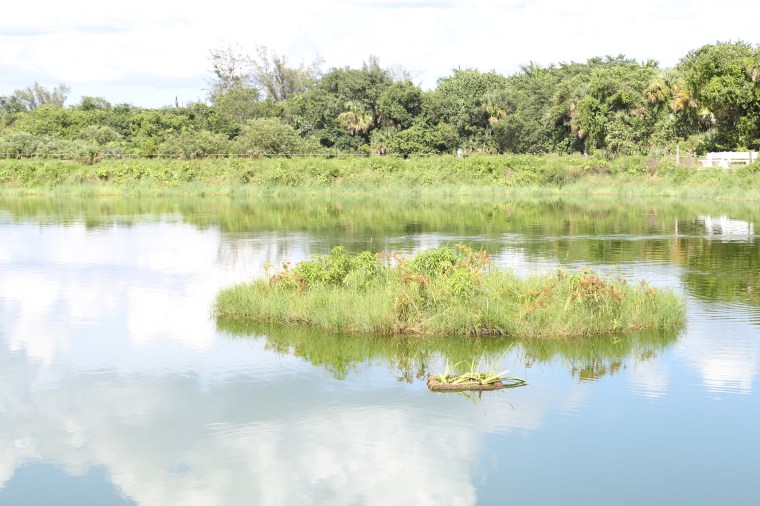 If you are curious about the remediation method used here, small rafts of plants are assembled and allowed to float in the ponds. The root systems of the plants help clean the water of pollutants that are washed into the ponds during storm runoff.
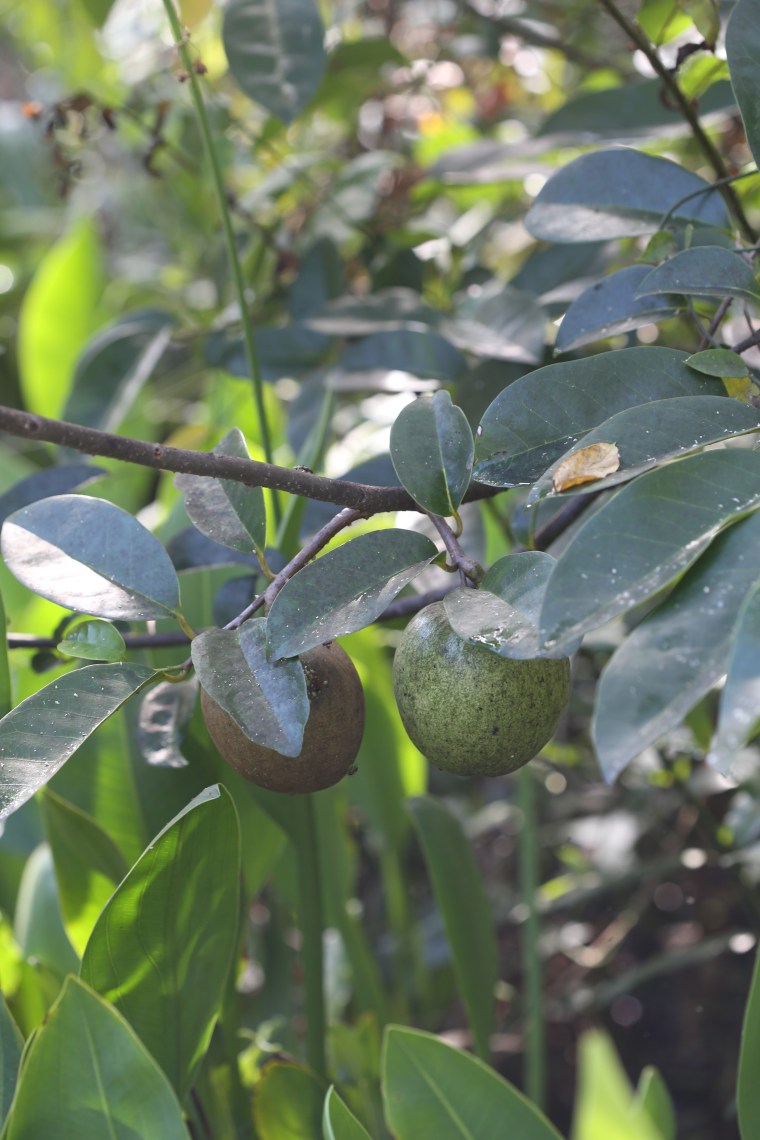 The trail gets its name from the native
  Although they were perfectly edible, we decided not to eat them. We enjoyed the trail and look forward to a trip back to the island so we can explore it again.
 On the day we were leaving, I scheduled the flight home late in the afternoon so that we could spend the day exploring some of Fort Meyers. Mother nature had other ideas and we were stuck walking in drizzly conditions. We found a great place to explore despite the rain!
  The stumps in the water are called knees and cypress trees develop these roots as they grow in the water. The water was so clear, golden in color but clear with amazing visibility!
 The ferns grow everywhere! These were colonizing the base of a tree trunk.
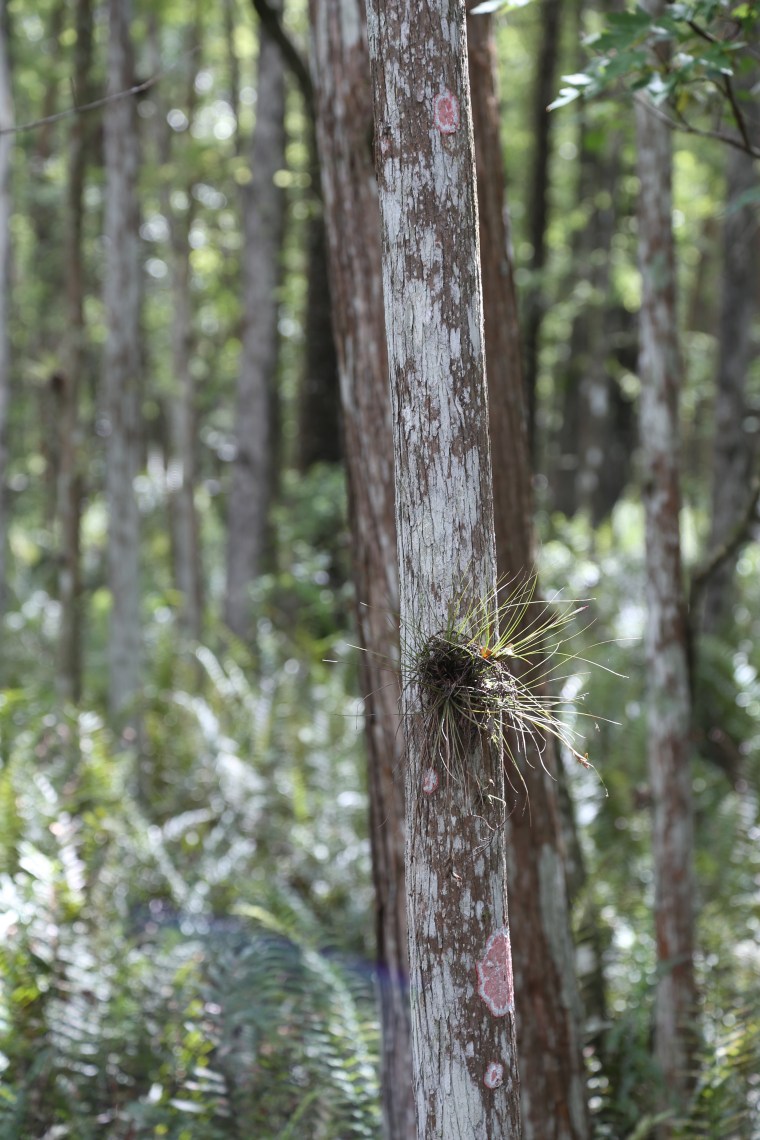 Have you seen those air plants for sale everywhere? They grow wild all over Sanibel Island and here in the slough as well. The lichens were pretty amazing as well, I have never seen them in this color before.
 More air plants, they can get pretty large.
 Ferns, love ferns… The way the little fronds unfurl…
 Of course, it would not be a proper southern swamp without some hanging moss.
 The boardwalk, it was only a mile from start to finish but we took our time and probably spent an hour wandering the walkway.
 At every turn, there was something to see. Plants above water, plants below water.
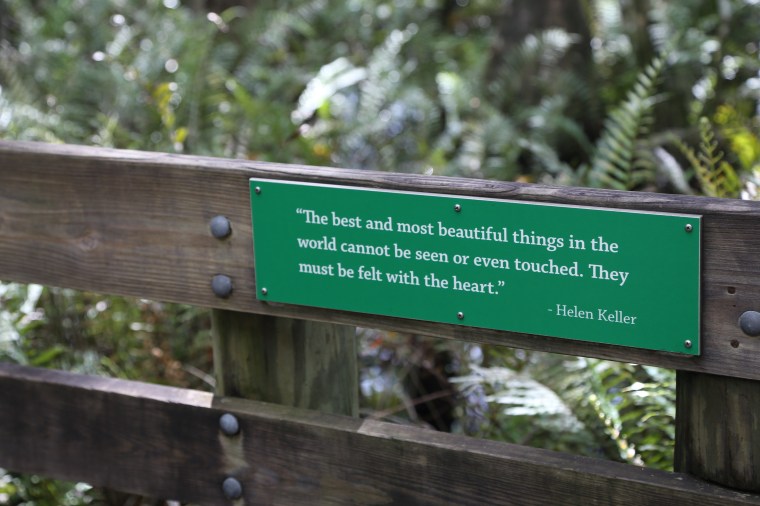
 And it wouldn’t be a proper hike without a reflection shot.
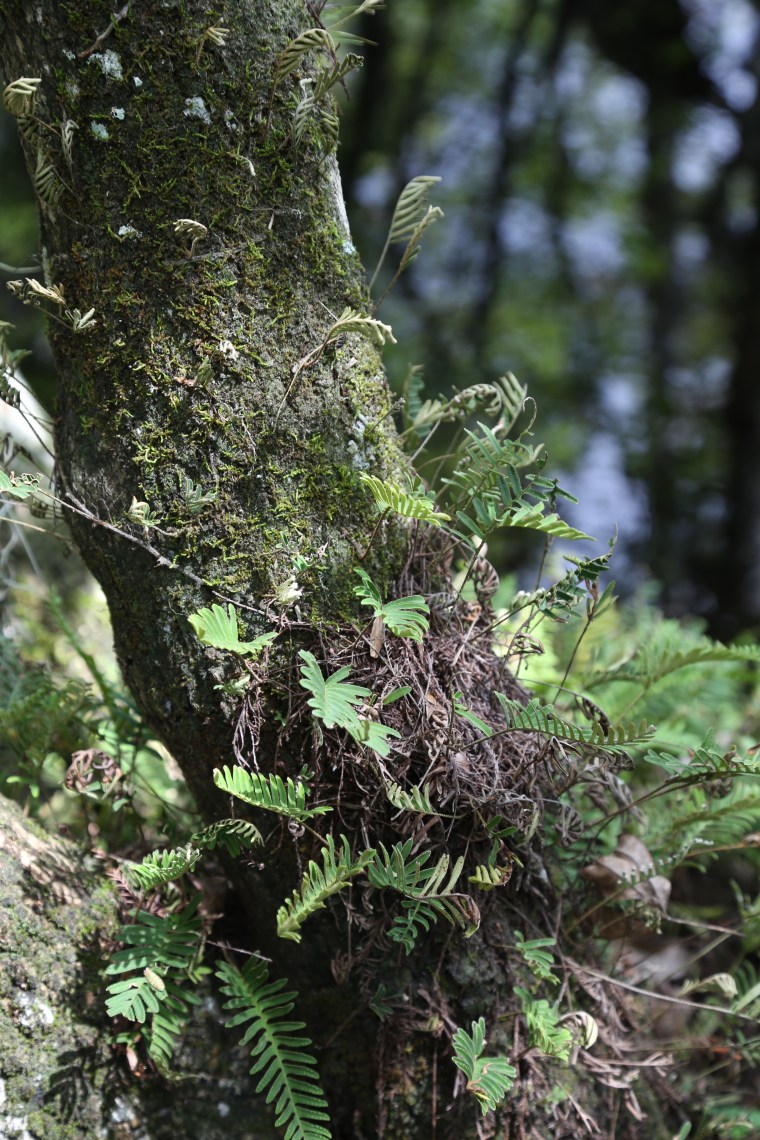 Moss and ferns, two of my favorite things.
 This guy was just hanging out, he let me take his photo. Hopefully, the damage to the trail was not too extensive and it will reopen soon.
 When I signed up to attend the hypertufa workshop, read about that
  Late summer is tomato season and if you find yourself with a few too many, consider making a cake with them. Actually, this recipe is versatile enough that you can make it with canned tomatoes, either crushed or puree, or even with tomato juice which means you can have it anytime. If you use a purchased puree or juice, check the ingredient list to make sure that ingredients such as onions or garlic are not included.
 A few things to consider here. Raisins are one of those ingredients that you either love or hate. Personally, I am not a big fan but in this recipe, the golden raisins really work. Just be sure not to skip the step to plump them or they will actually draw moisture from the cake and can make it seem dry. If you use fresh tomatoes, blanch them to remove the skin and then cut each one in half and squeeze out as many of the seeds as you can before pureeing them. The nice thing about using fresh tomatoes, you can mix it up by changing the variety of tomato. Of course, you can just use a can of puree and make it anytime you want a fresh baked spice cake.
 As the summer fades, spice cakes shift to center stage. Slightly denser, jammed full of warm spices, and in this case, loaded with dried fruit and nuts, spice cakes are the perfect pick-me-up as the temperatures finally start to cool off. For this cake, I combined cinnamon, allspice, cloves and freshly grated nutmeg which give the cake a warm, spicy flavor.
 Guess Again Tomato Cake
 One of the best decisions I have ever made was to become a Master Gardener. Not only have I learned a lot about the hows and whys of all things gardening, I have had a chance to make wonderful friends! Earlier in the summer, I was talking with a fellow MG member and I mentioned that I really wanted to learn how to make hypertufa pots and that I was more than willing to plan a get together at my home with some of our gardening friends. It was if the walls, or maybe the hostas were listening in on my plans because as quickly as I mentioned this, we learned that one of our fellow MG members was offering a tufa pot workshop in her backyard. Needless to say, I quickly signed up for the class!
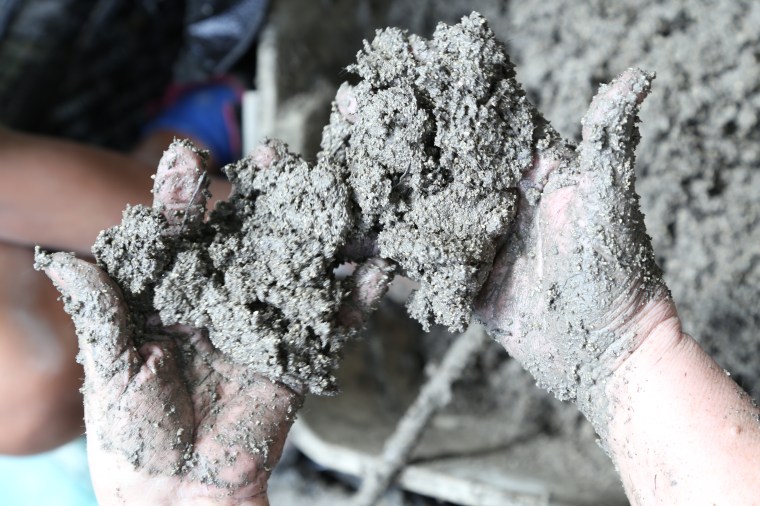
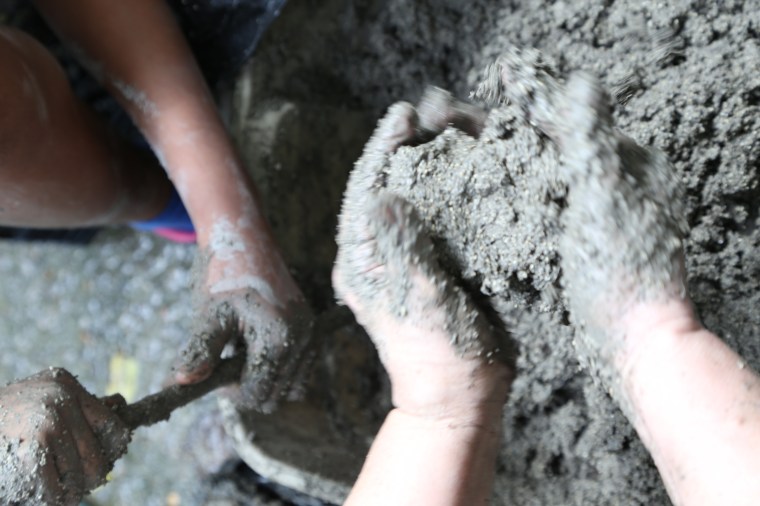

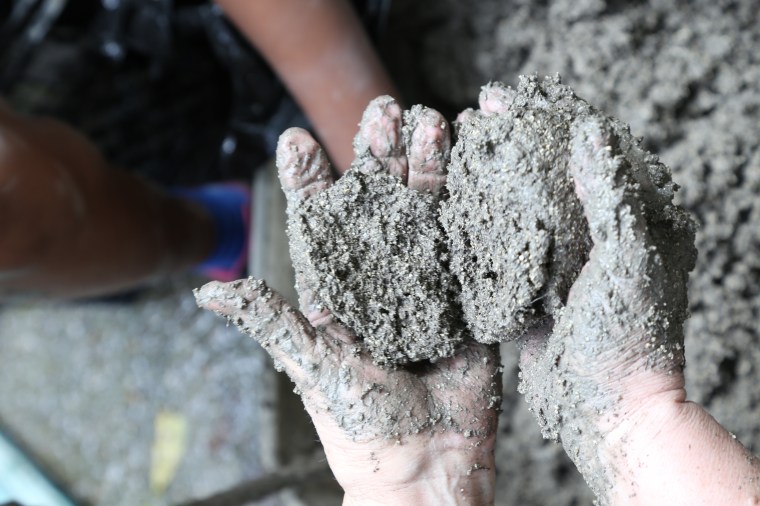 Making the mixture is fairly easy, it takes a little elbow grease but it is not at all difficult to make. In a large container with a wide opening, combine 3 parts peat moss, 3 parts vermiculite and 2 parts portland cement. For extra strength and durability, you can throw a handful or two of fiberglass reinforcing fibers. Add water to the container and mix it until it is moistened but holds its shape-refer to the photos above. Do not do this with bare hands!!! (nevermind Georgeann’s bare hands, she warned us about the consequences) Portland cement can be a bit caustic and it will dry your skin to the point of irritation.
 Select a mold with a wide opening and grease the inside with spray or a thin coat of shortening. Line it with a couple of plastic bags or a sheet of plastic drop cloth. Do not worry about the crinkles and wrinkles, they will add texture to the pot.
 Press handfuls of the mixture into the bottom so that it is at least an inch and a half thick. Using your fingers, make a hole for drainage. Keep building up the sides so that they are at least an inch thick but when it comes to the top edge, make it a little thicker and rounded so that it is stronger. Let it cure, out of direct sun-in full shade, gently lift the plastic sheet to remove the pot from the mold after a day or two. At this point, you can carefully shape the edges or carve designs into the surface of the pot. Use a metal brush or a file to sand the edges and small chisels for the carving. Replace it into the mold to finish curing. You want to do this to ensure that you can get it out of the mold at all-a lesson I learned the hard way!
 If you walk around Georgeann’s garden, you will find tufa pots. This one is home to just one of many hosta plants.
 The pots are very durable and can even spend the winter outdoors. Even though the cement mixture is on the alkaline side, plants can thrive in them and so can moss.
 The moss is a plus in my opinion, I just love the character it adds to the pots.
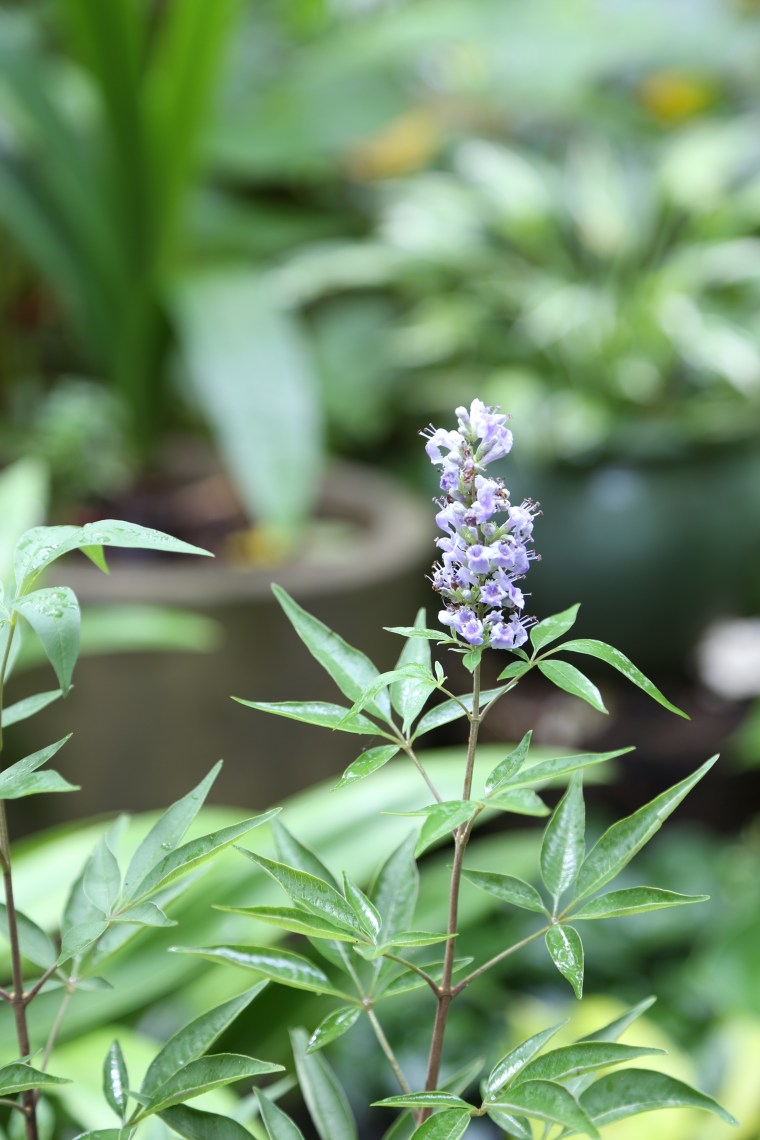 As a beekeeper, I love seeing Vitex (Chaste Tree) in gardens.
 All through the garden, I found little surprises like this mosaic of a Blue Jay.
 And this Earth ball.
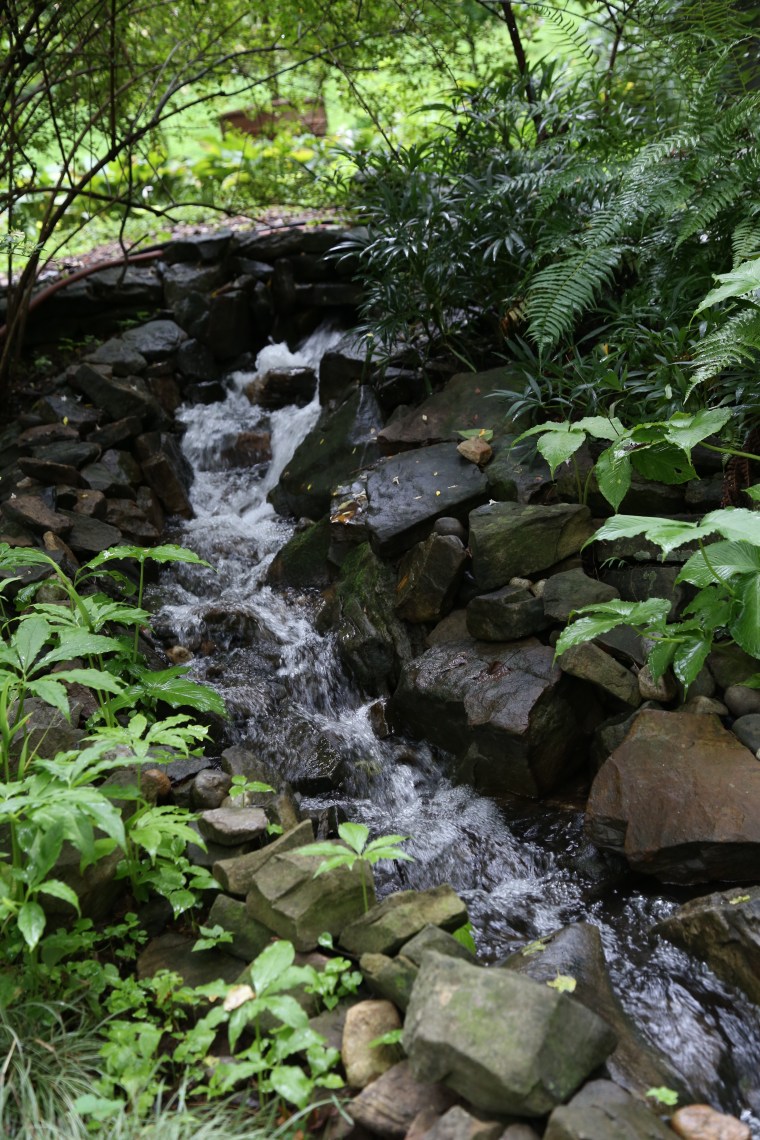 The waterfall is actually a water feature that recirculates but it is no less beautiful than a real stream!
 Of course, there are plenty of Hostas to admire, too!
 As much as I love Hostas, I really love Hydrangeas!
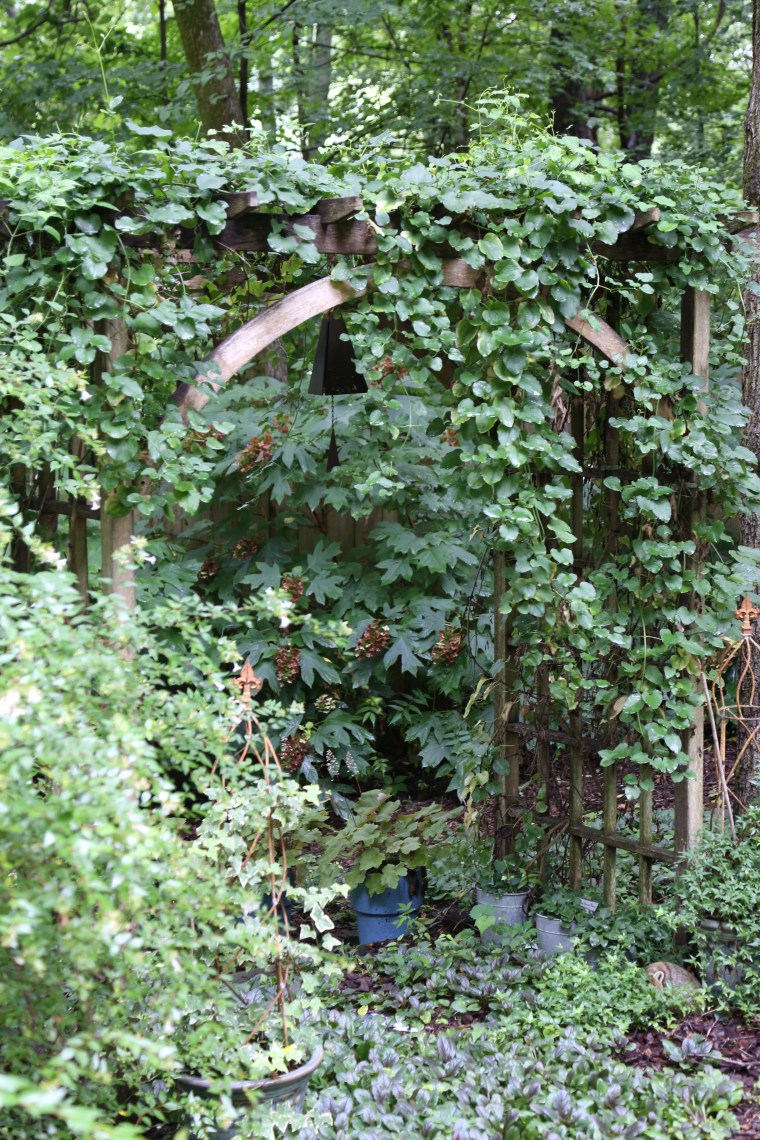 Arbors are everywhere in the garden.
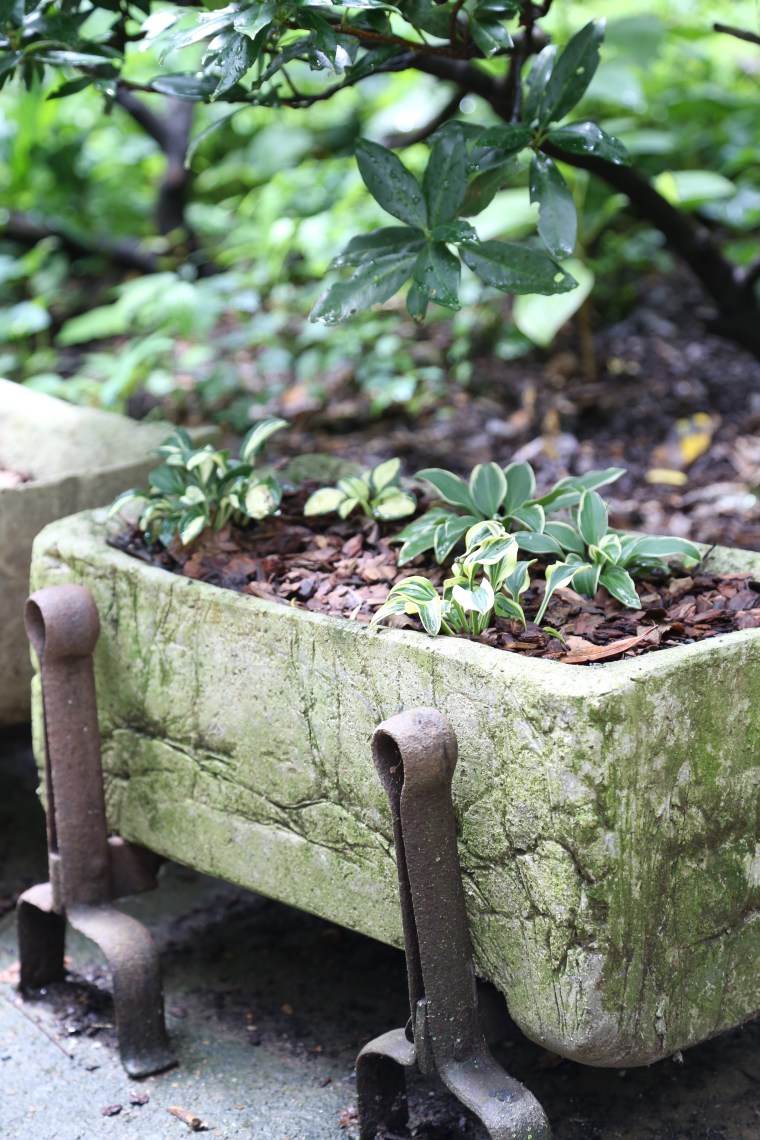 Another of Georgeann’s tufa pots, this time it is a trough. Remember what I said about the crinkles and wrinkles in the plastic liner? They really do add a lovely texture to the finished pot.
  Everywhere you look, there is something to see, and in my case, covet!
 Don’t you just love this little cottage?

 This swing is hidden from view in most of the yard but I was still hesitant to sit on it for fear of acting like a child…
 If this were my garden, I have a feeling that I would be spending a lot of time sitting out in front of the cottage at this table.
 Caladiums are quickly becoming one of my favorite plants to add color to a shade garden.
 This stone sits at the start of the path that leads up to the cottage and if you ask me, it is an accurate description of Georgeann’s garden.
 So the moral of this story; if a Master Gardener opens their home to you, go! You really have no idea what you will discover or learn until you walk through someone’s garden and I am genuinely grateful that I had the chance to spend a morning exploring this beautiful garden. And in case you were wondering, there was definitely cake; I brought my Guess Again Tomato Cake and the recipe will be posted soon!
 Another fact, taking a live sea creature as a souvenir carries a $500 fine per creature. That could be an expensive lesson to learn! We found this guy on the beach in the tide line. He, or she for that matter, was just laying there and I saw the shell first. Thinking it would be one to add to my collection, I picked it up and when I turned it over to check, there he was-a live Florida Fighting Conch!
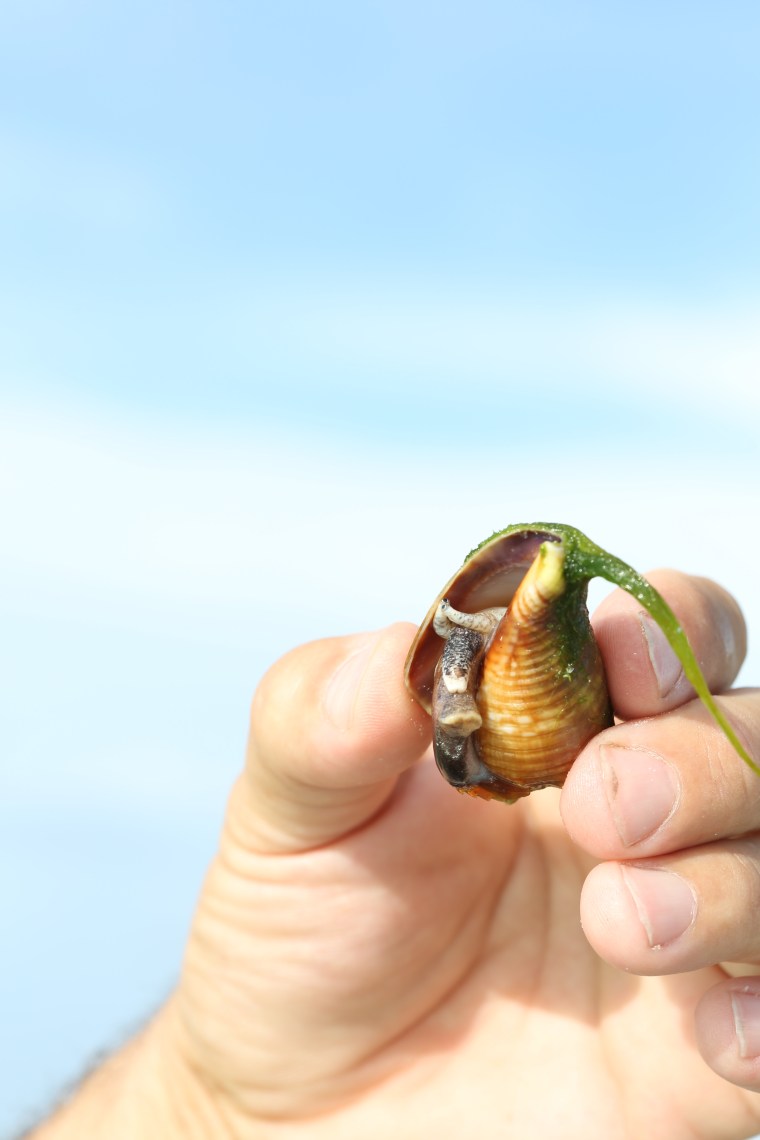 This little guy was as curious of us as we were of him. As Darry held him up so that I could take some photos, he slowly crept further and further out of his shell.
 Look at the love in his eyes…We returned him to the water and wandered on in search of that elusive green flash.
 This just goes to show you that barnacles will attach to anything, including cheap sunglasses.
 Sunset was approaching and so was a thunderstorm. The view from one end of the beach to the other was very different. In this direction, sunny.
 Turn 180 degrees and not so sunny.
 This little guy didn’t let the clouds stop him so we decided to follow his lead and keep walking on-even if there was thunder in the distance.
 The sun was sinking fast and that meant we might just see that flash.
 Thankfully, the storm seemed to be moving past us and no rain fell near us as we walked on the beach.
 Those clouds, the colors; the camera did not catch it all and I hate adding color to the photos; it seems like cheating.
 We had to wait a while, there was still at least half the sun above the horizon.
 The clouds just kept getting better and better, so did the colors in the sky.
 You would not have to do much to convince me to chuck it all out the window and move to the beach. Seriously, I could very easily learn to adapt to summer weather all year long and sunset walks on the beach.
 With about a quarter of the sun left, we waited patiently.
 To see that green flash, you need to be there just as the sun sinks below the horizon. We began walking back as the moment of truth approached and this was the last photo I took. If there was a green flash when the sun finally disappeared below the horizon, we did not see it. Thinking this means we need to go back to the beach!
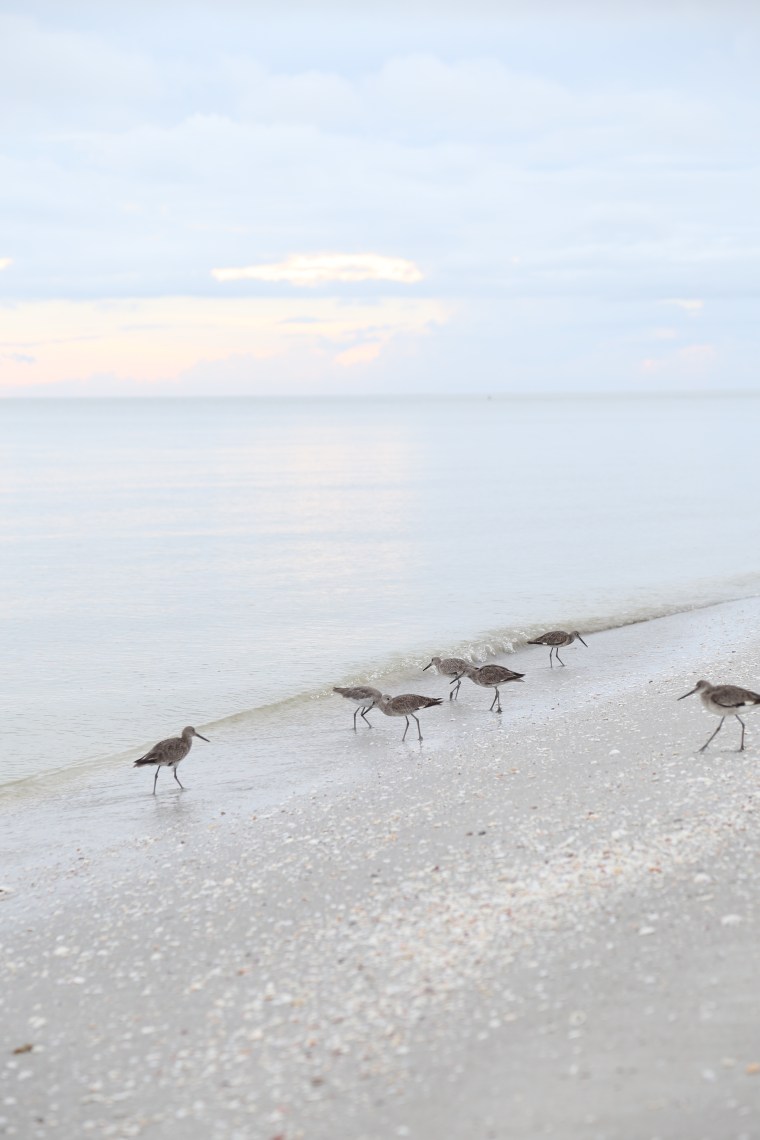 If you ask me, the perfect summer evening includes a long, leisurely stroll on a beach. Slowed pace, feet covered in sand and tickled by the surf, eyes scanning the tide line in search of seashells, breathing in the salty breeze-absolute heaven. We may not be world travelers, or even frequent vacationers, but one thing is certain, we will more than likely visit a beach if we plan a trip. Over the years, we have been to beaches on the East, West and Gulf coasts but this was the first time we visited
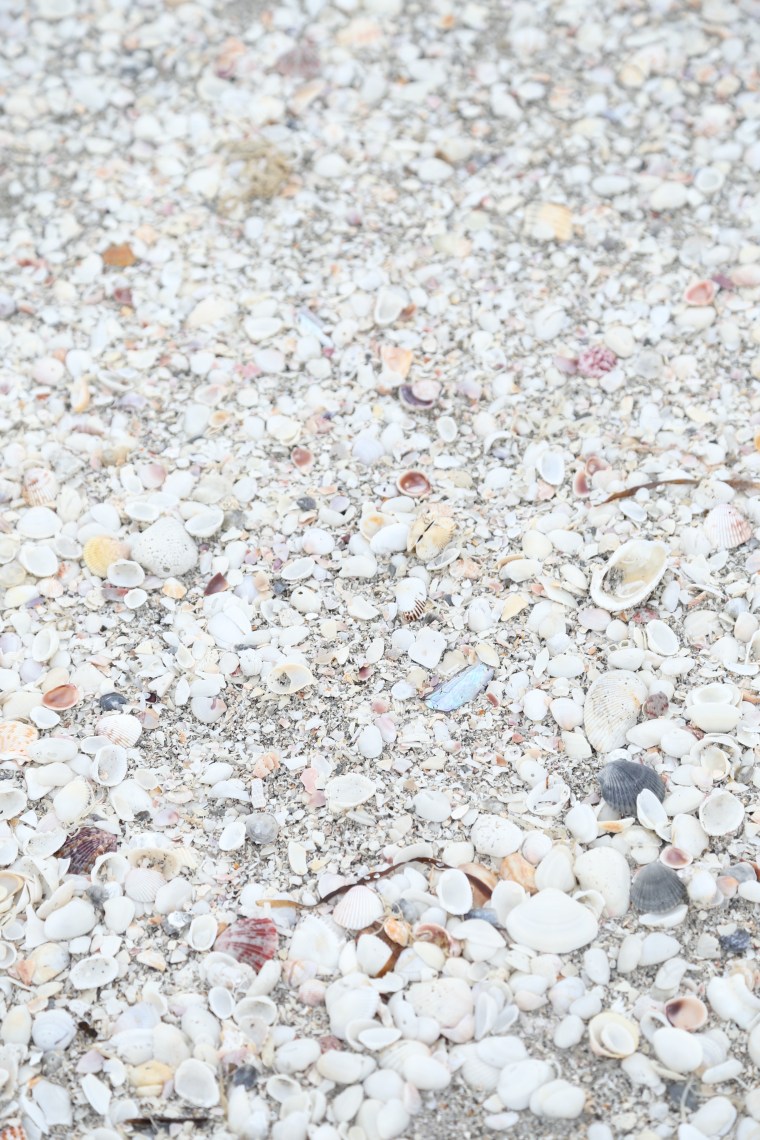
 The stripes formed along the tidal path are just littered with shells, mostly small but still beautiful and worthy of collecting.
 As I took photos, I noticed Darry doing his best “Sanibel Stoop” while he scanned the surface of the sand for treasures.
 He quickly retrieved a few shells to show me, from left to right: a Scotch bonnet and two Florida fighting conchs.
 It was somewhat addicting. Finding intact shells was also pretty easy and we had a bag full in no time.
 So many shells…
 Horse conchs can get very large, the world record shell is just over 2 feet long, but we didn’t have much luck finding anything over an inch or so!
 Rhubarb is not commonly found in southern gardens. The intense heat and humidity just do not suit the plant well. In the demonstration garden, we have learned that the best way to grow it is to plant it in an area that does not see the intense light and heat of afternoon sun. In the back of our vegetable garden, we have a shady area and in it are two rhubarb plants that are a green variety which seem to be better suited to our growing conditions.
 Color is not generally an indication of sweetness in rhubarb but the manner in which it was grown can be. Hot house rhubarbs that have been forced are generally sweeter than those grown outdoors naturally. This crop was pretty tart and I decided to let it macerate in sugar before adding it to the cake.
 Having chickens in our own garden has been a wonderful experience. When we moved into the new house, we added a few more and the littles have begun laying! We have one Americauna hen who has been laying tiny green eggs. We haven’t had the heart to crack them yet, but at the rate we are going, we will have to or run the risk of being buried in a pile of eggs.
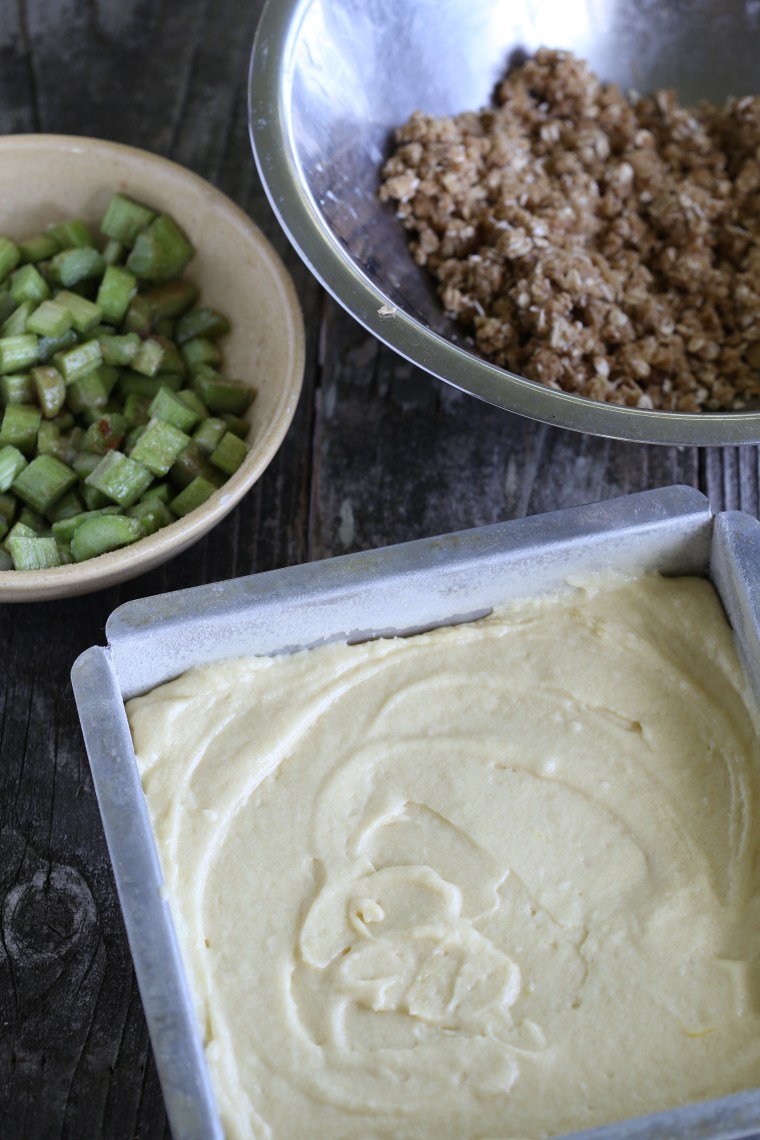 Buckles are one of my favorite summer fruit cakes. This particular recipe is so versatile that by making simple substitutions, you can have a completely different cake each time! This time though, I kept it pretty simple and just substituted rhubarb for the usual sour red cherries.
 The name “buckle” comes from the manner in which some of the fruit sinking while some of the batter rises up during the baking and this can give the cake a “buckled” appearance.
 With the final addition of a walnut crumb topping, the cake was ready to go into the oven.
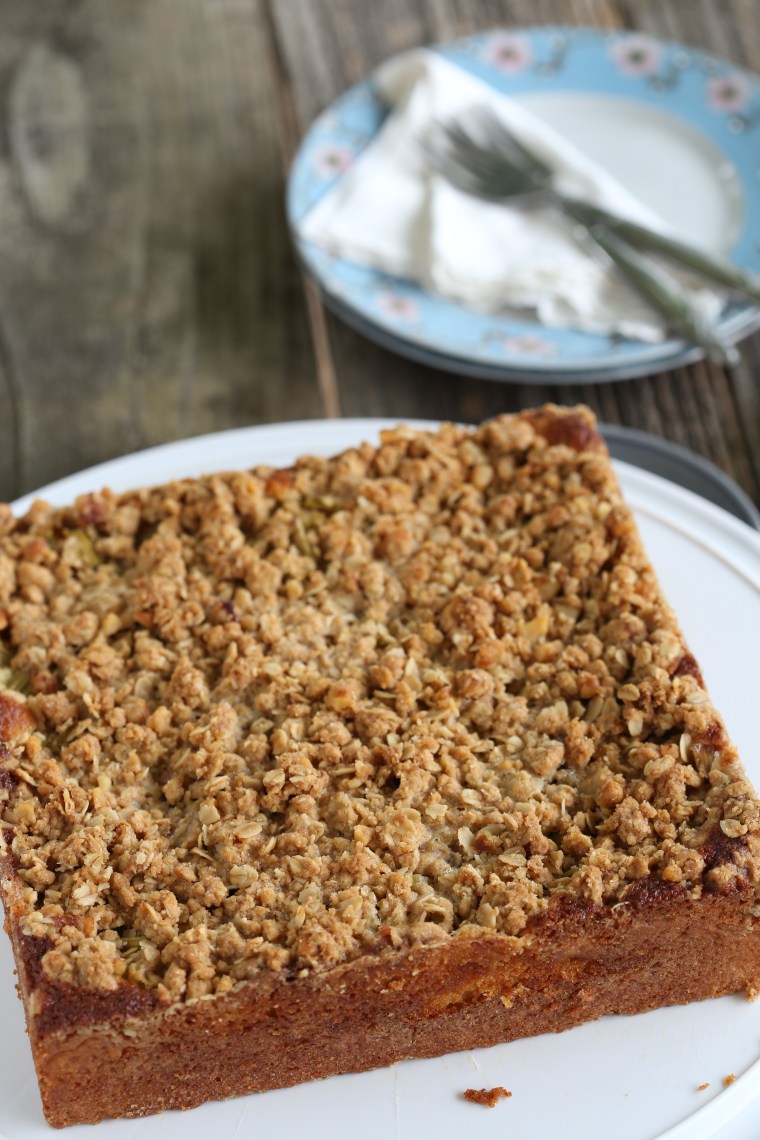 The buckling I was hoping for was not as pronounced and I suspect that it may have needed to macerate longer or I may need to increase the amount of rhubarb in the recipe. Looks like I will have to make another soon to test the theory! Despite that, it did make a nice sweet-tart layer of filling between the cake and the crumbs, the perfect treat after spending several hours digging and pulling weeds.
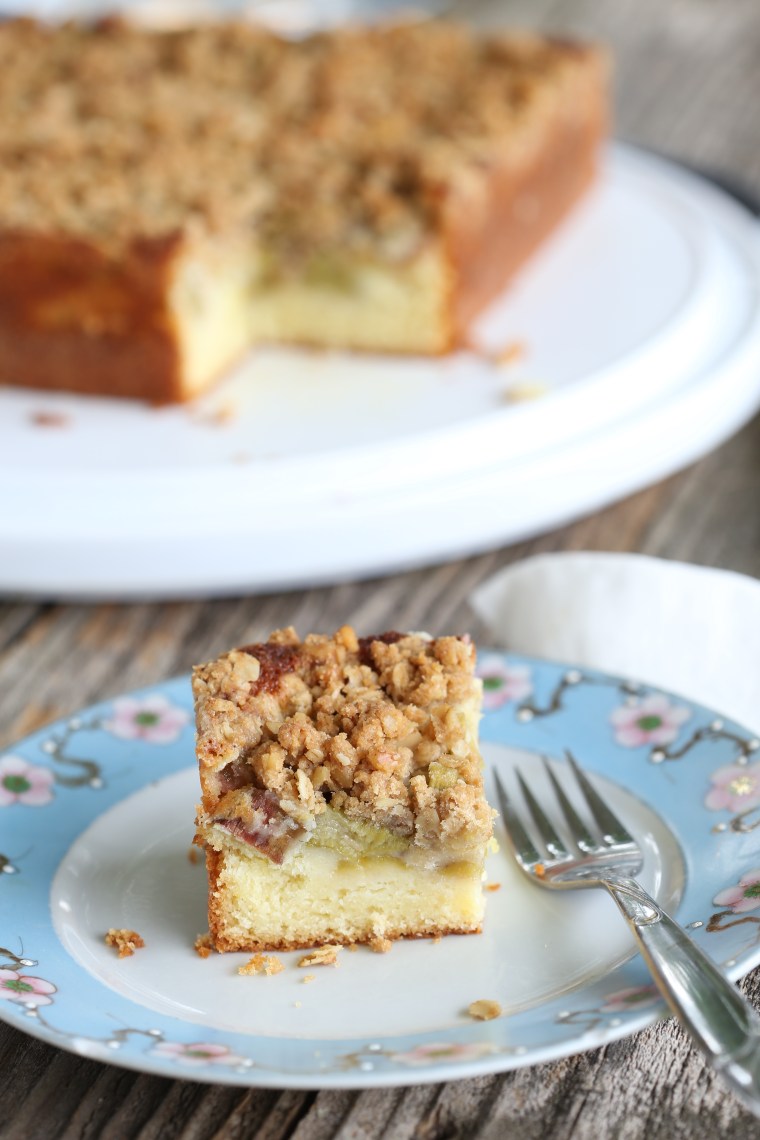 Fresh Rhubarb Buckle
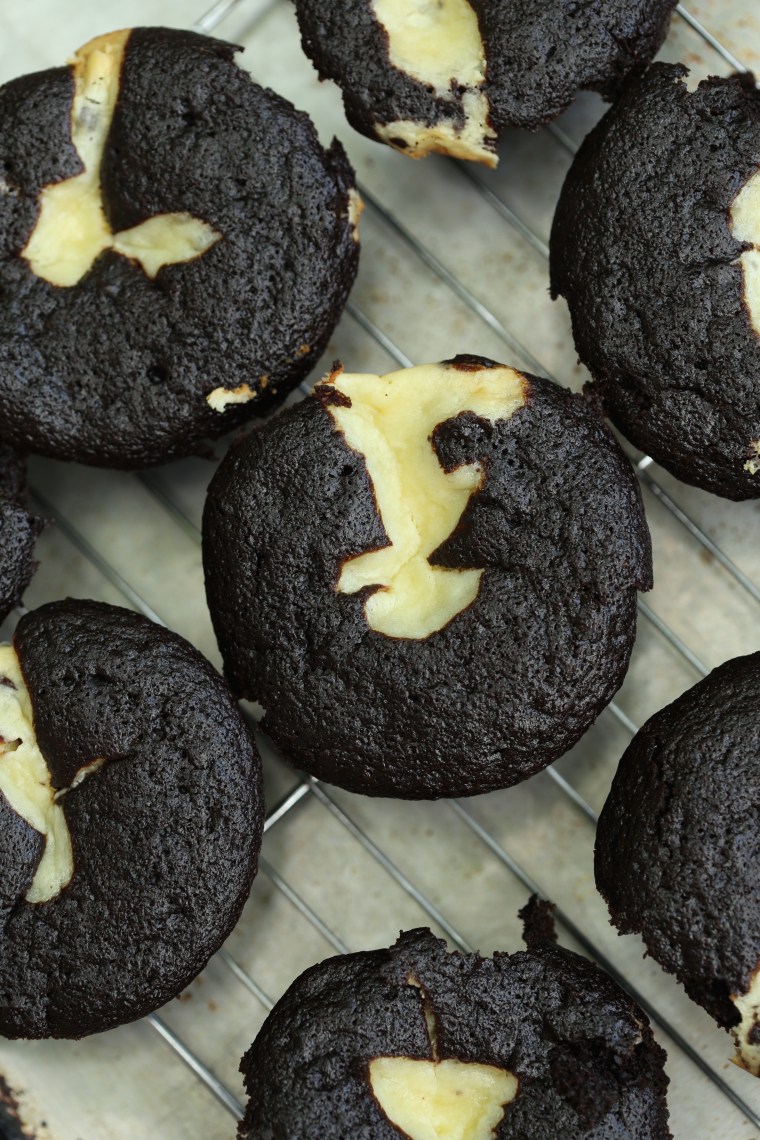 Obsession is a strong word, but in this case, an accurate one. When I began making these for our bakery (twenty years ago), everyone in my family got hooked on them. Moist chocolate cake and a rich chocolate chip cheesecake are baked together in muffin cups and the result is a decadent, obsession worthy treat.


 Let me just say that I am not a landscaping expert. My first idea was to shingle the rocks starting at the top. The thought was that the flow of water would be slowed down from hitting the cracks and crevices created by the rocks. It did slow the water but it also created many little pools of water and as I stood out there in a down pour watching, I realized that I needed to try it in reverse order.
 Because I had previously hauled all of the rocks to the stream, reversing them was a fairly quick task. For my second attempt, I started at the bottom and shingled them upwards. So far, it seems to work better but I suspect that in time, I will have to come back and truly dig out the stream bed to create a deeper channel that I can line with rocks. For now, this works.
 As I gathered rocks, I tried to pick them for shape and color but also for moss.
 Lichen also makes nice markings on the rocks.
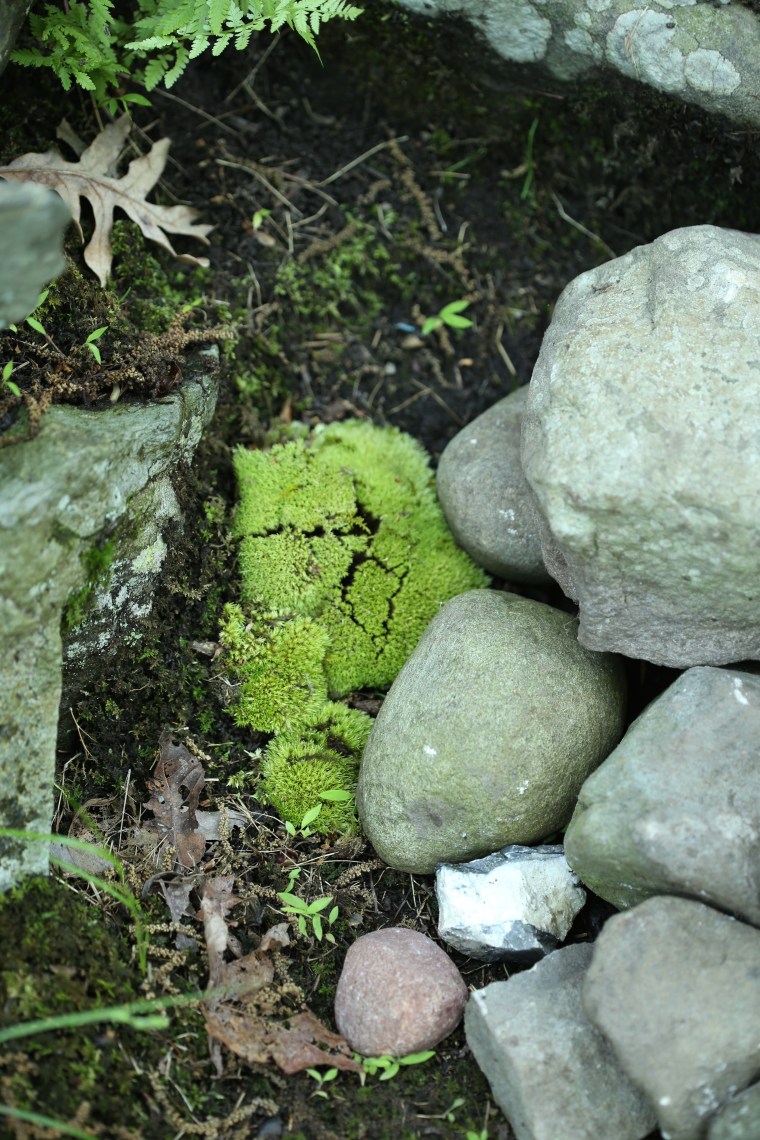 Because this is a mountain stream, mosses were a must and there is also no shortage of it here.
 By carefully digging out small ferns, I was also able to add them to the rocks.
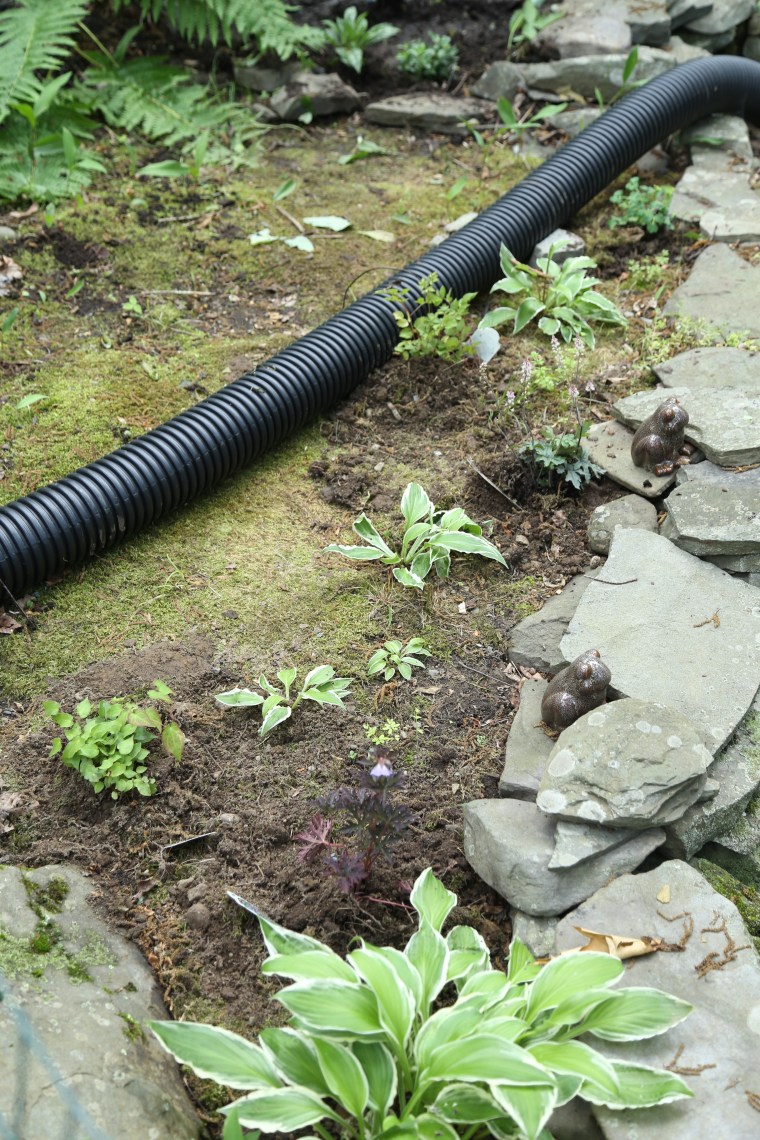 Once the stream was finished, I began working on the pond area. The person who built the stream bed had it all flow down hill into a small pond which acts as a basin to hold most of the water. The area is terraced and has a dry bed as well as a wet bed where the water from the stream flows in. Almost the entire yard is shaded or has dappled sun light which makes it easy to use plants like hostas but beware, deer will eat them and the pond is fenced in to keep them out.
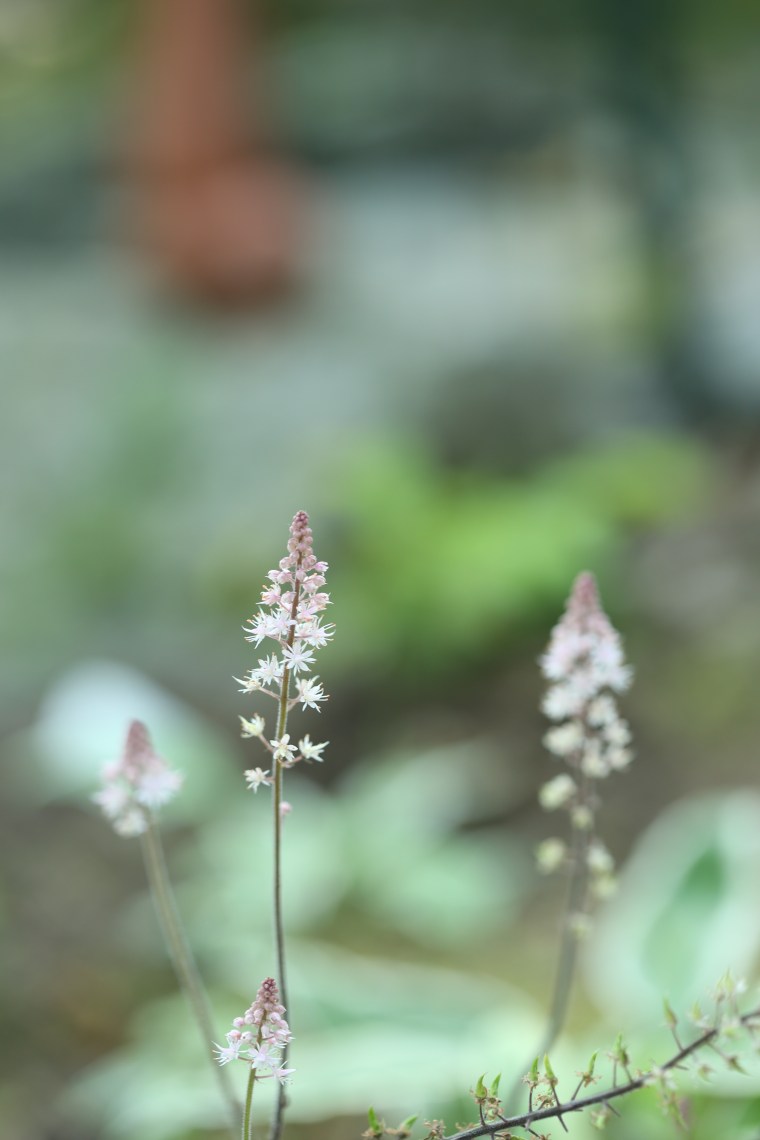 The flowers on shade plants generally are not as showy as their sunny counterparts. This tiny spike of pink blooms on the Tiarella Pink Skyrocket, commonly called Foamflower, it your reward for taking the time to look closely at the plants in the garden.
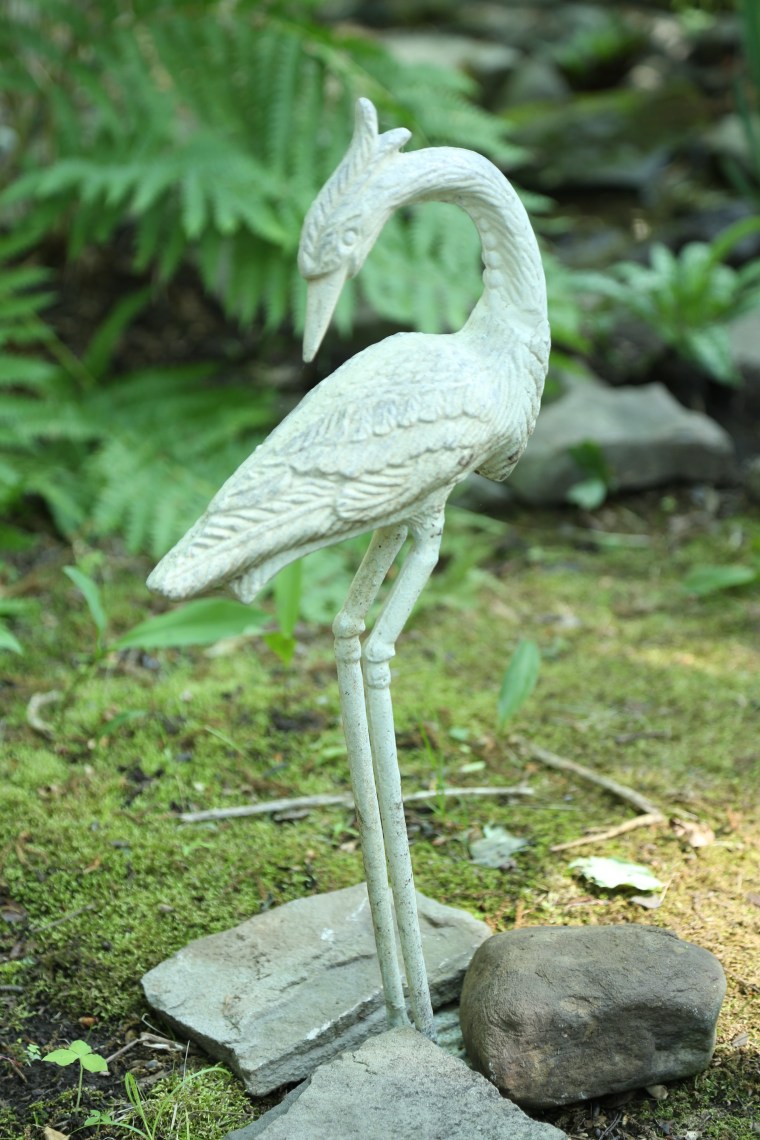 If you recall, about a year ago, I posted here about my mother’s garden. In that piece, I mentioned how she is a gardener of things rather than plants. This meant that I spent some time rearranging the statues in the garden as well.
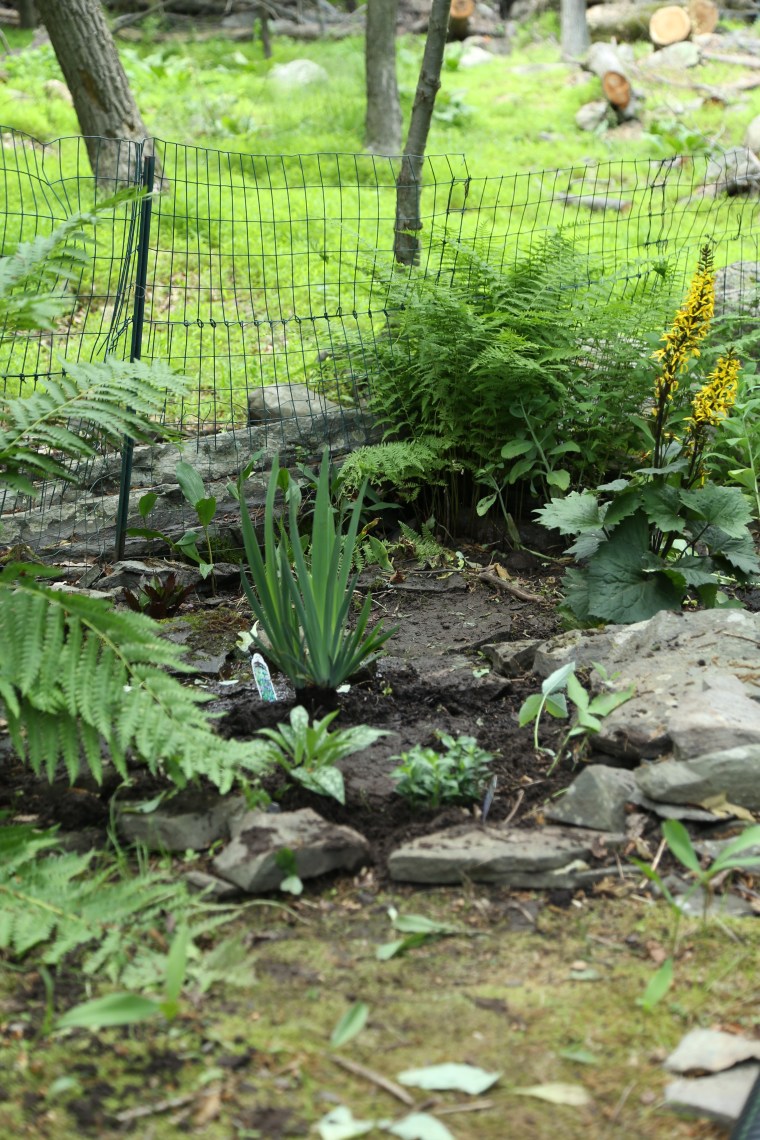 In the wet area of the pond, I had the chance to plant some water lovers; Iris versicolor Blue Flag and Iris sibirica Sparkling Rose. Keeping them company is a Ligularia stenocephala Little Rocket (commonly called Leopard plant or Ragwort), Lobelia speciosa Vulcan Red (commonly called Cardinal Flower), Pulmonaria Raspberry Splash (commonly called Lungwort), Phlox divaricata Blue Moon (commonly called Wild Sweet William or woodland phlox) and Astilbe chinensis v. taquetii Purple Candles.
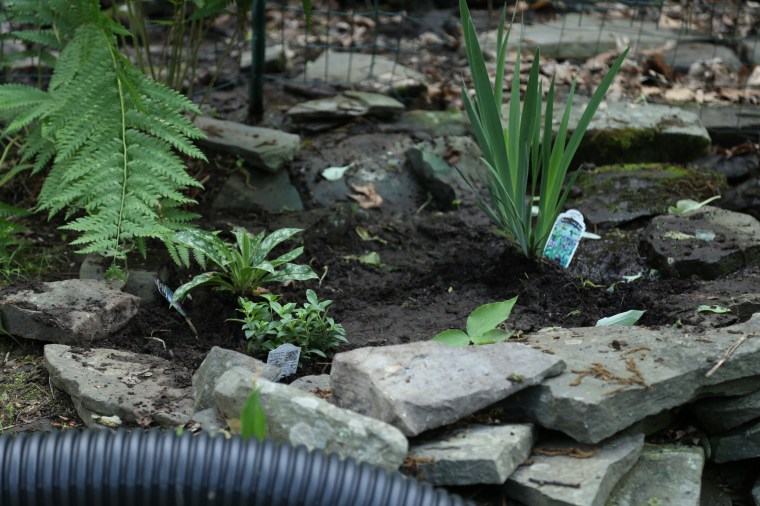 One of the surprises in the yard is the large quantity of native Jack in the Pulpits growing. With a small trowel, I carefully dug a few smaller specimens up and moved them into the wet area as well and near the center of the photo, you can see the trio of leaves from a single plant.
 Ligularia in bloom makes a statement and is large enough to be easily seen from the deck.
 The pulmonaria and the phlox have adapted well to their new homes.
 The cardinal plant has show quite a bit of new growth; the bright green leaves will turn darker with age.
 This is the first time I have tried gardening in my mother”s yard and everything I have planted is an experiment. Between the growing conditions and the deer, I am hoping for success. After seeing the amount of growth on this Cardinal plant in just one week, I am encouraged!
 Whoever did all of the stone stacking and terracing gets the blue ribbon! When the stream empties into the pond, it comes over this pile of rocks and collects in the basin which is lined with cement. Years of water have led to lots of ferns, moss and lichens but I think I like the reflection best.
 On my next visit, I hope to bring help with me along with a mattock; that hose needs to go!
