 When I was plotting the garden earlier this year, I planned on using a large amount of space for cucumbers because I think nothing beats a freshly picked cucumber when making a salad. Whether it is a bowl of lettuce topped with tomatoes and cucumbers or a bowl of slices in a hot-sweet, vinegar marinade, cucumbers are one of my favorite guilt-free pleasures. This year, I made sure to plant plenty of them so that I could have them all summer long.
In the past, I have tried to grow pickling cukes too but haven’t had much luck with them. While at the feed store stocking up on chicken scratch, I came across a package of pickling cucumbers from Livingston Seeds and appropriately titled, Homemade Pickles. According to the website, the vines only grow 2-3/4 feet, mine grew vertically on a trellis and I can assure you, they went at least 6 feet a piece! Allow them plenty of space and if you go vertically, give them a sturdy structure with plenty of surface space to grab onto. Since I pick them regularly, almost daily, they have continued to produce a pretty good amount for over a month now and my pantry is beginning to look like a pickle shop!
When I am going to can pickles, I like to boil the jars and lids to sanitize them. My canning pot holds a lot of water and can seal about a dozen jars at once.
 The light in the kitchen is beautiful in the morning. It is one of the things I like most about our home. The windows allow a lot of light in and in the summer, we can go most of the day and into evening without turning on lights in the kitchen.
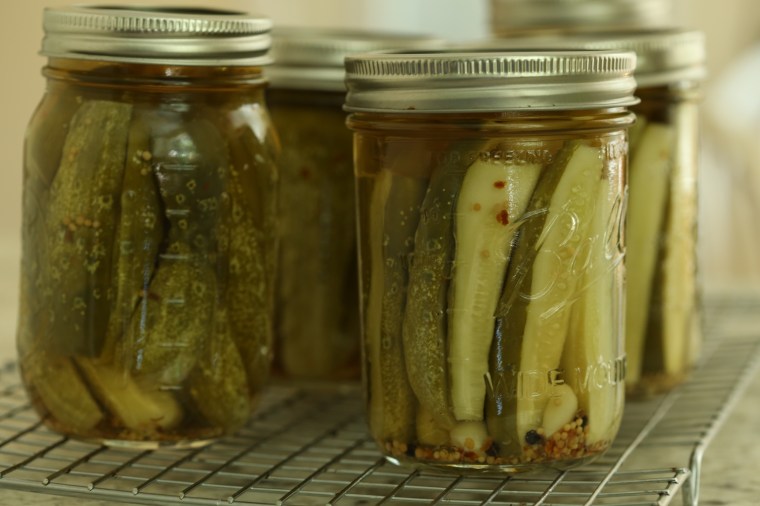
 These cucumbers have good flavor, soft skin and did not get bitter even when left on the vine too long-a few got missed in the leaves, swelled up and still did not turn bitter. These have been soaked overnight in a brine and are draining while the jars boil and the vinegar mixture is prepared.
 When I make dill pickles, I like to add a few mustard seeds and a pinch of dill seeds. Fresh garlic, crushed red pepper, black peppercorns, dill from the garden are added to a boiled mixture of cider vinegar , water and salt.
 If you like to can, I highly recommend picking up a pot that comes with a basket. It makes putting the jars into the pot and removing them so much easier and safer.
 The other tool I recommend, a pair of canning tongs, seriously, if you do not have them, buy them. Too many times I have tried to use regular kitchen tongs and have scalded my hands on more occasions than I can count!
 The pickles are packed into the jars with the spices and herbs and then the boiled vinegar mix is poured over them leaving about half an inch of space.
 When the tops are put on, be sure not to screw the bands too tightly. Nothing is worse than removing the jars from the water bath only to see that they have crimped and buckled because the bands were too tight! Load them into the basket and then lower it into the boiling water.
 After a boil of 10 minutes, raise the basket and remove the jars to a rack to cool. Listen for the lids to pop as they cool. If you find that some haven’t popped and appear sunken in the middle, put those in the fridge and use them first.
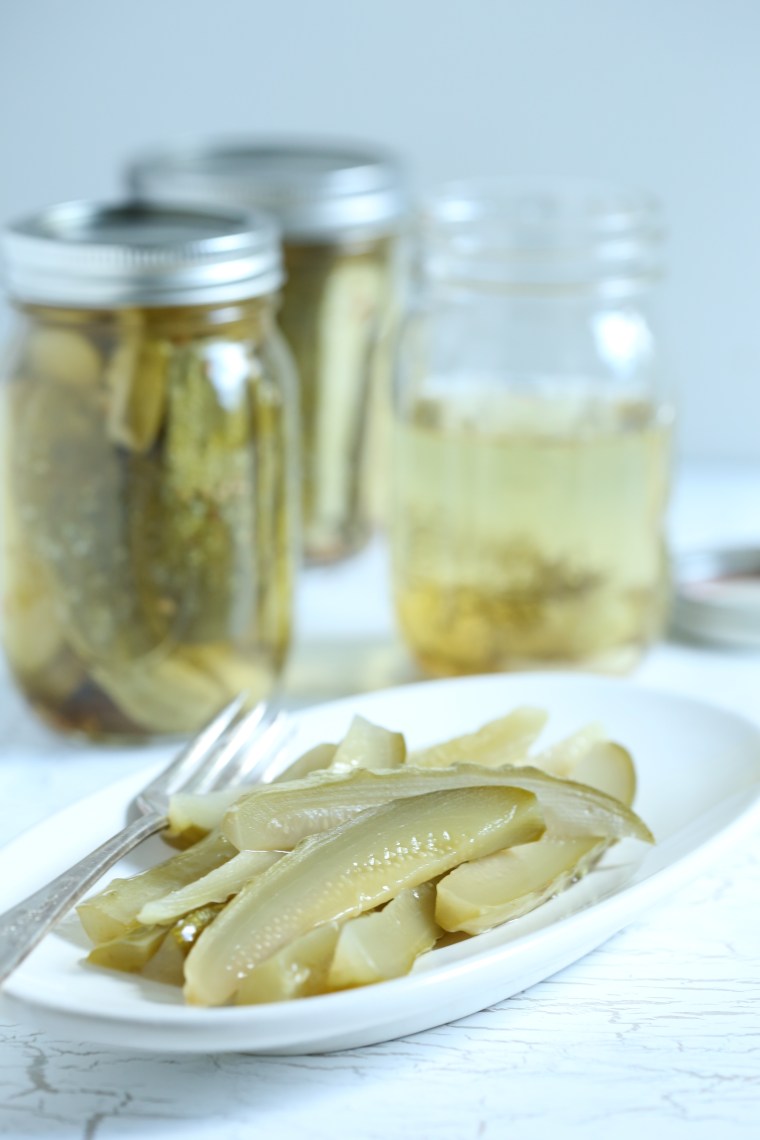 The recipe I used recommended allowing the jars to sit for 3 weeks to age and allow the flavors to develop. Since I have been making these pickles a few jars at a time, I decided to open one today and taste them. They did not disappoint! One thing about this recipe, no alum was used and despite that, they were pretty crispy, for a pickle anyway.
 The color has changed dramatically over the weeks. These will be enjoyed with many sandwiches…
 Sandwich-Sliced Dill Pickles
(not sliced, speared)
adapted from The Joy of Pickling by Linda Ziedrich
makes 6 -8 pints
5 pounds pickles with blossom ends removed-I only had 3.5 pounds but used the full recipe and yielded 5 pints plus one half pint
6 tablespoons sea salt, divided
2 quarts plus 3 cups cold water
2 cloves garlic jar each jar
1/4 teaspoon red pepper flakes per jar
4-8 peppercorns per jar
1/4 teaspoon mustard seeds per jar
pinch of dill seed per jar
1-2 sprigs fresh dill per jar
2 3/4 cups cider vinegar
Quarter the pickles into spears or cut into 3/16 inch slices, make sure to cut the blossom ends off and remove the stem end as well. Place into a large non-reactive bowl. Dissolve 3 tablespoons of the salt in 2 quarts of cold water. Pour over the cut pickles, cover loosely with plastic and place a plate on top to weight them down. Allow them to sit at room temperature for 12 hours. When ready to can, dump the pickles into a colander in the sink and allow them to drain completely.
Place the canning jars and lids into the basket and lower it into the canning pot. Fill the jars with water and then fill the entire pot so that the jars are covered by 2-3 inches of water. Over high heat, bring the water to a boil and allow the jars and lids to boil for a few minutes. Raise the basket and using canning tongs, carefully lift and drain the jars one at a time. Place them upside down on a rack to drain and dry. Do this for the lids as well. Keep the water at the boil, adding hot water if much has evaporated.
In another smaller, nonreactive pot, bring the vinegar to a boil with the remaining 3 cups of water and 3 tablespoons of salt. Stir to dissolve the salt and then turn off the heat and keep it on the stove while you pack the jars.
Place the spices and herbs into each jar. Fill the jars so that the spears are snug but not so tight that they are crushed against each other. Pour the hot vinegar mix over the pickles, leaving about a half inch of space. Wipe the rims, place the lids on and screw the bands so that they are secure but not tight. Make sure the water in the pot is at the boil. Load the jars into the basket and carefully lower it into the pot. Boil for 10 minutes, raise the basket and remove the jars with the tongs. Place them on a rack and allow them to cool completely before storing in a dark, dry place. Check the lids, if any have not popped and inverted, place them in the fridge, allow them to age for a couple weeks and use them first. The remaining jars should be ready to use in three weeks.
 Vintage cookbooks are often a treasure trove of information, especially if you want to know the history of a recipe. If you flip through some, you may come across recipes for Green Goddess Dressing, a classic creamy dressing that gets its color from the herbs that are pureed into the mixture. If you have an herb garden that is producing large quantities of parsley, tarragon and chives, this may just be the recipe for you.
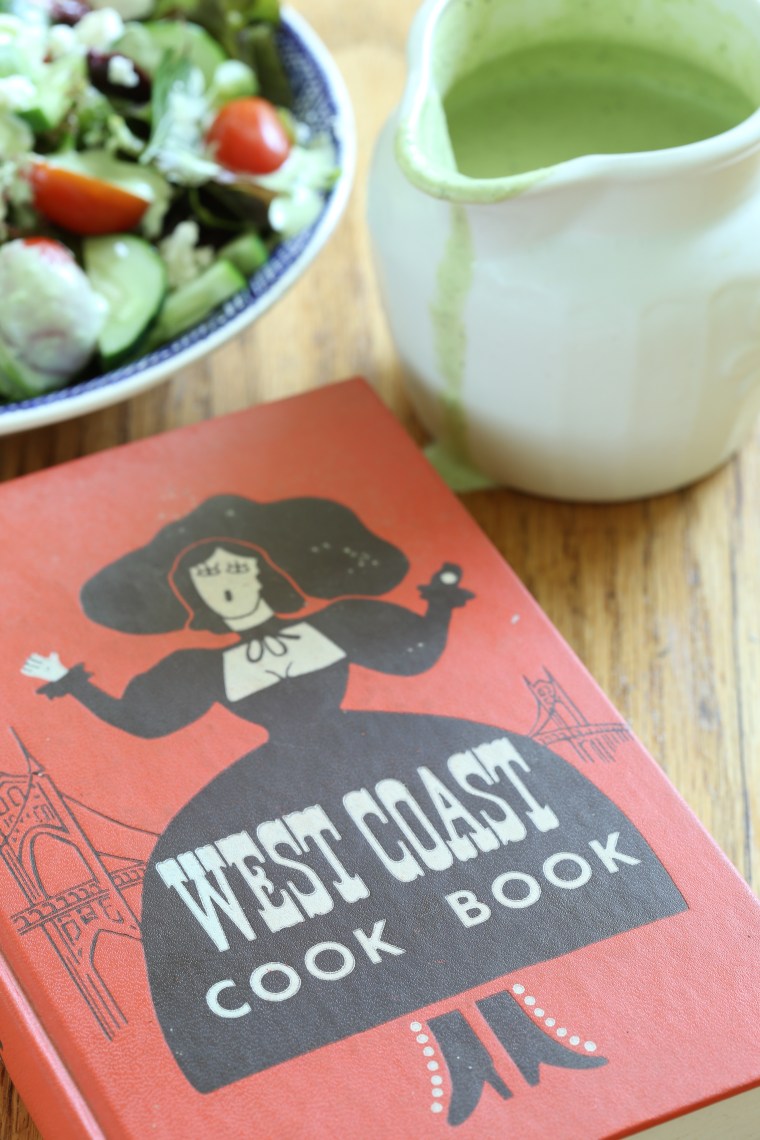 My copy of the book is a reprint but I love the graphics of this version! This printing does not include any other drawings or photographs in the recipe and I have not ever seen one with a dust jacket but if you are lucky enough to find a copy of the original printing, it may have the dust jacket. Either way, if you enjoy the Mid-Century Modern style of cooking, I recommend picking up a copy, it is full of great recipes!
 The Palace Hotel’s Green Goddess Dressing
 When you visit
 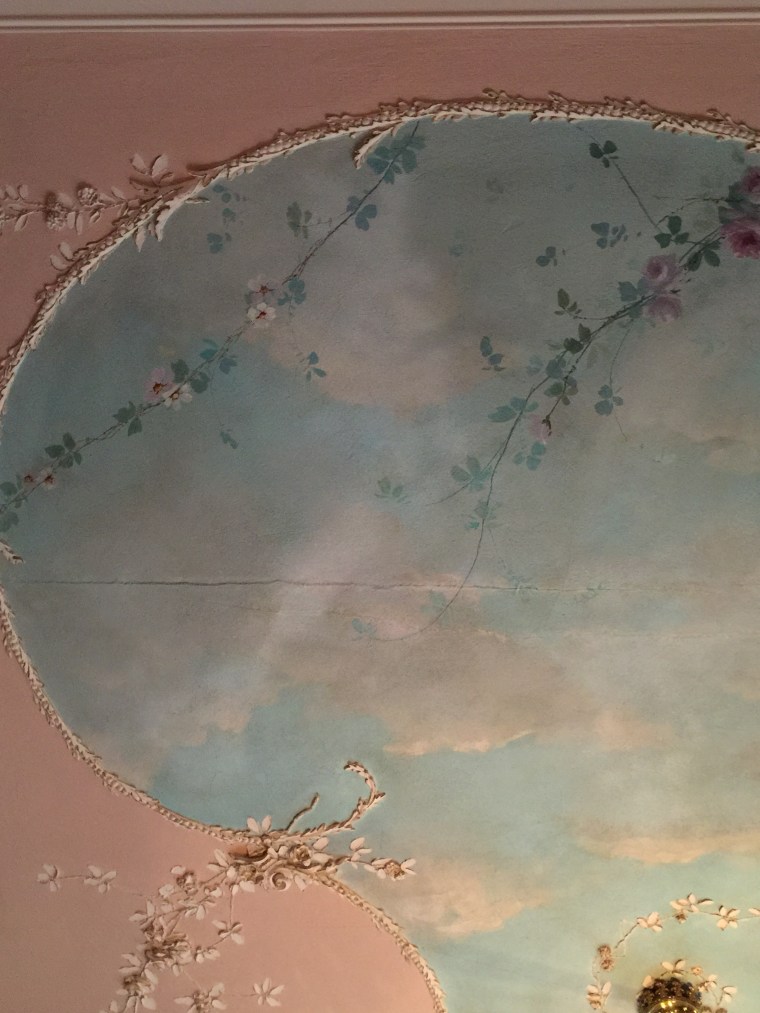 The thing that caught my eyes-the ceiling. All hand painted and all original to the house.
 The depth of the details, all hand applied and beautiful.
 Throughout the house, not a detail was spared. In the parlor next to the front parlor, the details were mostly silver in color. While this light fixture is actually sterling silver, the rest of the details in this room were actually aluminum, a metal which was more precious than platinum in that era.
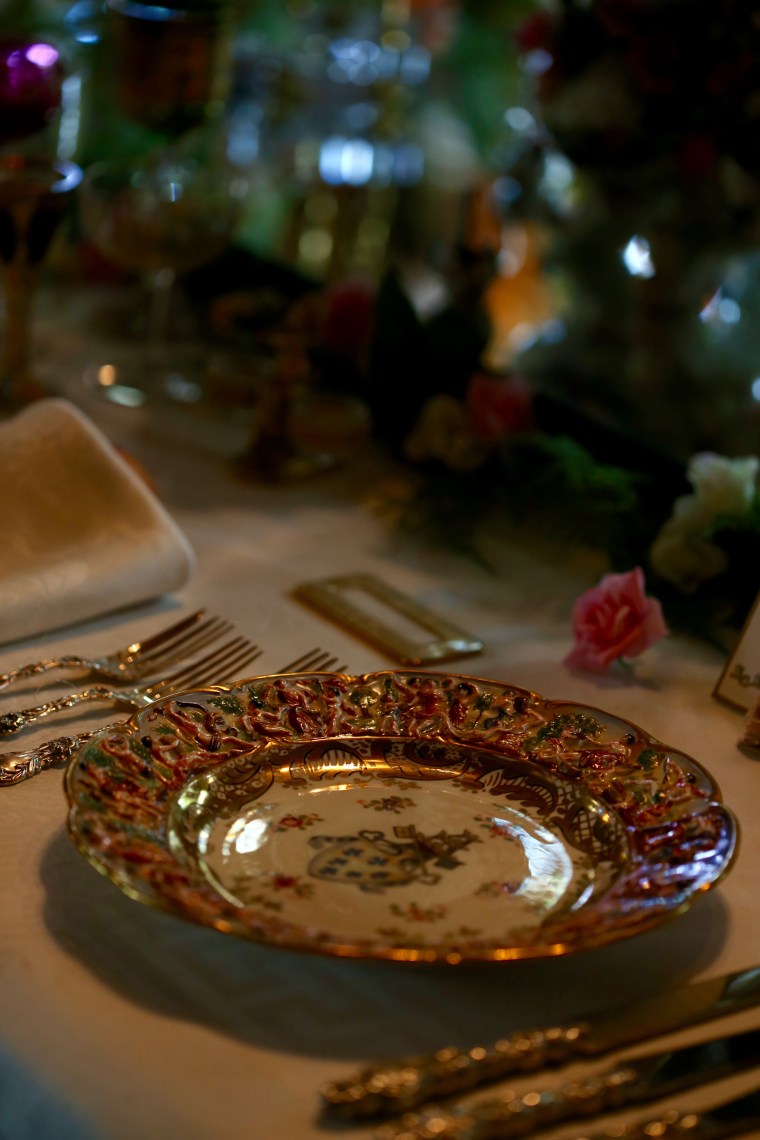 Of course, my favorite room was the dining room. The table was set for a formal dinner with the best furnishings they had.
 The glasses, the china and the flowers…overly ornate, perhaps but I would love to set a table like this!
 To preserve the quality of the furnishings, the lighting is low and it was a challenge to take photos with a hand held camera.
 Coveting the glasses is not a sin…
 And while my camera was challenged, my cell phone was not!
 Standing just outside the dining room, this was the overall view of the table as my camera saw it.
 and this is what my cellphone saw. Same room, same lighting-cell phone cameras are pretty sophisticated!
 One of the main features of the house are the Tiffany stained glass windows in the stair well leading to the second floor. They are 15 feet tall and some of the most beautifully detailed windows I have ever seen.
 It was a bright sunny day and the windows glowed with the light.
 A visit to the estate just to see the windows is well worth the time!
 Some of the few things that did not actually belong to Sallie Dooley are actually clothing such as this dress. While it is from the time period, it was not hers but it is still a stunning example of the era.
 In her bedroom, a trunk of ladies gloves and lingerie was on display.
 And then there is her bed. She had a love of swans and this is the actual bed she slept in.
 Obviously hand carved and painted, it is the thing of fairy tales…
 Her bedroom was just one of the many rooms in the house that gave you a real sense of who they were. Please take a trip to
 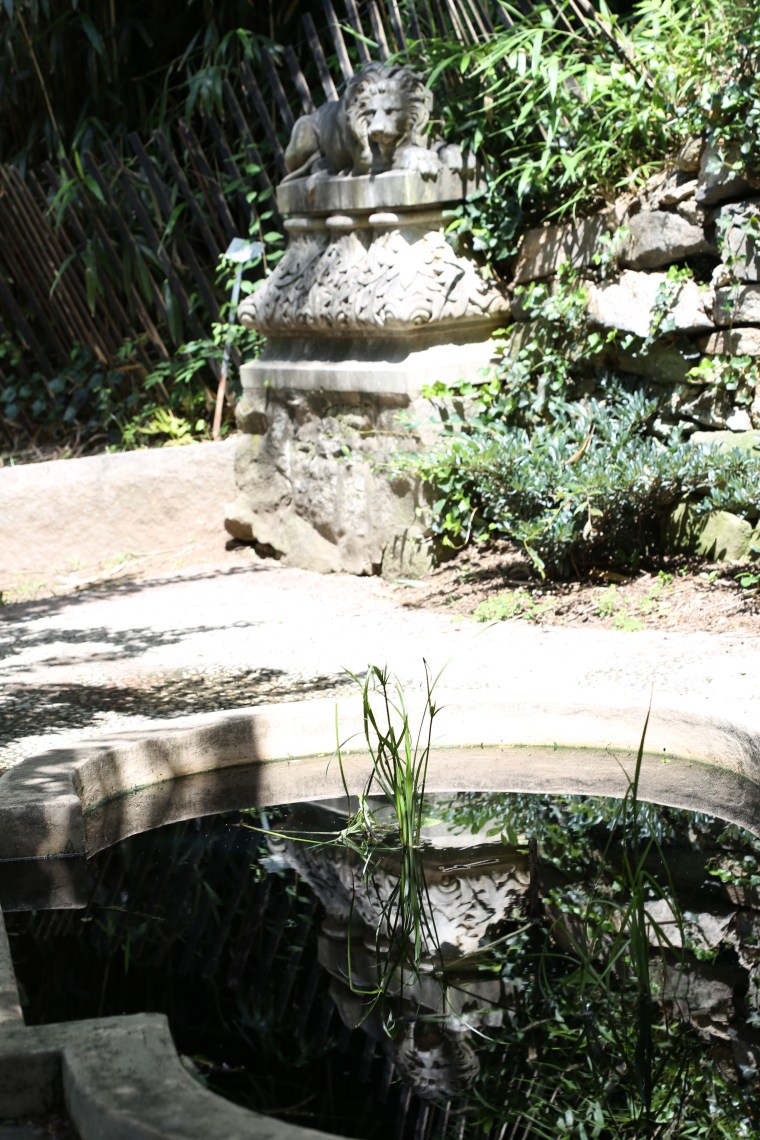 If you have been visiting this blog, you know that I frequently post photos about the places I visit, especially if they have a garden. In our quest to explore Virginia, my husband and I came across
  Pardon me, I have a thing for reflections and I take photos of them all the time…
 As we walked the trail, there was so much to see. The pond, the plants, the trees and the structures. The Dooleys spared nothing and built a beautiful landscape.
 We ventured out onto this raised walkway over the pond and quickly saw that the pond is full of fish.
 Beautiful Koi to be exact and many of them were well over a foot long.
 Dragonflies are abundant here as well, and they came in many colors.
 Water lilies; how I wish I had a pond or a water feature in my garden that I could fill with water lilies!
 Turtles were also abundant. This is an Eastern Painted Turtle.
 So many of the decorations and structures were added by the Dooleys and have managed to stay in tact nearly 90 years after they passed away.
 If you take the mansion tour, you will see a photo of this bridge and sculpture in the house. Do yourself a favor, go to the Japanese garden and walk over the bridge, it is beautiful.
 The park itself is huge and I suggest you spend the entire day exploring it. We took a quick walk through the wildlife area and I spied this little waterfall in an enclosure with Bald Eagles.
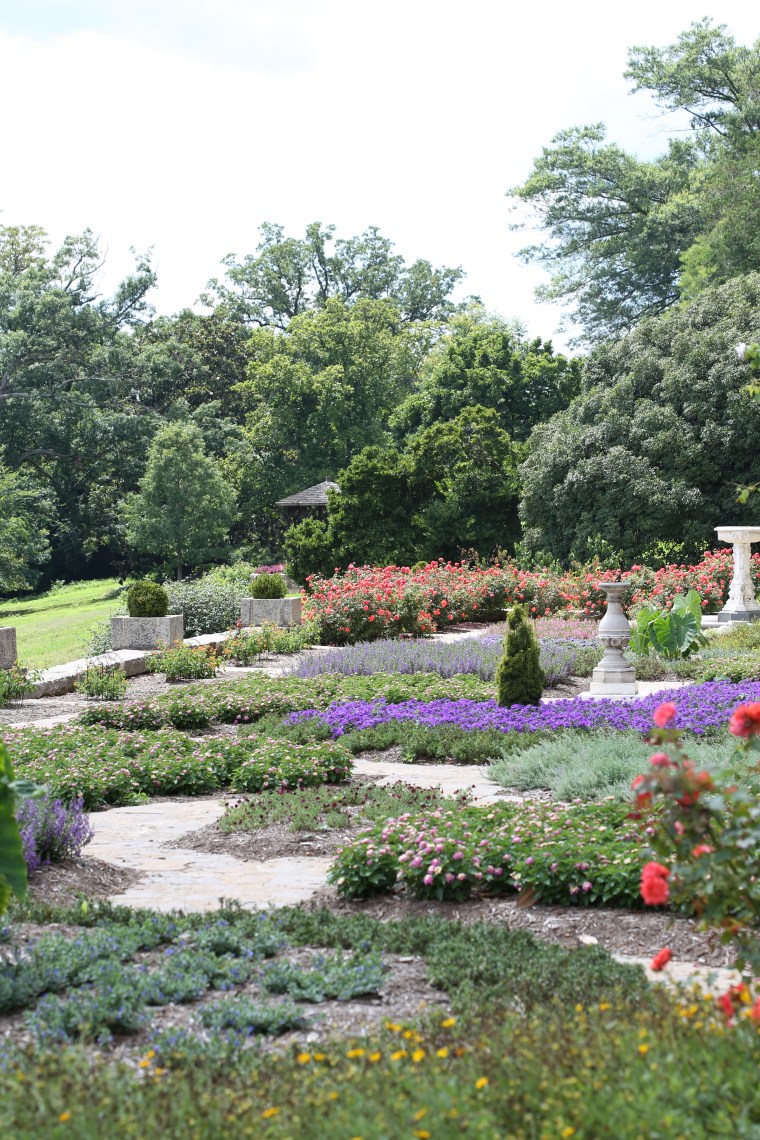 At the top of the hill above the Japanese Garden is
 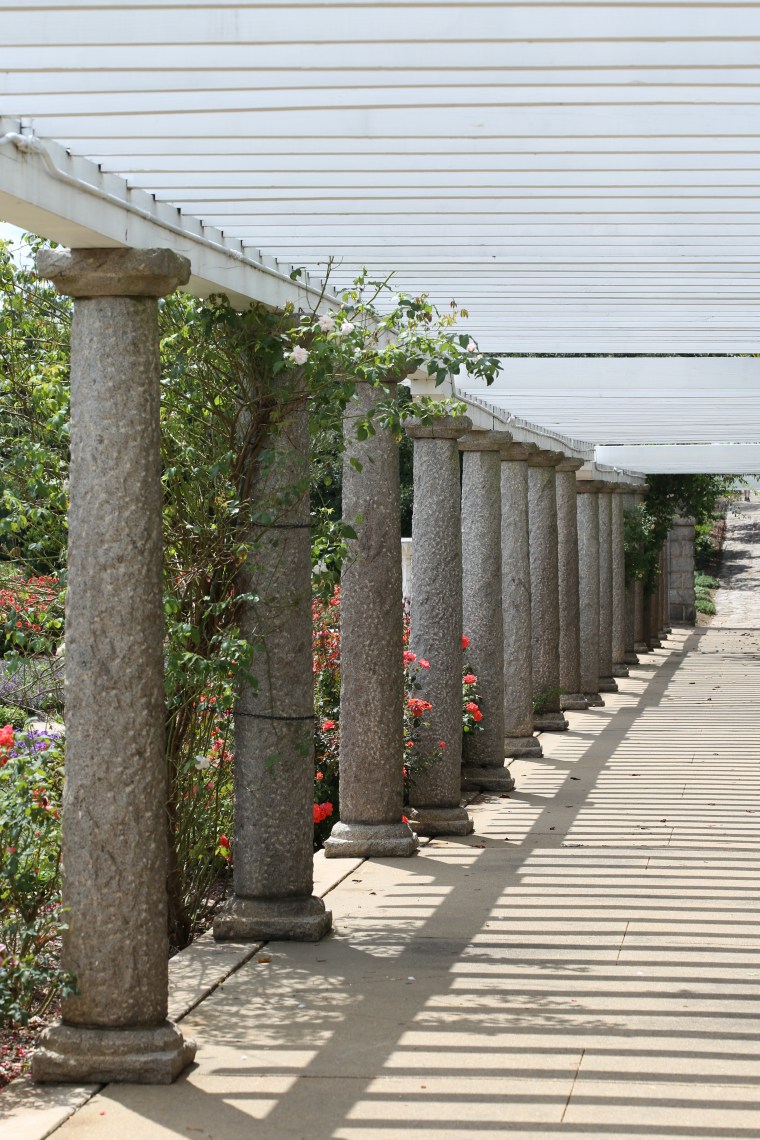 And an Italian Garden is not complete without a pergola and this one is a welcomed relief from the heat of the sun!
 This garden was so colorful and I wanted to walk through it more but the heat…
 Another feature, the Italian Gazebo. There is so much to see and it must all be done by walking. Be prepared for that, bring water and wear the right shoes. We will go back, we want to see the seasons and visit some of
  Apparently, I can Pinterest along with the best of them. Repurposing things has long been a hobby of mine but since Pinterest came along, there are so many people sharing ideas and photos that if you spend some time looking, you can quickly become overwhelmed with photos and tutorials. Unfortunately, for every great step-by- step tutorial, there is a vaguely written and generally poor one to counter it. Having seen so many for turning chandeliers into planters and outdoor lighting, I decided to give it a go when I found this fixture at my local Habitat for Humanity Restore. The painting on the metal made it look a little old and rustic which meant I wouldn’t have to try and paint it but even better was the $5 price tag.
 Knowing that I had to find three plates and cups, I searched in the housewares department and the gardening department. While I could not find plates at the HHRestore, I did find three terracotta pots that were already coated with a nice garden patina. A quick visit to my other favorite thrift store in town, the CHKD store, turned up these nice Pfaltzgraff saucers. At 78 cents a piece, how could I say no?
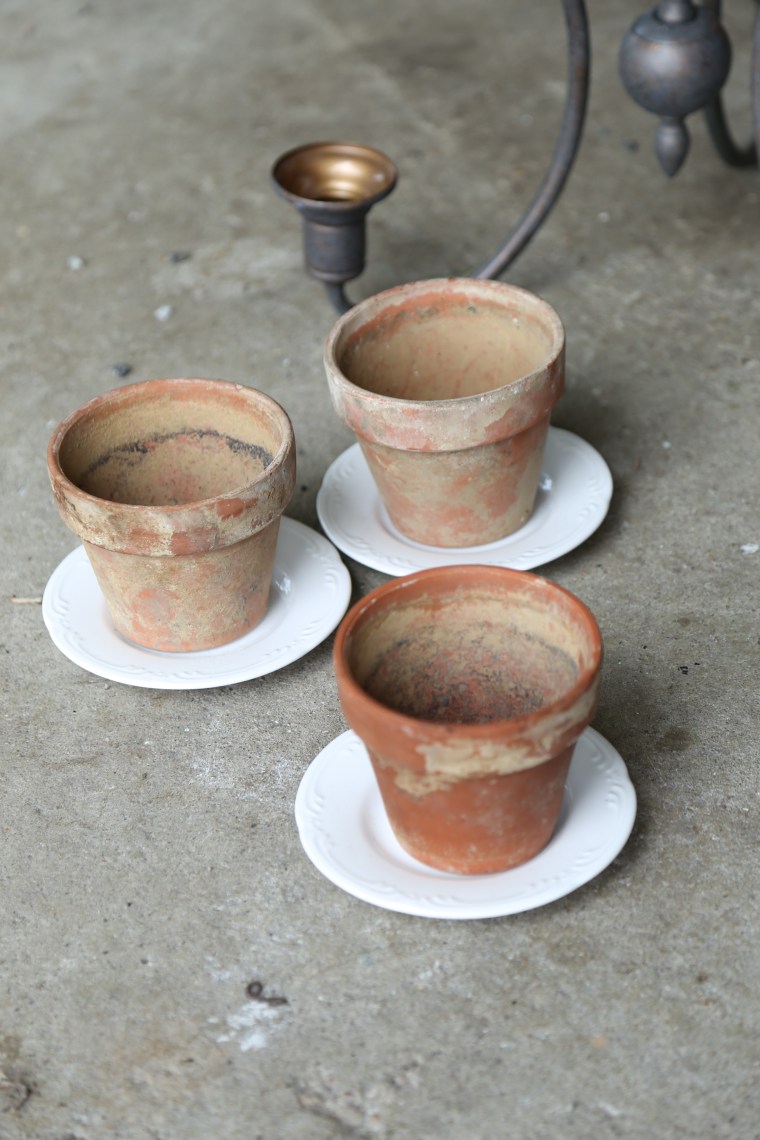 A quick preview of what is to come. If you can, take your fixture with you, it will give you the chance to view the pieces together and make sure they fit. Plates have a ring on the bottom that can make it awkward to assemble the pieces. My plates were not a perfect fit but came close enough that I was able to make them work together with the cups on the chandelier.
 After removing the electrical components and cutting the wires, I was left with the bolt at the bottom and a piece of threaded pipe. To attach the plate and pot, I needed a coupling nut to attach to the pipe that would also be used to secure the plate and pot with a bolt and washer. This is another reason that you need to take your fixture to the store with you; every single fixture has its own sized parts and while some are easy to find, others are proprietary or just not easy to locate.
 After considering that for about 12 seconds, I went off to my local ACE hardware store and told my sad tale to a wonderful salesman. He was intrigued him enough that he and I spent close to 20 minutes tracking down parts. When all was said and done, I placed a coupling nut (that still wasn’t cheap but at least it wasn’t as expensive as the others) in the cup and then I filled the area around it in the cup on the chandelier with quickcrete that we had at home. After letting it cure over night, I assembled the rest of the parts.
 The plates need to be drilled out and you will need to use a special drill bit, a glass and tile bit. Place a couple layers of masking tape over the area to keep the bit from slipping and carefully drill a hole slightly larger than your bolts. If you’re worried that bolting the plate and pot together will cause them to crack, place a rubber gasket or two in between the parts; I did use one but do not think it was necessary. Because I did not take measurements, my piece required a bunch of extra washers, I suggest you buy a couple packs of extra washers so that everything is snug.
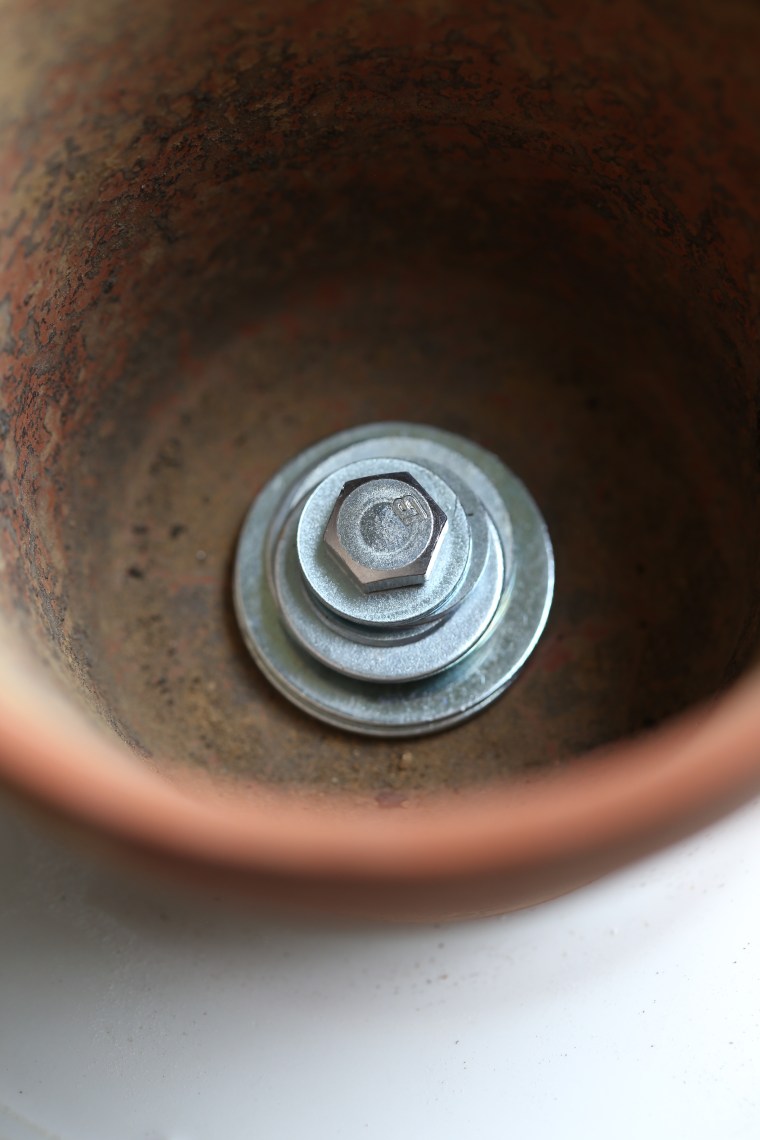 As you can see, I have a small pyramid of washers in there. If I hadn’t put so many in there, my pots would have wobbled and tipped. When I was done, my pots were secured and did not move at all.
 Ready to be filled with plants.
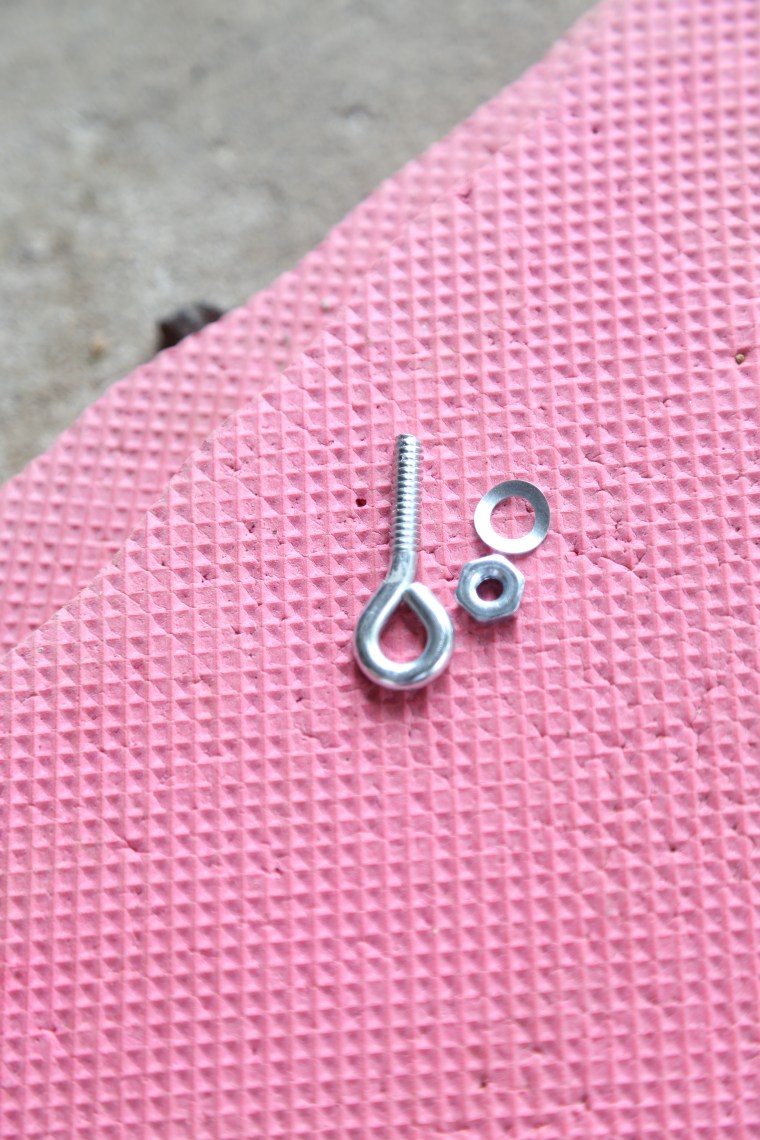 Because this is a chandelier, it needs to hang! While I was at ACE, John, my helpful hardware expert cobbled together a few pieces to create a loop at the top of my fixture.
 The top of the post actually comes off and I removed it and inserted the pieces to create the hanging loop.
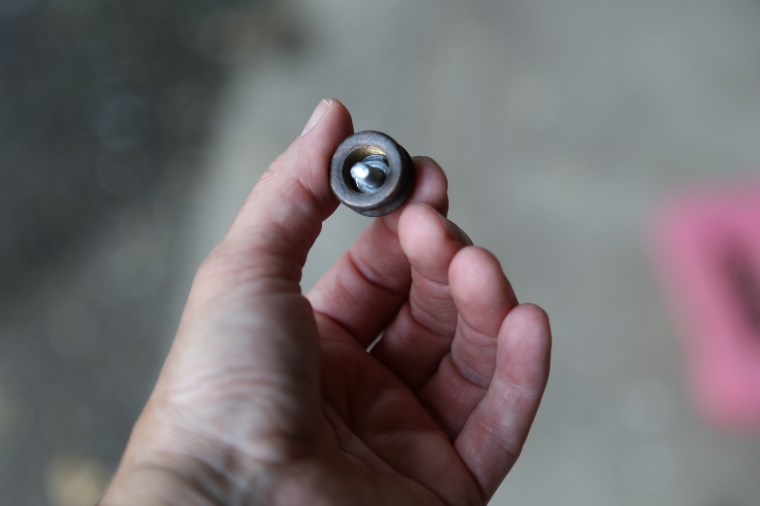 It was a tiny space to work in so I suggest you get a hold of some really narrow and long needle nose pliers if you have a fixture like mine.
 The finished hanging loop is ready to hang!
 The final step is to fill the pots. One thing many folks don’t consider when they arrange plants in hanging planters is that size is crucial. My pots are small, about 2 cups in capacity and that means a plant could quickly out grow the space. To prevent that from happening, I chose plants that I know have shallow growing roots that require little space; sedum and succulents! To fill my cups, I used a sedum v. John Creech and an ice plant. They have a low watering need and will not out grow the cups quickly.
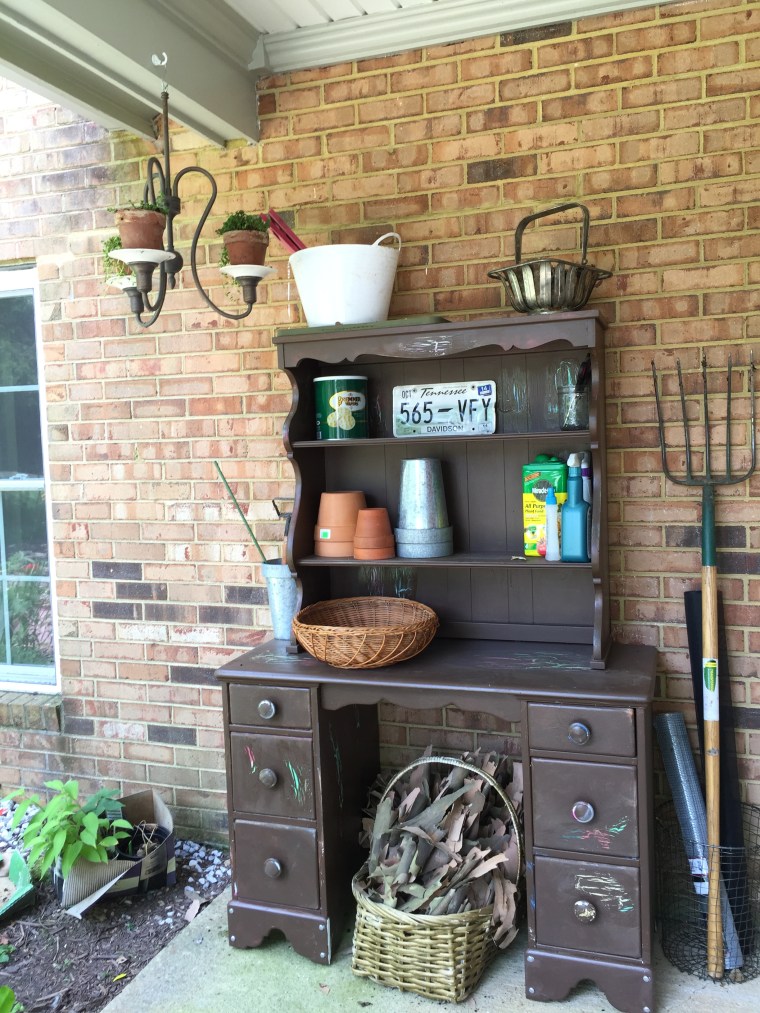
 Summer fruit pies are one of my favorite things. When the fruit season is at its peak, freshly picked, ripe and juicy, fruits just about beg to be baked into a pie. With a dozen peaches and a basket of blueberries in the house, I couldn’t resist the temptation and I baked a pie, a whole 9″ pie just for the two of us!
 Of course, I also used homemade pie dough. Before you start panicking, before you go on about how you just cannot roll out pie dough, let me tell you that you can, you absolutely can!!! First, make the dough ahead of time and chill it for at least an hour. Take it out of the fridge and let it soften until it is pliable but not sticky or squishy. Now do you see all of the flour on my table? That’s the secret, cool dough, lots of flour and short strokes with the rolling pin. Lift the dough and turn it as you go, spread out more flour on the table if it sticks, don’t worry you can brush it off before you put it into a greased dish. Make sure the circle of dough has an overhang of at least 2 inches to make the pleats like I have in the photo. Start by taking one small section and folding it in over the fruit but leave the center open. Section by section, fold the dough in towards the middle of the dish, creating the pleats until you get to the last section. Lift the first pleat up and carefully tuck the last one into place and lay the first one back down. Then brush it with some egg wash and sprinkle on some sugar before baking.
 To get a deep, even color, just use one temperature in the oven. Many recipes tell you to start high and drop it down low but I think one temperature is better. It prevents that “OH I FORGOT TO TURN DOWN THE OVEN” disaster and also prevents uneven coloring. My pies only bake at 350F.
 For this pie, I chose peaches and blueberries but you could easily switch out the blueberries for raspberries or blackberries and if you are lucky to have rhubarb on hand, it would be lovely too! Sweeten the pie according to taste but you will want at least half a cup of sugar, and if you use rhubarb, you will have to increase the sugar.
 Peach-Blueberry Deep Dish Galette
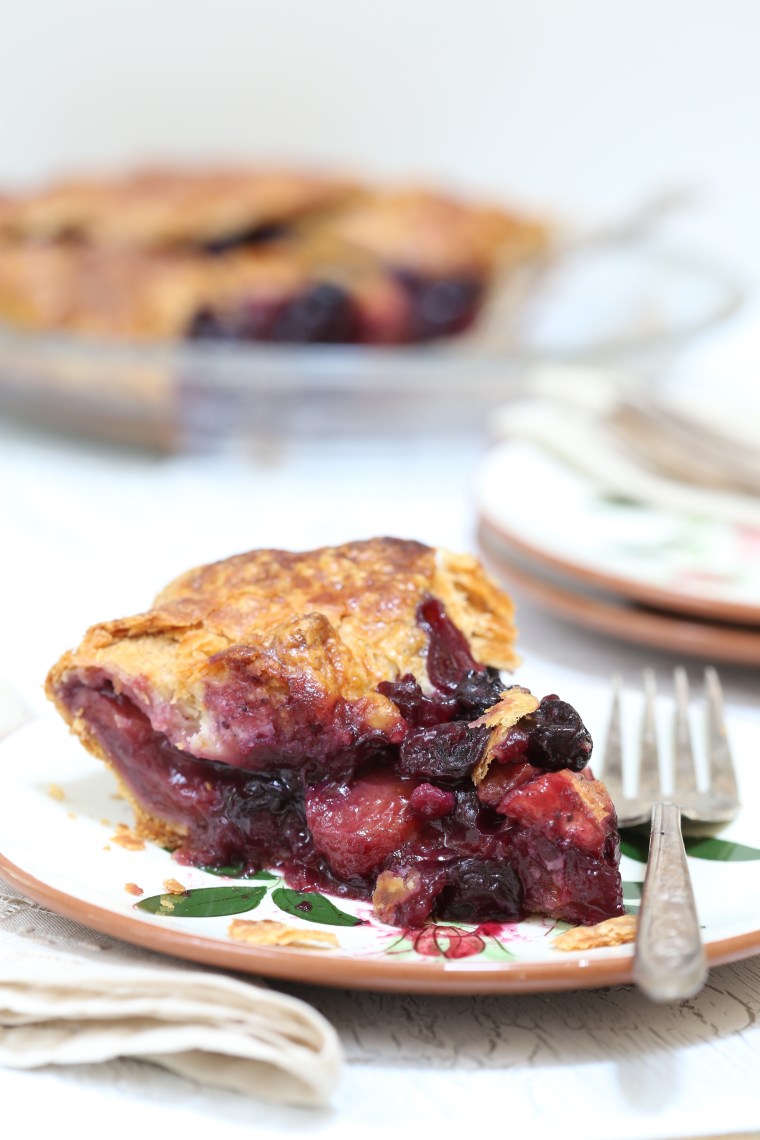 Preheat the oven to 350. Place the sugar, cornstarch, vanilla seeds, lemon zest and spices into a bowl and rub them together. Peel and slice the peaches, you need a pound of them-the extra weight is for the skin and pits you remove. Add the peaches and blueberries to the sugar with the lemon juice and toss them to coat them. Place the rolled out pie dough into a greased 9″ pie plate. Scrape the mixture into the pie crust and fold as directed above. Place the pie plate on a sheet pan and bake until the juices are bubbling in the center and the crust is a deep caramel color, about 1 hour. Allow it to cool for a few hours before cutting so the fruit can set up a bit. We enjoyed it like this but a generous scoop of ice cream would also be nice!
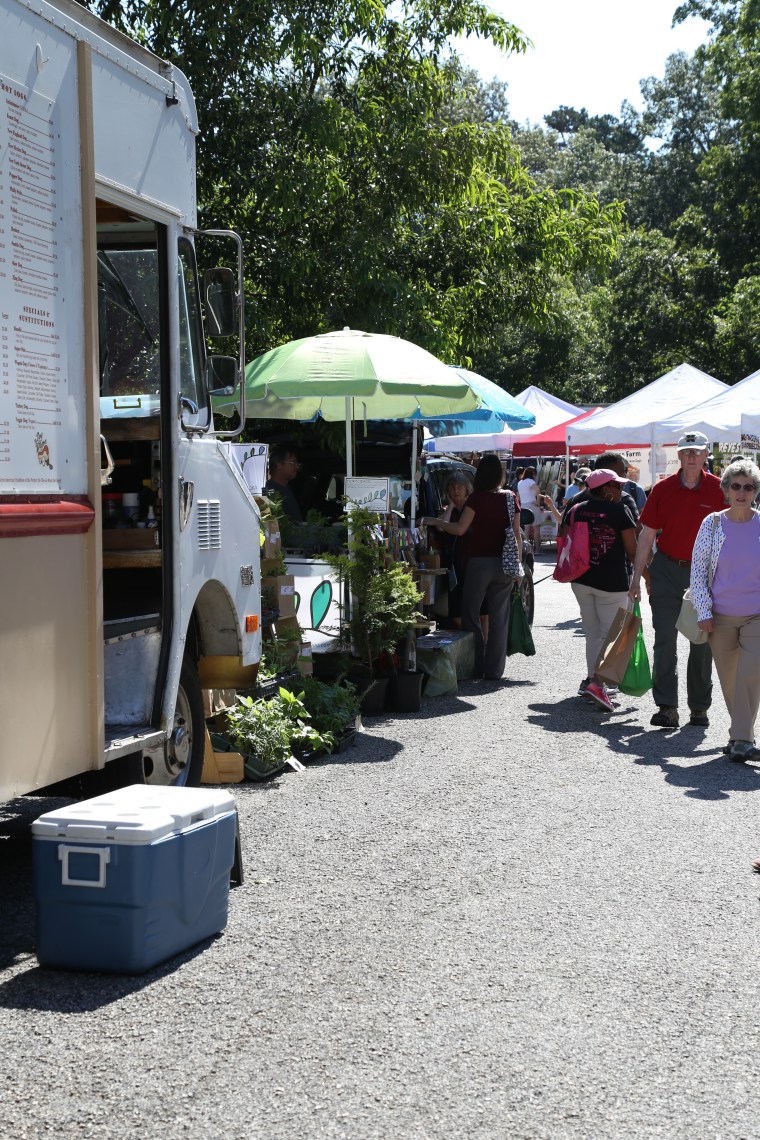 This summer, we are visiting as many farmers markets in our region as we can. After living here for nearly two years, it was time to get out and see what the area has to offer. On a lovely summer morning, we drove up to Richmond to visit the
 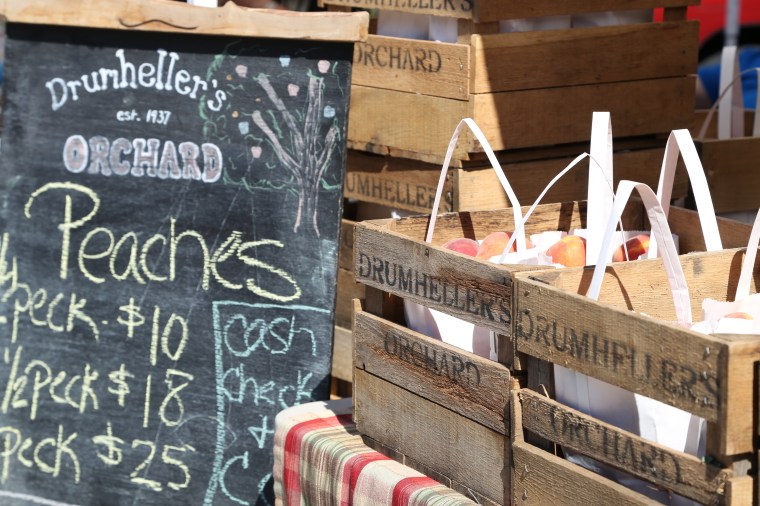 The folks at Drumheller’s get around! They sell in Williamsburg at the market too and I love their apple cider but it’s peach season and they were selling them by the bag.
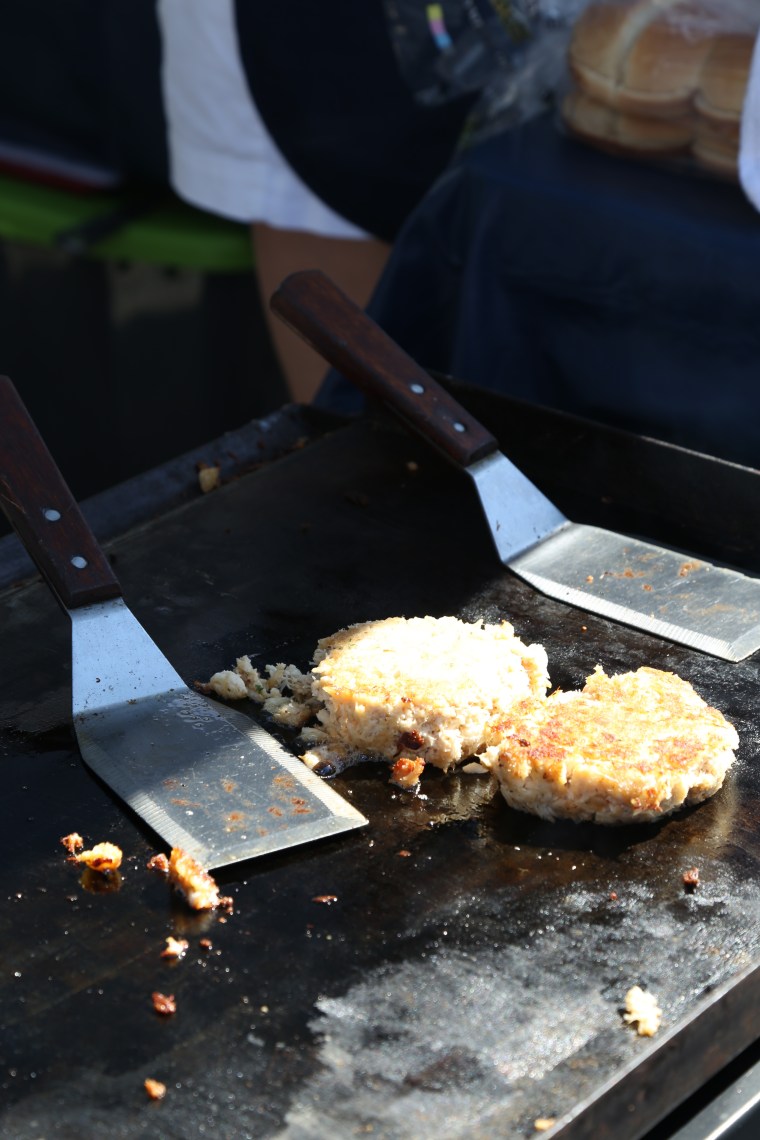 When in the Chesapeake area, expect to find crab cakes-we have seen them at several markets and they always look so tempting but I am not a big fan of crab cakes for breakfast.
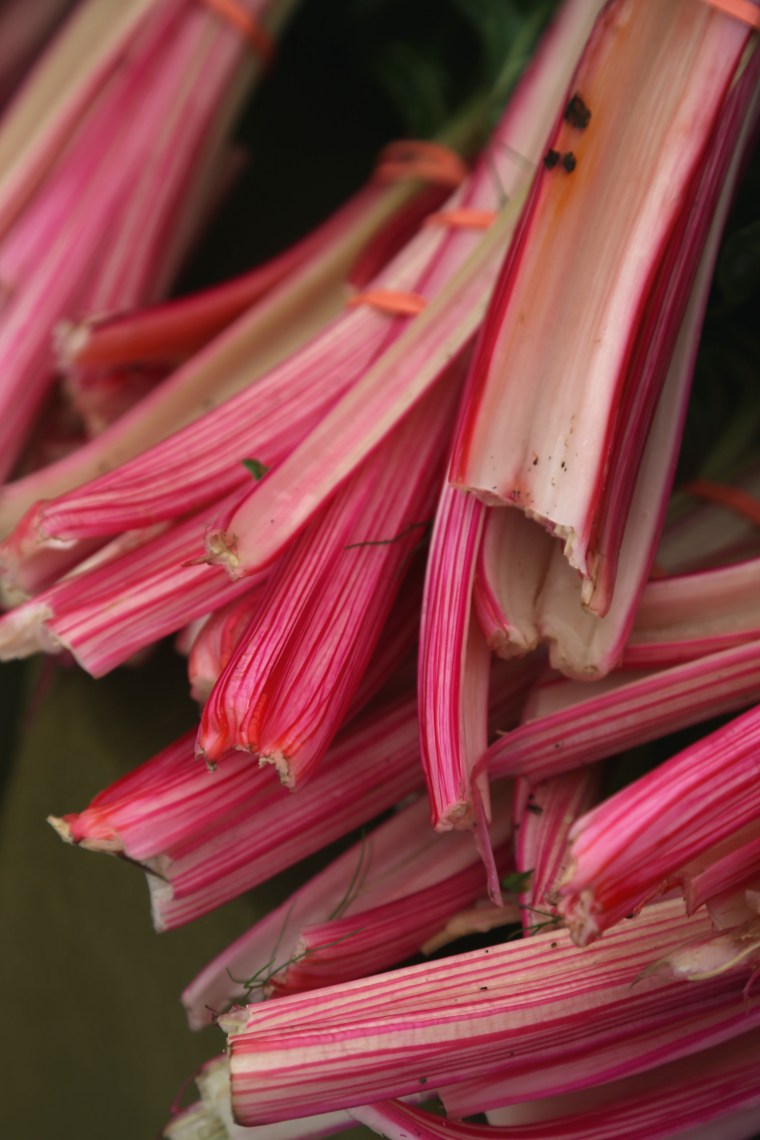 The stems of swiss chard are so beautiful-I know, I take pictures of chard at every market. What’s not to love about peppermint chard? Those stripes…
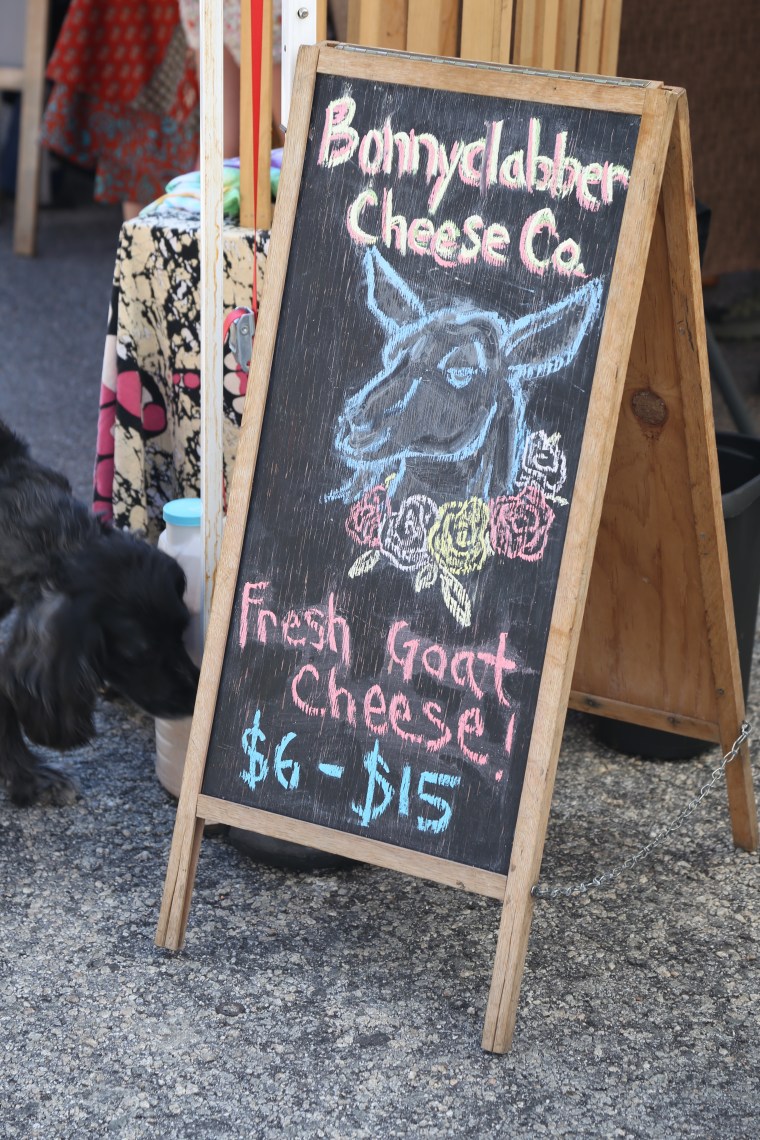 Local cheeses are abundant in the markets.
 Finding Kombucha at the market is pretty easy here, we have seen it at the Charlottesville market too.
 Gotta love the trailer, too bad some jerk stole their generator!
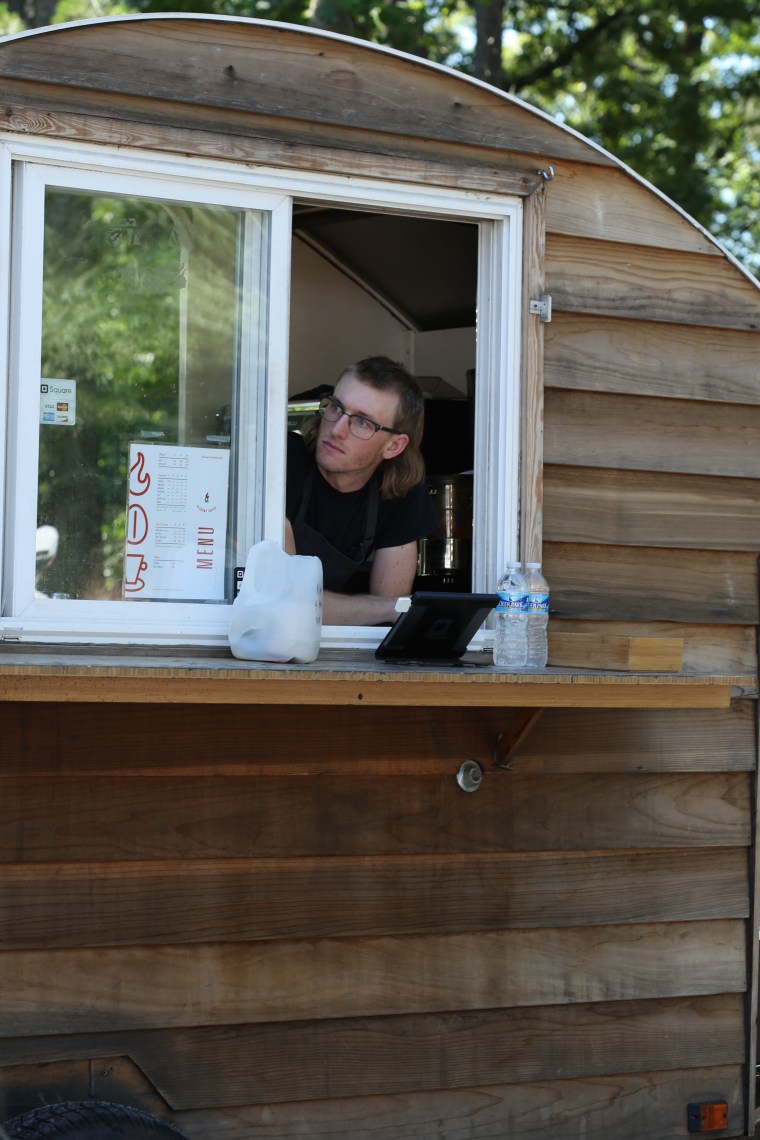 Fresh coffee anyone? Another great little trailer that was equipped with an espresso machine for that morning fix.
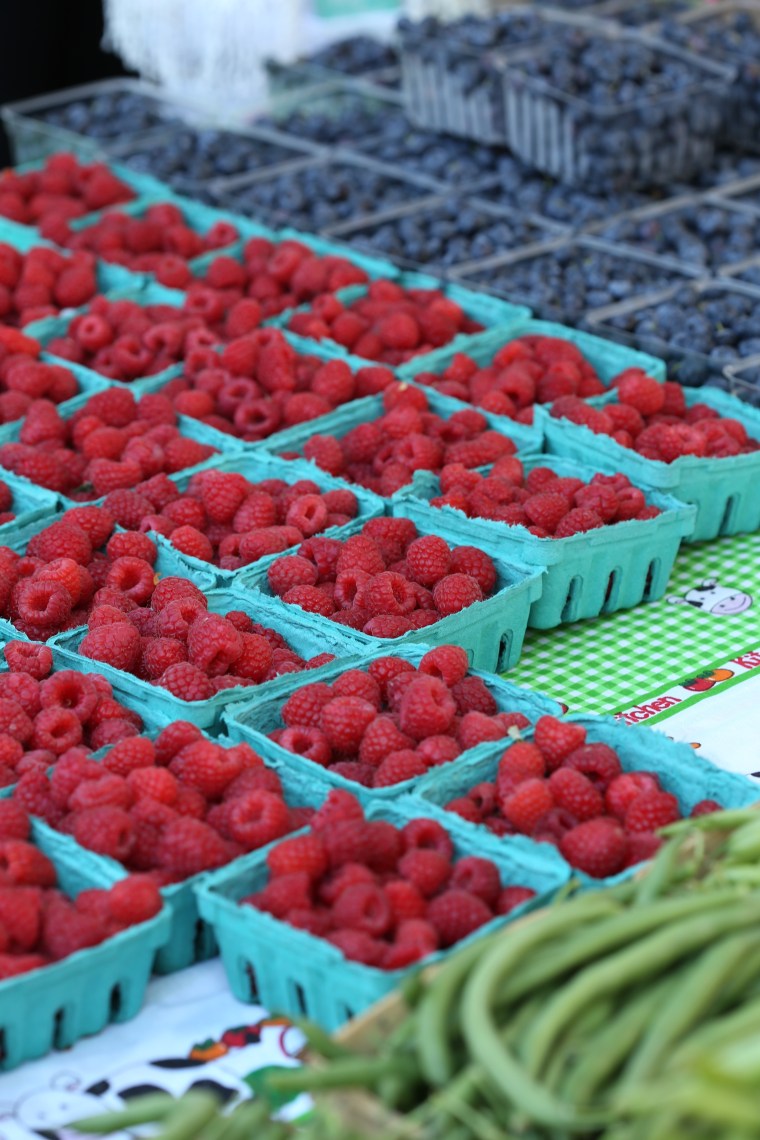 Summer has arrived; berries anyone???
 Or maybe some fresh picked beans?
 Although they always taste the same, I always reach for the yellow ones and the purple ones first.
 Not sure what variety this cauliflower is but when ours looked fuzzy like this, I thought something was wrong with it. Apparently, this variety is a bit fuzzy.
 Also available was everyone’s favorite fractal; Romanesco along with cheddar.
 Carrots by the bunch
 And goats too! These goats weren’t for sale but they were very friendly and optimistic.
 They assumed that any edibles were there for the taking as this little guy found out when the goat reached over and cleaned up his snack tray!
 There were plenty of options for food and we had noodles for lunch.
 Freshly stir-fried and served with shrimp.
 As we walked out of the market, we saw this odd pack on a man’s back.
 Apparently, they test products and this was a carrying case for a cat! What a cute cat he was too!
 Get out there and explore the markets! Learn about the real offerings of the season and not what the grocery store carries, it’s fresher, it tastes better and it’s a great way to spend a couple hours! My only other suggestion, skip the restrooms up at the top of the hill in the parking area-one of the worst rest room experiences we have had!!!
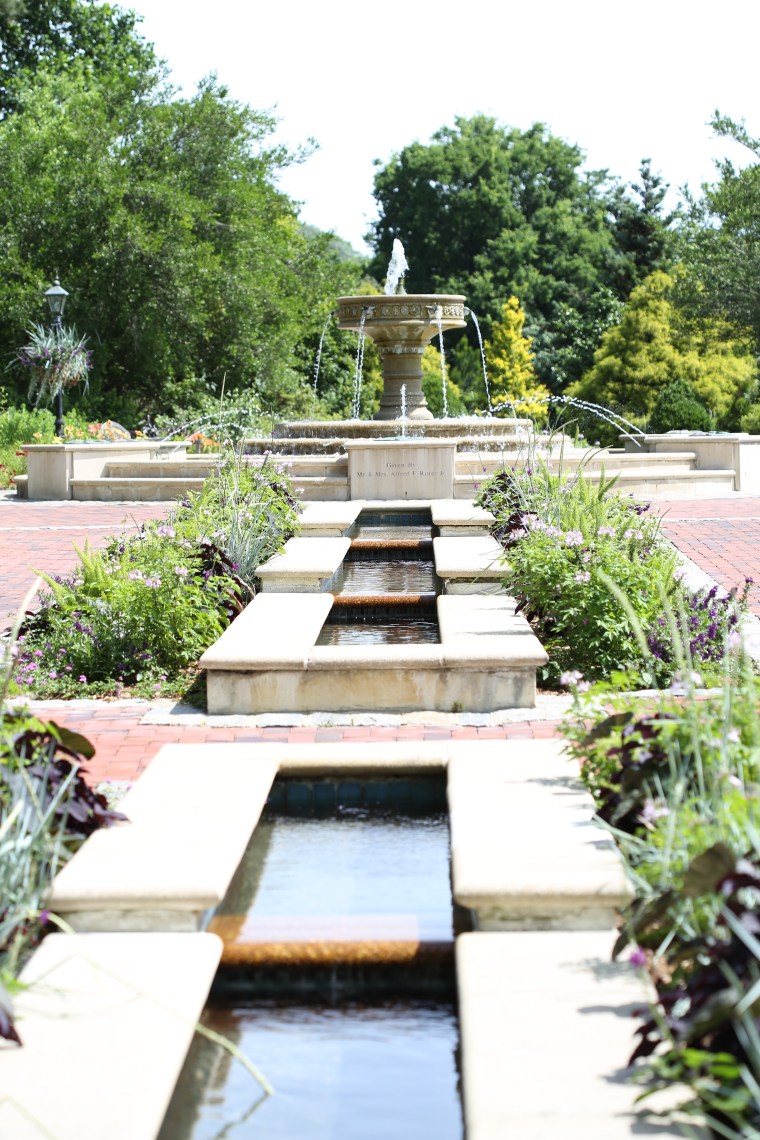 When Darry was on vacation earlier this month, we visited the
  This is one of my favorite color palettes for a garden; purple/black, blue/silver and and pink. That sounds confusing so here is my explanation; purple in flowers and foliage that is also dark enough that it appears black at lower lighting, greens that are on the blue end of that spectrum but that also look a little grey or silver on the new growth and of course, pink flowers. It is considered a cool color palette and I try to incorporate those colors into my garden.
 Day Lily, “Predator”. Let me start by saying I am not a huge day lily fan. For me, I like flowers that last more than a day. However, after wandering through and looking at dozens of them, I may consider a few like this one.
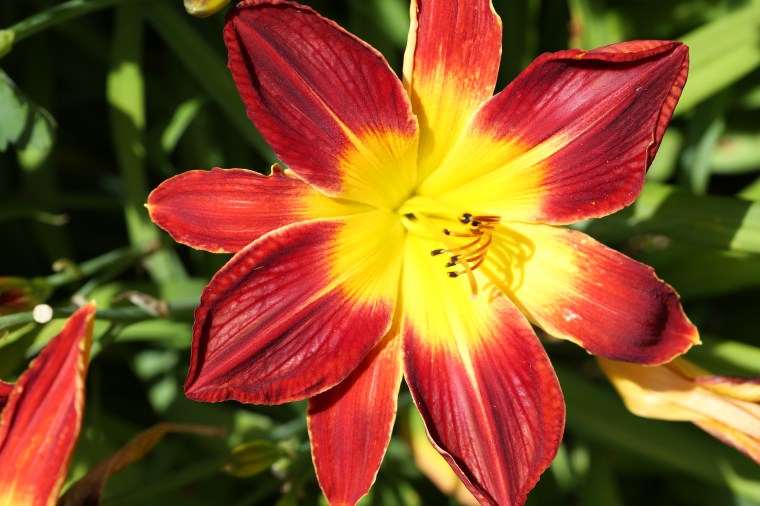 Or maybe this one, “Ruby Spider”
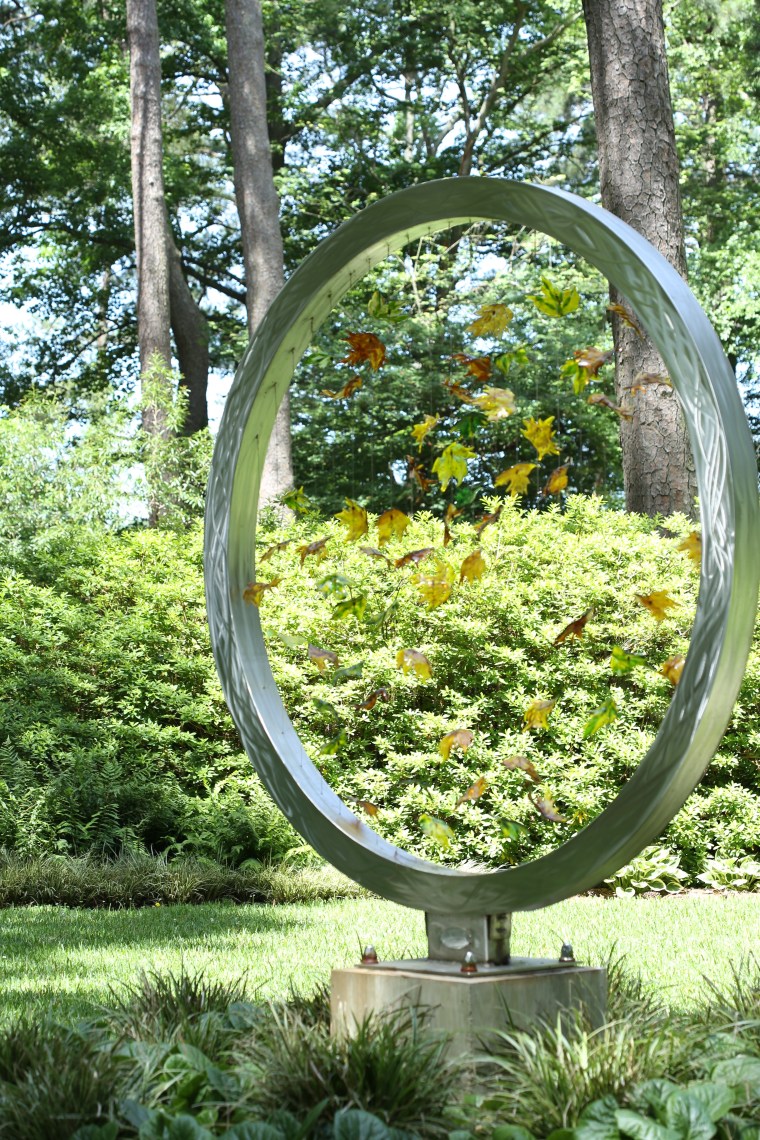 What I really want, this sculpture! Located in a small grove near the fountain, it was a meditation garden and this piece sits in the middle of the area.
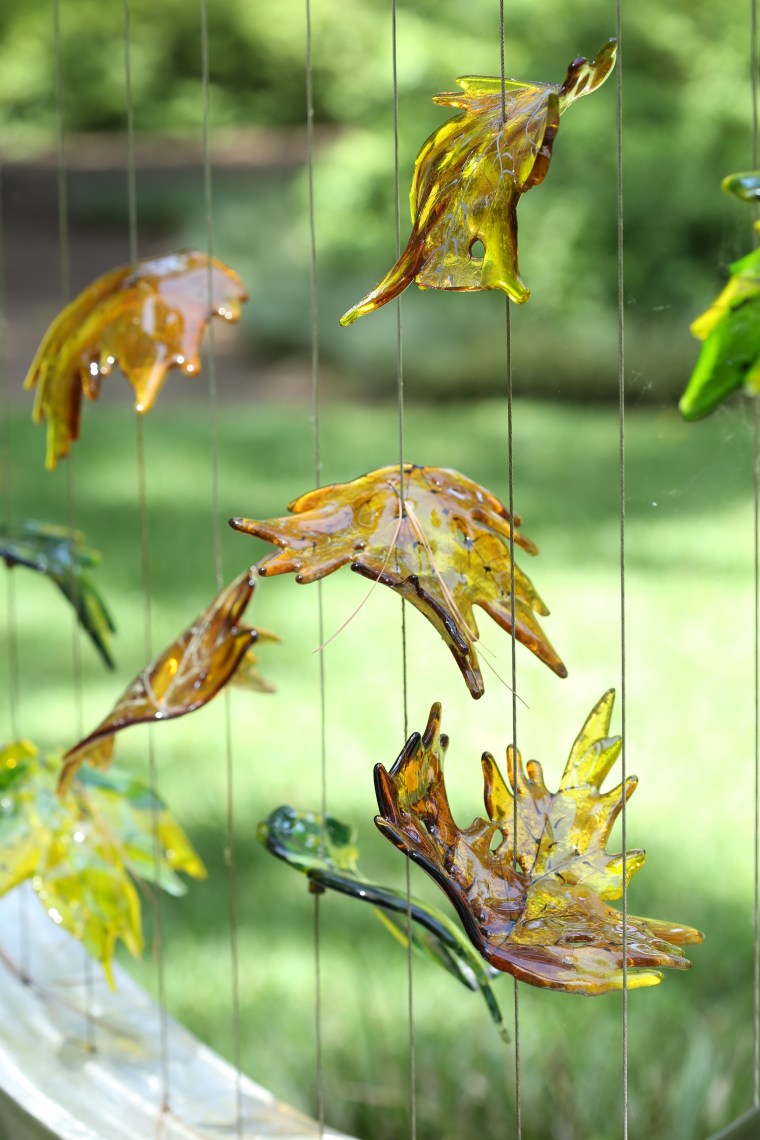 Those leaves are made of glass and I love the way they look as if they are floating when you see it from a distance.
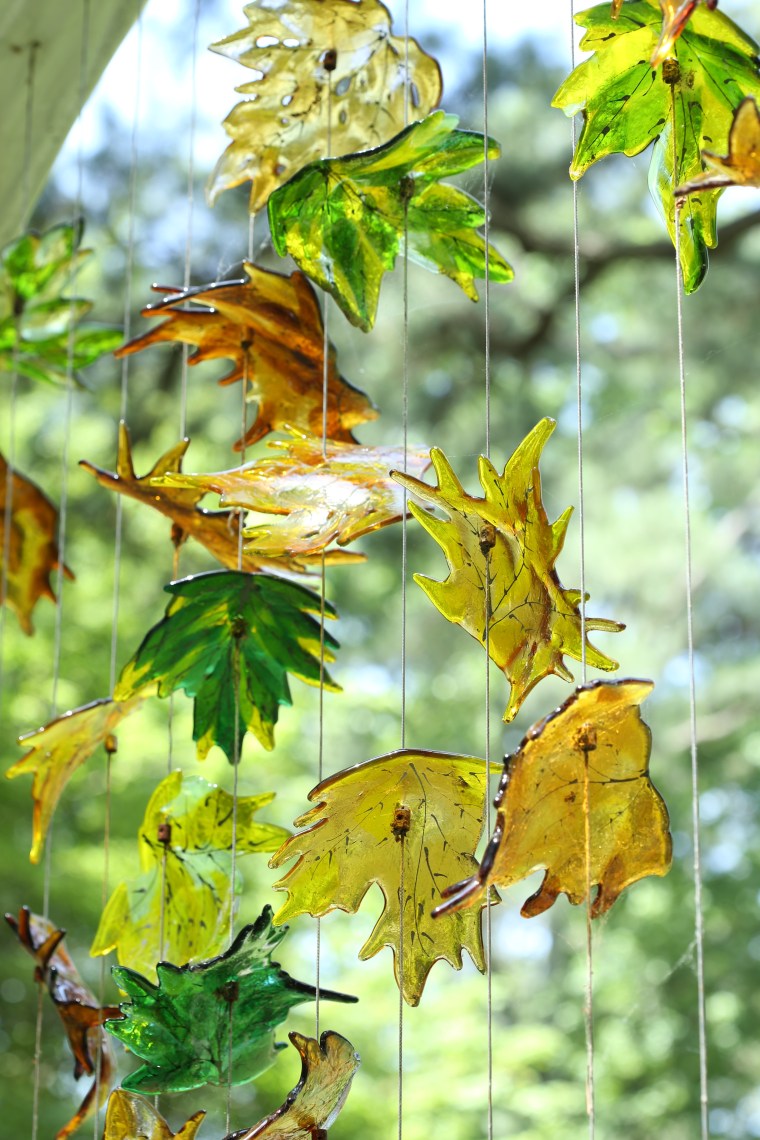 The details on the leaves is amazing; the veins, the colors-so realistic.
 It was such a bright and sunny day that I did not take as many photos as I wanted to-the lighting was just too harsh. But I made an exception for this rugosa rose. What is so special about this rose?
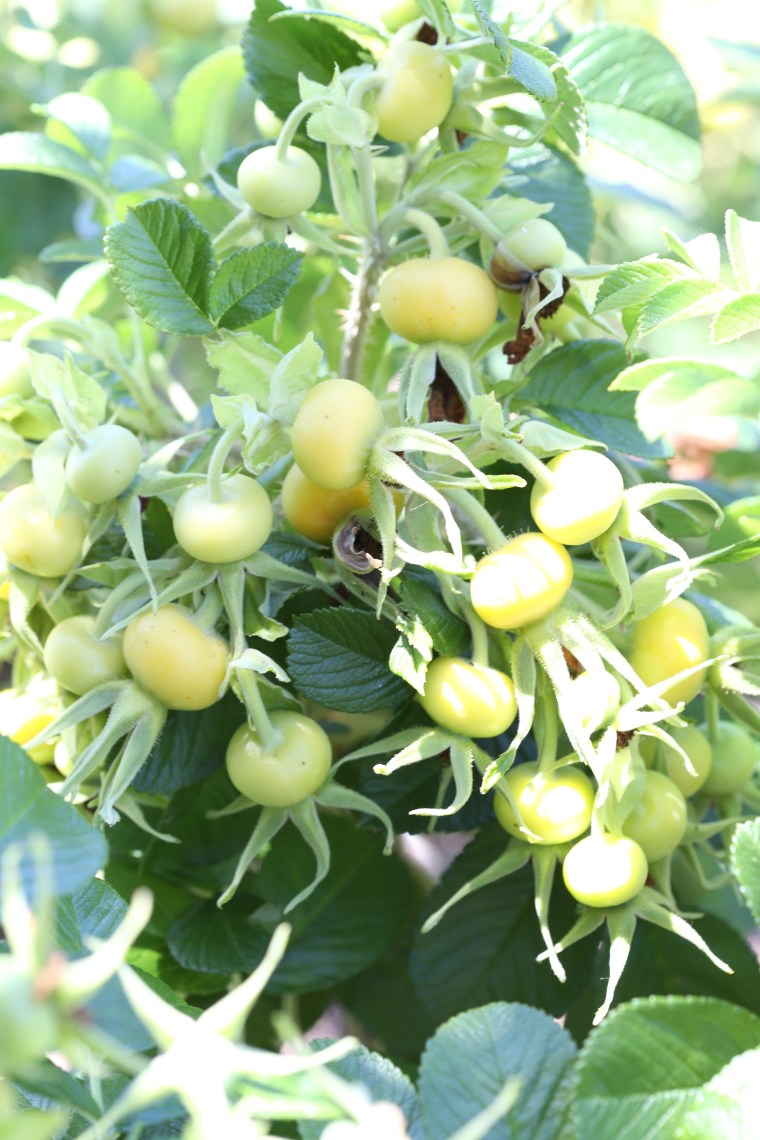 Those hips, that’s what!!! If you want to make rose hip jam or tea, you need a rugosa rose for the hips. They had two varieties with hips like this. “Alba” was a white, single rose and “Purple Pavement” was a fuschia-purple shade. It would be wonderful to plant them close to each other and let the canes cross so that you have both colors in one bed, or draped over a fence…
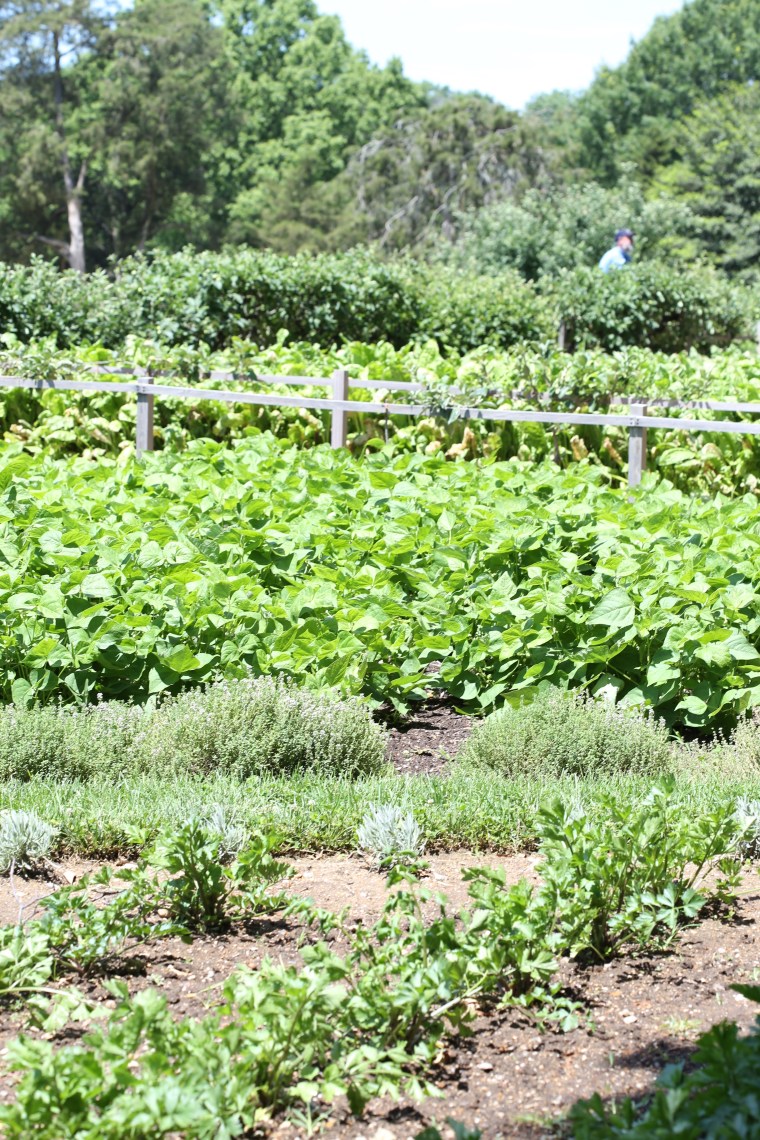
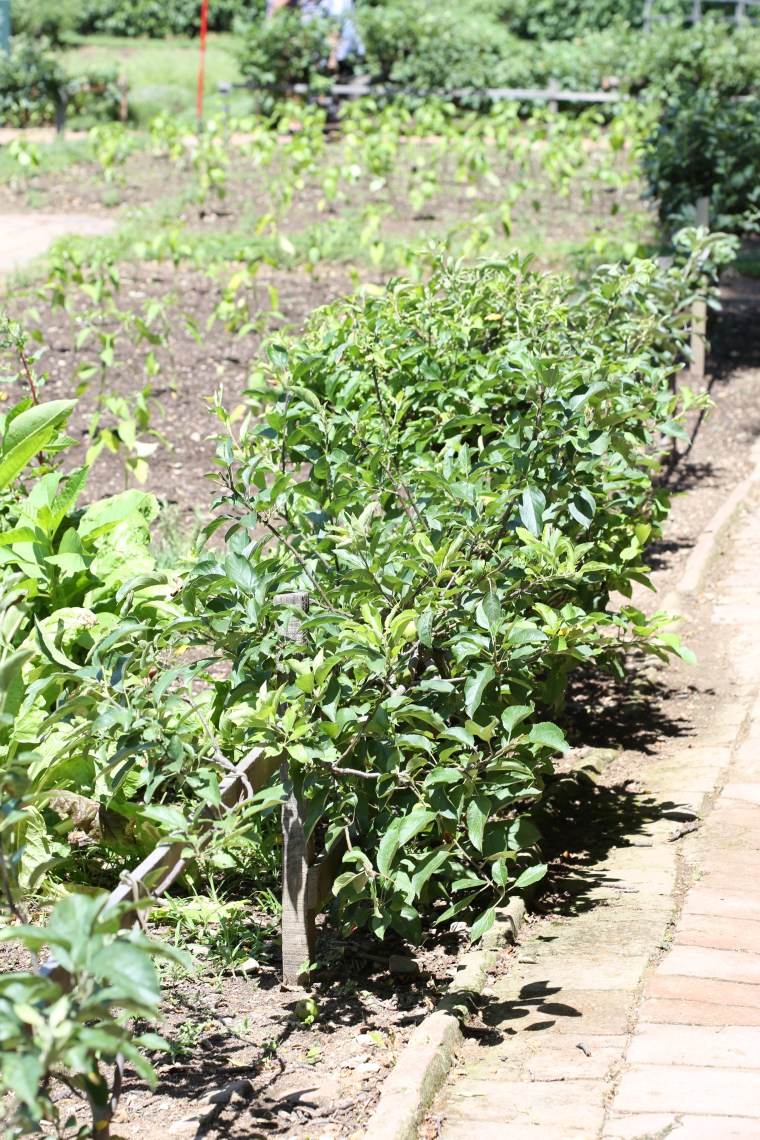 In the lower garden, most of the beds included fruit trees grown in the espalier style. Some were trained to grow up against walls and others, like these apples, were grown as a living fence for the garden.
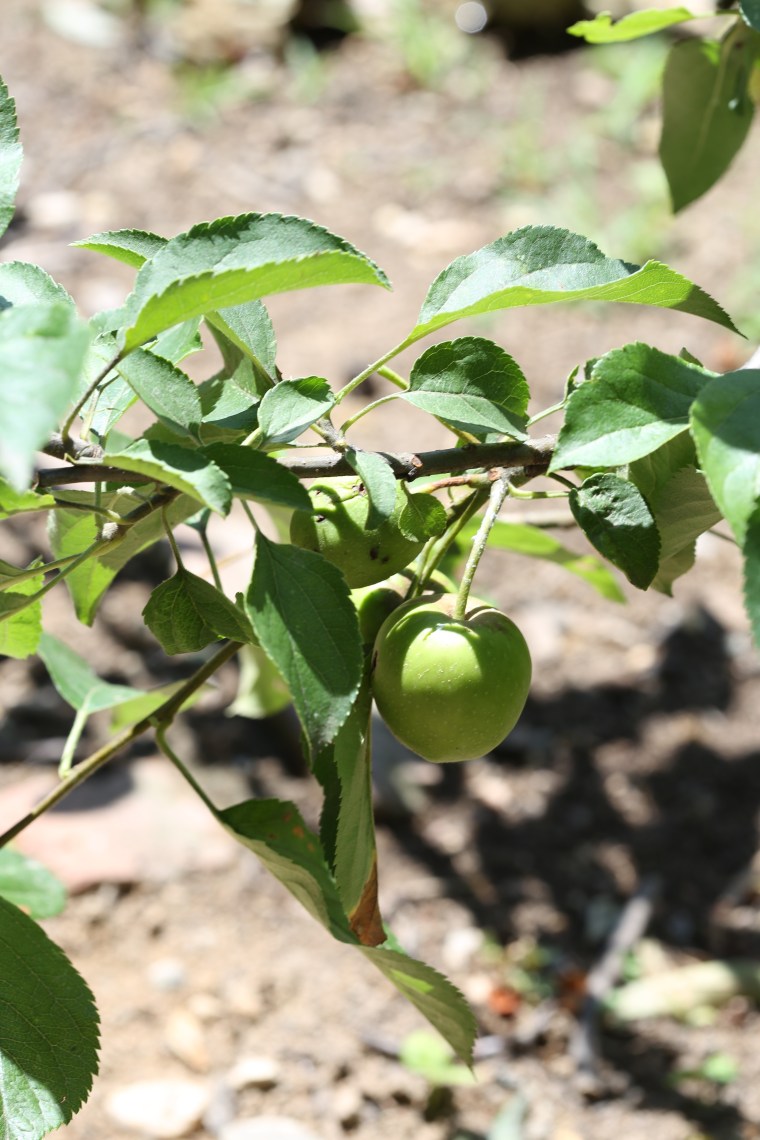 There were so many apple trees-I was truly jealous!
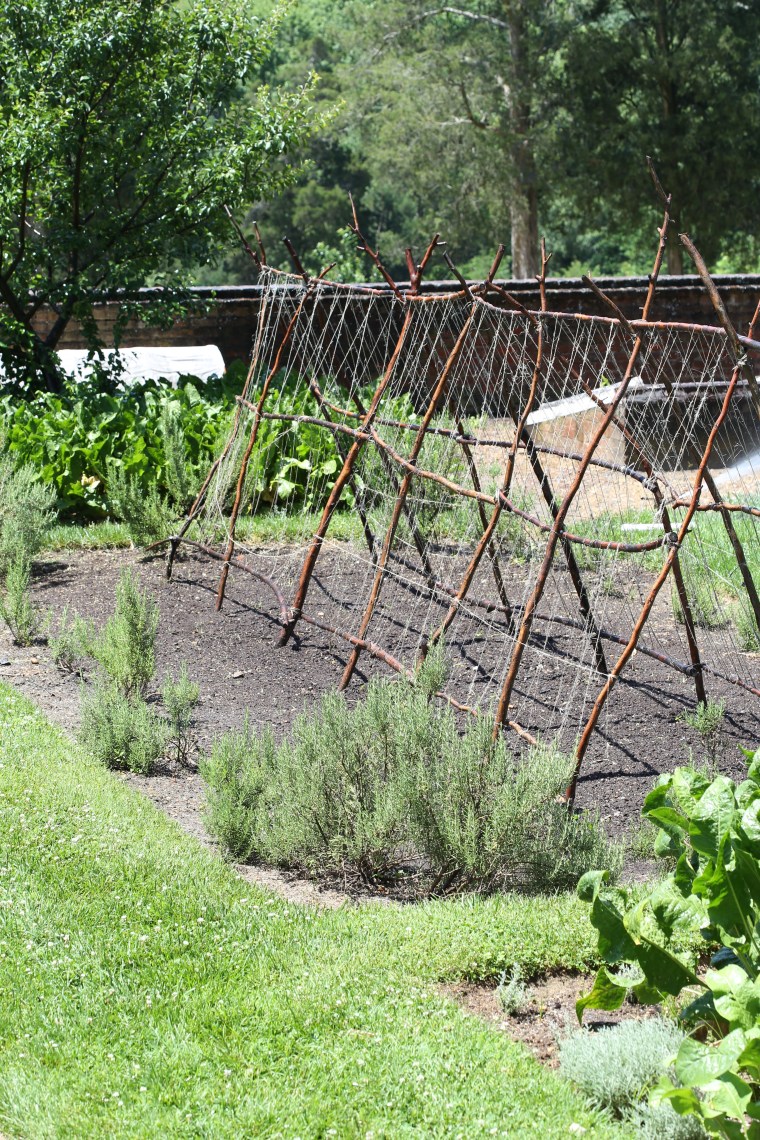 This trellis looks a little intimidating but it is easier to construct than you might think. There weren’t any plants growing near it so I wonder what it will be supporting.
 The high walls surrounding the garden created a micro climate that helped keep the temperatures up to give the plants an early start in spring.
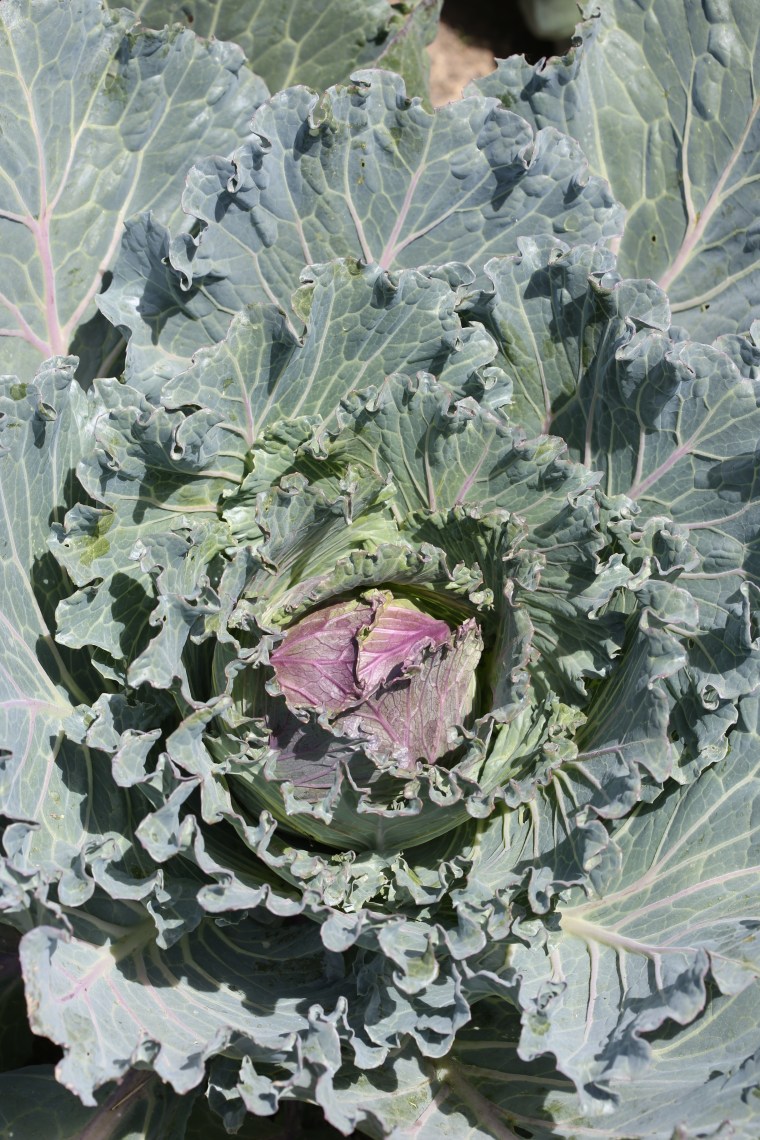 Have you ever heard of cabbage envy? No? Well, you have now. Down by the river, there is another small garden area near the 16 sided barn. We literally stood there and stared at the cabbages. Someday, when I grow up, I’m gonna grow cabbages like these…
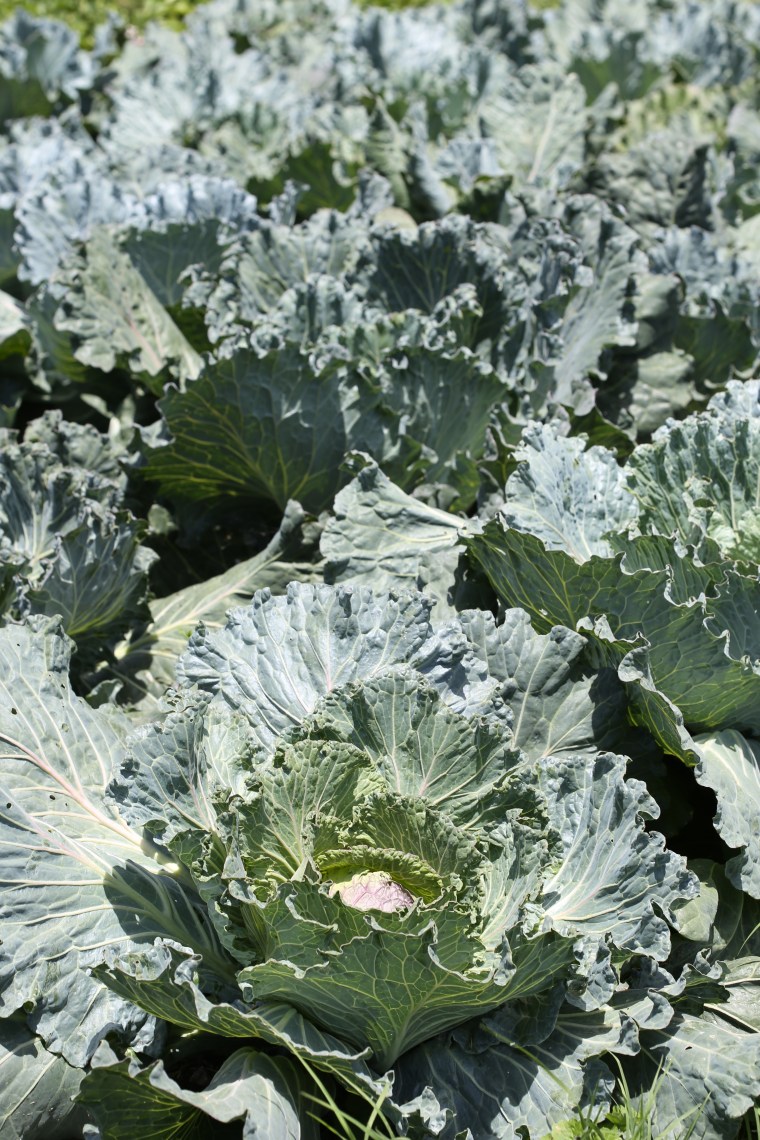 And not a cabbage worm in sight. Then we stood there and wondered what chemicals they were using on them to keep the caterpillars at bay…
 These onions were at in bloom and they must have been near 5 feet tall and as big as a softball. Again, some day…
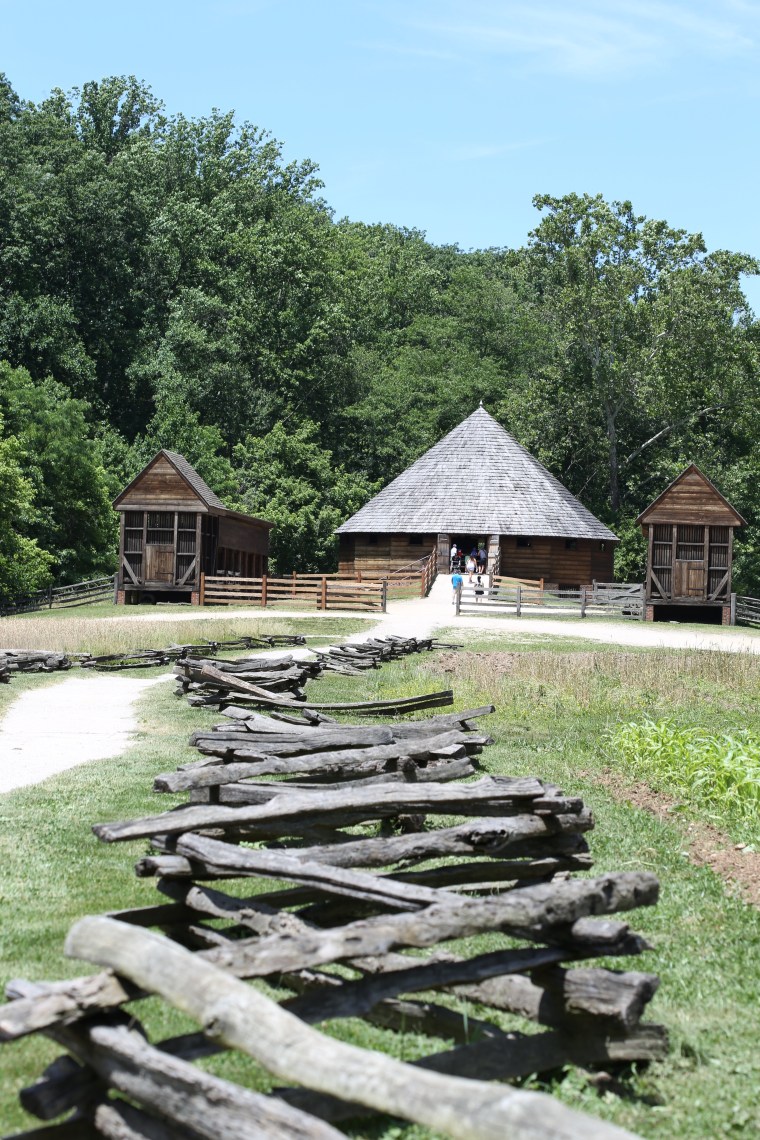 As we ponder the possibilities of fencing for our own garden, I admired this one because of its simple construction. Then I remembered that I do not live in a forest and my husband is not a lumberjack; this might not be our solution.
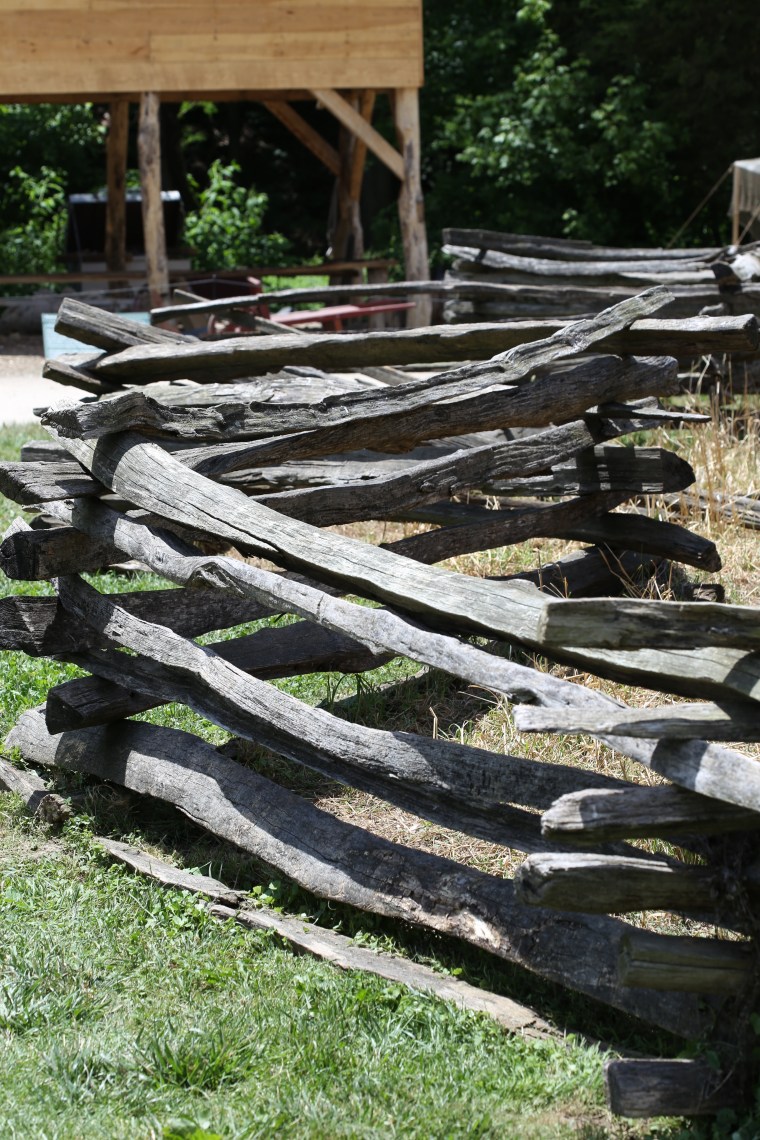 Really loving the fencing
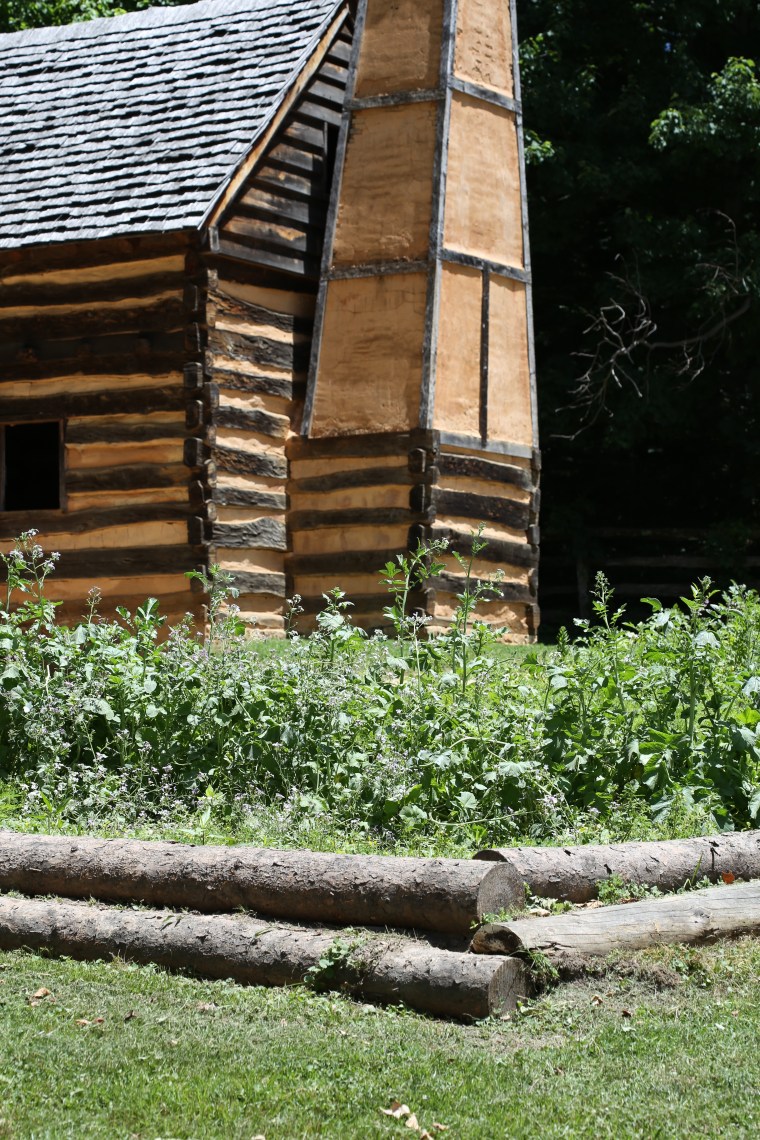 This house is a recreation of a cabin that belonged to one of the more prominent slaves and his family.
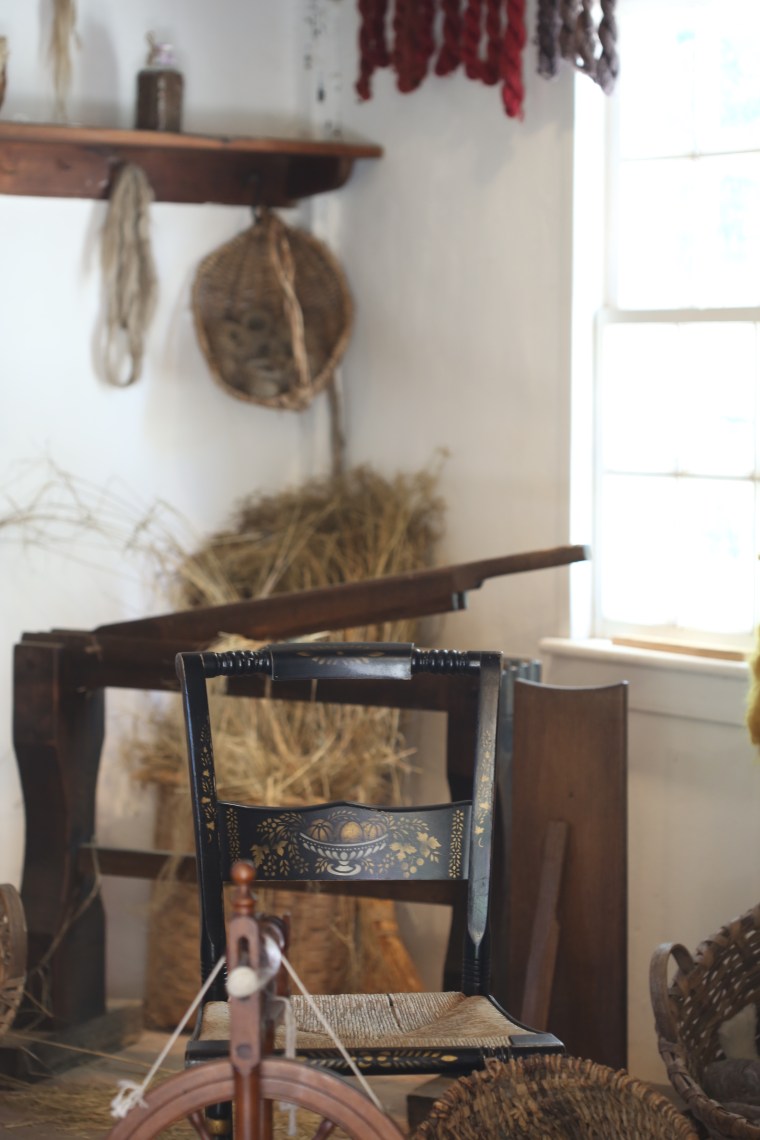 Just out of view from the mansion is a row of buildings. Many had a specific purpose; salt house, smokehouse and so on. This was the knitter/weaver house and as a knitter, I had to stop in and take a few photos. George Washington led a very ordered life. His primary goal was to be as self-sufficient as possible and while he had the advantage of wealth, the slaves working on his estate were able to produce most of what they needed. The things produced here would most likely have been used on the property.
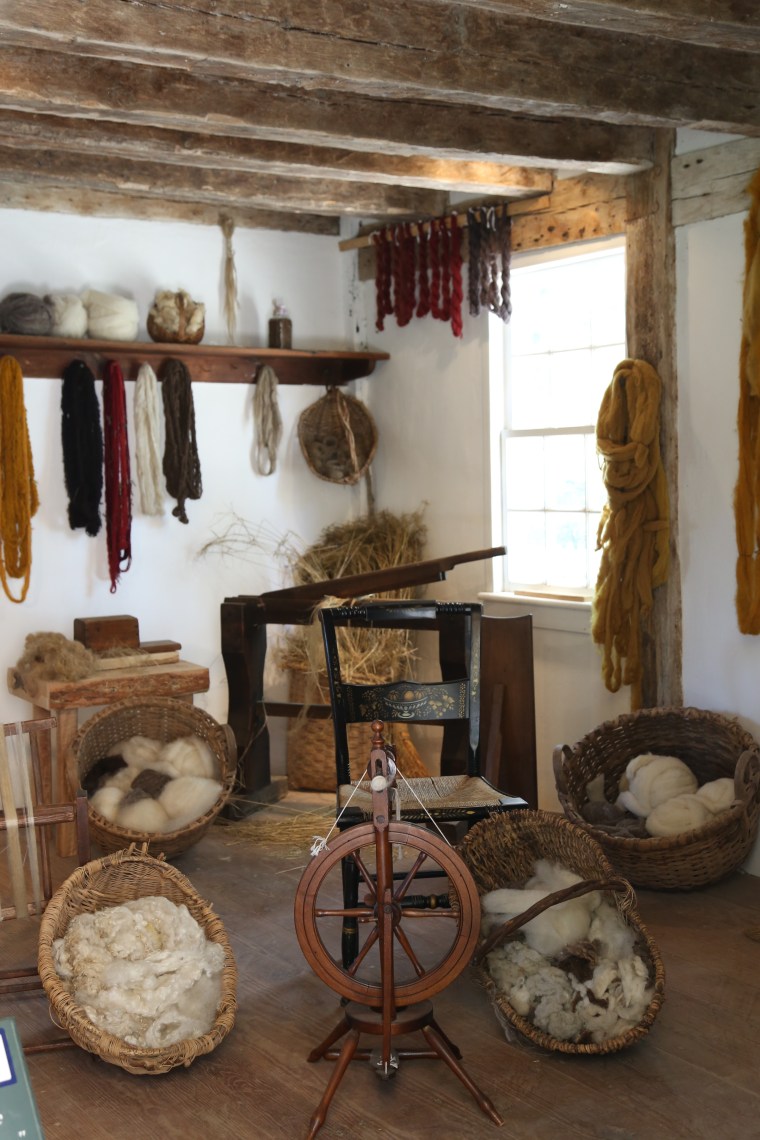 The wool would have come from livestock on the estate and it would have been processed by slaves who would have also used it for weaving and knitting.
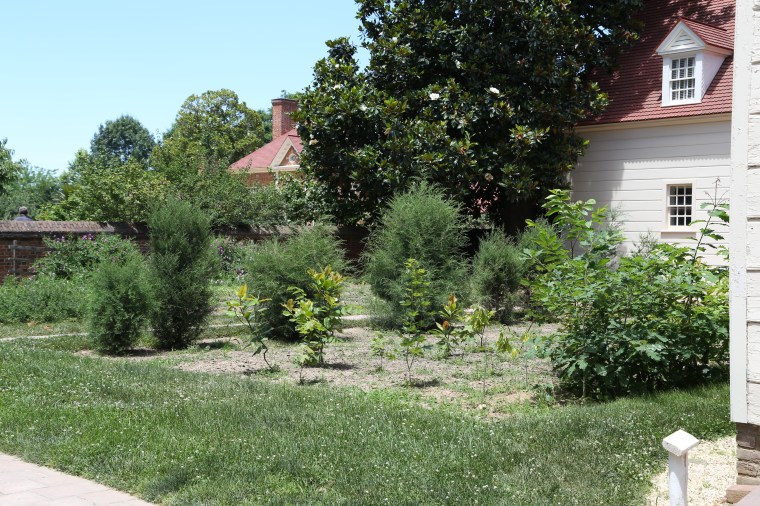 Along side the weaving house was a small plot that was called the botanical garden. In this small space, Mr. Washington would experiment with new varieties of seeds and plants. If they were successful, they would have been added to one of the gardens or groves to produce food.
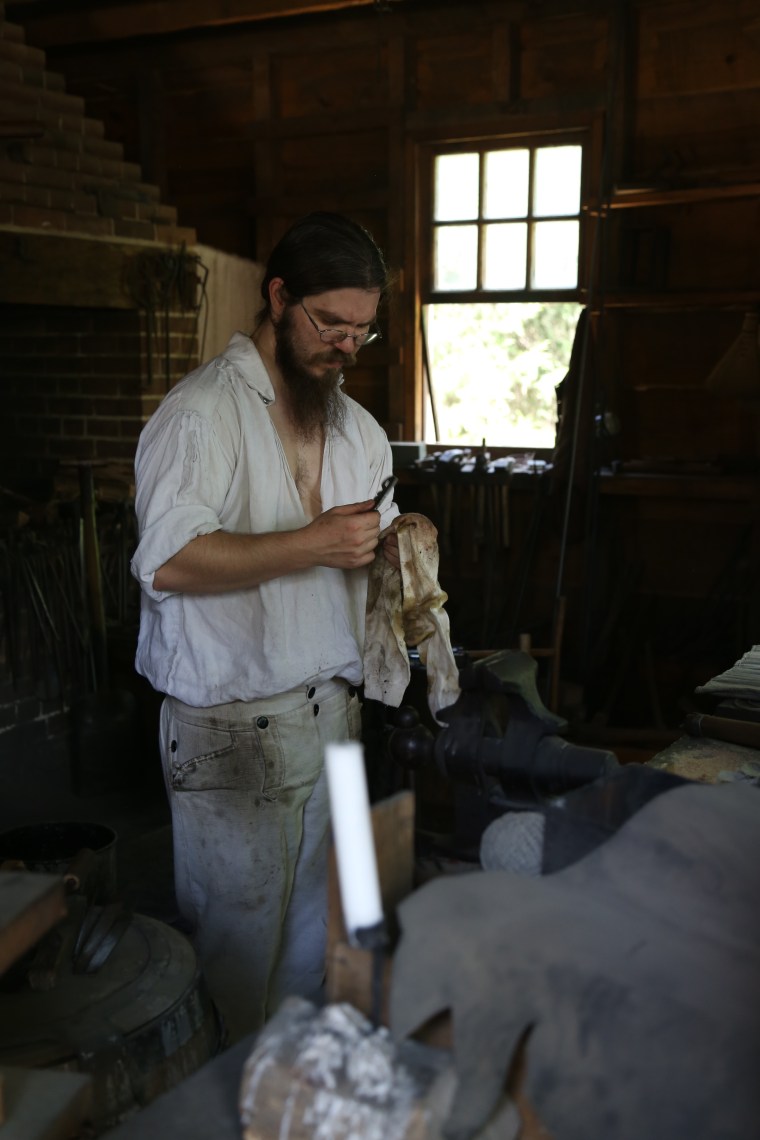 There is a recreated blacksmith shop along the path as well. In this shop, tools are produced using the same methods that were employed over 200 years ago. Most of the tools they make now get used around the estate.
 As we looked on, this gentleman was working on a project. They may have a lot of stuff in there for visual impact but this really is a working blacksmith shop and he went back and forth between the table/anvil and the fire as he worked on the piece in his hand.
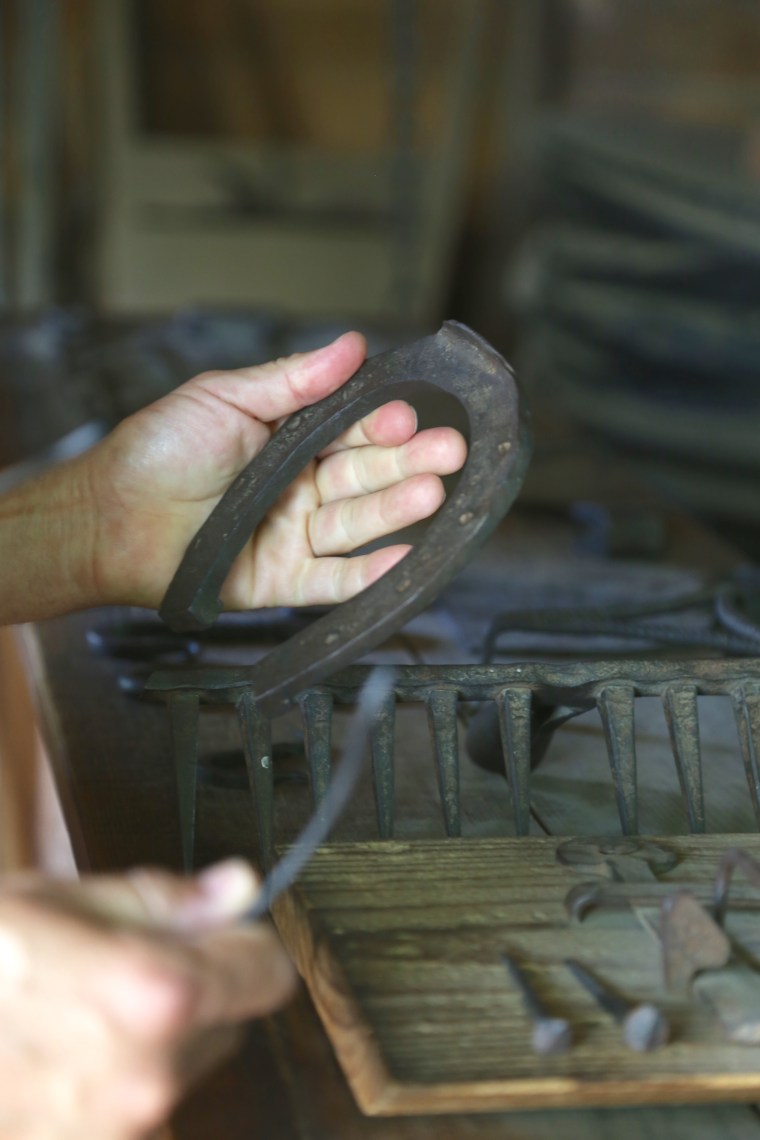 There were horses present back then but there wasn’t a farrier to produce shoes for them. Because Mr. Washington was not one to spend money unnecessarily, he made sure that a few of the blacksmiths were properly trained to produce shoes and tend to a horse’s feet.
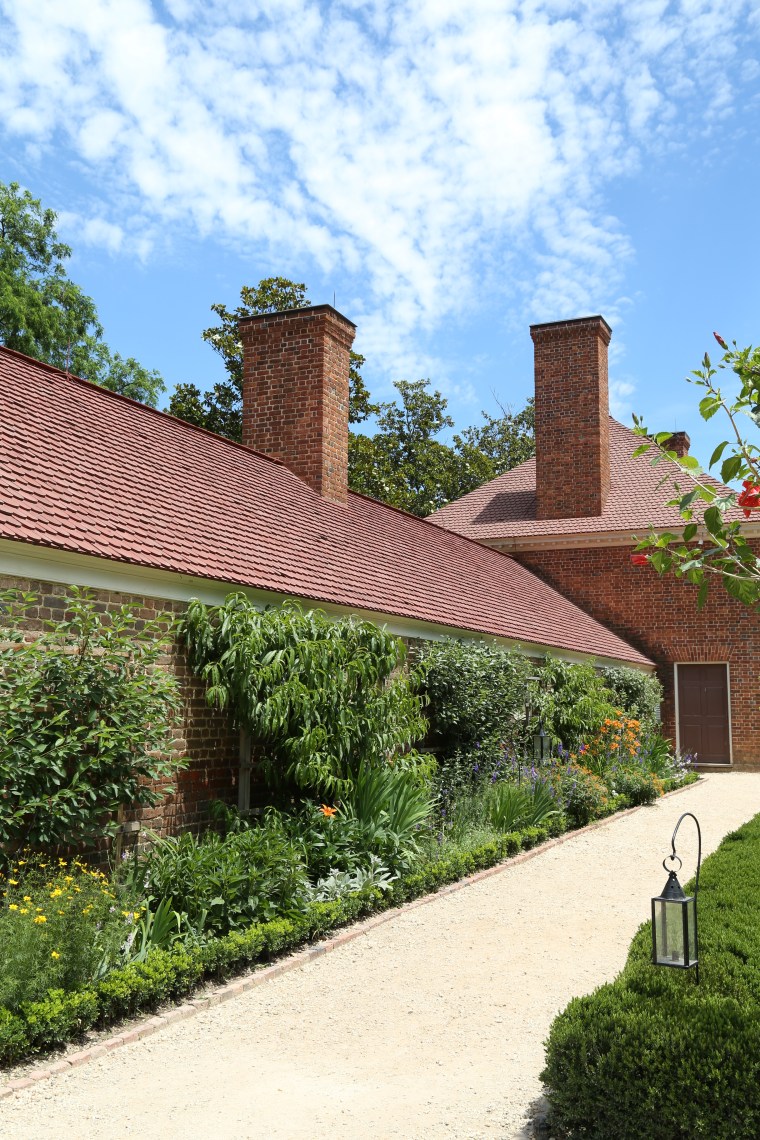 One of the most interesting parts of our Gardens and Groves tour was the greenhouse. While we were not permitted inside, it was interesting to know that back then, they would grow citrus trees and other tropical plants in the greenhouse during winter and move them outside in summer. There was a room in the back of the building where a fire was tended around the clock to keep it warm for the plants. The men in charge of keeping the fire lit would sleep in that room .
 The larkspur is one plant that they know was growing on the property when Mr. Washington lived there. They actually sell packages of seeds and when my mother in law visited here last year, she brought me one. So far, I haven’t had any luck getting them to germinate but I will try again this fall.
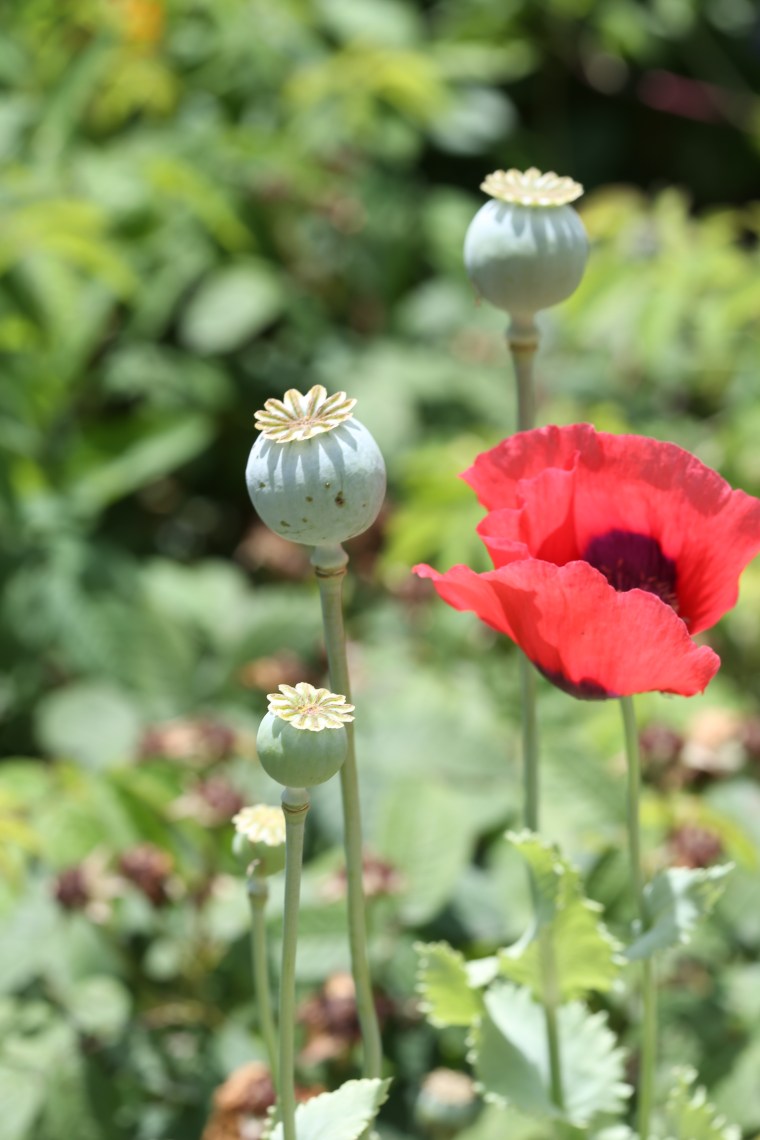 After seeing these poppies, I have a new admiration for them! Beautiful when in bloom and then come the seed pods, which I think are just as pretty as the flowers.
 In the upper garden, flowers are everywhere but if you look closely, there is a vegetable garden hidden in there too!
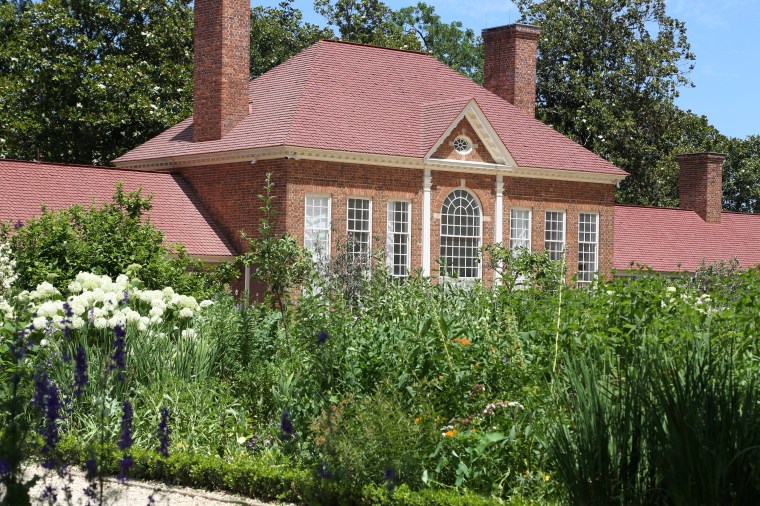 We toured the mansion (a quickly guided walk through with little time to stop and truly take it all in-and no photos allowed), walked the grounds, saw the tomb and trees that George Washington himself planted (two tulip poplars and a hemlock-absolutely huge) and then wandered through the museum. The museum is a trip in itself, honestly. There are several videos to watch and plenty of historical displays with lots of text to read. He was such a fascinating man and it was a bit overwhelming after all the walking in full sun for two hours on the grounds. Then we arrived at the end of the tour and the final display; his teeth.
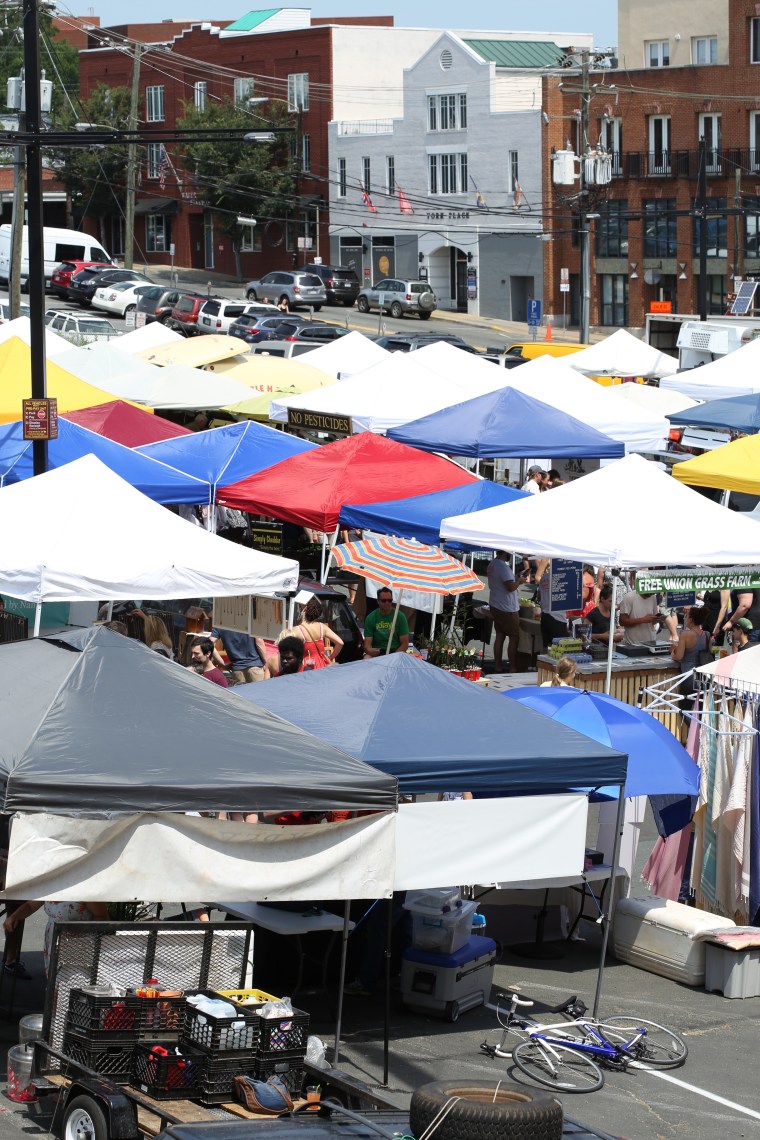 Darry is on vacation this week and we have been traveling around the area visiting gardens and markets. We got an early start on Saturday and drove to the
  City Market is a producers only market and each week, approximately 100 vendors come to sell produce, meats, cheese, flowers, hand-crafted goods, bakery items and more. We started off with donuts, freshly fried and rolled in cinnamon sugar!
 So many tents, so much to see, we will have to go back as the seasons progress to see what is available.
 Romanesco cauliflower; I haven’t had much luck with it in the garden but looking at this basket, I must try again.
 Our peas pooped out on us a while back but the climate in the Charlottesville area is a little cooler than ours here in Williamsburg and peas were still available at this market.
 Our carrots are not as large as these, but they are getting there!
 Free range chickens are pretty common but have you ever heard of free swimming ducks? We laughed at that one! Duck eggs are such a pretty blue color.
 Spring potatoes! It will be months before we have any to harvest. When I harvested them last fall, I missed some and now, we have potatoes growing randomly in the beds. This week, I did plant some seed potatoes and hopefully, we will have some russets to go with the reds and golds that have been sprouting in the garden.
 Swiss chard is so pretty to look at, I love the colors of the stems.
 In one booth, peppers were being flame roasted-it smelled so good!
 It is almost tomato season-I saw the first tomato blooms in our garden just this afternoon!
 What’s in season? Beets!!! Love beets and I have red and gold in the garden.
 These look perfect for roasting, although, pickling them would be pretty tasty too!
 Lacinto Kale is another one of those plants that hasn’t been a good producer for me in the garden. Considering how much we like it, I will have to try again.
 If I hadn’t started off our visit with a donut, I might have had an almond croissant!
 Love the stenciled loaves, they were eye catching and very tempting!
 Every where we went, there was food to eat. These ladies were cooking crab cakes.
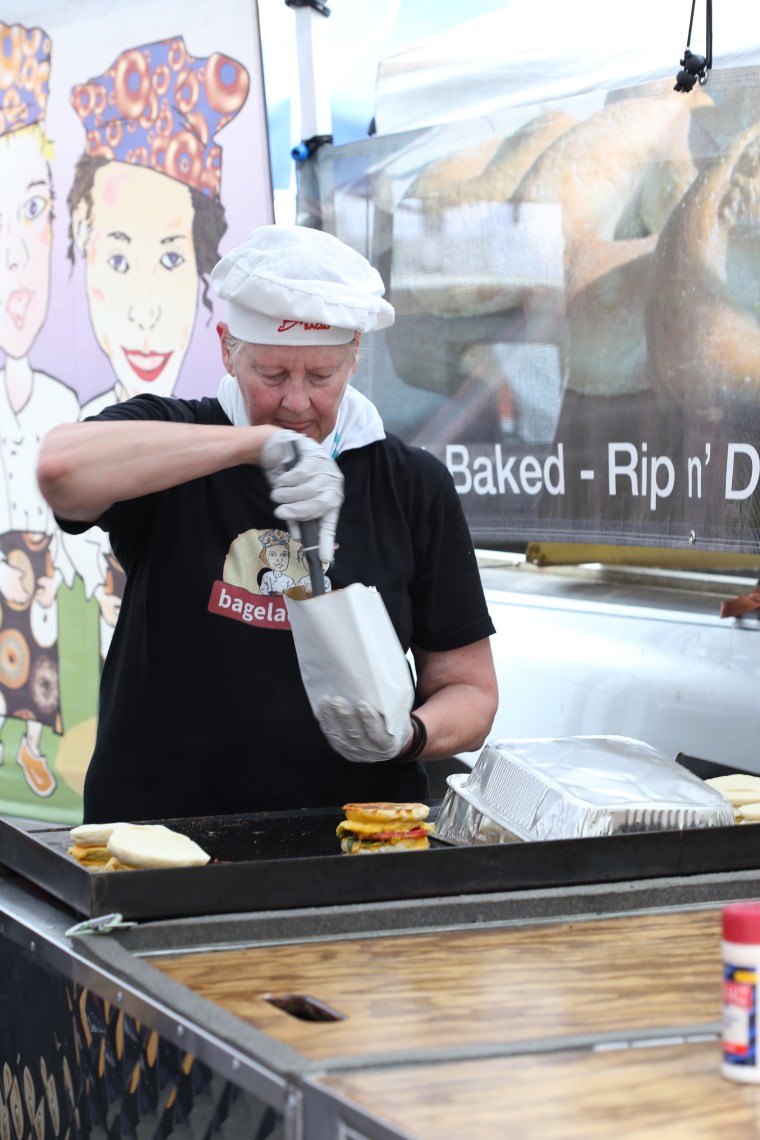 The bagel ladies had sandwiches on the grill and bagels to take and bake at home.
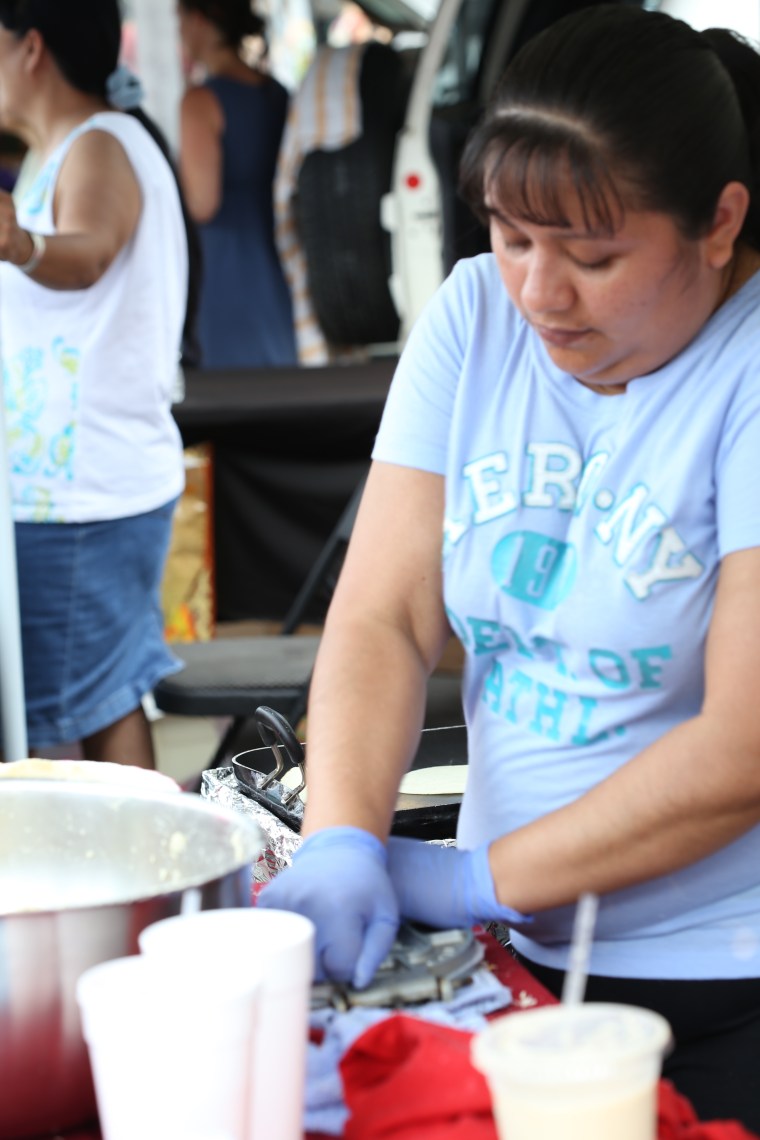 Feel like tacos? In this booth, they were pressing fresh tortillas and making tamales. If only the line wasn’t 20 people deep, we might have had tamal for lunch.
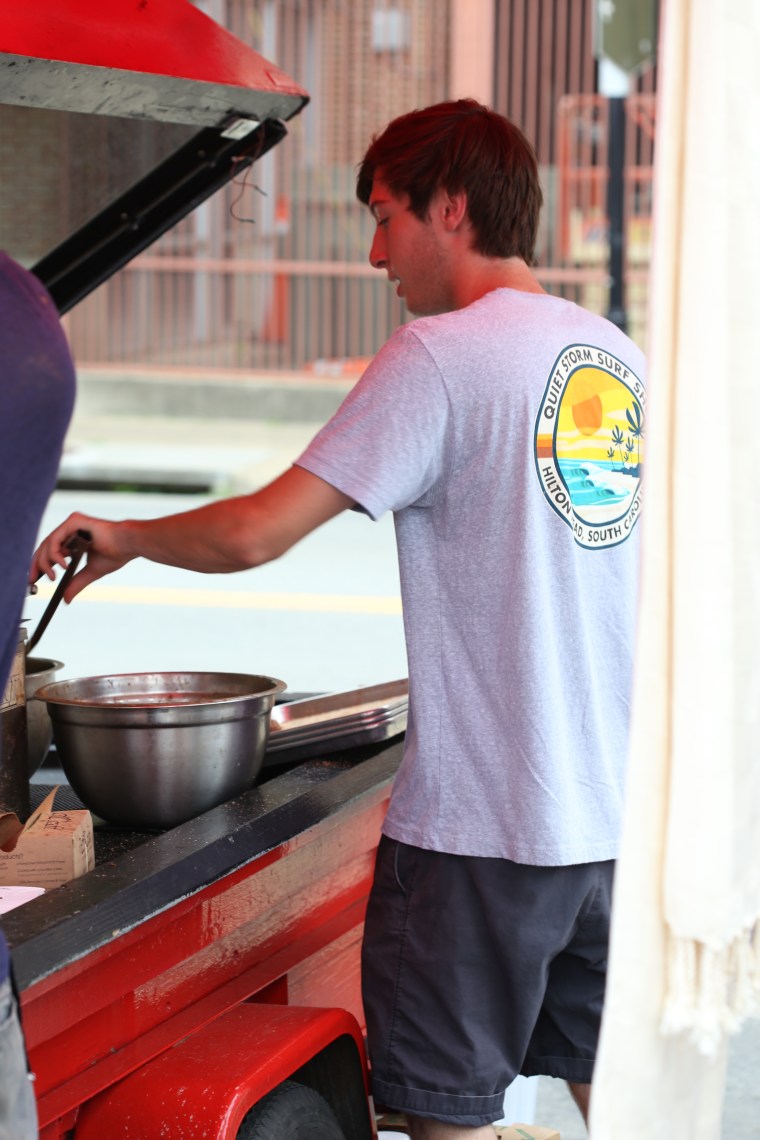 Remember those donuts I mentioned? In this booth, they fry them and then coat them with a sugar and cinnamon mix.
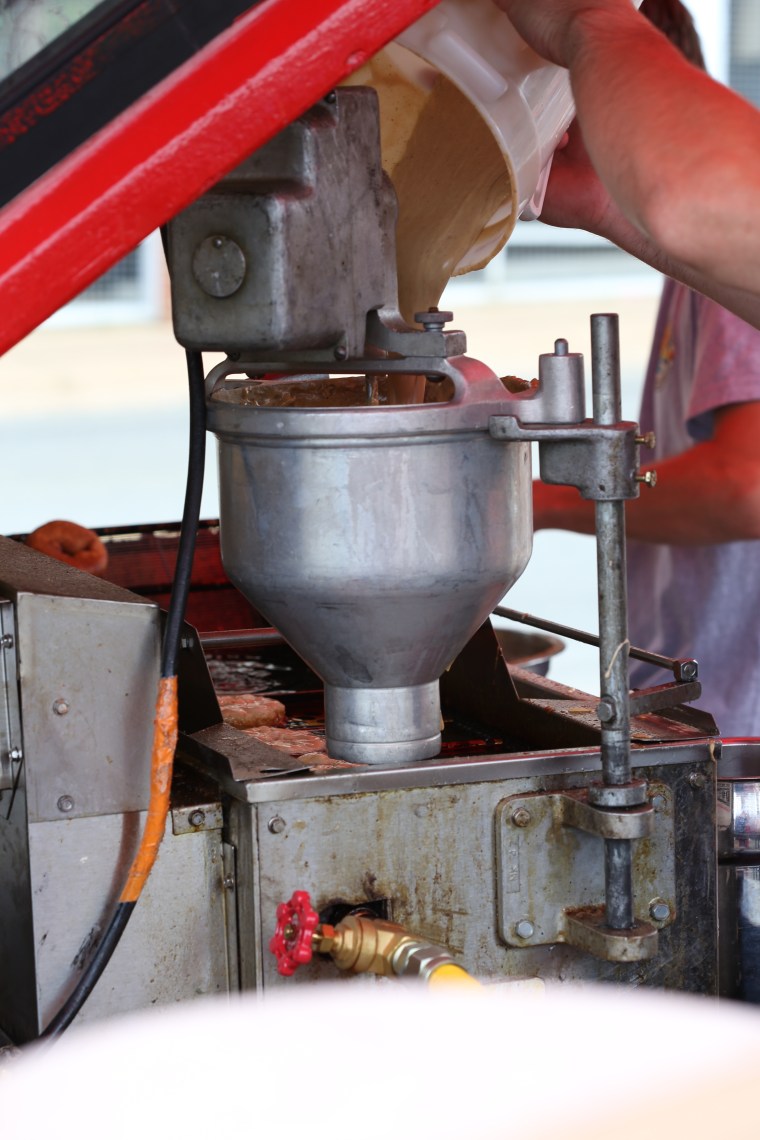 The batter gets poured into a hopper and it is portioned and dropped into the hot oil.
 Feel like an omelet? Chef Tony has your back! He was cooking them to order on a grill.
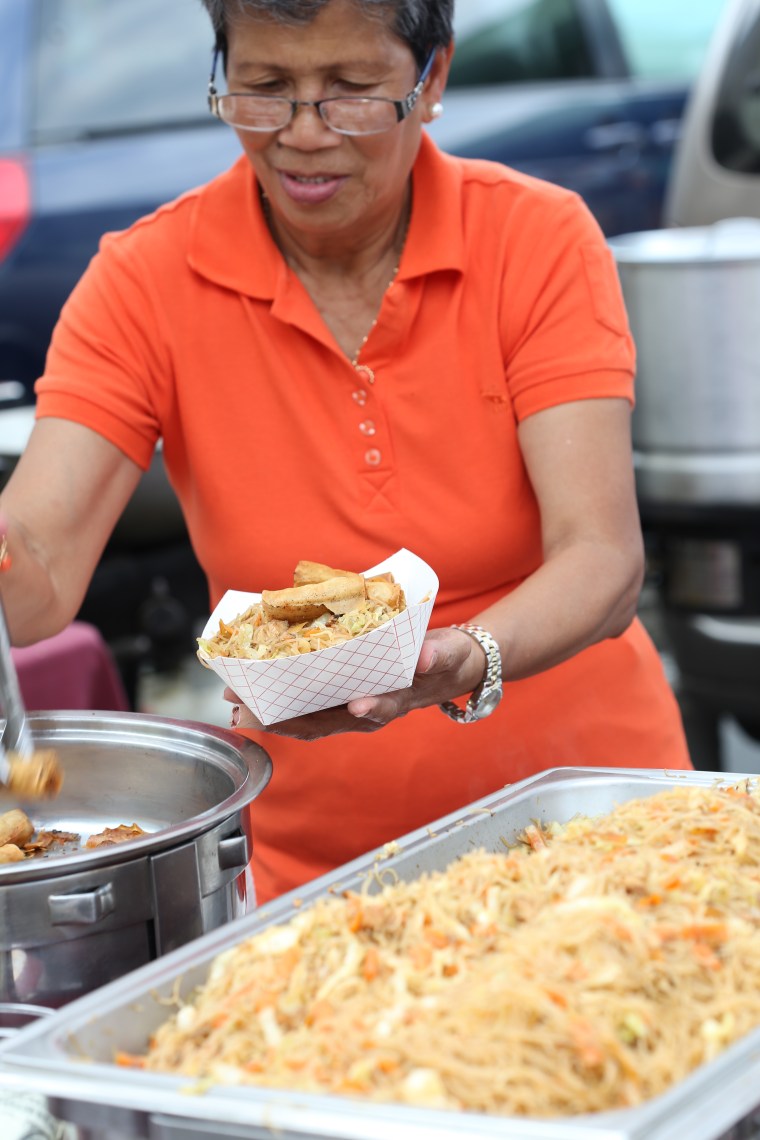 We decided to have some fresh Filipino style noodles.
 Thin rice noodles with chicken and vegetables.
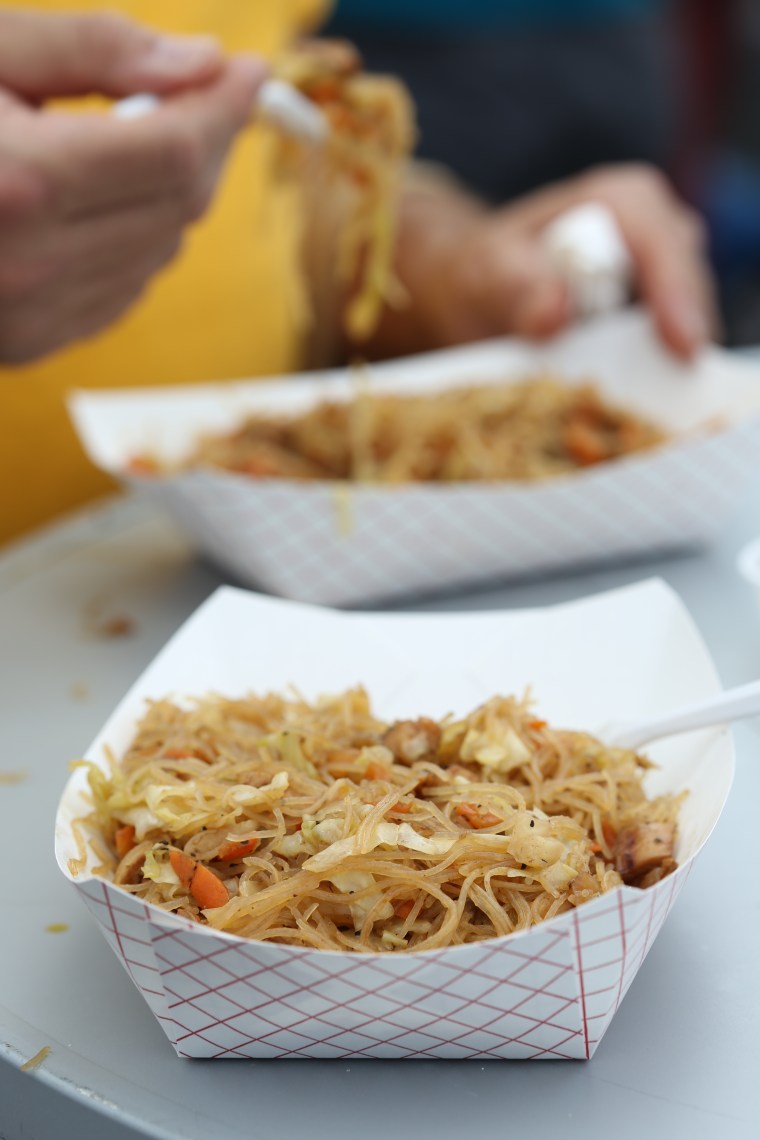 We haven’t had much Filipino food since we left San Francisco and it was a nice change from the usual Asian fare we find here in Williamsburg.
 Fear not, they are also a green market! Food scraps can be composted and recyclables are collected separately from the trash.