 When I was a child, a really young child, I would spend weekends with my grandmother and great-grandparents. They would indulge me in many ways, especially sweets. My great-grandmother always had a batch of jello in the fridge. For as long as I could remember, my grandmother took great pleasure in telling the story of my “disappearance” while I was visiting one weekend. Apparently, I climbed out of my crib and went on a midnight jello raid and fell asleep on the dining room floor. The three of them frantically searched for me and in their panicked state, they did not see me in the corner of the room. Luckily, they found me before they called the police or worse yet, my parents. Over the years, we shared many laughs with each retelling of this story.
 Another story my grandmother loved to tell was how I would sit with my great-grandfather and watch tv with him. According to my grandmother, he had a favorite show-I think it may have been the Jackie Gleason Show but I was too young to remember. What I do recall is that I had a little yellow chair with a cane seat and that I would sit along side of him as he watched the program. He also had a thing for Milano cookies and he would share the with me as we sat together.
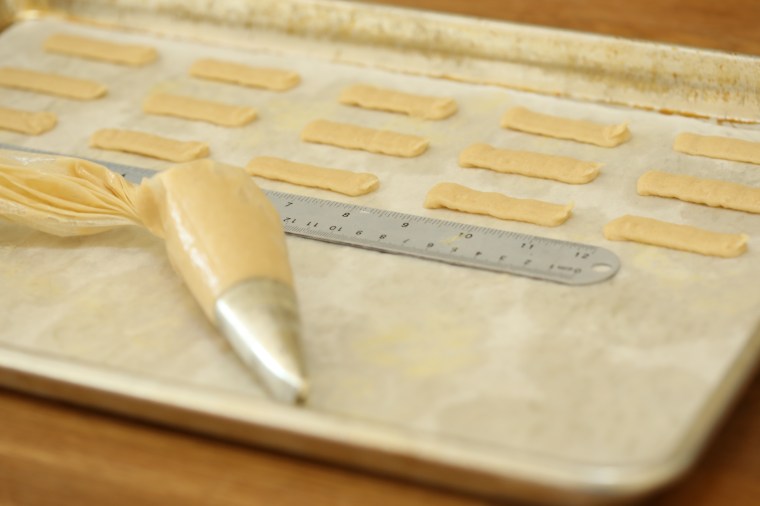
My grandmother would have turned 100 on the 26th of March and as I was making cookies to send out to my family for Easter, I decided to make a batch of Milano cookies in honor of the two of them. Rather than try to duplicate the recipe myself, I turned to a website that I can trust and this time, I went to Leite’s Culinaria where a copycat recipe is posted. The recipe calls for piping out the cookies and while I didn’t mind that part, I did not have the right sized tip so my cookies were rather small in comparison to the recipe.
If you make these cookies, plan ahead and get the proper tip. Also keep in mind that it is best not to put the entire batch of dough into the piping bad-your hand will thank you! Use a ruler as you go to make sure that you get the right length so that your cookies are all the same size.
 Now to the filling…While I may know a lot about baking, I am not an expert on everything but I do know this, boiling chocolate is not the best idea. The filling recipe calls for simmering the ingredients until they “break” and then to blend them back together. The mixture of cream, sugar, unsweetened chocolate and butter being simmered and it thickened as it cooked.
 After 45 minutes or so, it finally got real thick and broke. The fat separated out and floated on top. Unfortunately, I do not own an immersion blender and had to rely on a whisk to mix back together. The whisk did not do the job and the filling was a little grainy. More importantly, it did not taste anything like what I remember the filling of a Milano cookie tastes like.
 If you look closely, you can see the grainy bits of chocolate in the filling that I mentioned. Despite this, my family members enjoyed them. While I may make these again, most likely will make these again, I will not make the filling again and I think I will probably just make some dark chocolate ganache to fill the cookies.
 Over the years, Darry and I have lived in different cities on the East coast, the West coast and in between and some how, I still have this little chair. It is showing its age, well, so am I if you must know.
 A while back, I picked up a little tin of matcha tea so that I could try baking with it. Needless to say, it has been living on the spice rack in the pantry and would probably still be there, unopened, if the Tuesdays with Dorie bakers had not chosen to make matcha financiers this week!
 Since we are trying to lose a little weight here, I only made a third of the recipe which gave me 10 little cakes. My new pan, one I found on my last trip to Pennsylvania, is actually for popovers and for some reason, it only has 7 cups in it which meant I had to use 2 pans. The ones I baked in the muffin pan, a black-nonstick pan, are on the right side of the photo. The look very different from the ones baked in my aluminum popover pan.
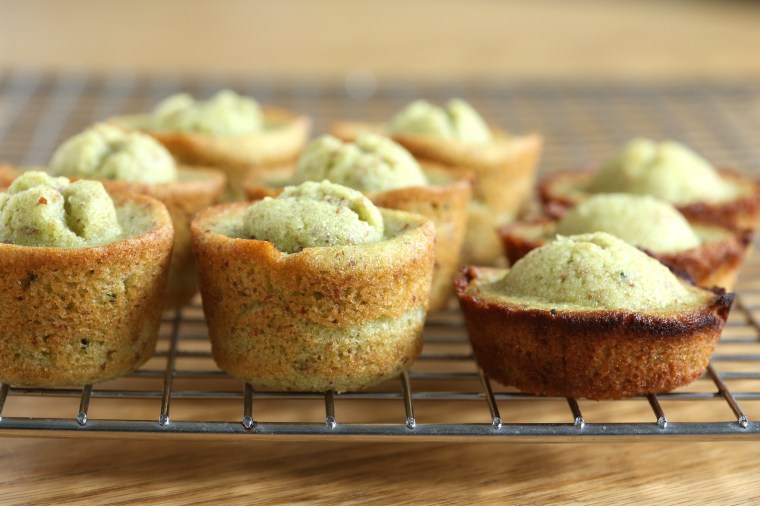 Not only did they look different, they also came out shorter and much darker. Beleive it or not, I used a portion scoop and each one is the same amount of batter-the pans were just so different that it really shows in the baked cakes above.
 Matcha tea is not easy to find and I picked mine up in a
 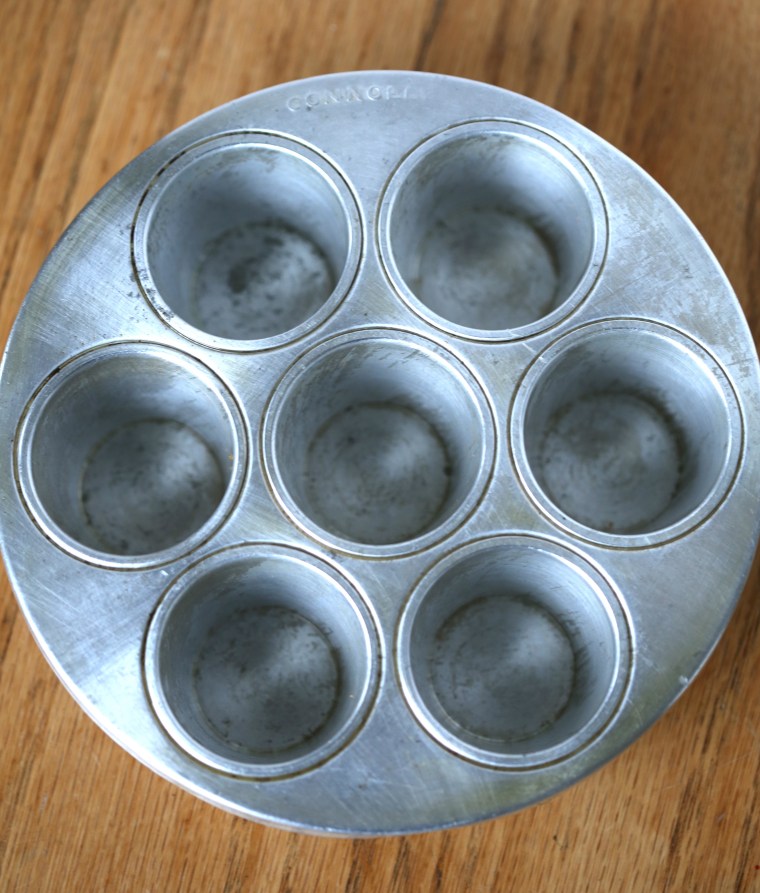 My new, old pan. It is a fairly heavy gauge, aluminum popover pan and the cups are nice and deep. Best part, I think I spent $3.00 for it!
 A side view of the cups-nice and deep
 The photo in the book has very bright green cakes but the recipe tells you that the batter will be a pea green. Mine are definitely pea green which makes me wonder about the photo in the book. The day these were baked, the flavor was a little grassy and I did not care for them but as they aged for a day or two, the flavor improved, a lot. These may make another appearance in our kitchen, but not for a while-we really need to get back on track with the diet!
 When I was 15, my sister Kristen was born. Needless to say, we haven’t had much of a chance to spend time together; she lived with my father and stepmother, I lived with my mother. Did I mention that I was 15 at the time? You know, a teenager? Before I knew it, I was shipping off to the Culinary Institute of America. Then suddenly, I was married-Kristen was our flower girl, and Darry and I started our migration. We had moved away by the time she was seven and now that we are back on the east coast, we are still pretty far apart; we are in Southern Virginia and she is near Boston. We rarely find ourselves in the same location.
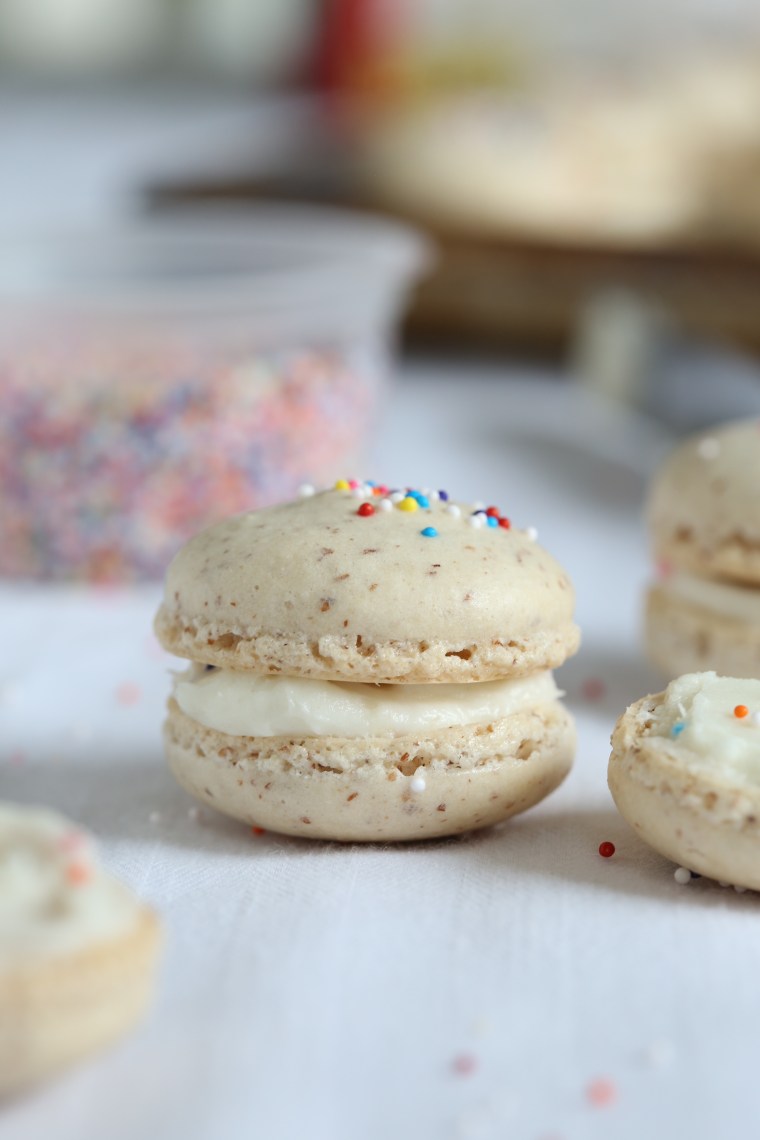 When I was growing up, my mother would always say she was 27. Year after year, she was 27, again and again. Not surprising since her father, my grandfather, had stopped having birthdays after his 39th. Then when our first daughter Alix was born, on my father’s birthday, he made the decision to hand over the reins to her and he has been 46 ever since. As it stands, I am 10 years older than my mother, 2 years younger than my grandfather was when he passed away, 9 years younger than my father and exactly the same age as my sister. Gotta love math…
 Making macarons is a new thing for me. They just seemed too fussy and annoying to make. Too many rules. Then I found an article from
 All packed up and ready to ship out to Boston.
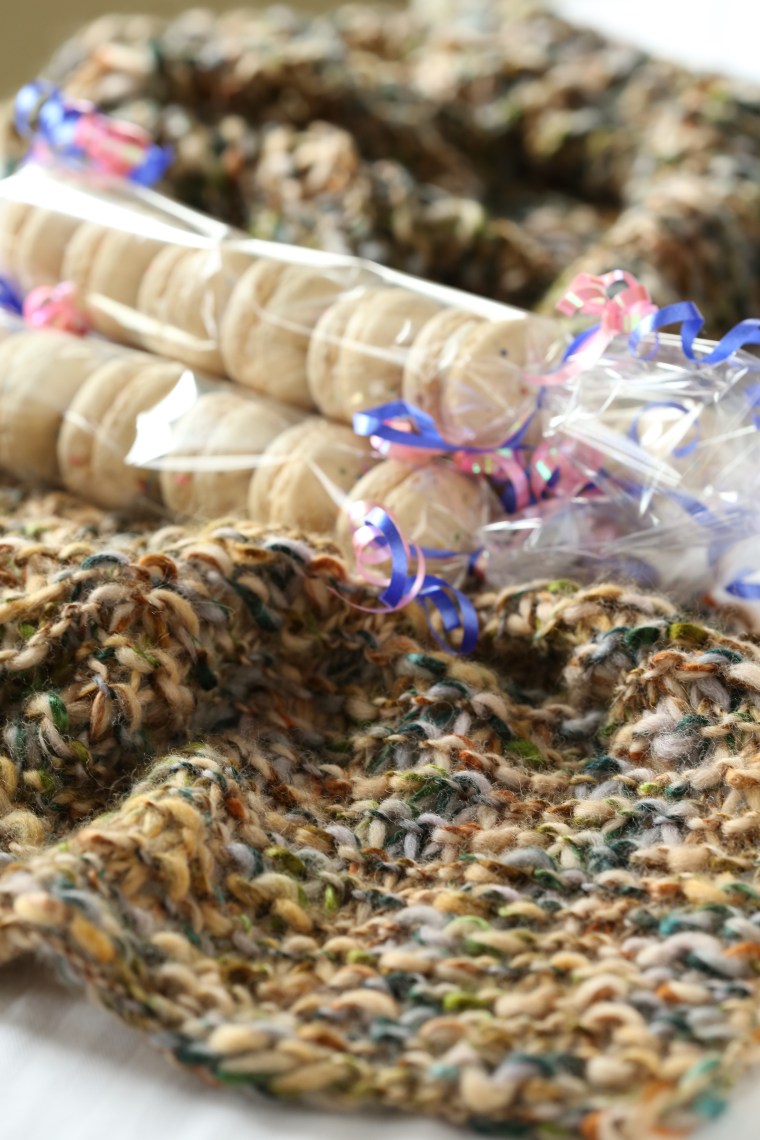 Because macarons are delicate, I knitted a scarf/wrap to keep them safe on the trip. It seems that I have been doing a lot of knitting in recent months-it keeps idle hands busy. This yarn is so soft too, found it one day while wandering through Tuesday Morning and could not resist. When I walked out of the store that day, every skein of
  Everybody join in and help me wish my sister a big, Happy 37th Birthday!!!
 This week, the recipe was a true challenge that took two weeks to complete. Now if that doesn’t deter you from trying to mix up a batch of this bread, not much will! To make a traditional Pain de Campagne, you have to save a piece of the dough from your batch to act as a starter for your next loaf which means you are always working with a bit of old dough called a chef. If you find yourself without a chef, you have to start one with whole wheat flour and water and pray the yeast feels like cooperating.
 The rye is on the left, the graham is on the right. What a disappointment it was, I had assumed that since I do a fair amount of bread baking here that there would be plenty of yeast to grab and get the starter going.
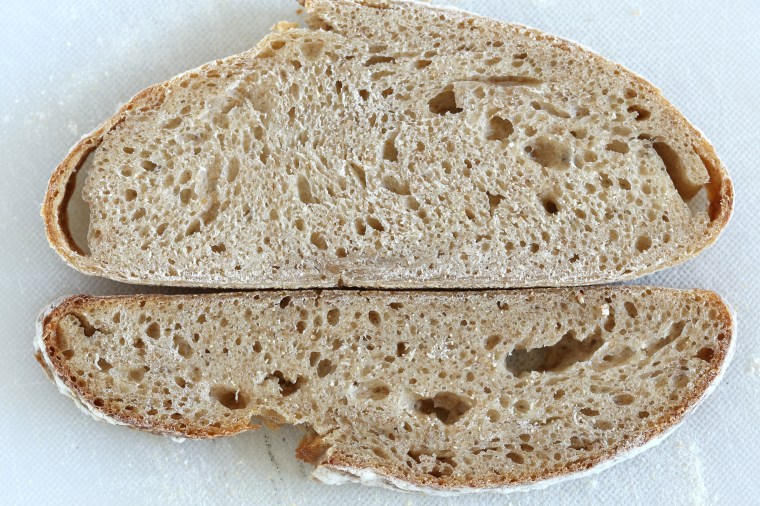 Out of curiosity, I sliced the loaves to see what the interior looked like. It was dense, moist and a bit gummy. Both of them were. It was pretty obvious that there just was not enough yeast in the chef and then the levain to give rise to the bread. Honestly, I was surprised that the graham loaf had a ribbon of raw dough along the bottom crust-it had risen pretty well. The flavor was surprisingly sour, a mild sour but it was there.
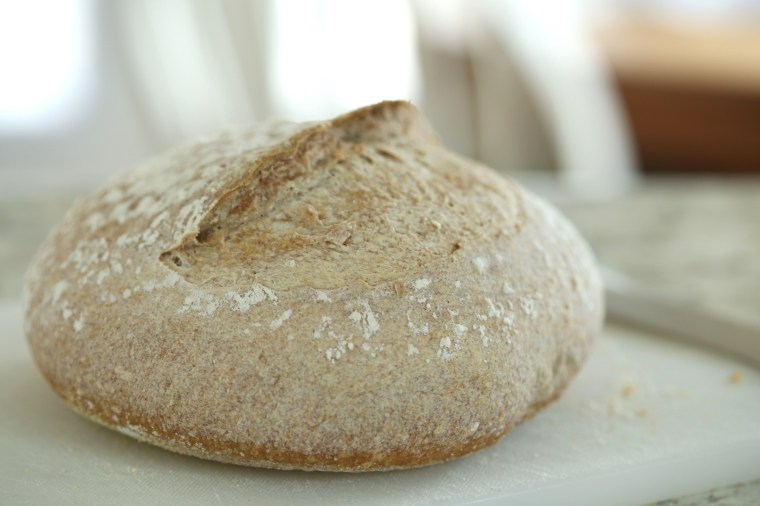 The little ball of dough rose nicely and because I ran out of time, I decided I would put the basket of dough in the fridge to rise overnight. Because I am curious, I pulled off a walnut sized piece and set it aside in the fridge; I was going to use it as a chef for a full batch of dough. The next morning, I pulled the basket out of the fridge and let it sit on the counter to warm up and rise a little more.
 When the time came to bake the loaf, I was excited-this one actually rose! There was oven spring too-it rose more! The only thing I did not understand was the pale color of the crust on the top, it browned nicely on the bottom. The interior looked nice, no stripes and no gummy crumb. It also had a nice sour flavor. As for that piece I set aside, I used it to start a new loaf but this time, I made a full batch.
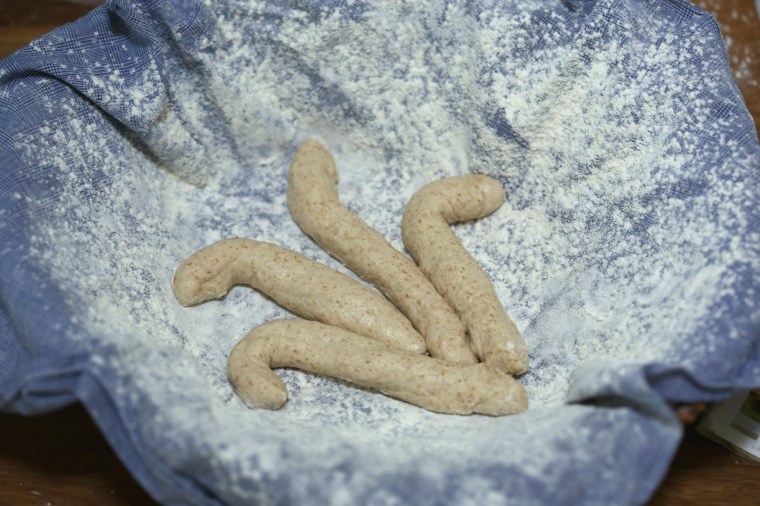 The shaping was easy to do and I cannot remember when I did this type of baking last-perhaps at school…My wheat stalks in the bottom of the basket.
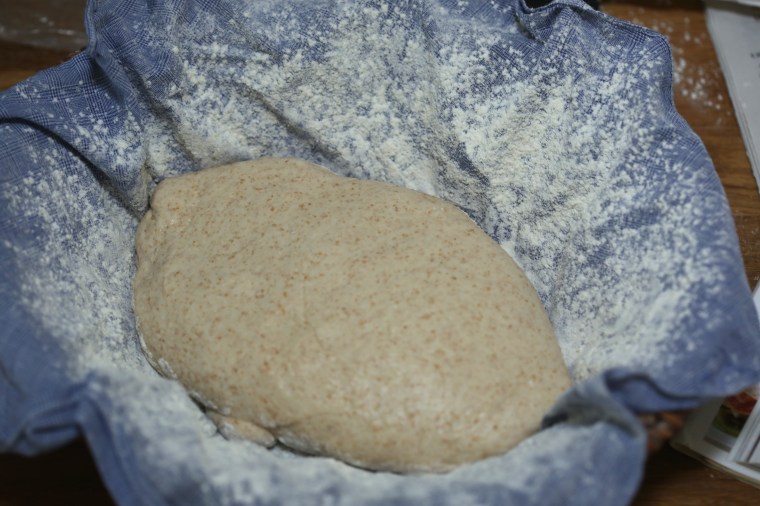 The loaf was placed over the wheat stalks.
 The loaf gets wrapped with a braid of dough and then it is left to rise in the basket. Two hours later, I turned it out onto the peel and let it rise some more. Just before baking, I brushed the loaf with a wash of egg whites and snipped the wheat stalks.
 Fresh out of the oven, my wheat stalks look more like paws.
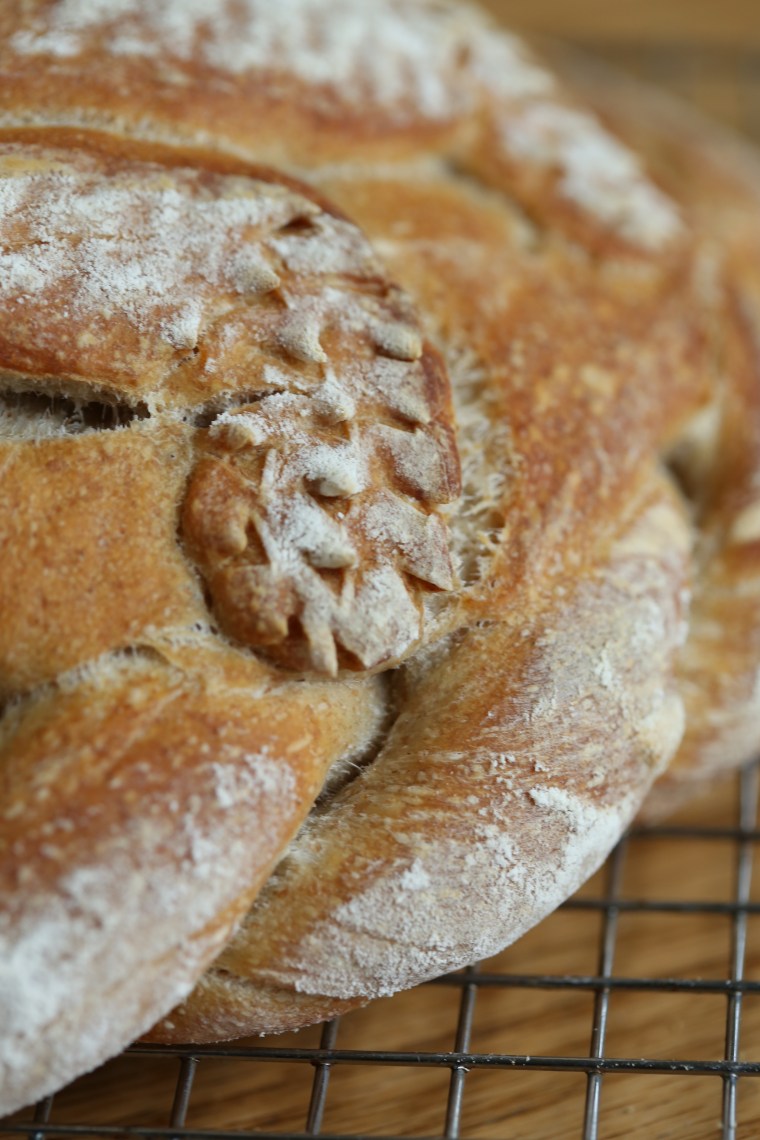 The scissors did a nice job on the stalks. It was fun to make this loaf and now it is sitting on the counter taunting me…
 May have to make another one just so I can make those wheat stalks again! Be sure to visit the
  It has been a while since I have participated in the Tuesdays with Dorie baking and I decided to get back to it this week by baking Odile’s Fresh Orange Cake. Luckily for me, I happened to have a bowl of Sky Valley heirloom oranges from Trader Joe’s camping out on the kitchen counter and this gave me a way to use them before they went bad.
 It seems that to call yourself a pastry chef, one must know how to make macarons. Well, maybe not but that is the impression I have been given. A baker’s version of the Holy Grail, your cookies must be perfect little circles with slightly glossy, smooth tops sans cracks, and those famous “feet” and they are also the thing anxiety attacks are made of. They are fussy, subject to all kinds of results (and not many that you want) and quite capable of intimidating even the most experienced bakers. Of course I am speaking with experience. My own efforts landed with mixed results and I was beginning to hate the little things. This was only aggravated by the plethora of blogposts and pinterest posts from bakers and their dogs bragging about how easy they were to make…It was time to take action and by action, I mean that it was time to get over my fear of failure (again) and to actually try making them. First I needed to find a better recipe and I did; Joanne Chang has a
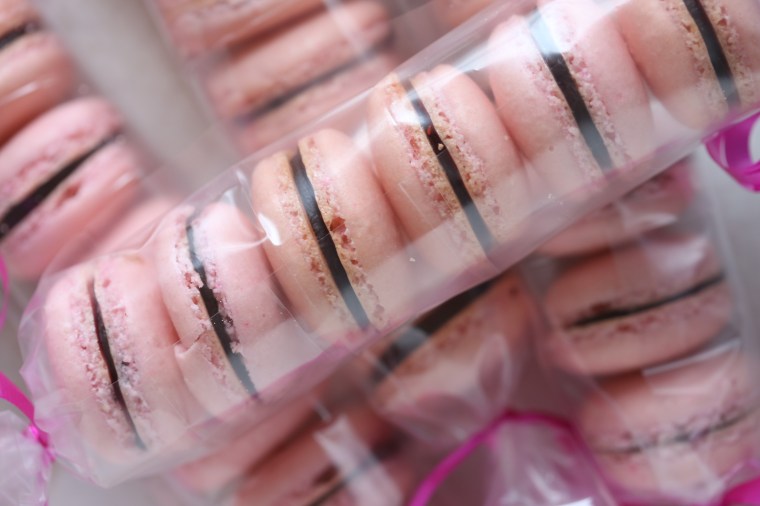
 Popcorn is one of those snacks that I cannot give up. My idea of perfect is a big bowl of corn popped in coconut oil and liberally sprinkled with salt. Caramel corn comes close and so does real state fair kettle corn but I can live without the sweet and 99% of the time, it is just a sprinkle of salt on top for me.
 Have you ever really looked at popcorn? The stuff you get in bags and at the fair always seems so much larger when it pops than the kernels you get from the supermarket and there is a good reason for that. Believe it or not, there is a special type of corn out there that will pop into large round puffs and it is called mushroom corn. Take a good look at the puff above. Notice how it is a larger, rounder puff with a texture on the outside that looks a little like a mushroom cap? You will have to seek this one out, search for it online and if you are lucky to live near a store that carries it, buy some and try it out.
 All bagged up and ready to ship. If you make this, let me share a few hints with you. Make your popcorn first! If you can get the mushroom corn, use it because the little nooks and crannies on the outside will catch the candy nicely. The original recipe for this called for 8 cups of popped corn from 1/3 cup of kernels, I doubled up on the recipe and 2/3 cup of mushroom corn made about 12 cups of popcorn so I made a second 12 cups. However, when I doubled the syrup, it made a huge amount and I personally would suggest you make double the popcorn called for-to me it was way too much candy for the amount of popcorn. Instead, dump the extra hearts into a bag with the candied corn as a garnish.
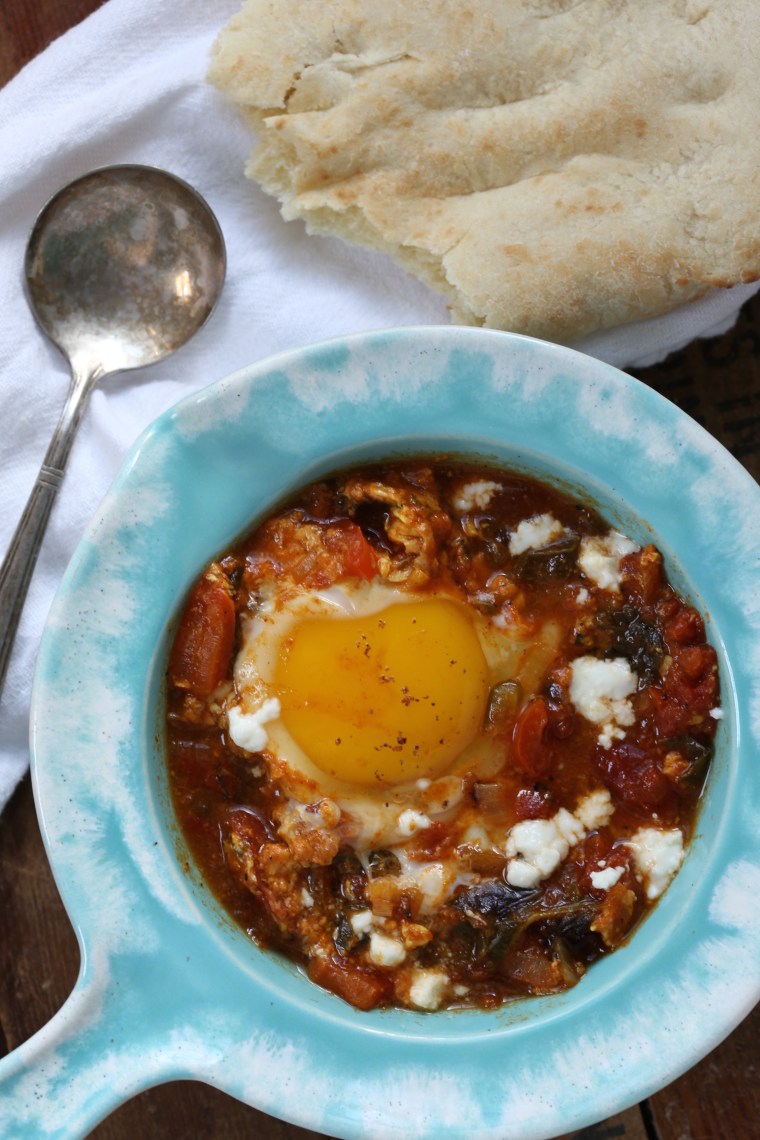 Recently, I overheard my husband telling a friend how he enjoys having hens because they are pets that feed you. Honestly, I never really looked at it that way. For me, I wanted the added bonus of fresh manure for the garden, the eggs are just a bonus. Either way, we end up with plenty of eggs to eat and to share.
 As the stew was simmering, I cracked four fresh eggs from our hens and carefully added them to the pot. To make it easier on myself, I baked the stew to finish the eggs and you can too because the recipe explains both methods. Because David says to serve it with crusty bread to soak up the sauce, I heated several rounds to naan and we stuffed ourselves with the spicy, tomato-y sauce. Now that I know how to make this dish and cook the eggs to that perfect solid white and runny yolk state, I will be making this again-we certainly have enough eggs! And for those of you that do not have laying hens, pick up some fresh local eggs and make a batch of this stew; you will not regret this at all!
 The cake for today’s challenge is supposed to be a tangerine-carrot cake but after a quick check in the fridge, I could only find lemons. Then I spied the last lonely parsnip and decided that I should keep going in this direction and change it all up. We have been trying to cut back on snacking and it has been a while since I made a cake. The fresh eggs from our hens are stacking up on the counter and it was a chance to use a couple.
 The change from tangerine to lemon meant that the acid level was increased and I am pretty sure that it changed the texture of the cake and made it a little denser than the description in the recipe. Even so, it was still pleasingly moist and a little firm. The parsnip mellowed during the baking and honestly, you wouldn’t know it was there unless I told you.
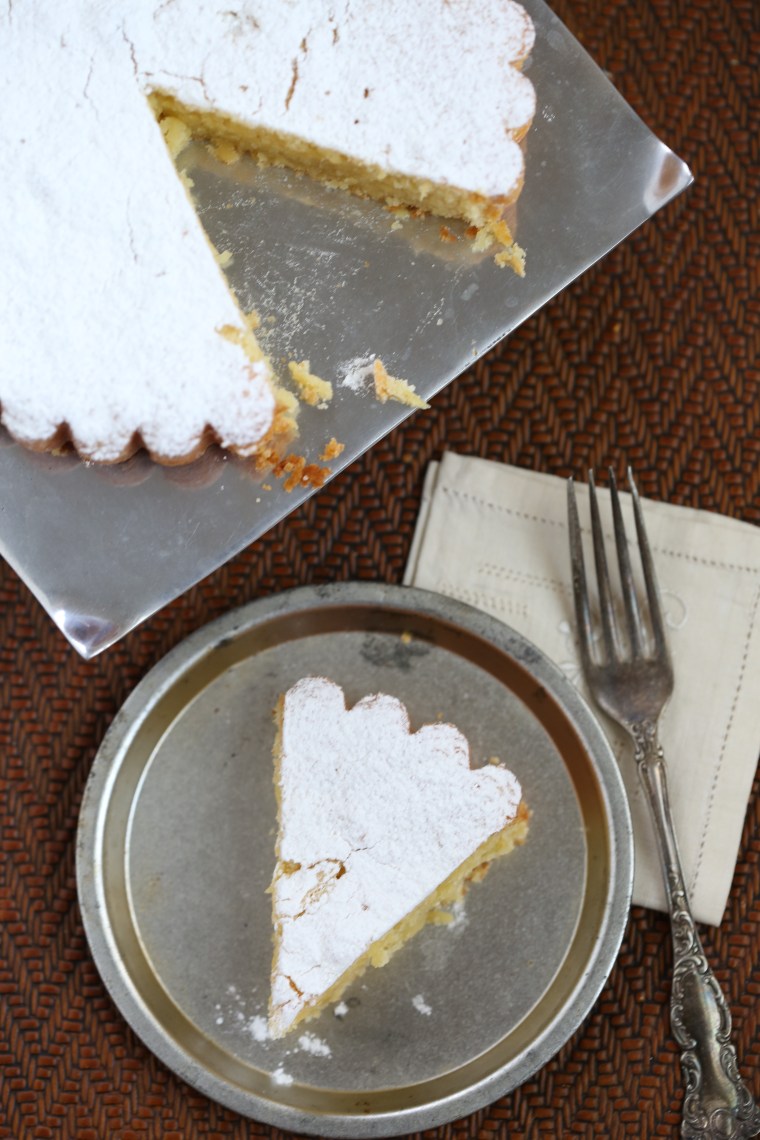 The only other observation I made was that the batter amount baked up just fine in my 8 inch tart pan. After greasing the ring and bottom and dusting it with flour, I set it onto a sheet pan to prevent leakage in the oven. It came out of the pan and off the bottom beautifully. This was such an easy cake to make and honestly, the potential combinations are numerous so I can see myself pulling this recipe out again when I need a quick and foolproof cake!
 It has been a while since I baked with the TWD gang. The holiday season is generally a hectic one for me and with all that I was baking for gifts, I just decided not to bake anything more, because baking it means eating it and I have gained more weight than I care to admit at this point. (thanks menopause…)
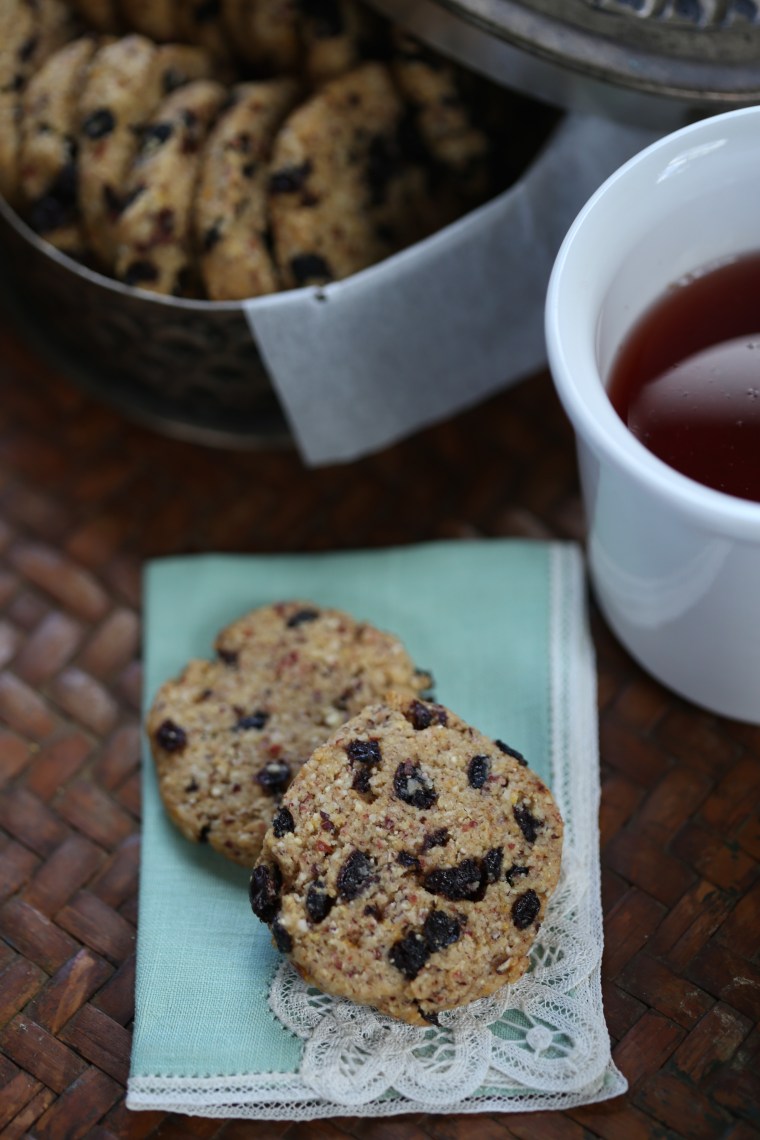
 Stone ground cornmeal is always more coarse than the regular grind but the bloody butcher had a large range in particle sizes and makes it very easy to see the meal in the dough. This particular batch was grown and ground right here in Virginia and it is from
  There was a box of currants lurking in the pantry and since they were a little dry, I added several tablespoons of dark rum to them and heated them so that they would plump up. To offset the extra liquid, I cut out the extra egg yolk and that made the dough slightly drier than I would have preferred. However, now that we have our own egg laying hens, I hate the thought of wasting an egg white. The recipe calls for the dough to be formed into a log and cut into scone-like wedges. After asking one of the other TWD bakers how they worked out like that, I decided to go with a slice and bake log which is what most of the recipes I read called for. The result was a crunchy, crumbly cookie.
 The weather took a sudden turn towards winter today and turning on the oven was comforting in many ways and so was the scent of cookies baking-although, I really do not need to be eating cookies at this point! The bottom line, I love currants and cornmeal but it is not likely that I would think to make these again, at least not with this recipe. Personally, I would like them to be a little sweeter and a little crispier. Either way, these cookies are a lovely accompaniment to a cup of hot tea, especially on a chilly day!