Apparently, I can Pinterest along with the best of them. Repurposing things has long been a hobby of mine but since Pinterest came along, there are so many people sharing ideas and photos that if you spend some time looking, you can quickly become overwhelmed with photos and tutorials. Unfortunately, for every great step-by- step tutorial, there is a vaguely written and generally poor one to counter it. Having seen so many for turning chandeliers into planters and outdoor lighting, I decided to give it a go when I found this fixture at my local Habitat for Humanity Restore. The painting on the metal made it look a little old and rustic which meant I wouldn’t have to try and paint it but even better was the $5 price tag.
 Knowing that I had to find three plates and cups, I searched in the housewares department and the gardening department. While I could not find plates at the HHRestore, I did find three terracotta pots that were already coated with a nice garden patina. A quick visit to my other favorite thrift store in town, the CHKD store, turned up these nice Pfaltzgraff saucers. At 78 cents a piece, how could I say no?
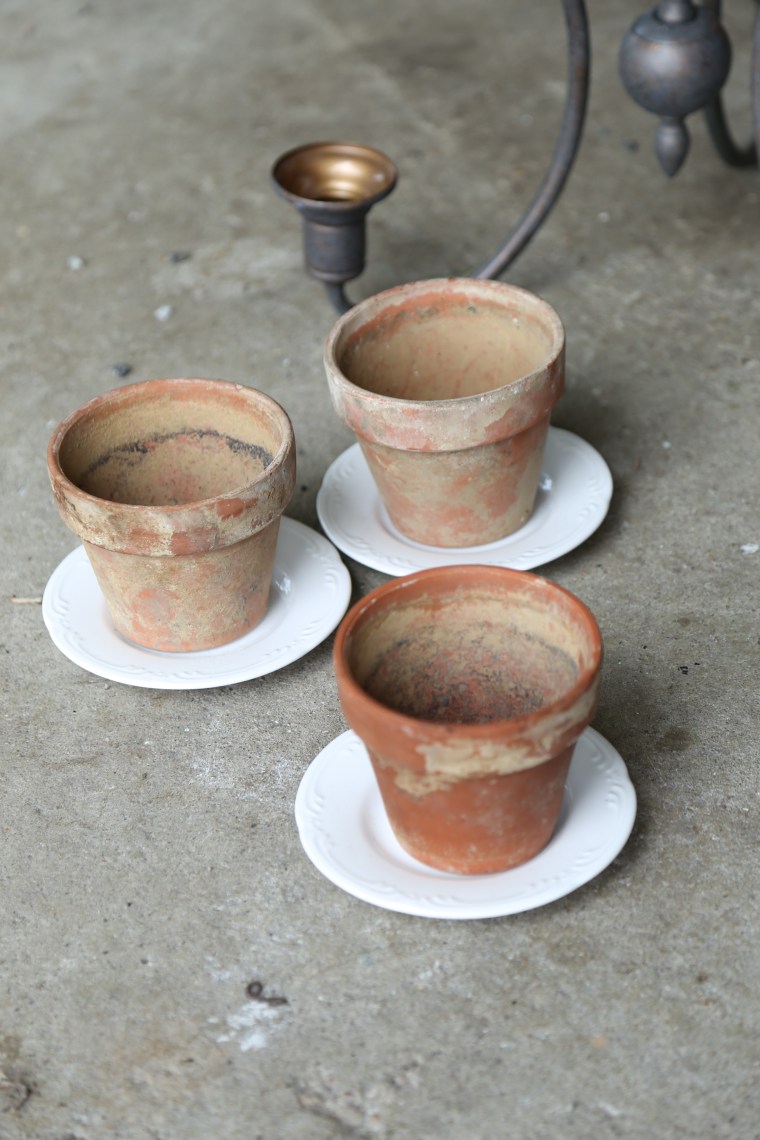 A quick preview of what is to come. If you can, take your fixture with you, it will give you the chance to view the pieces together and make sure they fit. Plates have a ring on the bottom that can make it awkward to assemble the pieces. My plates were not a perfect fit but came close enough that I was able to make them work together with the cups on the chandelier.
 After removing the electrical components and cutting the wires, I was left with the bolt at the bottom and a piece of threaded pipe. To attach the plate and pot, I needed a coupling nut to attach to the pipe that would also be used to secure the plate and pot with a bolt and washer. This is another reason that you need to take your fixture to the store with you; every single fixture has its own sized parts and while some are easy to find, others are proprietary or just not easy to locate.
Apparently, my fixture fell into the latter category. All bolts and nuts are sized by diameter, either in US standard sizes or metric sizes. To further complicate matters, not only are they sized by diameter, they are sized by the thread. While a wonderful young man at Lowe’s was willing to help me figure out which size coupling nuts I would need, he could not sell them to me and my only choice was to order them off the internet. The bottom line, I would have to pay close to $20 to get the three coupling nuts!!!
 After considering that for about 12 seconds, I went off to my local ACE hardware store and told my sad tale to a wonderful salesman. He was intrigued him enough that he and I spent close to 20 minutes tracking down parts. When all was said and done, I placed a coupling nut (that still wasn’t cheap but at least it wasn’t as expensive as the others) in the cup and then I filled the area around it in the cup on the chandelier with quickcrete that we had at home. After letting it cure over night, I assembled the rest of the parts.
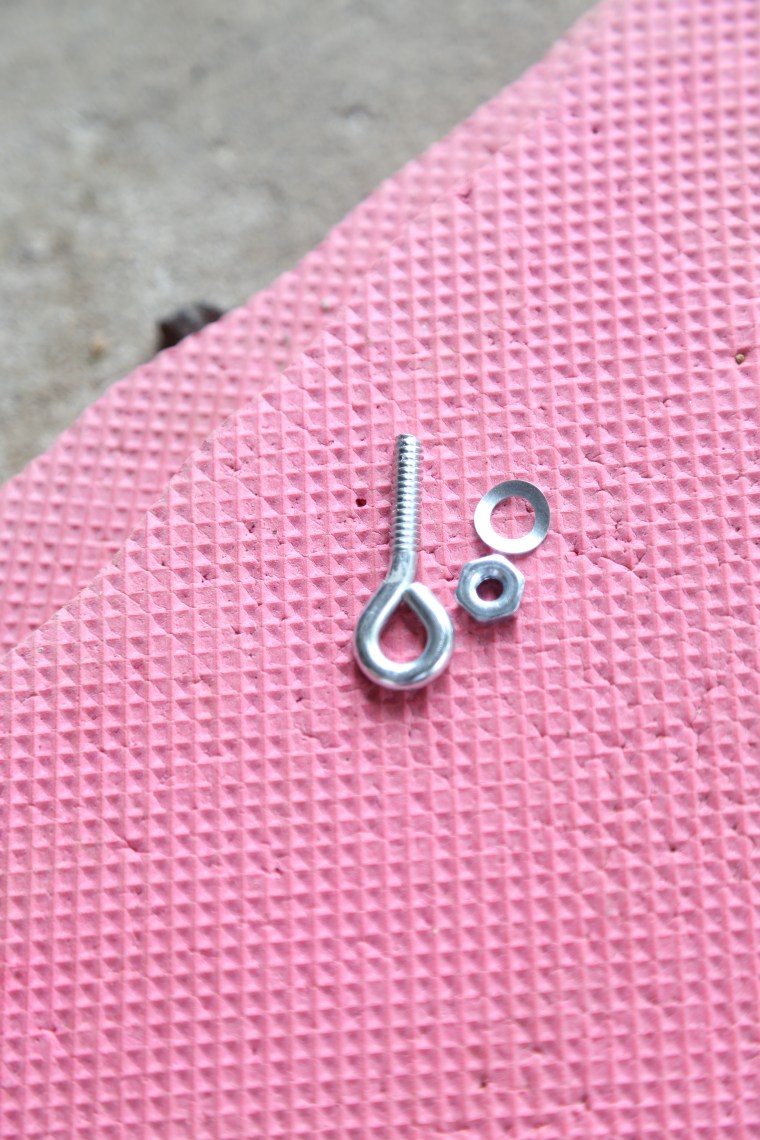
 The plates need to be drilled out and you will need to use a special drill bit, a glass and tile bit. Place a couple layers of masking tape over the area to keep the bit from slipping and carefully drill a hole slightly larger than your bolts. If you’re worried that bolting the plate and pot together will cause them to crack, place a rubber gasket or two in between the parts; I did use one but do not think it was necessary. Because I did not take measurements, my piece required a bunch of extra washers, I suggest you buy a couple packs of extra washers so that everything is snug.
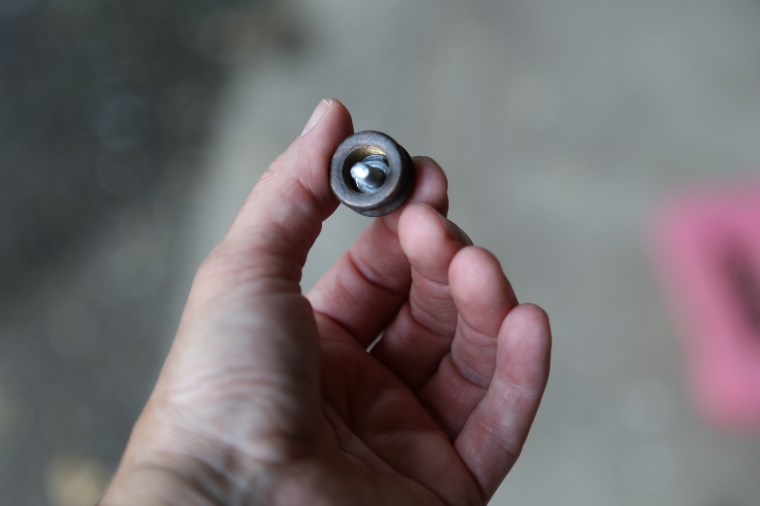
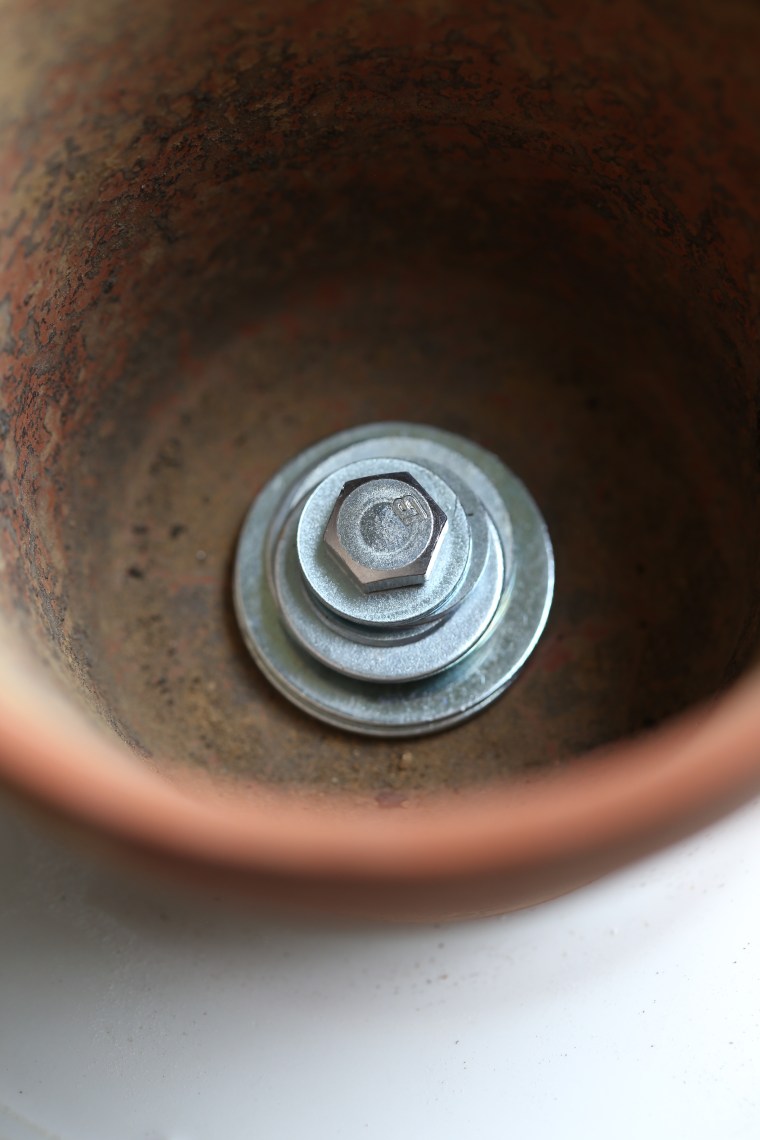 As you can see, I have a small pyramid of washers in there. If I hadn’t put so many in there, my pots would have wobbled and tipped. When I was done, my pots were secured and did not move at all.
 Ready to be filled with plants.
 Because this is a chandelier, it needs to hang! While I was at ACE, John, my helpful hardware expert cobbled together a few pieces to create a loop at the top of my fixture.
 The top of the post actually comes off and I removed it and inserted the pieces to create the hanging loop.
 It was a tiny space to work in so I suggest you get a hold of some really narrow and long needle nose pliers if you have a fixture like mine.
 The finished hanging loop is ready to hang!
 The final step is to fill the pots. One thing many folks don’t consider when they arrange plants in hanging planters is that size is crucial. My pots are small, about 2 cups in capacity and that means a plant could quickly out grow the space. To prevent that from happening, I chose plants that I know have shallow growing roots that require little space; sedum and succulents! To fill my cups, I used a sedum v. John Creech and an ice plant. They have a low watering need and will not out grow the cups quickly.
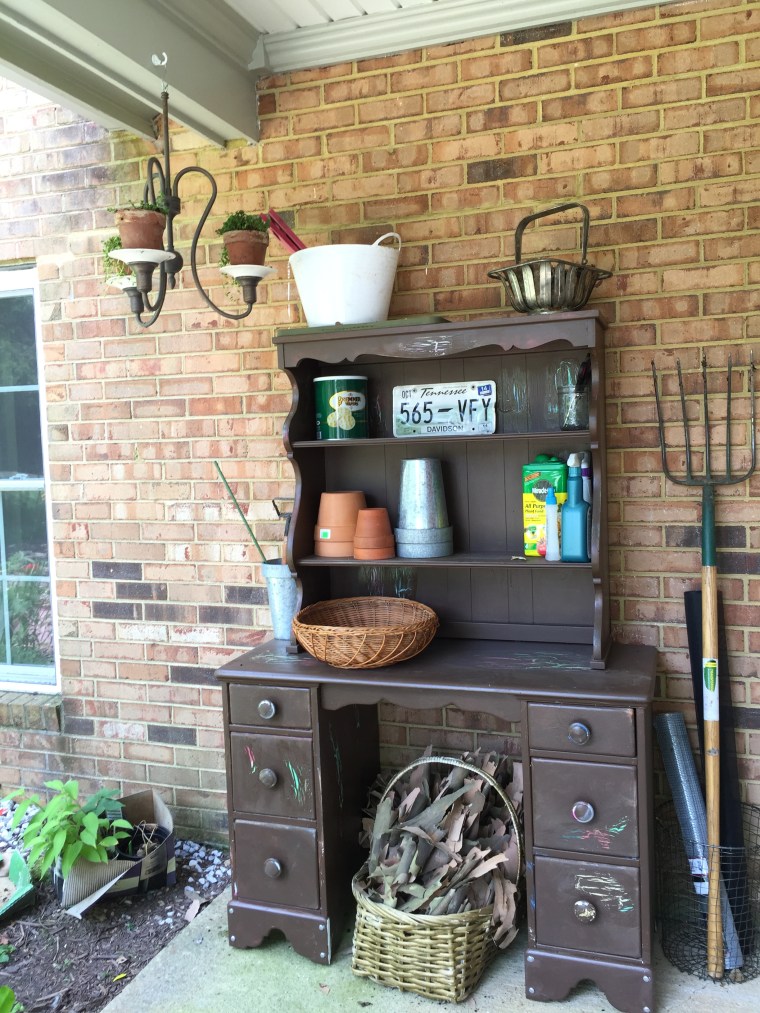
Happily hanging in its new home! My new potting bench, another HHRestore purchase is actually a desk with a mismatched dining room hutch bolted to it. Because they did not match, I painted the whole thing brown but also did some white clue crackle painting on it. Finally, I have a place to fill pots and start seeds that does not include sitting on milk crates and working on the ground. It also gives me a place to store all of my tools and supplies by the garden without looking like a dump zone!
 Making liqueur is a bit tedious because you must pick large quantities of the blossoms. For the batch I made this year, I must have picked about 3 pints. For a single pint of liquer, I placed 2 cups of blossoms into a pint sized jar and added 2 cups of potato vodka and allowed the flowers to steep for a couple days, shaking it once a day. After it had sat and the flowers faded and grew limp, I strained them out and filled the jar with another 2 cups of blossoms. To this, I poured the previously infused vodka over the blossoms and allowed it to steep, shaking it daily for a couple of days and then I repeated the process a third time. My goal was to get a nice dark liqueur and a strong floral flavor.
 Having allowed the last batch of flowers time to infuse the batch, I strained them out and this was the result. If you look at the top of the liquid, you can see that it is a deep violet color, almost grey. Despite everything, it still had a strong alcohol taste but the aroma was all flowers-and honestly, I am not much of a vodka drinker so it was hard to not taste the vodka in the background but there was definitely a floral flavor there as well. And now that it has aged for a couple weeks, it has mellowed a bit.
 This beauty is
  A close up shot of the flower; look at the hairs on the back of the bloom and the tiny little stamens!
 Dead Nettle is a close cousin of Henbit, both are in the mint family, but if you look closely, you will see that these leaves are heart shaped and gradient in color from the top of the plant to the base while Henbit has round leaves with teeth. Another thing, Dead Nettle flowers make the blossoms from Henbit look huge!
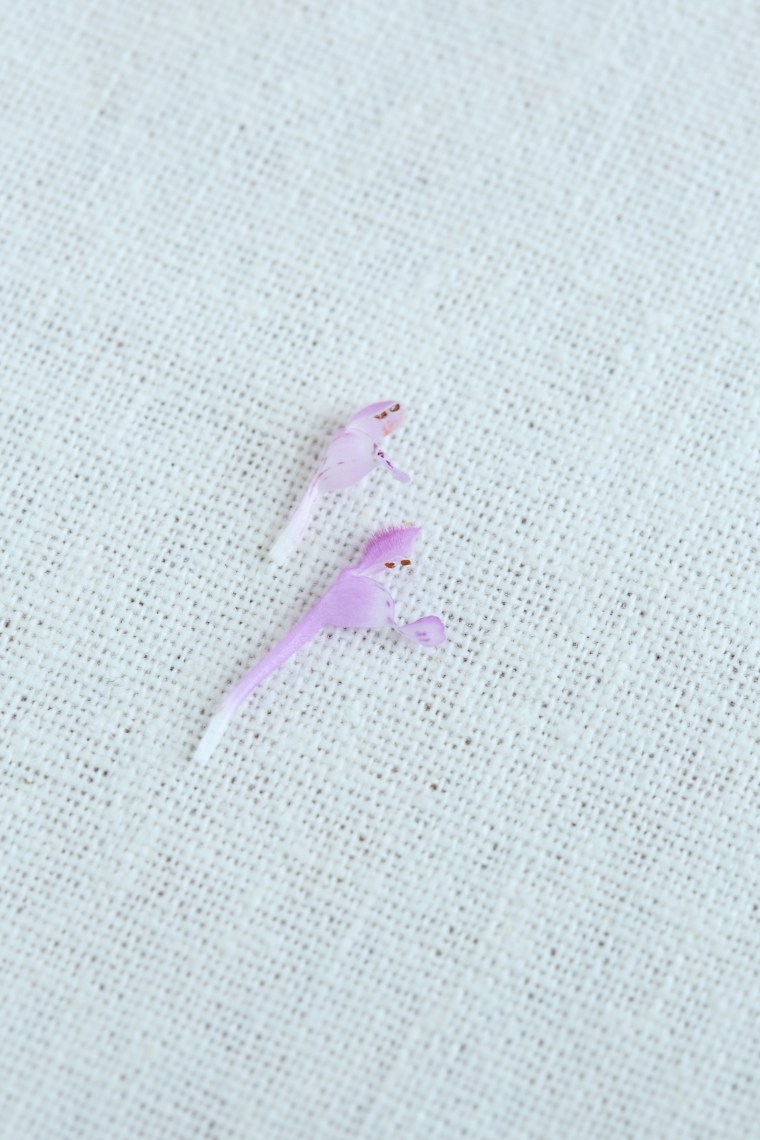 Dead Nettle flower on the top, Henbit flower on the bottom.
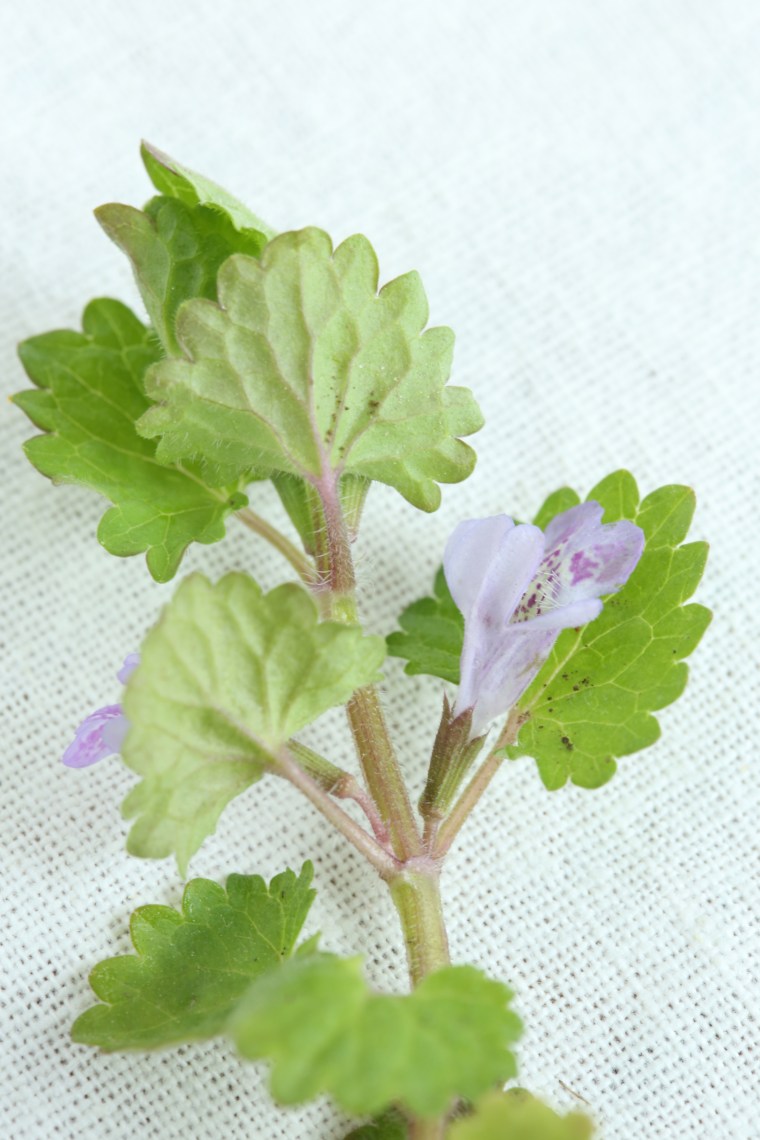 A third player in this game, Ground Ivy, also called Creeping Charlie because it trails like a vine and can quickly cover an area. These blooms are the largest of the three. While some publications will tell you that it is best to make teas rather than eat the leaves, I don’t think there is any real danger in adding a handful of blooms to a batch of likker-although, your back may cry foul!
 My first batch of lawn likker from last year, it has since changed color and is now a bright golden yellow and looks more like a bottle of urine than likker but trust me, the flavor is still floral and so is the aroma!