so, if it is tuesday, it is time to bake with julia, right? oh, that’s right, it’s wednesday and i am a day behind. such is life, my life, a day late and a dollar short. whatever. luckily for me, this week’s challenge was one that i was really excited about. back in the day, i made croissants daily. but back then, i did it with a dough sheeter, not a rolling pin. this was going to be a bit of a challenge after all.
if you aren’t already familiar with the tuesdays with dorie group, we are a bunch of bakers working our way through the book, baking with julia. for the recipe to this week’s challenge, visit the page of this weeks host, amanda of girl + food = love. if you would like to see how the rest of the group did, check out the tuesdays with dorie page.
before we get started, let me share a few of my observations, opinions and what nots. first of all, i only followed the instructions for assembling the dough and making the folds. and if you ask me, the directions were not always easy to follow. and judging by some of the other bakers results, i was not the only one who had this issue. needless to say, i did not always do as instructed by the recipe.

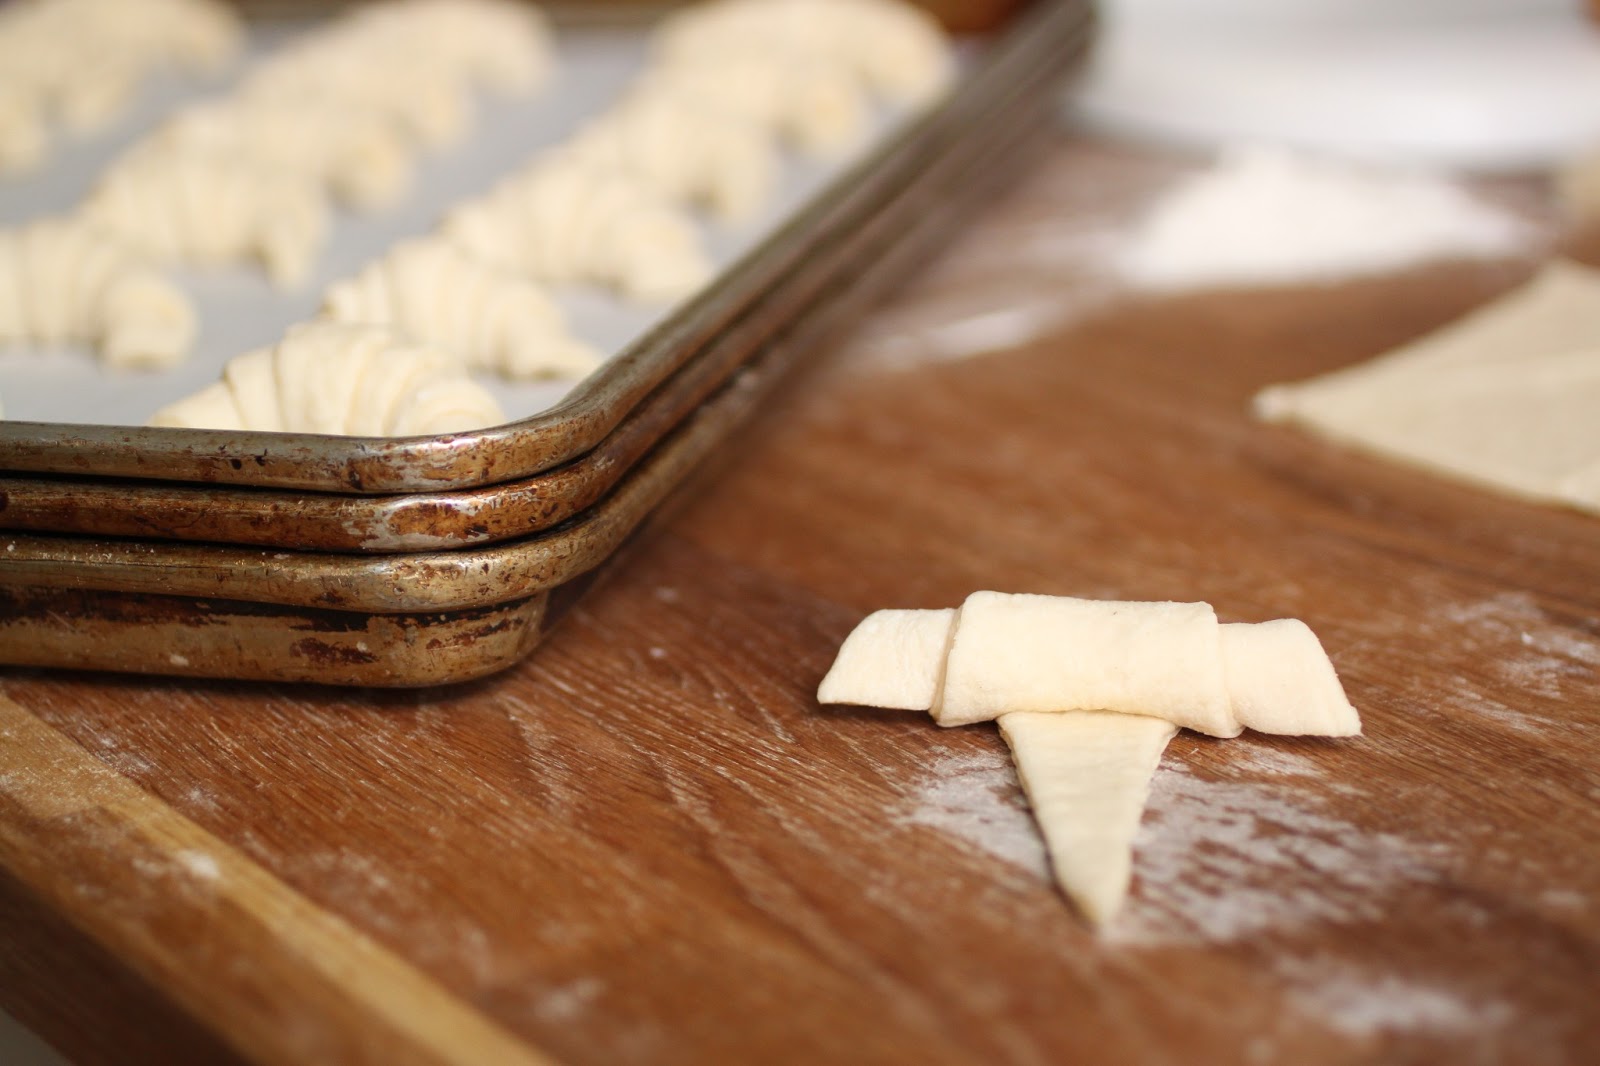
every month, i attend a potluck dinner with my fellow master gardeners and i decided to make the croissants my contribution. in order to share them with everyone, i made mini croissants. i rolled the dough out to the required 15″x24″ and cut it into 3 (5″) strips. i marked the strips every 3 inches on one long side. to get triangles, starting at the other long edge, i marked it 1.5″in from the edge and then again every 3″ across. using a rotary cutter, i cut the dough by going from bottom to top and back down to the bottom-connecting the cuts to make triangles. i did this with the other strips as well.
to shape them, i carefully stretched the dough and rolled them up. as i placed them on the pans, i curved the edges in a little. here is another way i departed from the instructions, i bagged the trays and put them in the fridge to rise slowly overnight rather than using the oven to proof them (more on that in a moment).
so easy to do
perfectly proofed. now, about the rising time. i noticed on a couple of the bakers blogs that their croissants melted. my guess is that the instructions were not clear. the contributing baker suggested rising them in an oven that was turned off. that gives the impression that at some point, the oven was turned on and heated then turned off. what she should have said was an unheated oven or a cold oven with a pilot light or an oven light turned on. a heated oven would cause all of the butter to melt out and the croissants would collapse in a puddle.
how do you know if you proofed them long enough, they should be more than double in size but still slightly firm to the touch. left-proofed, right-not proofed.
perfectly bronzed, and crispy and flaky
look at the lovely interior. a little chewy and a little flaky-tasty any way you look at it! thanks for hosting amanda. and one more note, these are for you grandma, something tells me that you would have enjoyed them…