It’s no secret that maintaining a food blog means doing some serious time in the kitchen. Whether you create your own recipes or just use recipes you find, if you want to be considered a credible source, you have to spend time in the kitchen preparing food. And everybody knows that a blog post about food without photos is pointless so do not forget about the time it takes to style the photo and get the shot. On a typical blogwork day, I can easily spend 2-3 hours from start to finish and if you count the time I spend just perfecting a recipe, it can easily be spread out over several days with as much as 10 hours spent just on the recipe. We won’t even mention the cost of ingredients or the fact that I have not monetized my blog and earn nothing for my efforts. Seems like a pointless activity, doesn’t it?
So why would someone pursue blogging as a pastime? Personally, I enjoy the process of creating recipes and then photographing them. Keeping a blog also makes sharing these recipes so much easier too. When I get a request, I can simply send a link via email. But the biggest plus, the sense of community that comes from sharing recipes. How can that be? It is a fact that using computers and the internet tends to isolate us but they also give us the opportunity to communicate with others around the world. Of course, you do need to have readers to truly get that sense of belonging and luckily, there are many online groups and websites that bloggers and even non-bloggers can join. While some websites that allow users to post recipes freely cannot always be trusted, there are plenty of them that can.
One of my favorite websites to search for recipes and information as well as post my own recipes to is food52.com. Many of the articles posted on the website are written by well-known cookbook authors and chefs. By creating an account, anyone can upload recipes to the website and create personal collections of recipes found on the site. For a person with little interest in blogging but a desire to get their recipes online, this is a great way to gain exposure. The website features a theme based contest regularly and anyone with an account can participate, something I have done on numerous occasions. The theme changes each time and you never know what it will be; canned fish, beer, Thanksgiving pies and honey are a few past themes that come to mind.

After the submission period ends, the editors of the website cull through the recipes and select a group of recipes that they title “Community Picks” and give the members a chance to test them. On a recent afternoon, I signed up to test a bread recipe that had been chosen as a Community Pick from the “Best recipe with honey” contest. While the website does offer a prize for the two finalists of each contest, the testing does not but if you follow through and send in your testing notes, they may get included in the for the recipe.
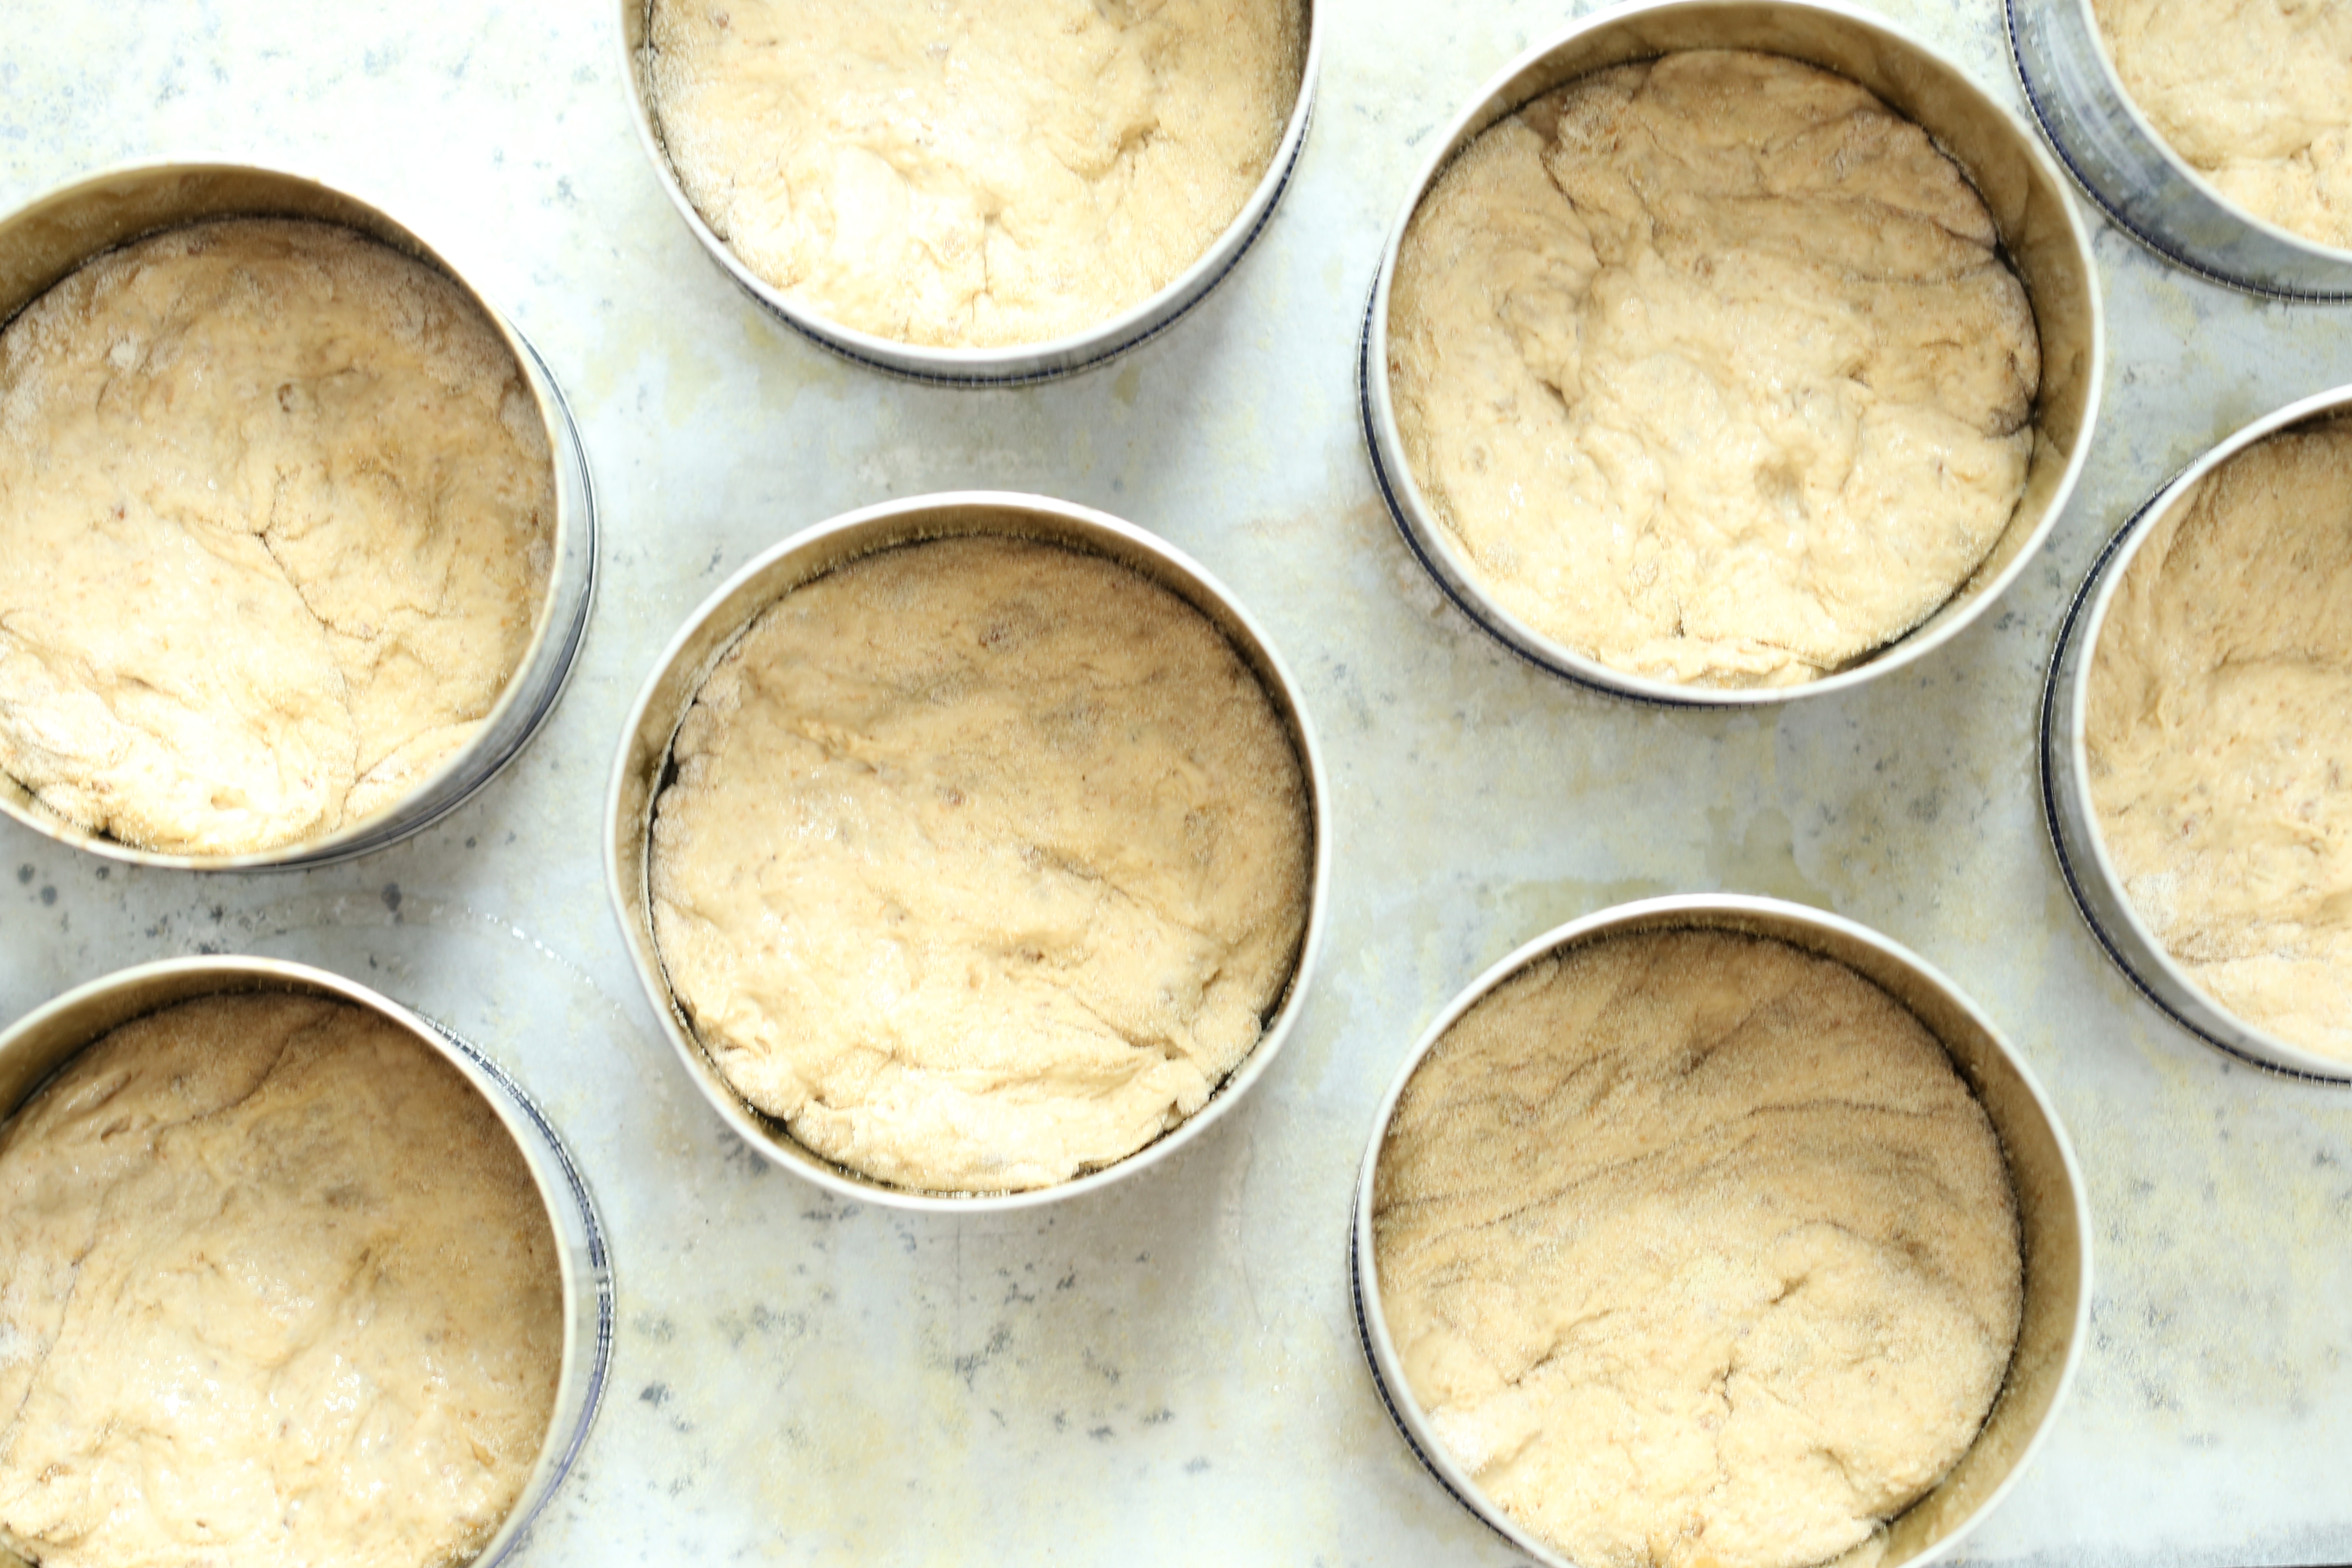
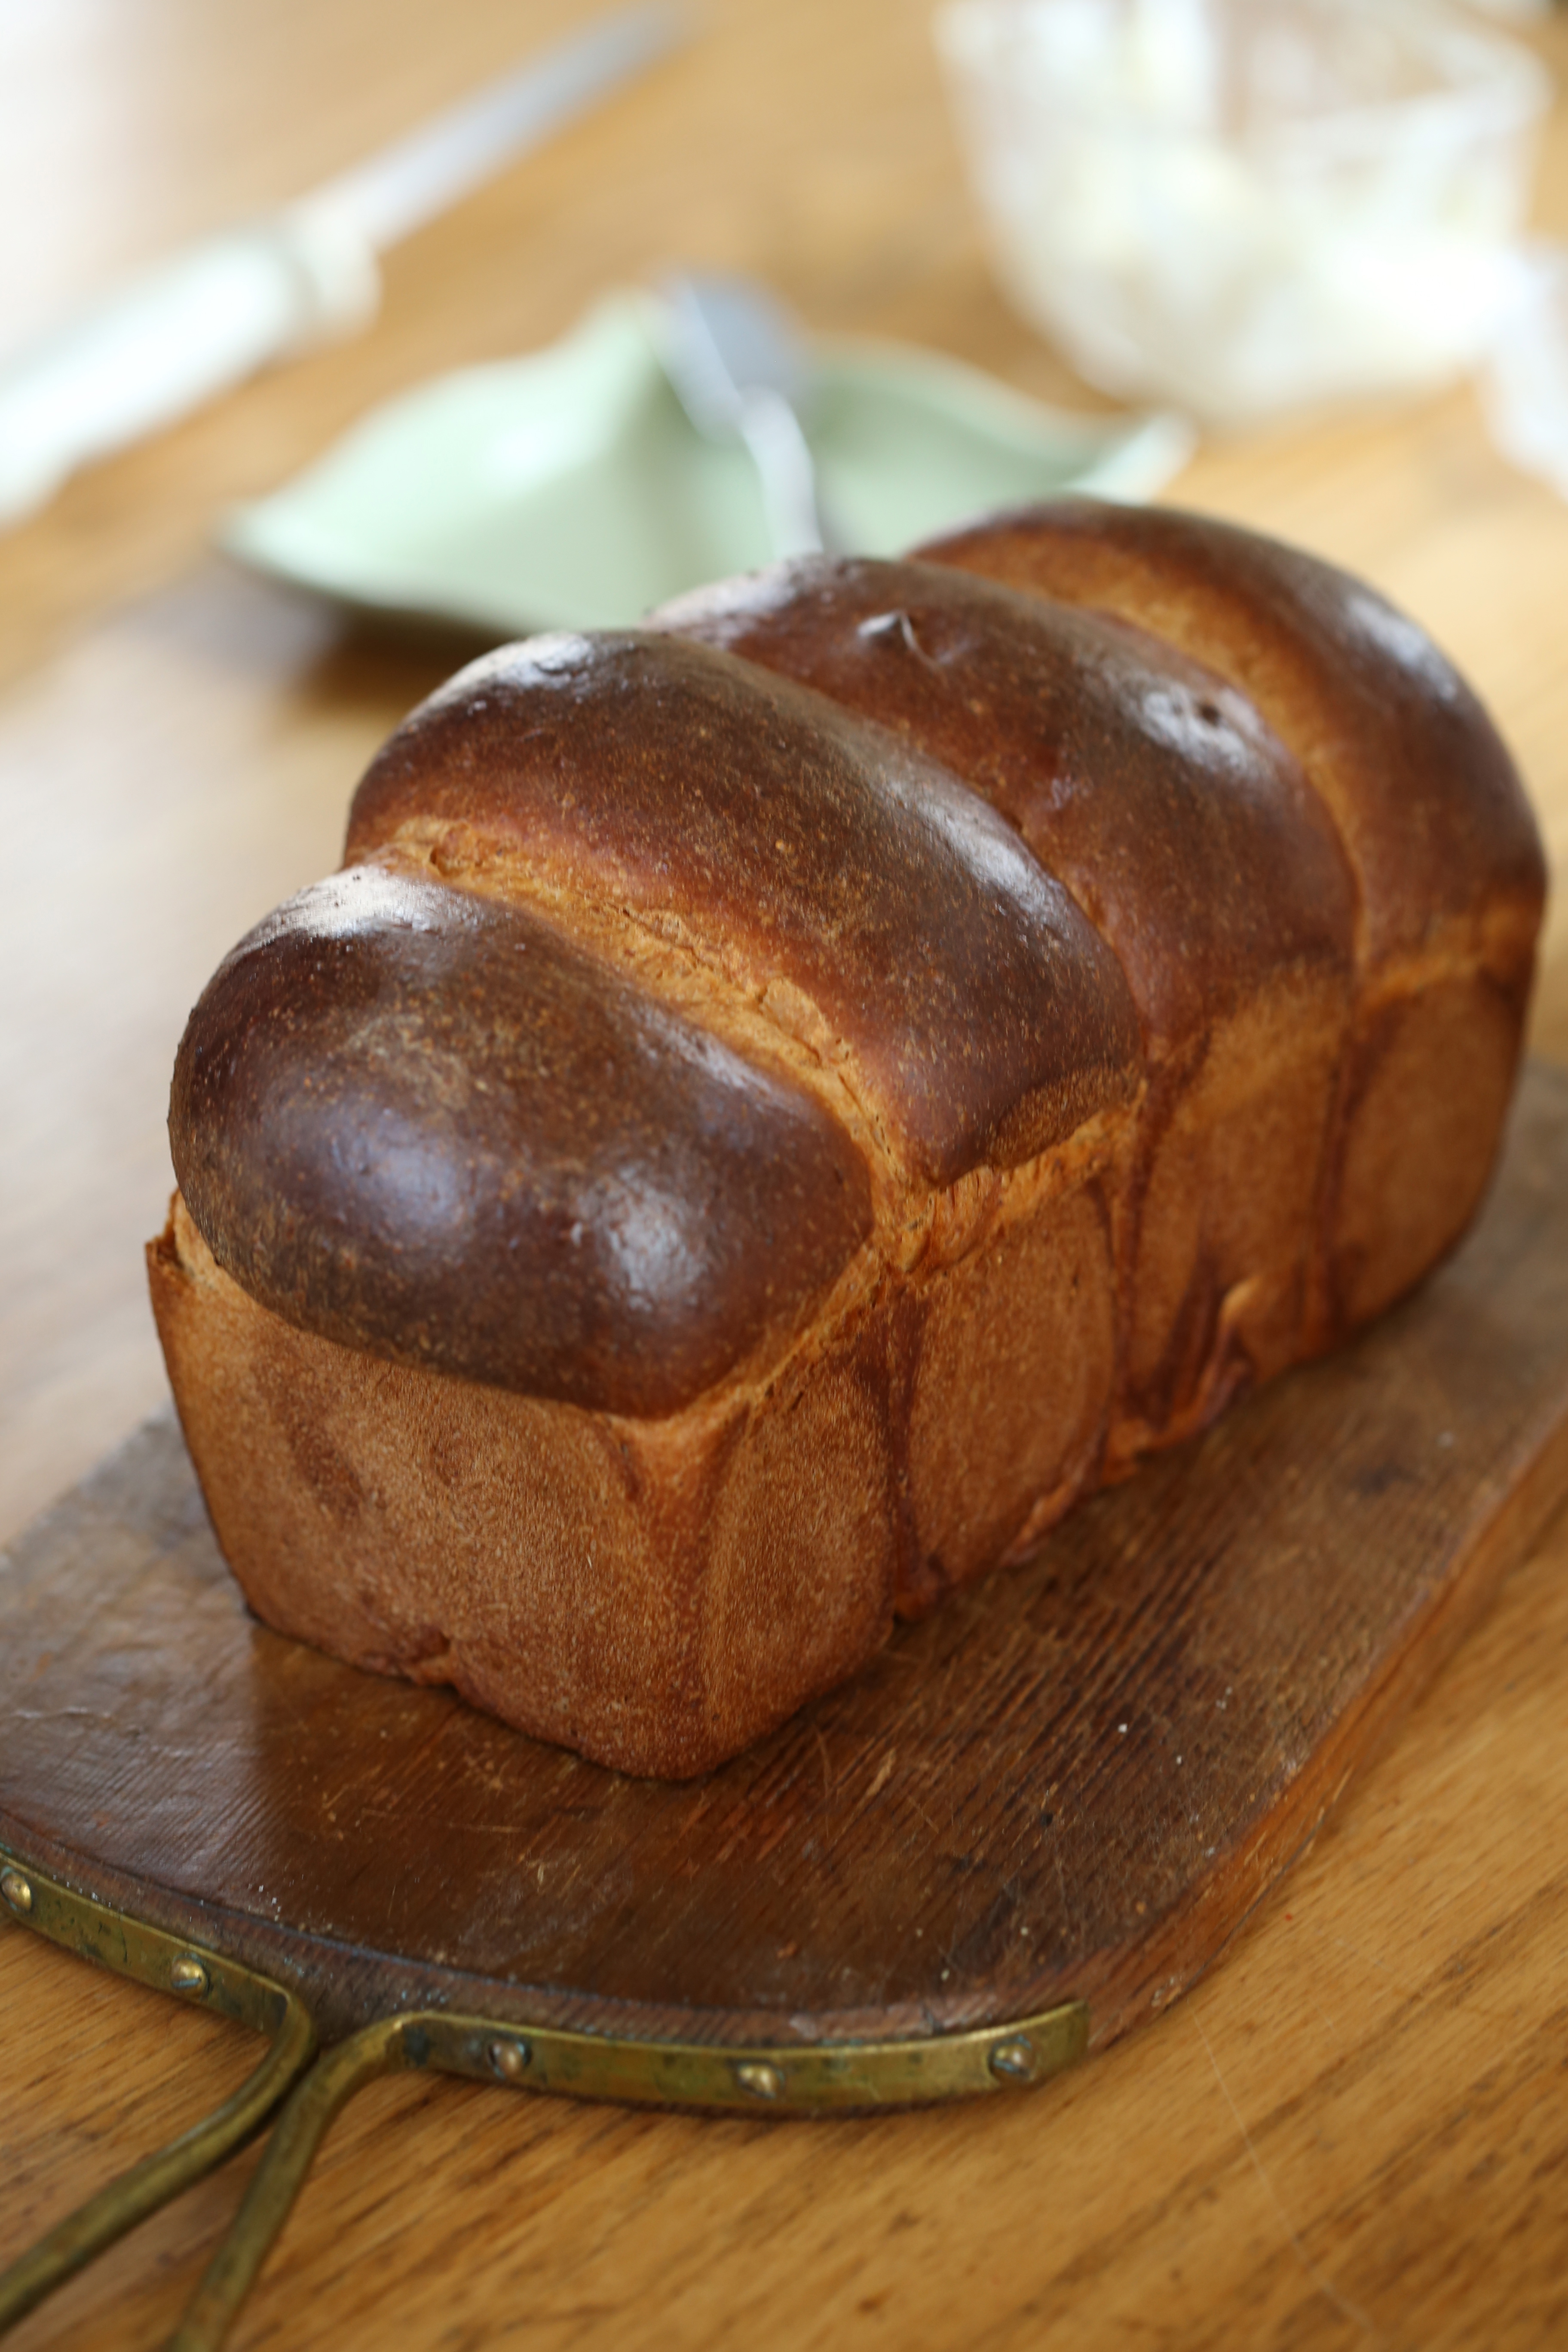
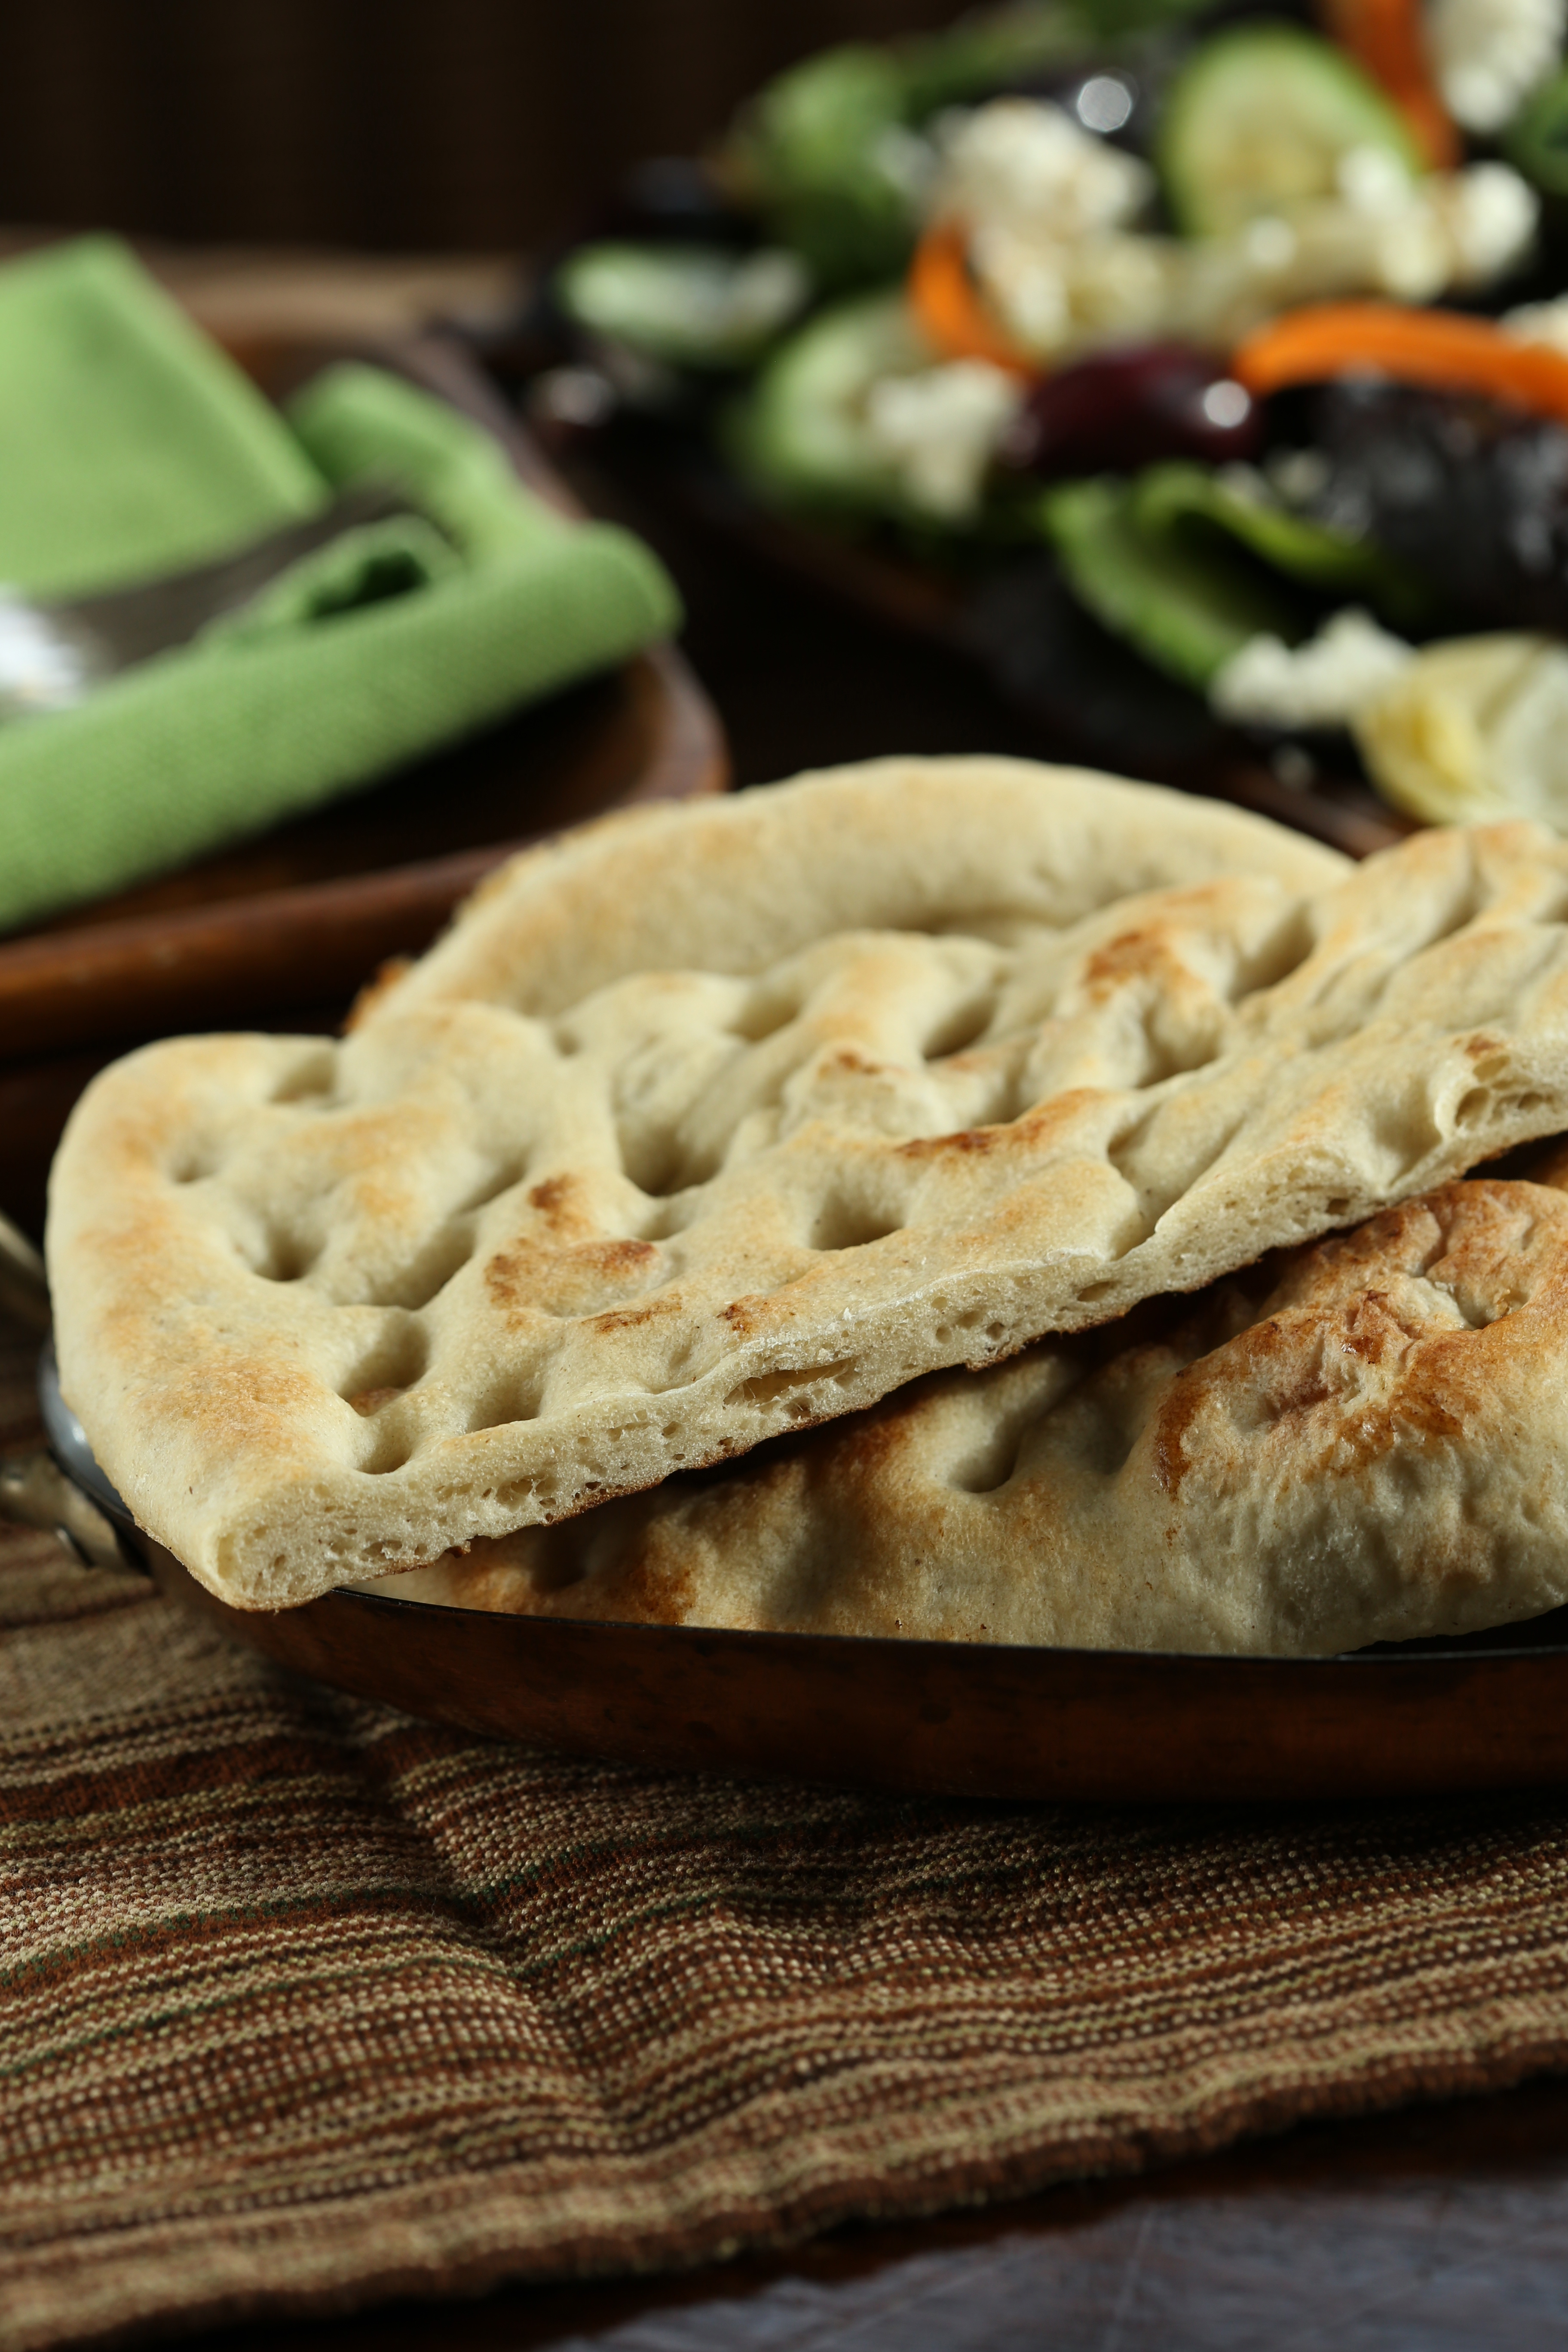
Since I am a member of the website, I chose to make the Milk and Honey bread. When I saw the photo, I immediately thought of Hokkaido Milk bread and was reminded of all of my trips to the Korean Bakeries in Atlanta that sell a similar bread. Tall, narrow loaves with fluffy interiors that make divine toast. However, this bread was actually more like a loaf of brioche; tighter crumb, richer flavor but delicious toasted.

My notes went off to the editors and while they did not use them, I am including them here:
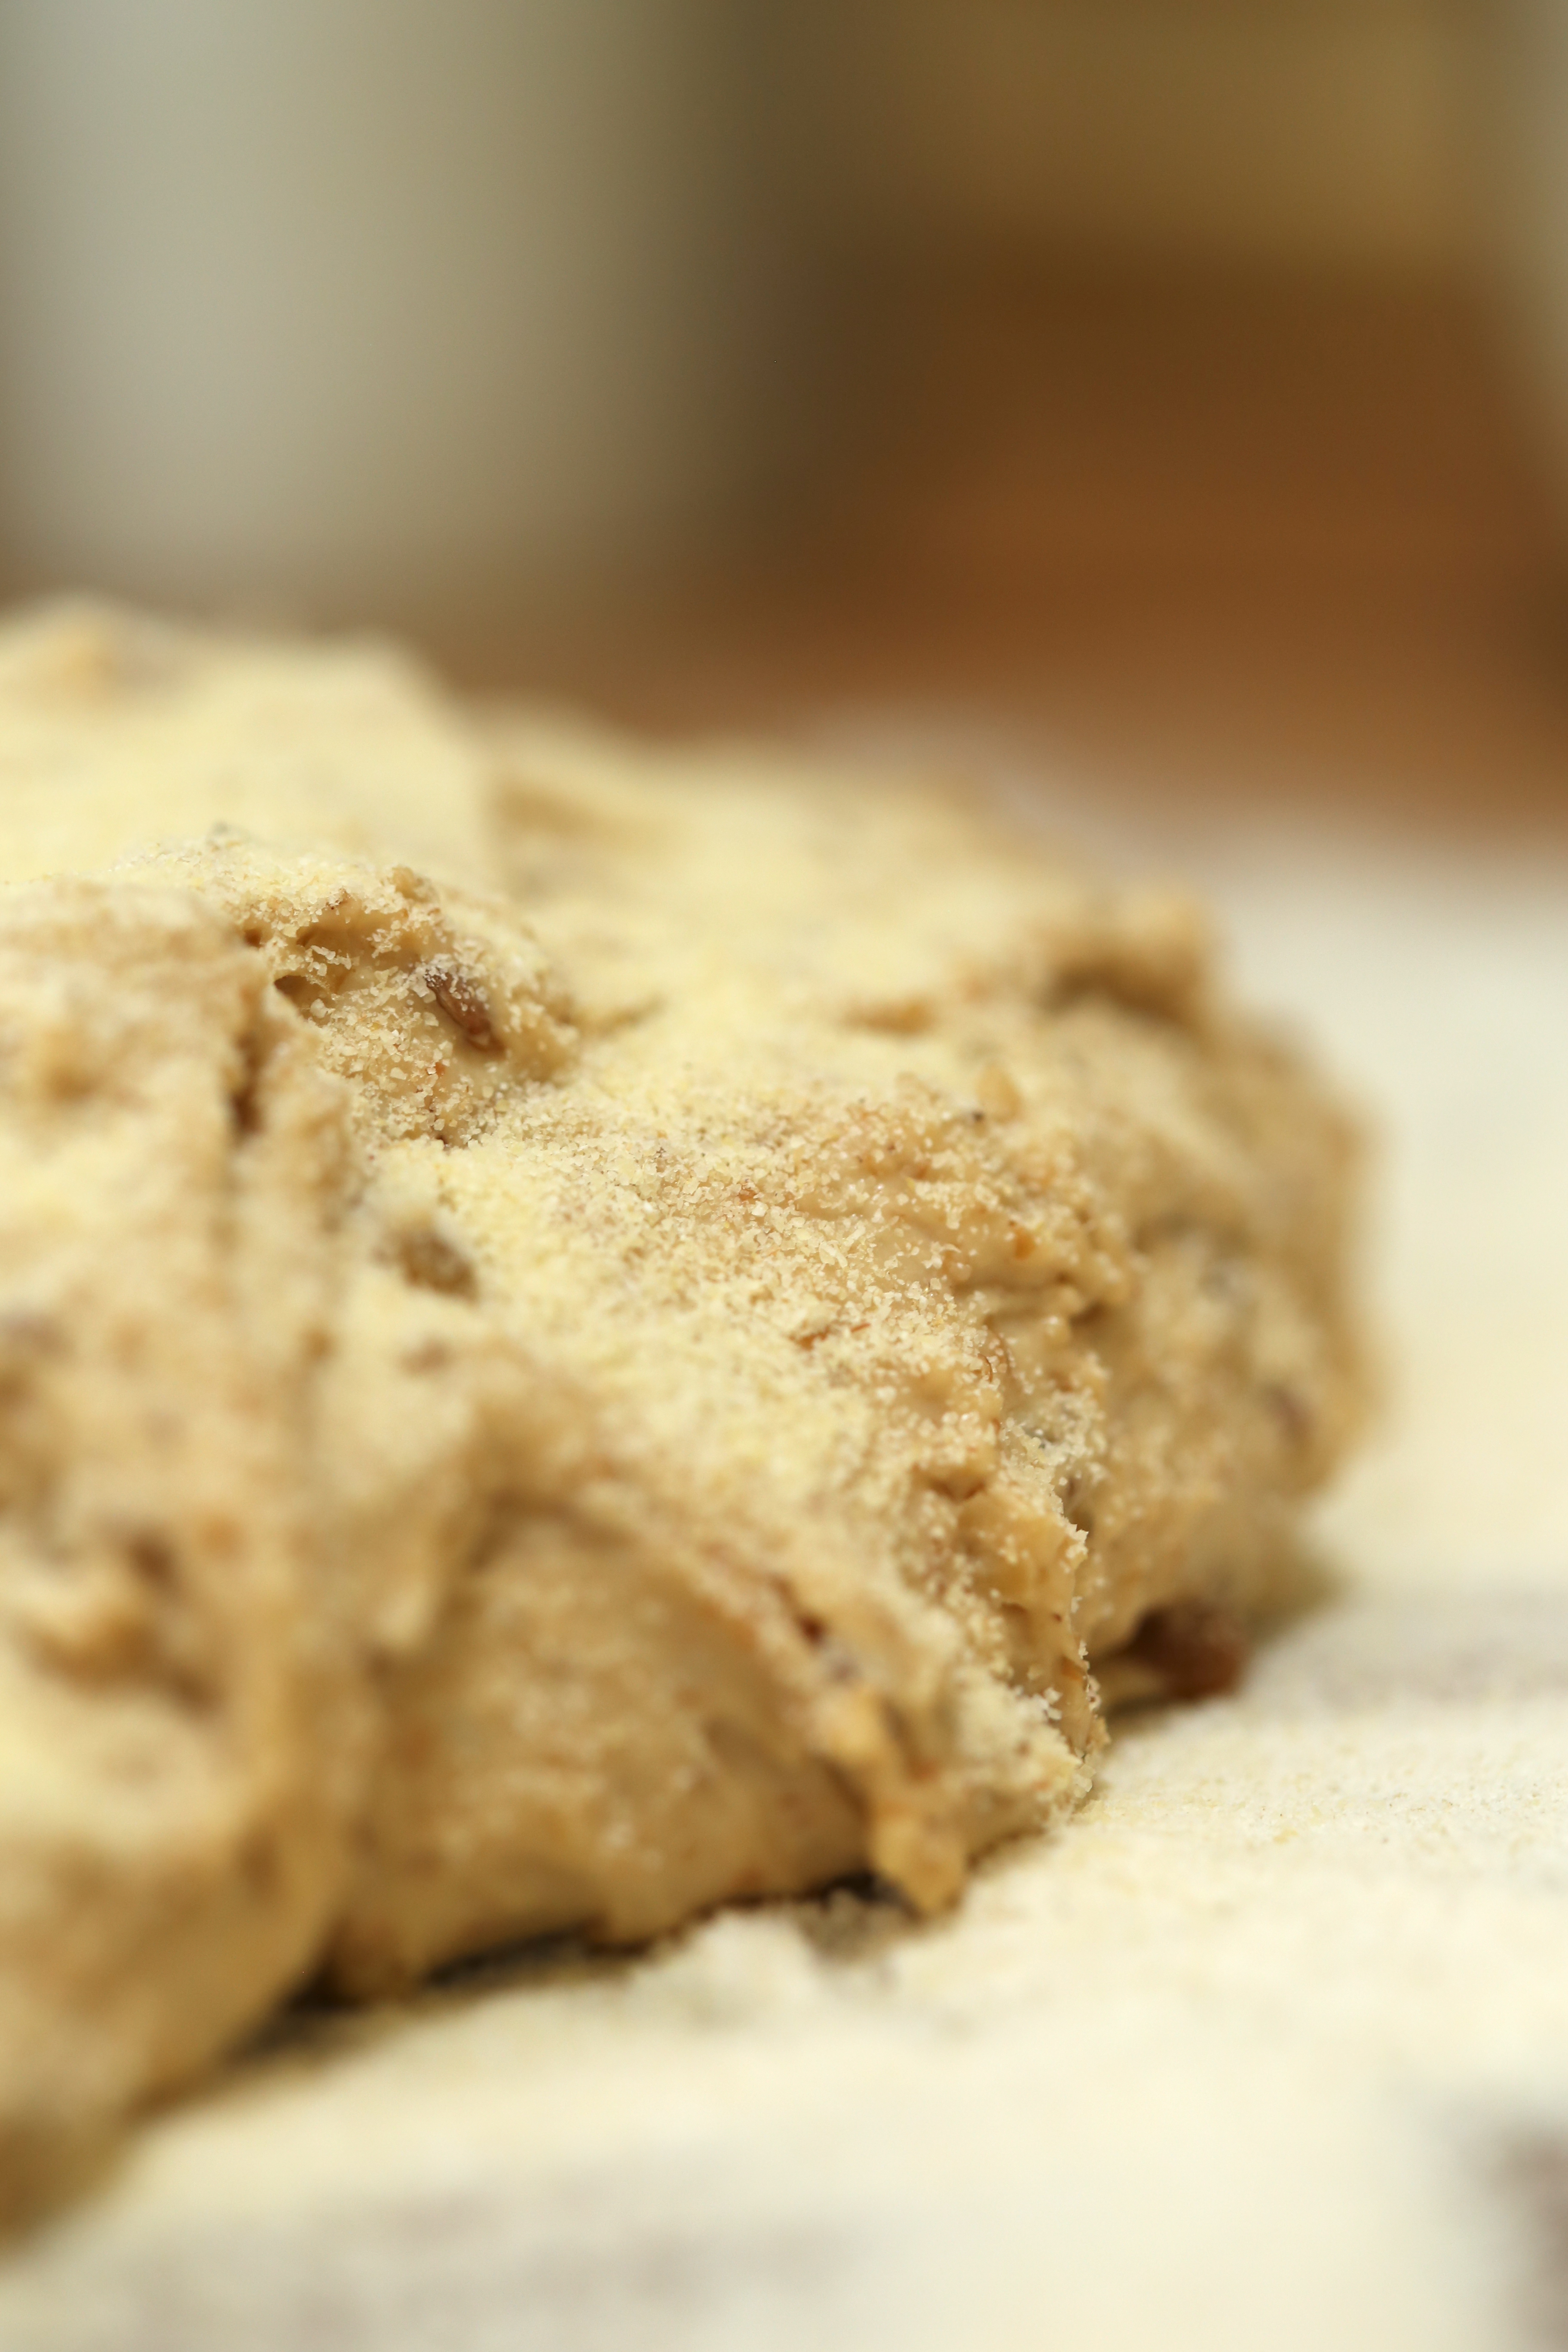
A quick glance at the ingredient list for this recipe might have you questioning the seemingly random numbers but to an experienced baker, it means that the amounts are exact and precise. The truth is the art of baking is steeped in math and science and serious bakers know that a scale is a necessity, not a luxury and when weighing in grams, there is little room for surprises.
The shape of the resulting loaf reminds me of Hokkaido Milk bread but that is where the similarity ends and it is actually produced in a manner more like a brioche dough. It yields a rich bread with a tight crumb, lightly scented with honey and perfectly suited for any number of uses. Toasted with marmalade or drenched with custard for French toast, this bread is a wonderful addition to your baking arsenal.
For those of you that do not have access to a scale that weighs in grams, here are a few conversions for you. The 278 grams of milk is slightly less than 1 1/4 cup while the rye flour and the toasted wheat germ are 3 tablespoons each. The 420 grams of bread flour translates to nearly 3 cups but do yourself a favor and hold back 1/4 cup, you may not need it, I didn’t. Keep an eye on the oven, I dropped the temperature to 375 and the loaf baked in 40-45 minutes but I had to use a foil tent after 20 minutes.

My results with the recipe were a little mixed and I actually prepared the bread twice. Does this mean the recipe is not good? Absolutely NOT; my second batch of bread was spot on and quickly devoured by my coworkers. There are so many things that can cause different results that I would say this recipe is worth preparing and to get the proper results, follow these two suggestions; hold back some of the flour and lower the oven temperature. Flour is one of those ingredients that can vary from region to region and I don’t mean just by the growing region, the area you bought it in can matter too. Here in the south, we tend to use softer wheats while up north, hard wheats are more common so knowing what your favorite brand is milled from helps. And as always, oven temperatures can vary greatly because of calibration or due to elevation and just because my oven set to 350 works for me does not mean yours will work for you. My suggestion to home bakers is to always use an oven thermometer and a timer and if you live in a higher elevation, knowing the needed adjustments is crucial for success.
 As I mentioned, I have entered contests on the site. A couple of my recipes have reached the finalist stage:
Masala Spiced Pear Pie, Best Thanksgiving Pie
Blackberry Cornbread Buckle, Best Buckle, Slump, Grunt, Crumble, Cobbler, Crisp, Sonker, Pandowdy, and/or Betty
Some of my recipes have also been chosen as Community Picks and to see that list, here is a link. But the best news of all, I actually won the Best recipe with Beer contest, and of course, it was with a bundt cake recipe! Yes, you can have your beer and cake it too…
Gingerbread Beer Bundt Cake with Chocolate Glaze
Now for those of you who are wondering, no I did not get paid to write this post, I also did not receive a shipment of kitchen gadgets or ingredients for posting it. In the past, I have received some lovely gifts of Oxo kitchen gadgets for making it to the finalist stage. However, I am just grateful for the chance to belong to a “community” of food lovers who enjoy sharing recipes and information as well as a little friendly competition.


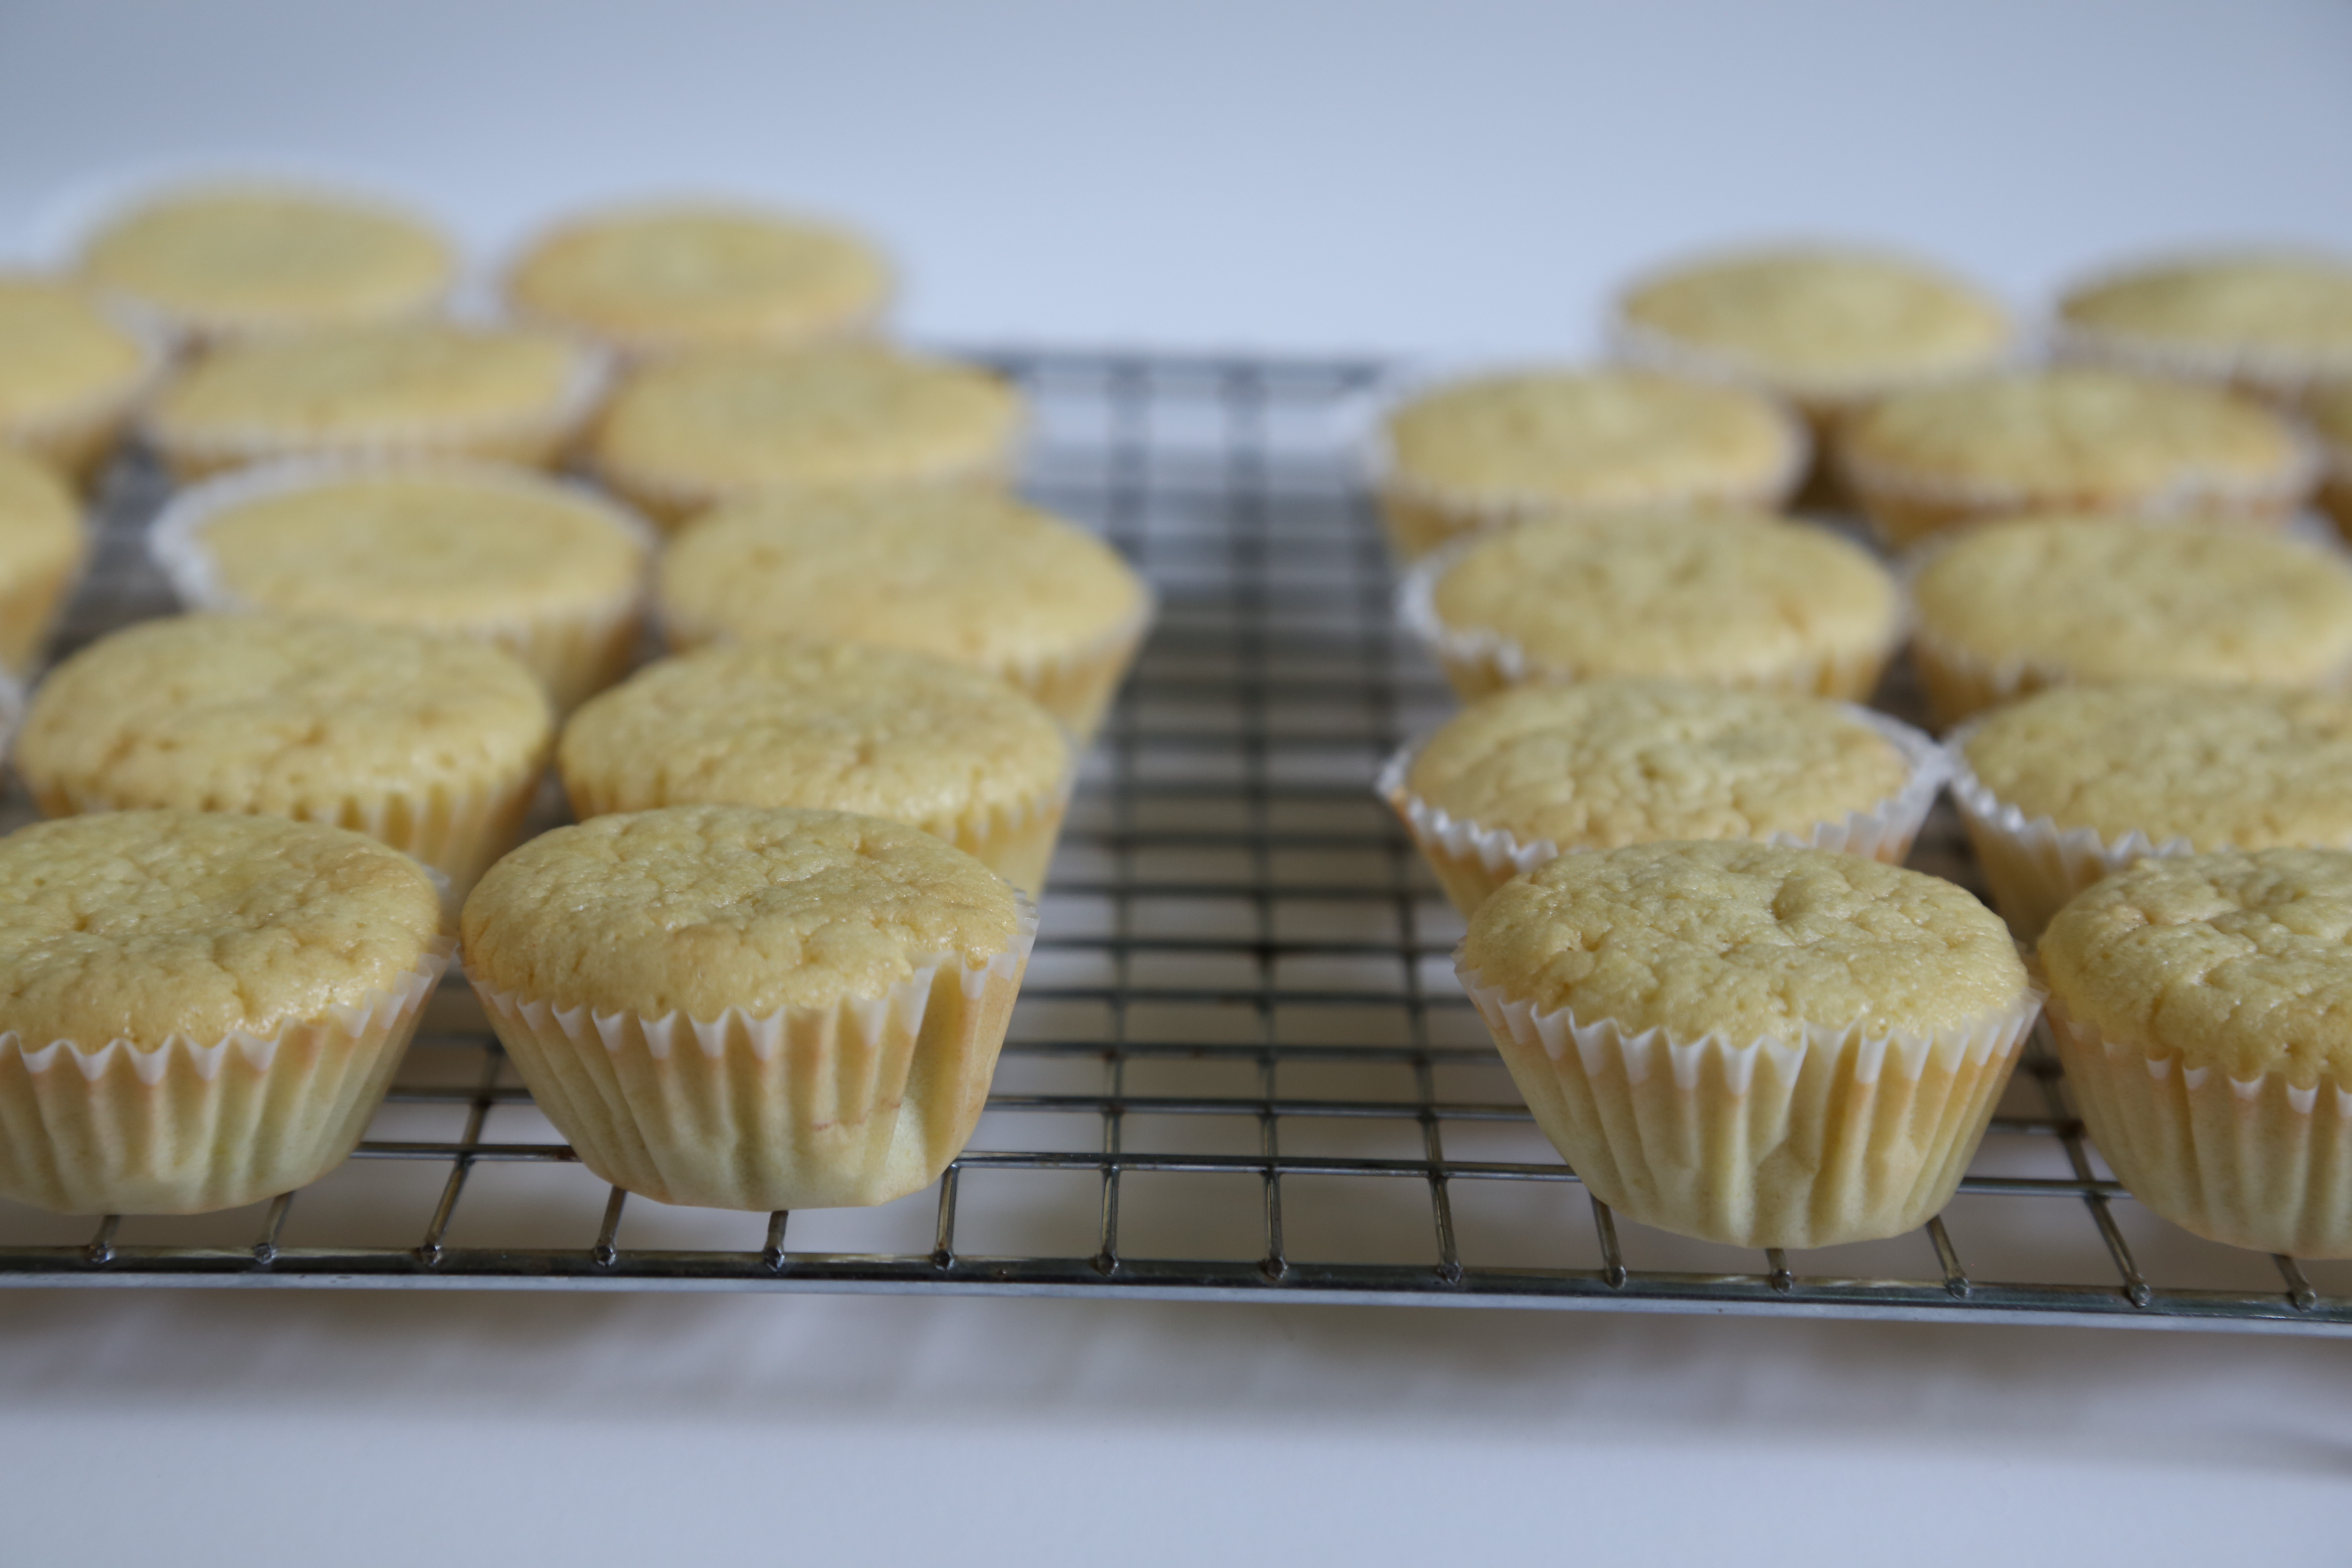
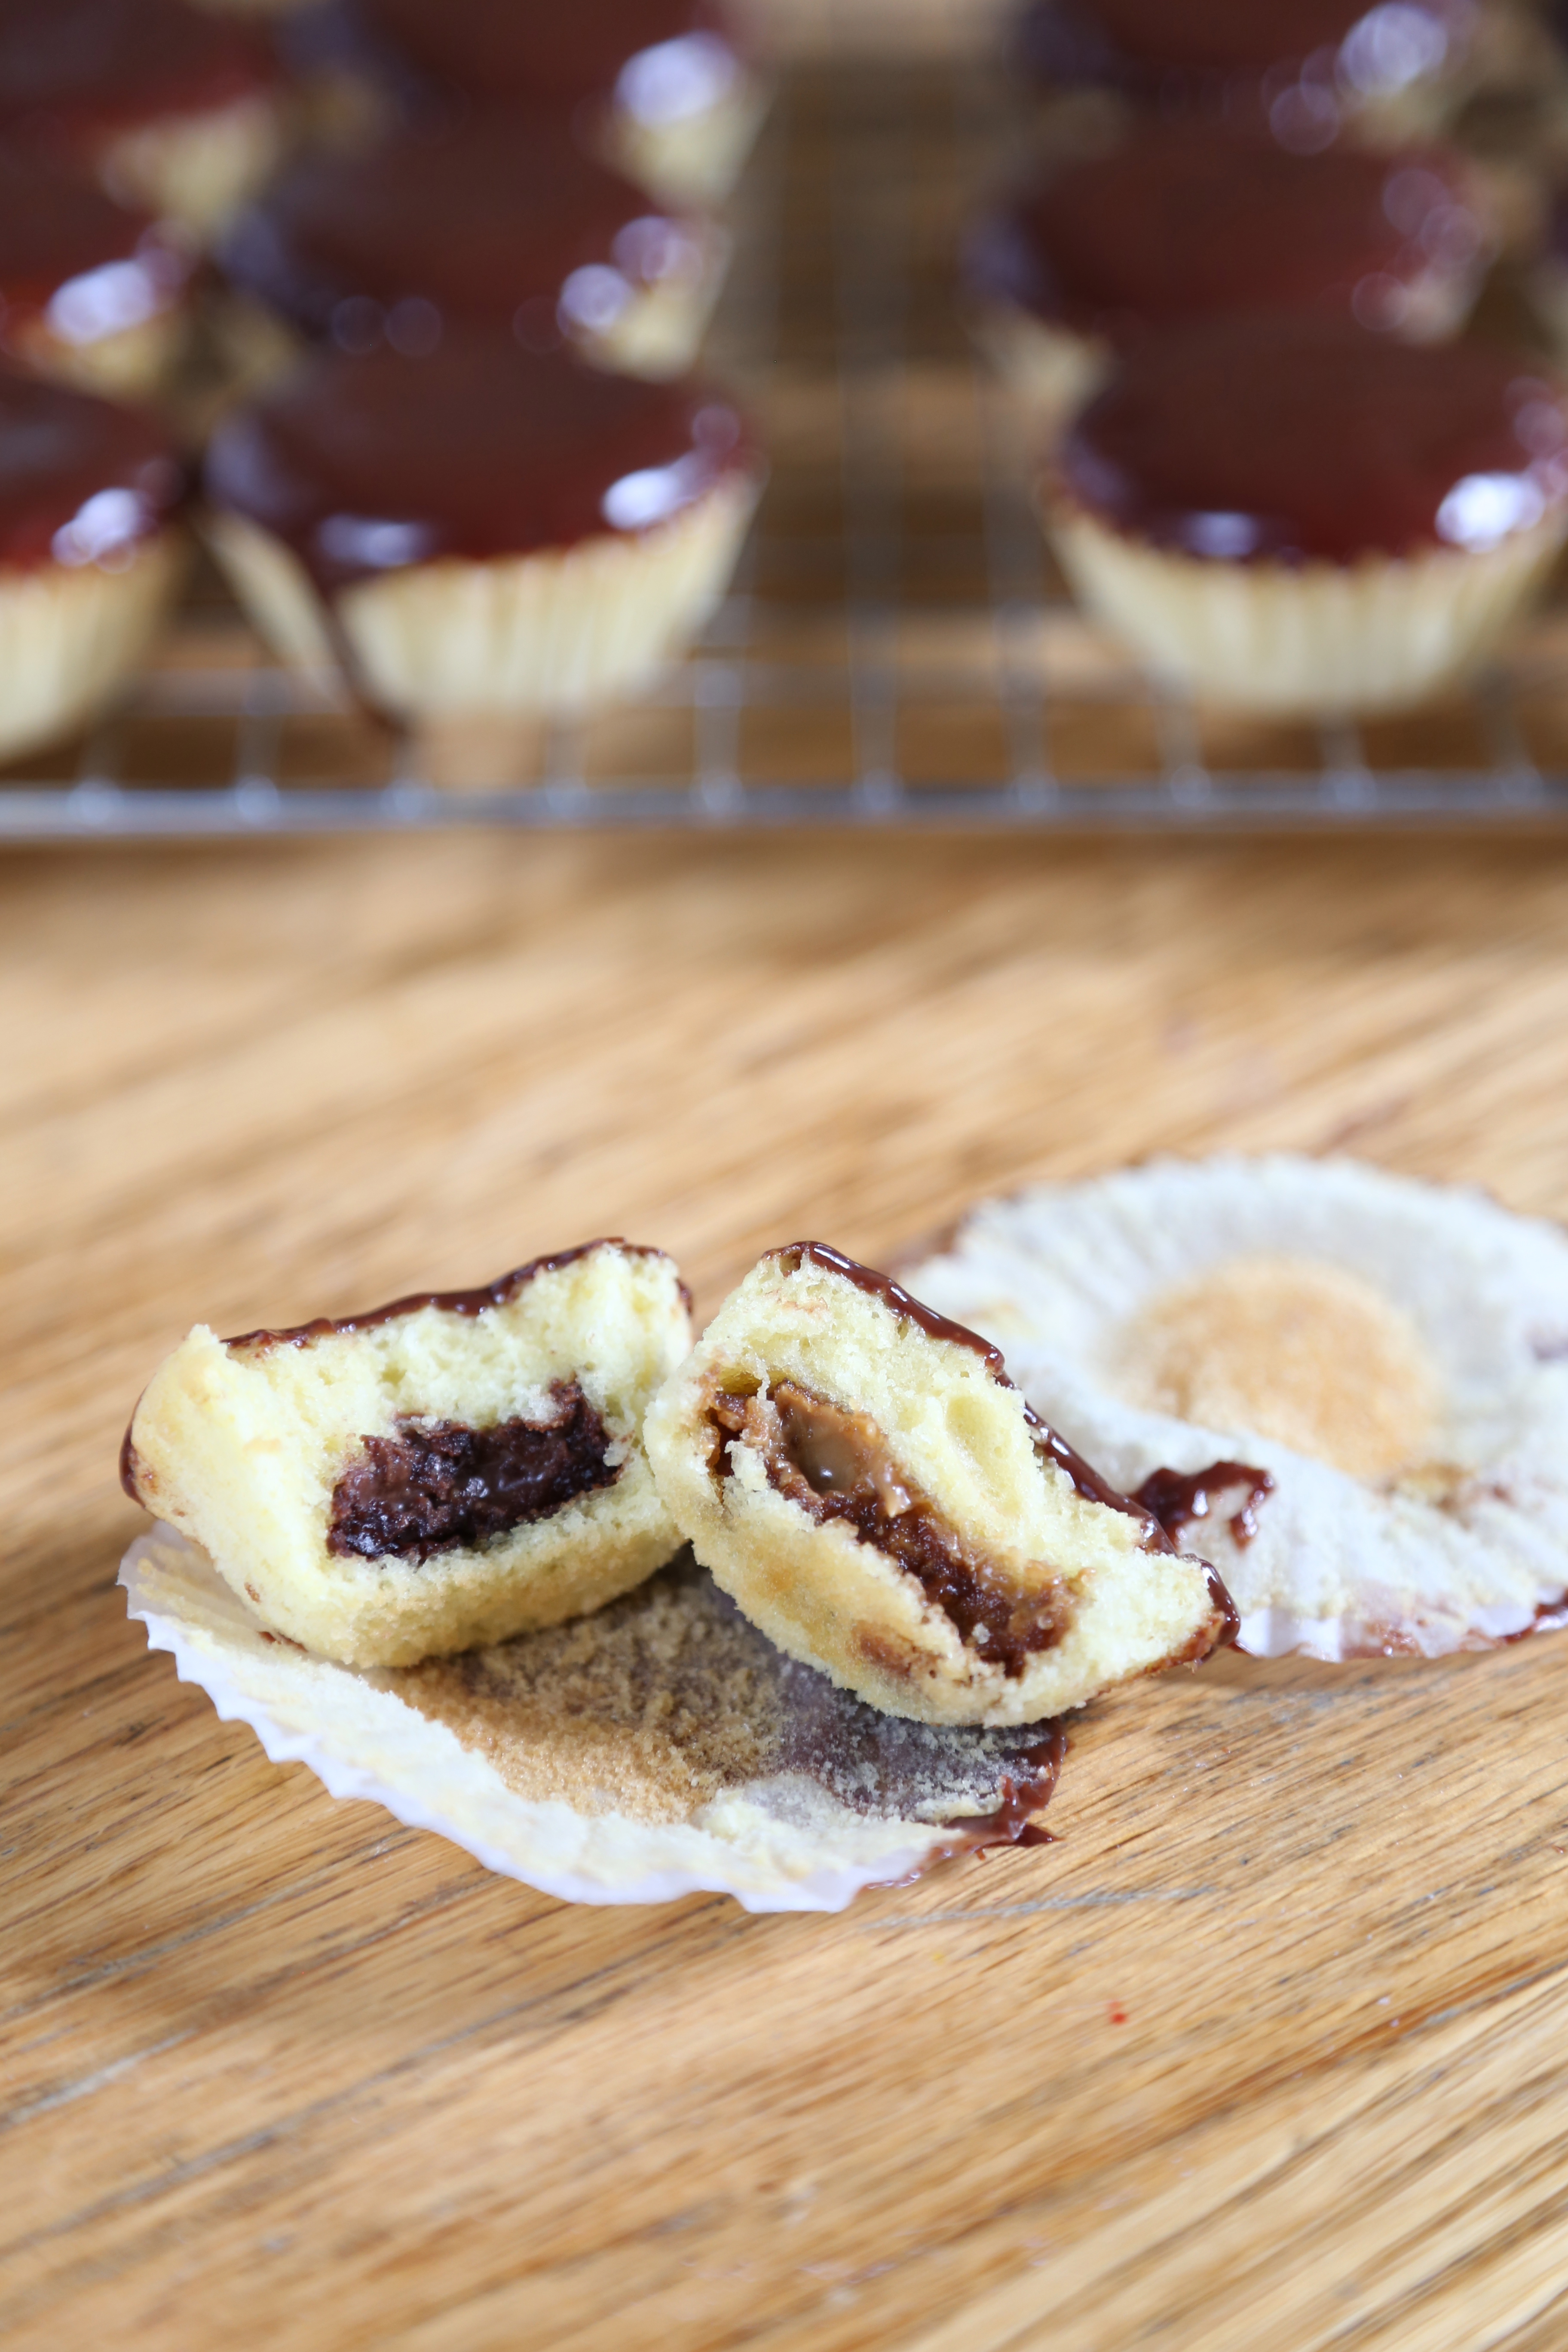
 Using a small portion scoop for the batter and spoons for the spreads, I had a full tray of little cakes ready to bake in just a few minutes.
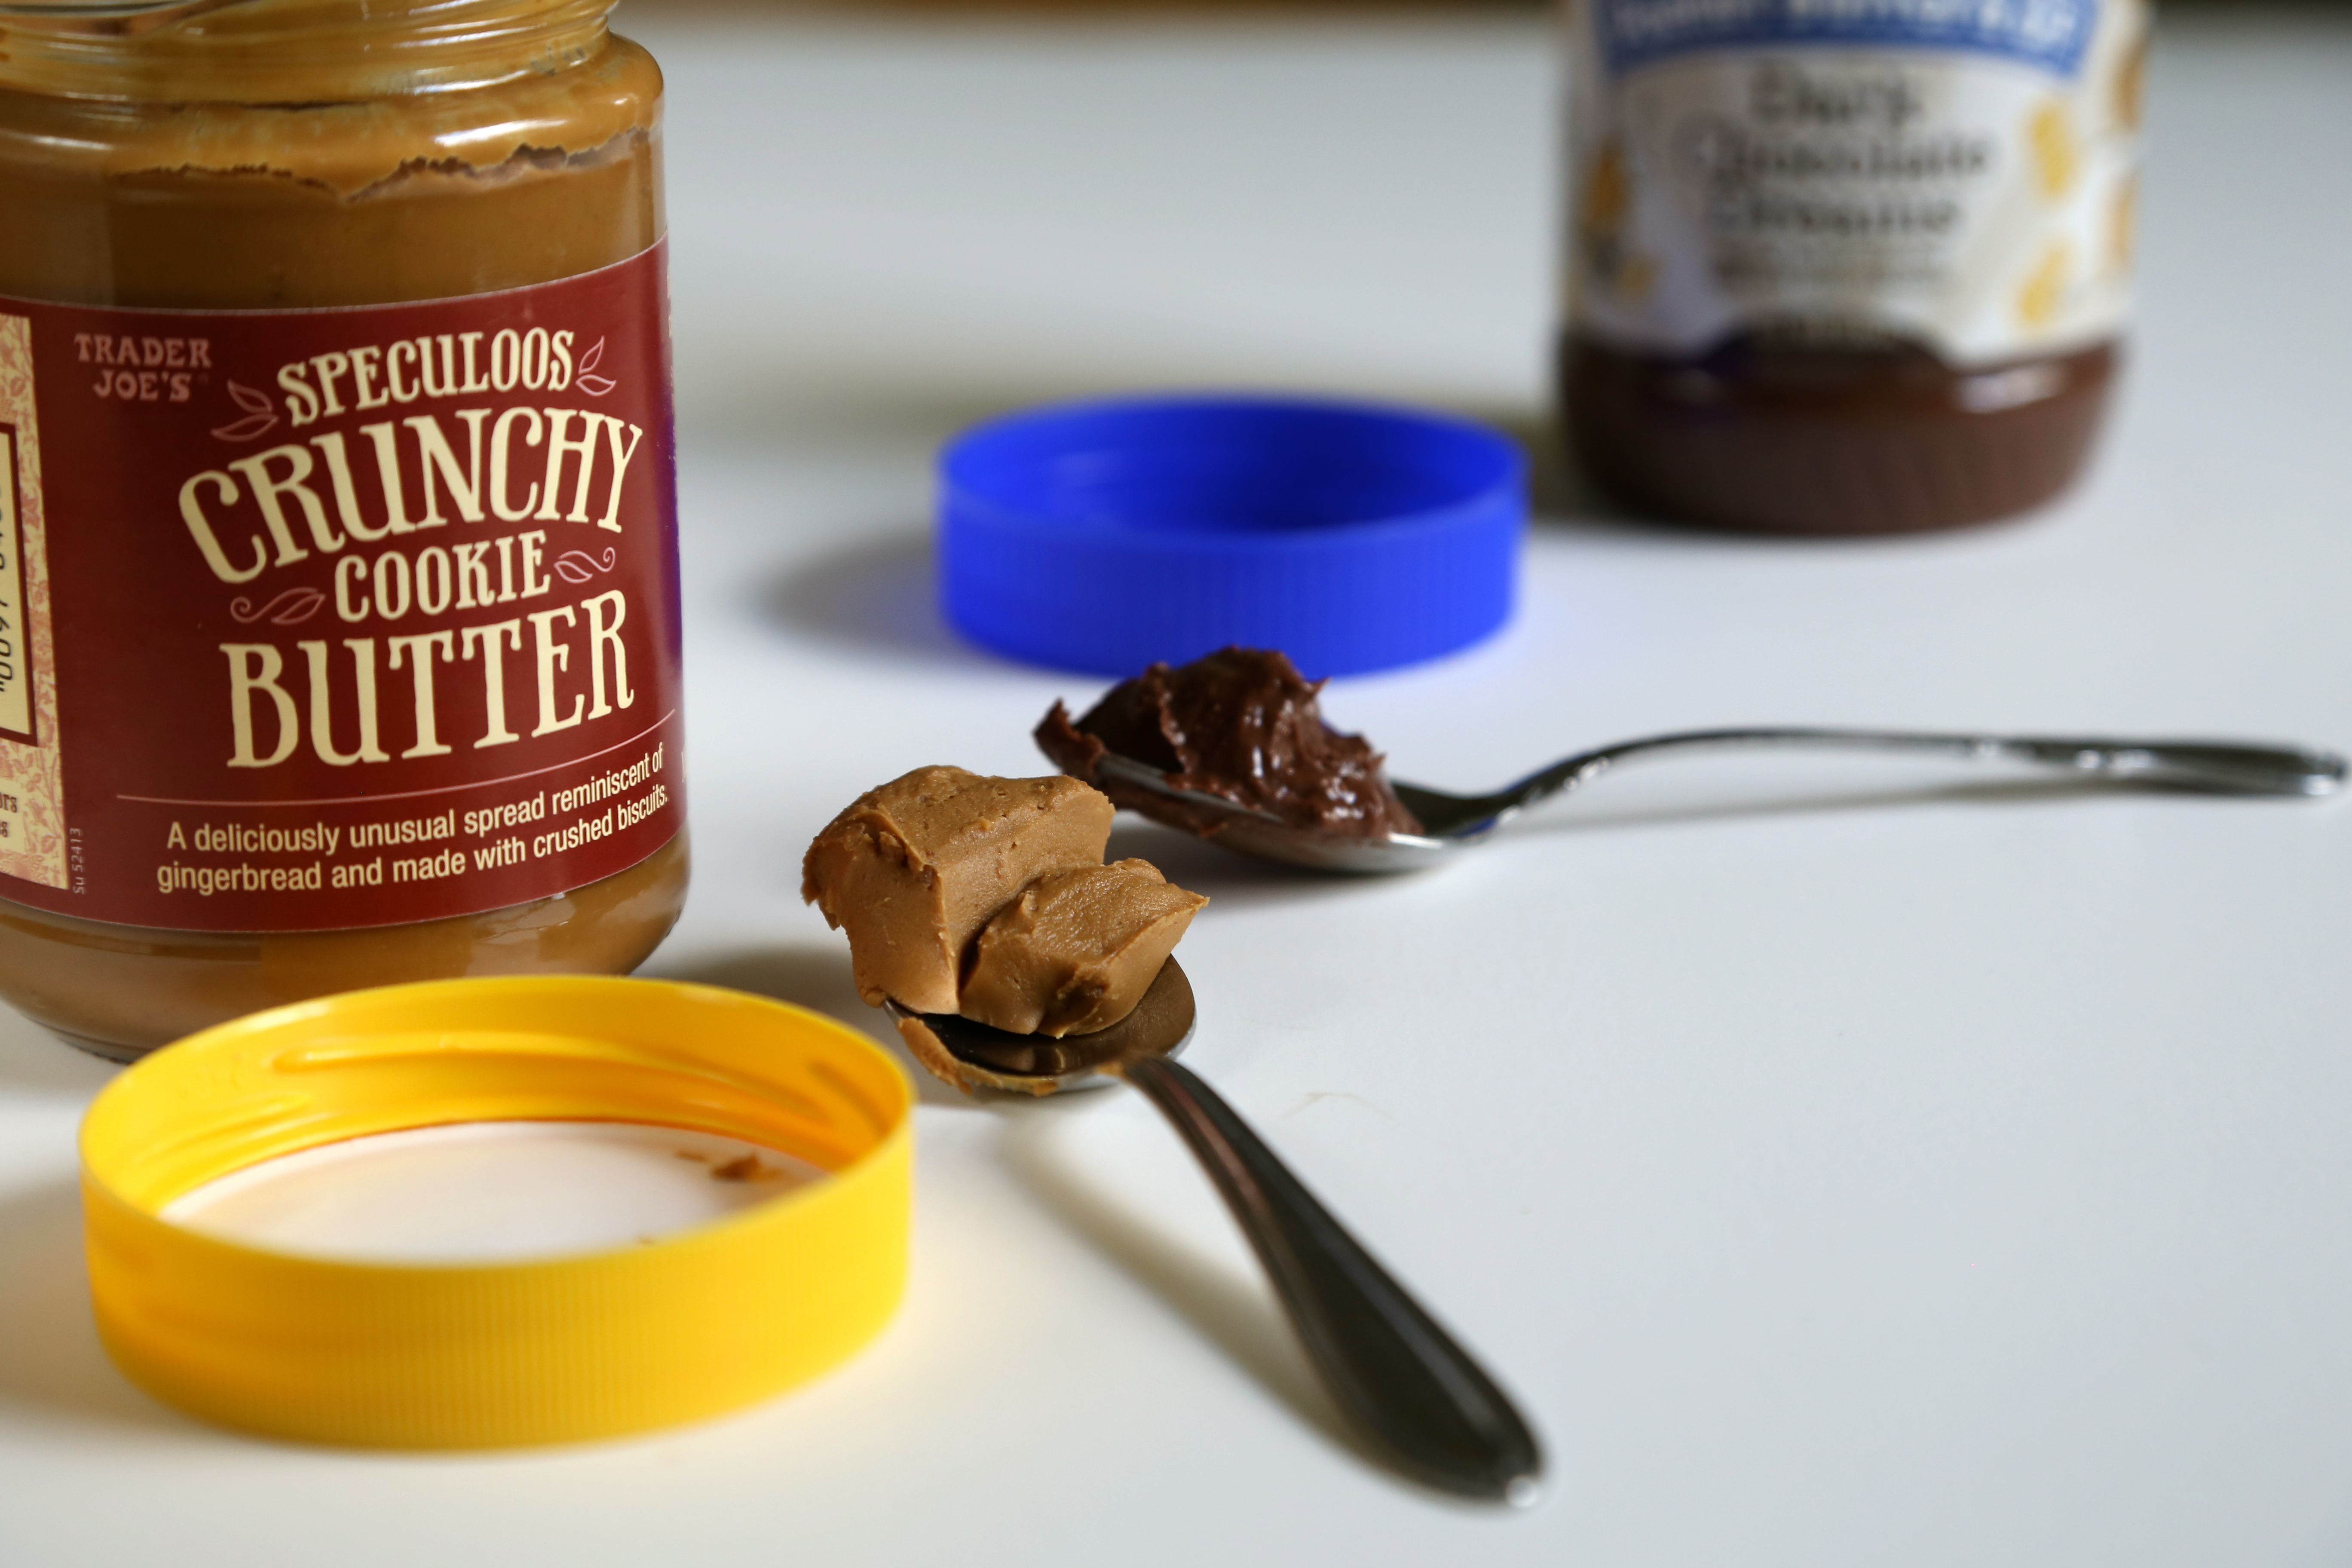
 Do yourself a favor, pick up a copy of the book and bake along with us, you will enjoy the adventure! To see the results, visit the website and look for the LYL page.


 This recipe is the second bread recipe I have tried from the book, the first being the Country White loaves from the chapter on growing a starter, and it was a true learning experience. As with many of the recipes I have glanced at so far in this book, there is an ingredient list that is longer than you would expect and an equipment list that calls for specialized baking tools. Anyone who has ever been to my home knows that I do not generally shy away from purchasing tools and equipment. On occasion, I will try to use something similar rather than adding to the clutter unless it is a bundt pan or a cookie cutter; a baker can never have too many shapes to choose from. However, a long list of tools and ingredients that I must shop in several stores to find is always a little off putting, even for a dedicated baker like myself.