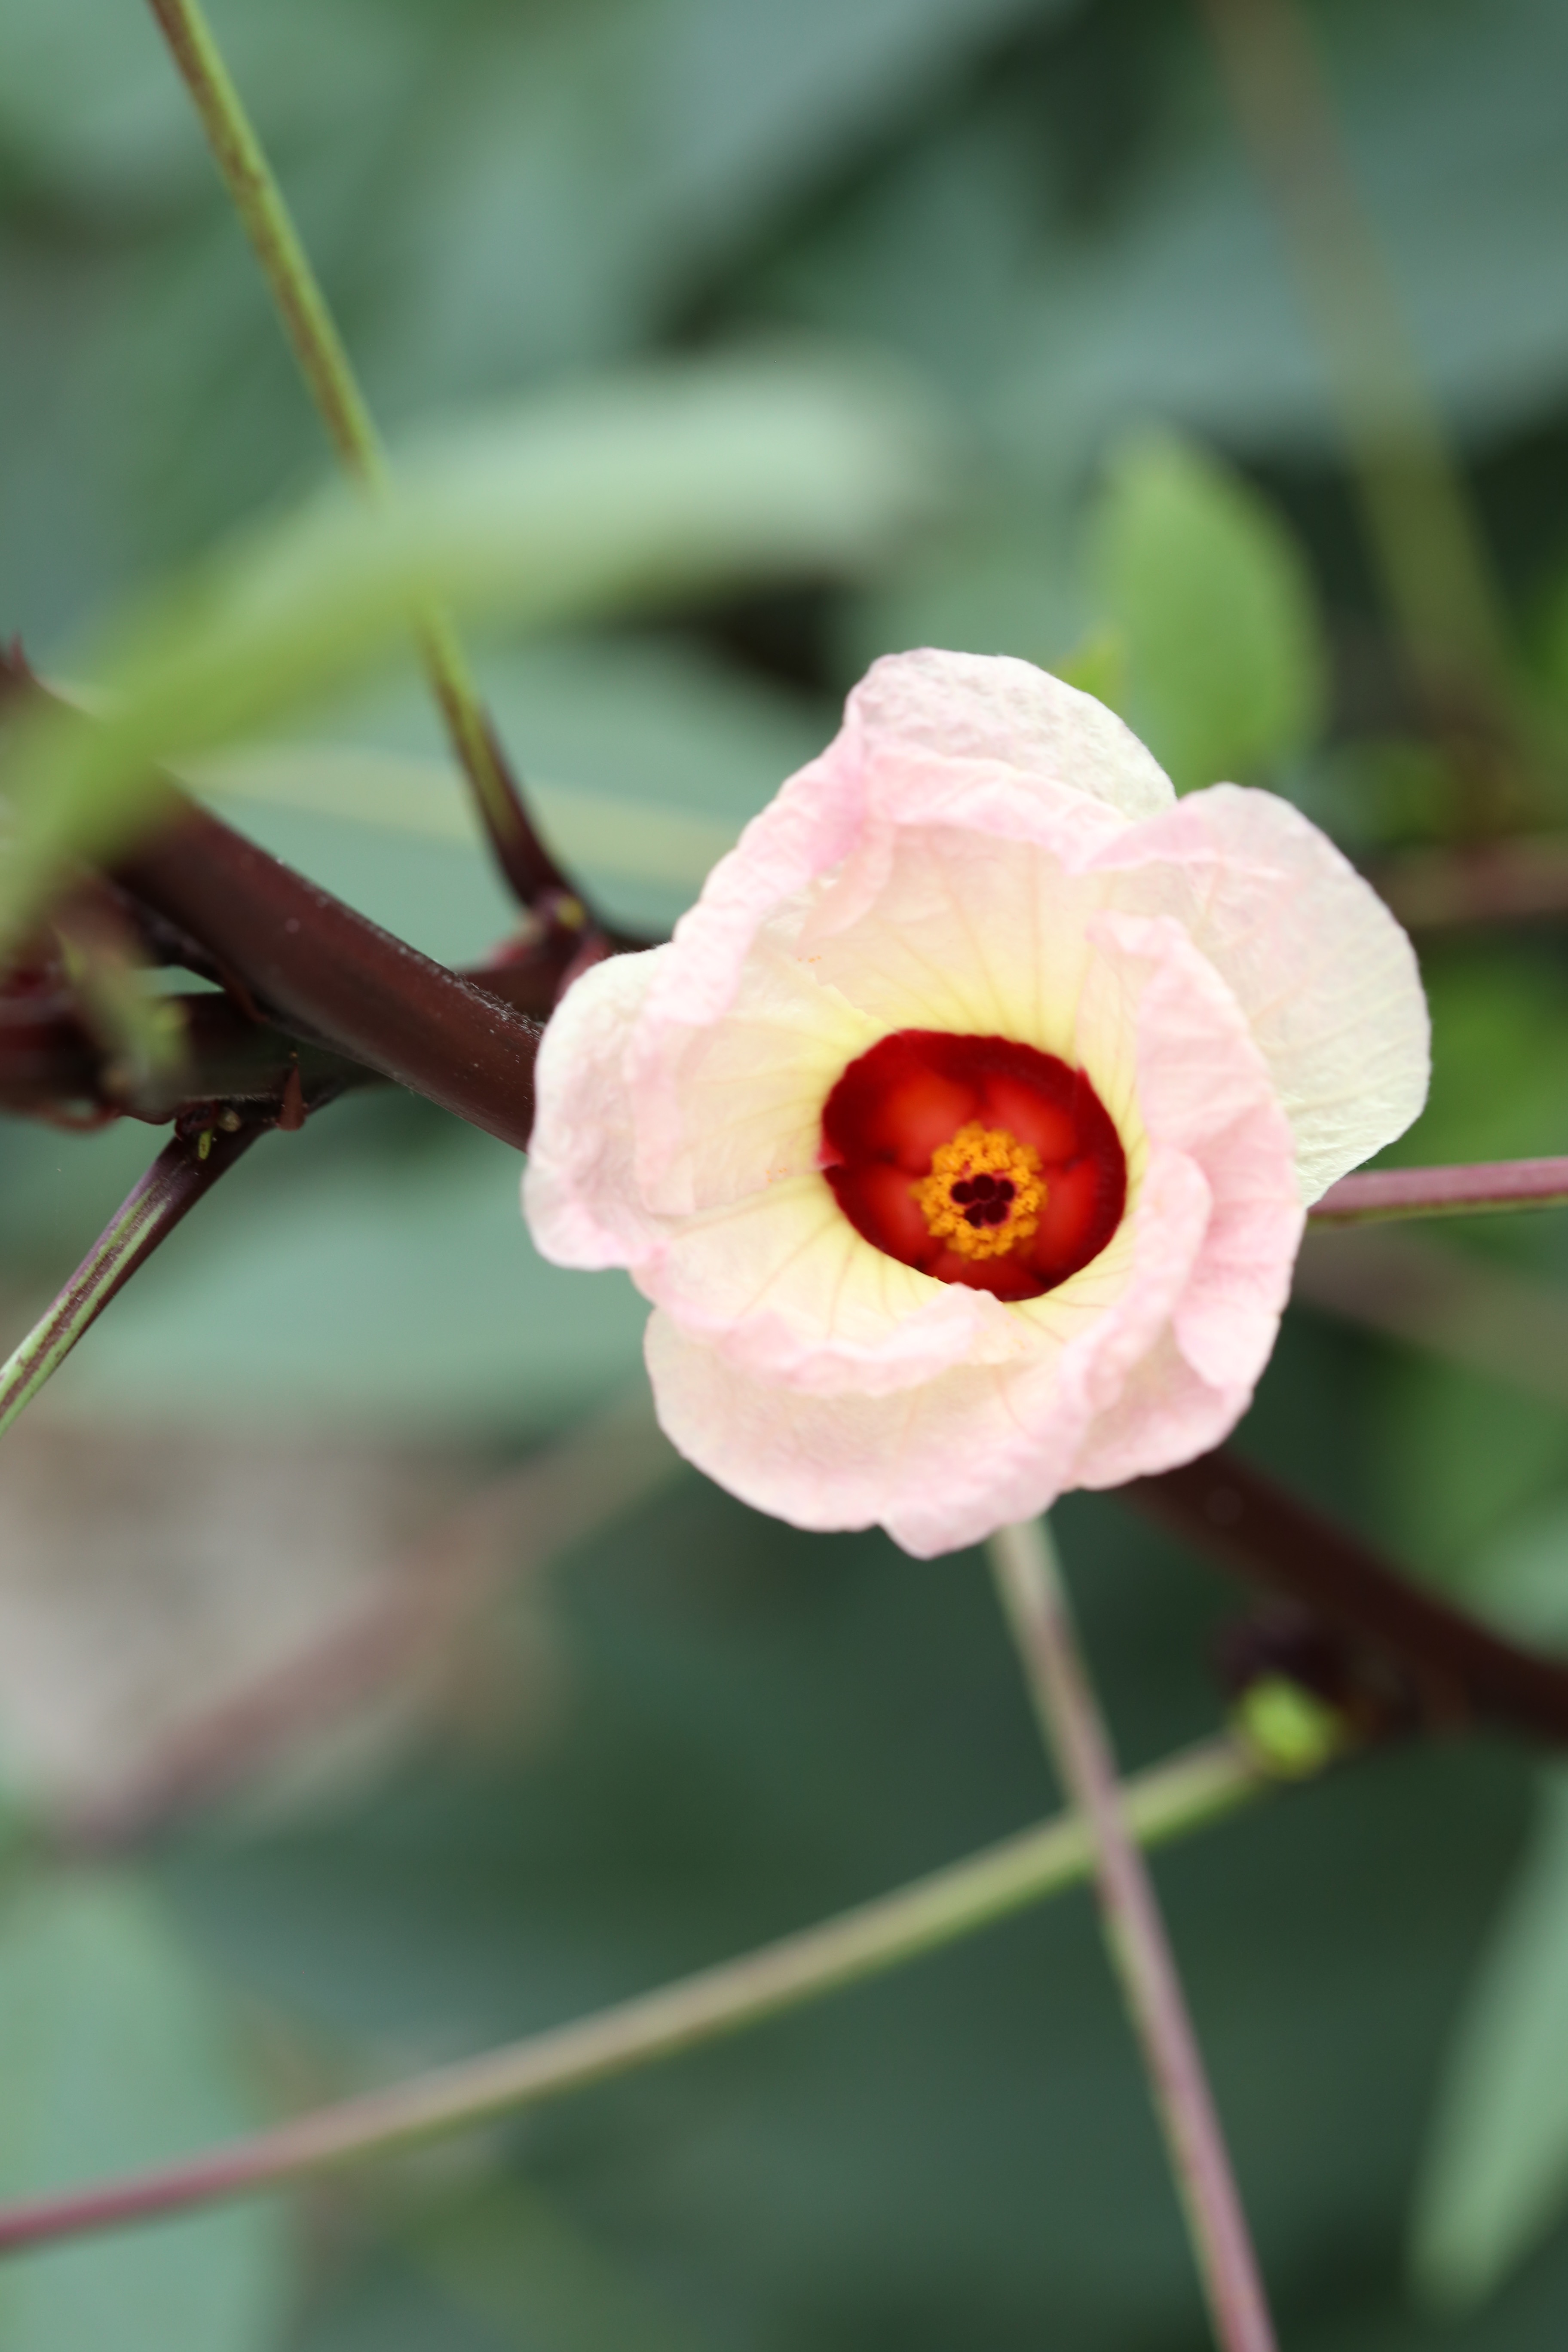
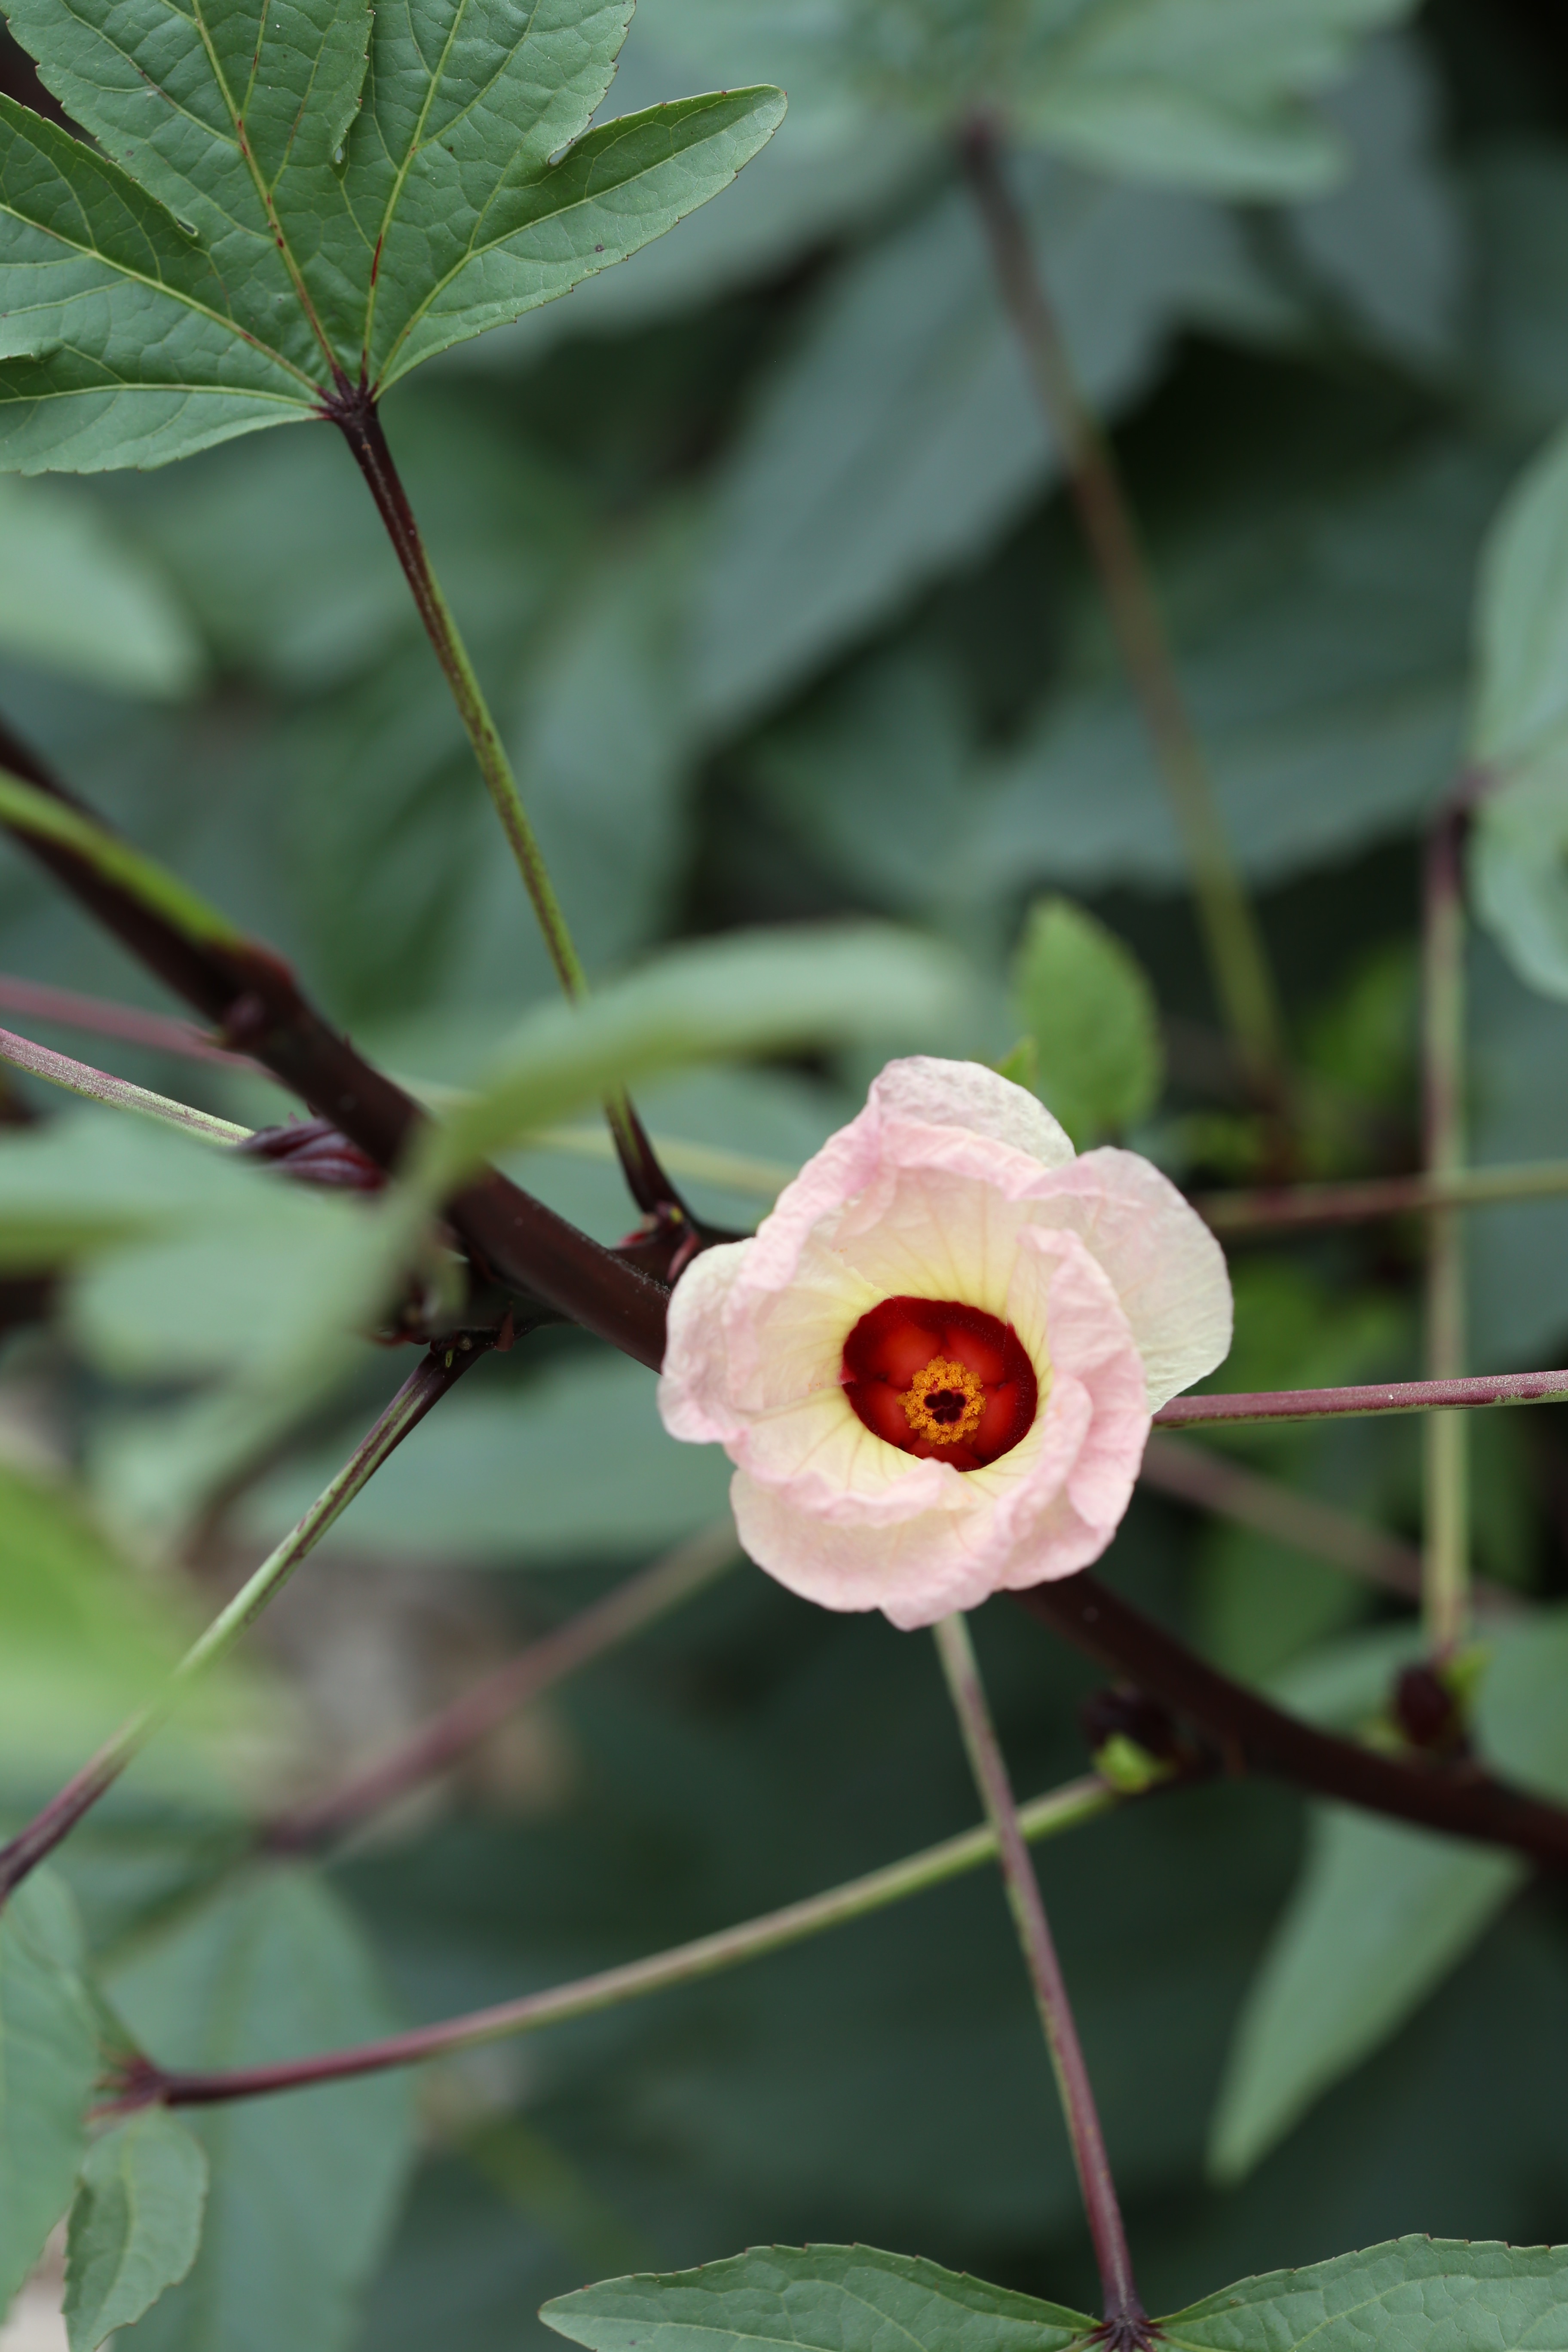
When I was plotting the garden earlier this year, I planned on using a large amount of space for cucumbers because I think nothing beats a freshly picked cucumber when making a salad. Whether it is a bowl of lettuce topped with tomatoes and cucumbers or a bowl of slices in a hot-sweet, vinegar marinade, cucumbers are one of my favorite guilt-free pleasures. This year, I made sure to plant plenty of them so that I could have them all summer long.
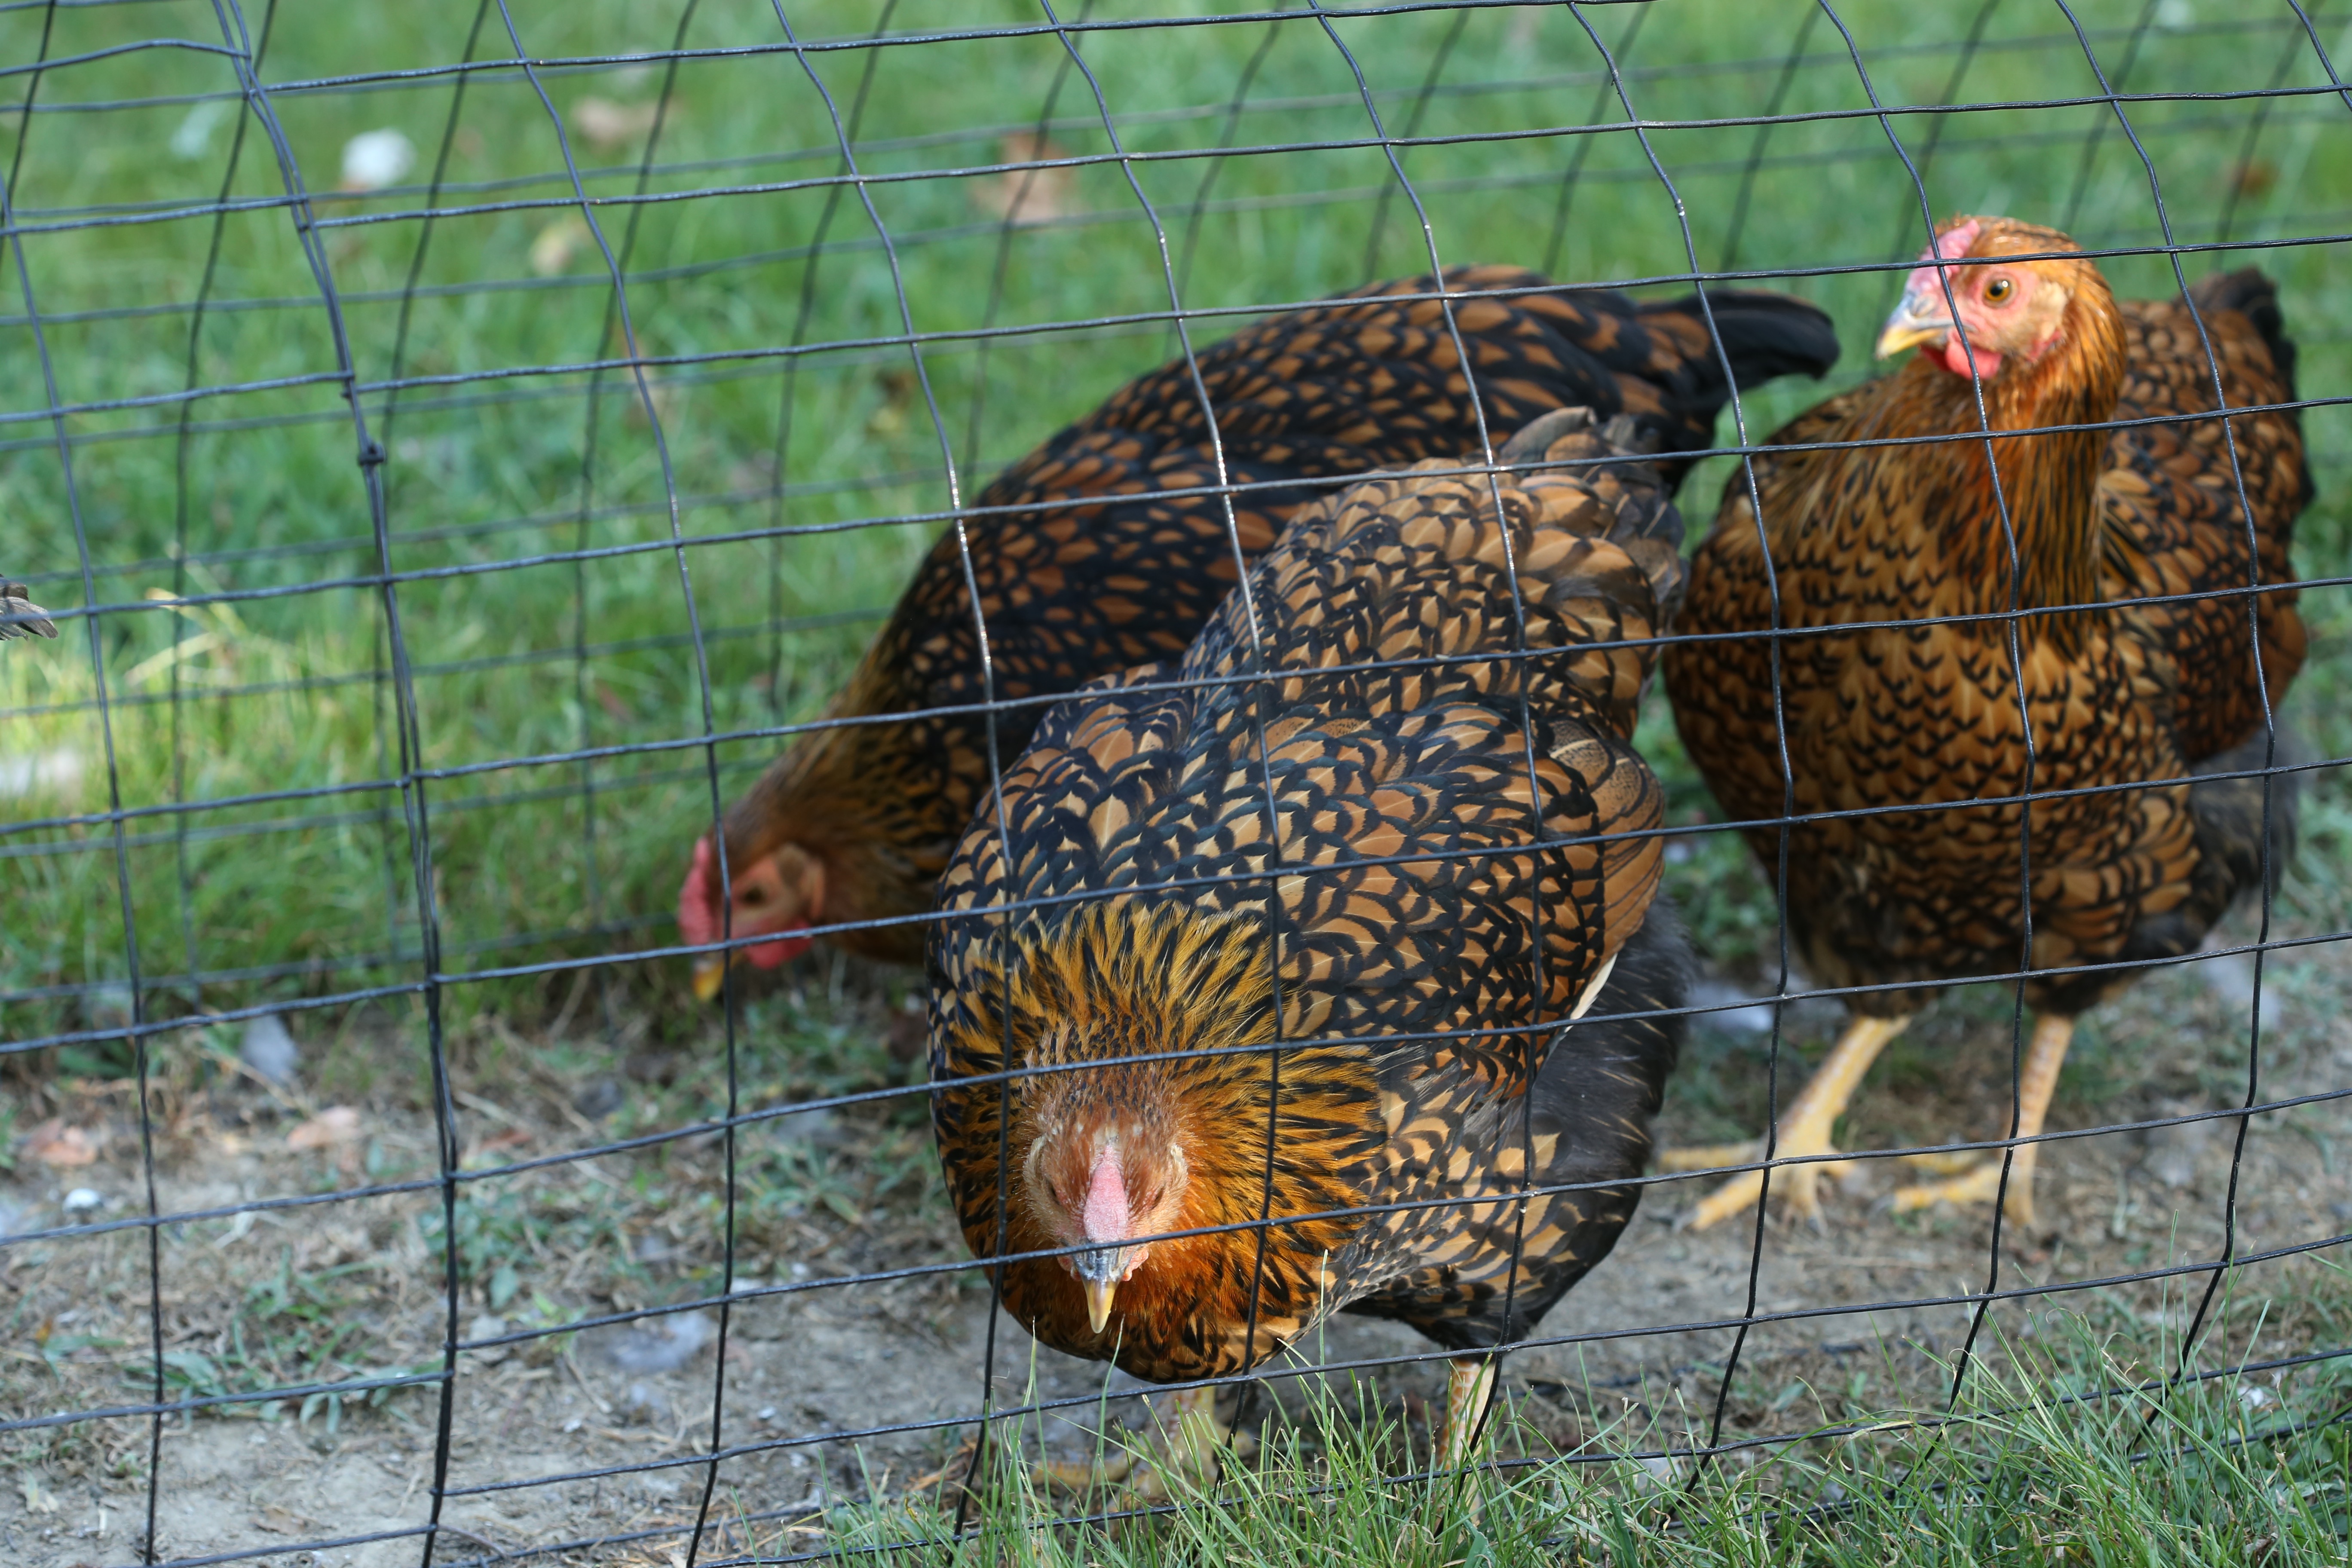
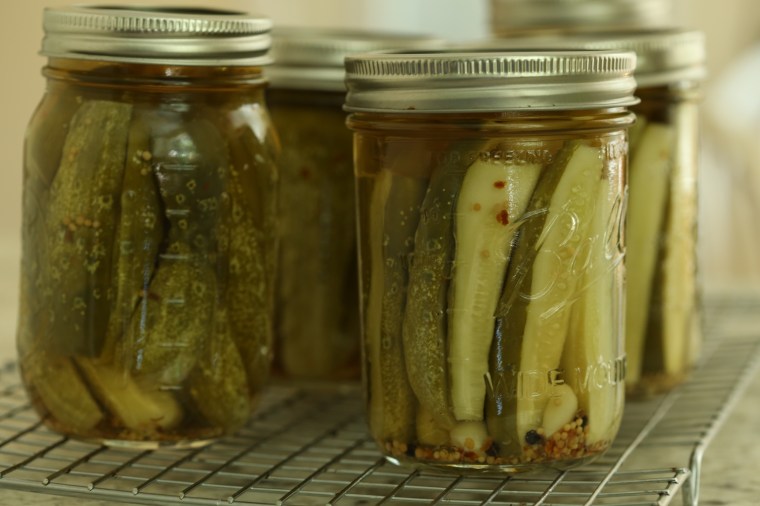
In the past, I have tried to grow pickling cukes too but haven’t had much luck with them. While at the feed store stocking up on chicken scratch, I came across a package of pickling cucumbers from Livingston Seeds and appropriately titled, Homemade Pickles. According to the website, the vines only grow 2-3/4 feet, mine grew vertically on a trellis and I can assure you, they went at least 6 feet a piece! Allow them plenty of space and if you go vertically, give them a sturdy structure with plenty of surface space to grab onto. Since I pick them regularly, almost daily, they have continued to produce a pretty good amount for over a month now and my pantry is beginning to look like a pickle shop!
When I am going to can pickles, I like to boil the jars and lids to sanitize them. My canning pot holds a lot of water and can seal about a dozen jars at once.
 The light in the kitchen is beautiful in the morning. It is one of the things I like most about our home. The windows allow a lot of light in and in the summer, we can go most of the day and into evening without turning on lights in the kitchen.
 These cucumbers have good flavor, soft skin and did not get bitter even when left on the vine too long-a few got missed in the leaves, swelled up and still did not turn bitter. These have been soaked overnight in a brine and are draining while the jars boil and the vinegar mixture is prepared.
 When I make dill pickles, I like to add a few mustard seeds and a pinch of dill seeds. Fresh garlic, crushed red pepper, black peppercorns, dill from the garden are added to a boiled mixture of cider vinegar , water and salt.
 If you like to can, I highly recommend picking up a pot that comes with a basket. It makes putting the jars into the pot and removing them so much easier and safer.
 The other tool I recommend, a pair of canning tongs, seriously, if you do not have them, buy them. Too many times I have tried to use regular kitchen tongs and have scalded my hands on more occasions than I can count!
 The pickles are packed into the jars with the spices and herbs and then the boiled vinegar mix is poured over them leaving about half an inch of space.
 When the tops are put on, be sure not to screw the bands too tightly. Nothing is worse than removing the jars from the water bath only to see that they have crimped and buckled because the bands were too tight! Load them into the basket and then lower it into the boiling water.
 After a boil of 10 minutes, raise the basket and remove the jars to a rack to cool. Listen for the lids to pop as they cool. If you find that some haven’t popped and appear sunken in the middle, put those in the fridge and use them first.
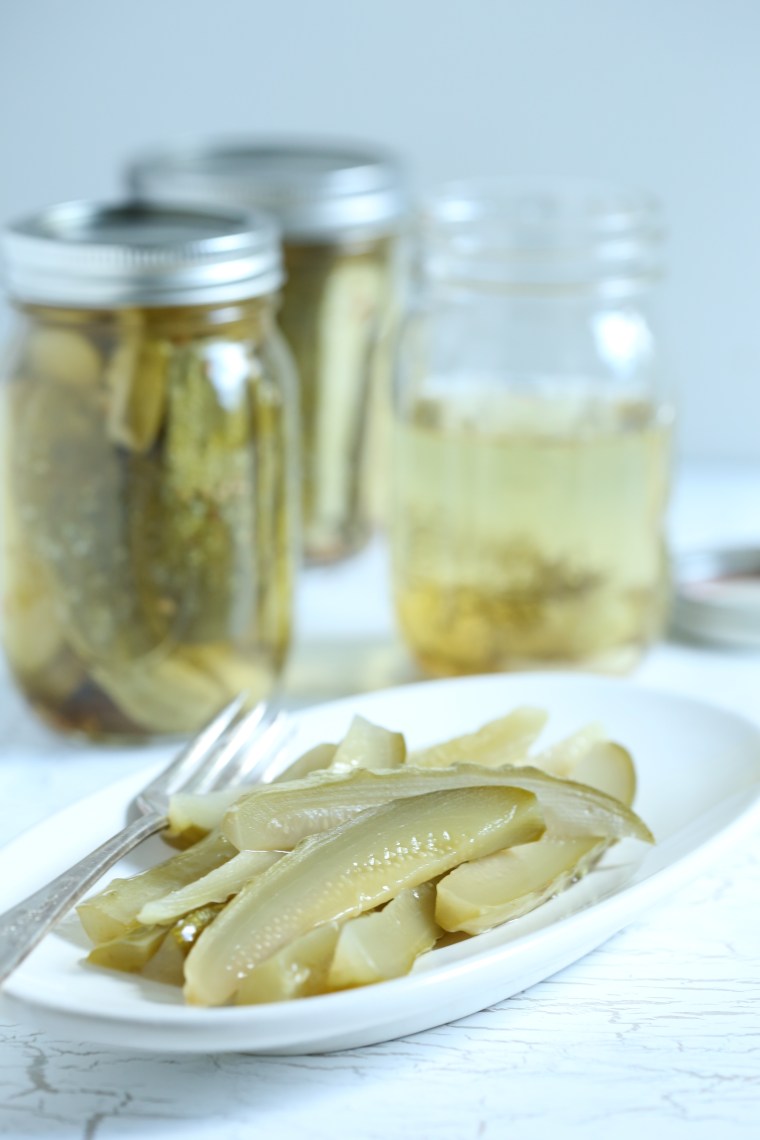 The recipe I used recommended allowing the jars to sit for 3 weeks to age and allow the flavors to develop. Since I have been making these pickles a few jars at a time, I decided to open one today and taste them. They did not disappoint! One thing about this recipe, no alum was used and despite that, they were pretty crispy, for a pickle anyway.
 The color has changed dramatically over the weeks. These will be enjoyed with many sandwiches…
 Sandwich-Sliced Dill Pickles
(not sliced, speared)
adapted from The Joy of Pickling by Linda Ziedrich
makes 6 -8 pints
5 pounds pickles with blossom ends removed-I only had 3.5 pounds but used the full recipe and yielded 5 pints plus one half pint
6 tablespoons sea salt, divided
2 quarts plus 3 cups cold water
2 cloves garlic jar each jar
1/4 teaspoon red pepper flakes per jar
4-8 peppercorns per jar
1/4 teaspoon mustard seeds per jar
pinch of dill seed per jar
1-2 sprigs fresh dill per jar
2 3/4 cups cider vinegar
Quarter the pickles into spears or cut into 3/16 inch slices, make sure to cut the blossom ends off and remove the stem end as well. Place into a large non-reactive bowl. Dissolve 3 tablespoons of the salt in 2 quarts of cold water. Pour over the cut pickles, cover loosely with plastic and place a plate on top to weight them down. Allow them to sit at room temperature for 12 hours. When ready to can, dump the pickles into a colander in the sink and allow them to drain completely.
Place the canning jars and lids into the basket and lower it into the canning pot. Fill the jars with water and then fill the entire pot so that the jars are covered by 2-3 inches of water. Over high heat, bring the water to a boil and allow the jars and lids to boil for a few minutes. Raise the basket and using canning tongs, carefully lift and drain the jars one at a time. Place them upside down on a rack to drain and dry. Do this for the lids as well. Keep the water at the boil, adding hot water if much has evaporated.
In another smaller, nonreactive pot, bring the vinegar to a boil with the remaining 3 cups of water and 3 tablespoons of salt. Stir to dissolve the salt and then turn off the heat and keep it on the stove while you pack the jars.
Place the spices and herbs into each jar. Fill the jars so that the spears are snug but not so tight that they are crushed against each other. Pour the hot vinegar mix over the pickles, leaving about a half inch of space. Wipe the rims, place the lids on and screw the bands so that they are secure but not tight. Make sure the water in the pot is at the boil. Load the jars into the basket and carefully lower it into the pot. Boil for 10 minutes, raise the basket and remove the jars with the tongs. Place them on a rack and allow them to cool completely before storing in a dark, dry place. Check the lids, if any have not popped and inverted, place them in the fridge, allow them to age for a couple weeks and use them first. The remaining jars should be ready to use in three weeks.
 Apparently, I can Pinterest along with the best of them. Repurposing things has long been a hobby of mine but since Pinterest came along, there are so many people sharing ideas and photos that if you spend some time looking, you can quickly become overwhelmed with photos and tutorials. Unfortunately, for every great step-by- step tutorial, there is a vaguely written and generally poor one to counter it. Having seen so many for turning chandeliers into planters and outdoor lighting, I decided to give it a go when I found this fixture at my local Habitat for Humanity Restore. The painting on the metal made it look a little old and rustic which meant I wouldn’t have to try and paint it but even better was the $5 price tag.
 Knowing that I had to find three plates and cups, I searched in the housewares department and the gardening department. While I could not find plates at the HHRestore, I did find three terracotta pots that were already coated with a nice garden patina. A quick visit to my other favorite thrift store in town, the CHKD store, turned up these nice Pfaltzgraff saucers. At 78 cents a piece, how could I say no?
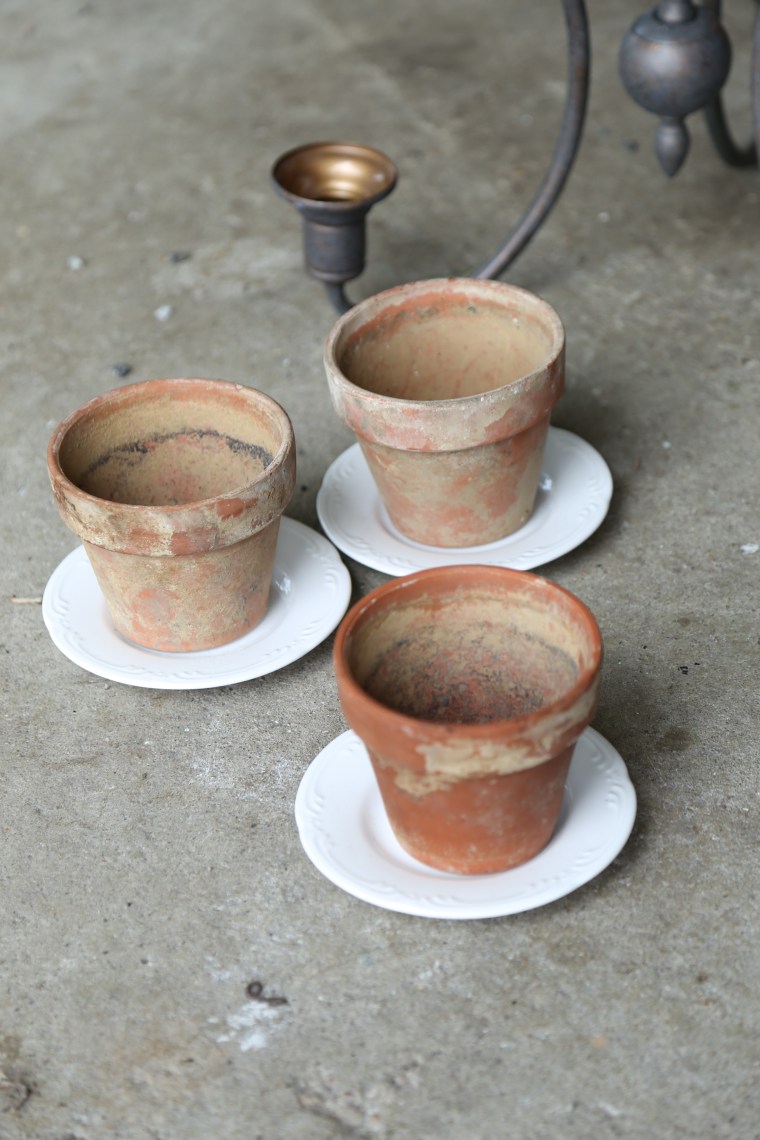 A quick preview of what is to come. If you can, take your fixture with you, it will give you the chance to view the pieces together and make sure they fit. Plates have a ring on the bottom that can make it awkward to assemble the pieces. My plates were not a perfect fit but came close enough that I was able to make them work together with the cups on the chandelier.
 After removing the electrical components and cutting the wires, I was left with the bolt at the bottom and a piece of threaded pipe. To attach the plate and pot, I needed a coupling nut to attach to the pipe that would also be used to secure the plate and pot with a bolt and washer. This is another reason that you need to take your fixture to the store with you; every single fixture has its own sized parts and while some are easy to find, others are proprietary or just not easy to locate.
 After considering that for about 12 seconds, I went off to my local ACE hardware store and told my sad tale to a wonderful salesman. He was intrigued him enough that he and I spent close to 20 minutes tracking down parts. When all was said and done, I placed a coupling nut (that still wasn’t cheap but at least it wasn’t as expensive as the others) in the cup and then I filled the area around it in the cup on the chandelier with quickcrete that we had at home. After letting it cure over night, I assembled the rest of the parts.
 The plates need to be drilled out and you will need to use a special drill bit, a glass and tile bit. Place a couple layers of masking tape over the area to keep the bit from slipping and carefully drill a hole slightly larger than your bolts. If you’re worried that bolting the plate and pot together will cause them to crack, place a rubber gasket or two in between the parts; I did use one but do not think it was necessary. Because I did not take measurements, my piece required a bunch of extra washers, I suggest you buy a couple packs of extra washers so that everything is snug.
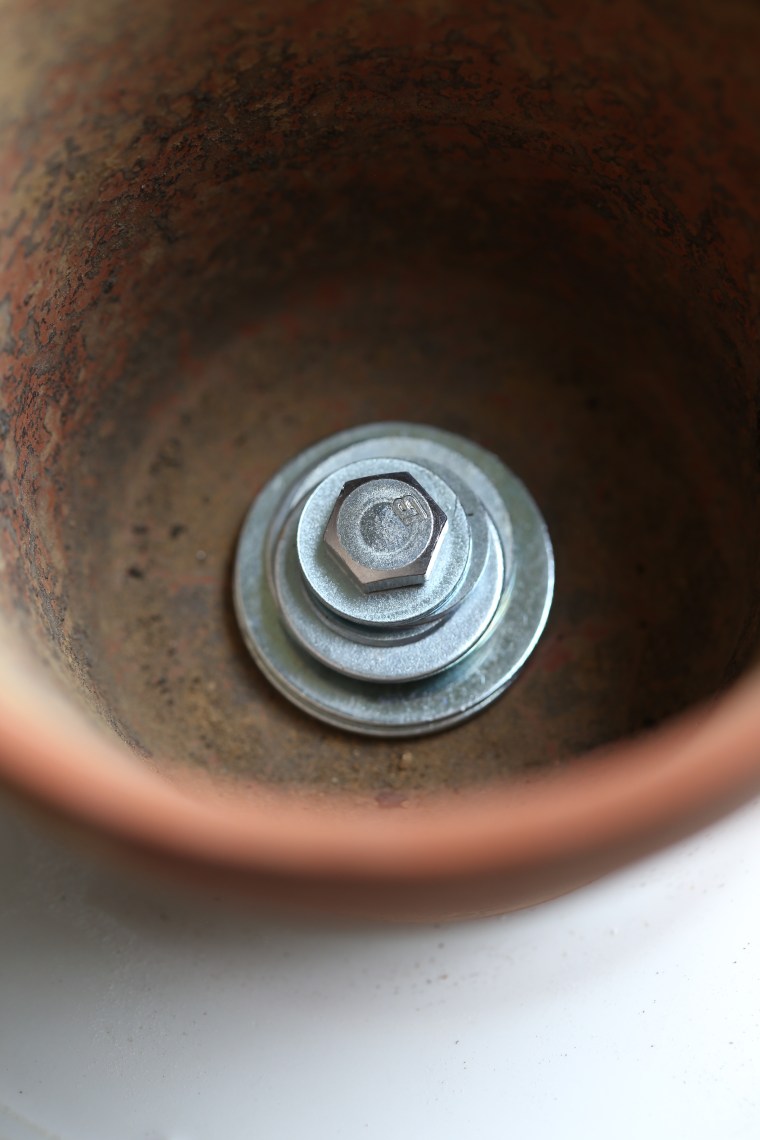 As you can see, I have a small pyramid of washers in there. If I hadn’t put so many in there, my pots would have wobbled and tipped. When I was done, my pots were secured and did not move at all.
 Ready to be filled with plants.
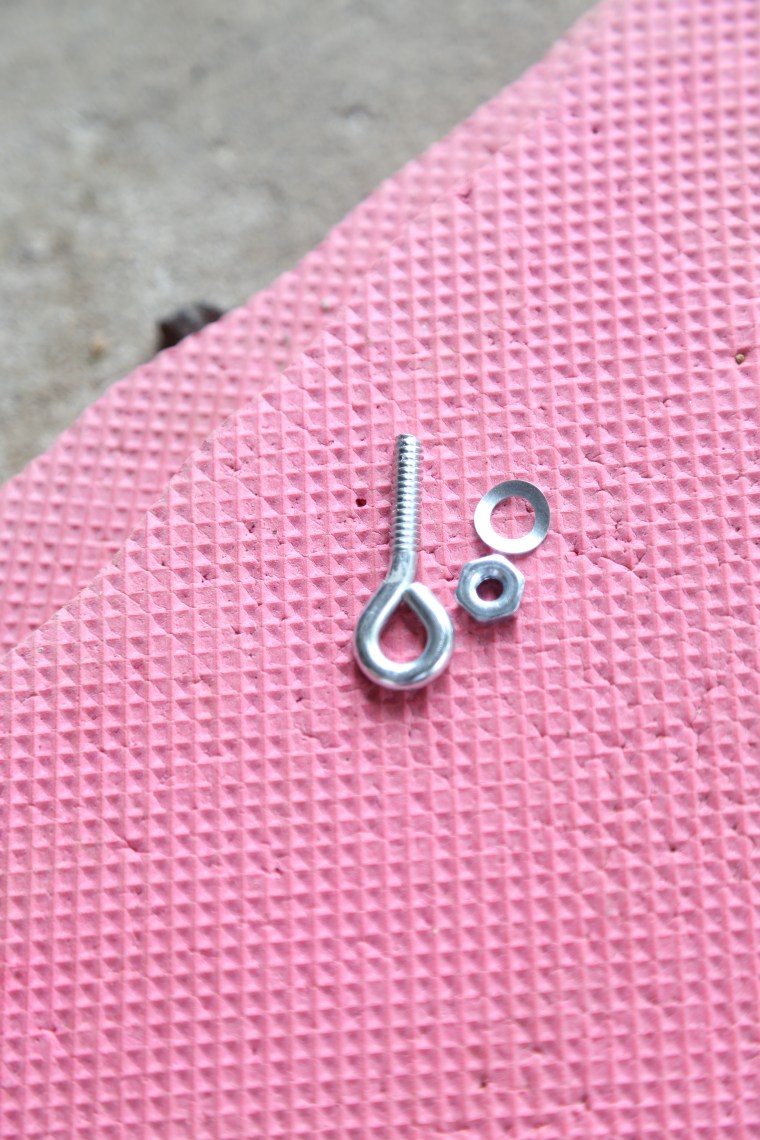 Because this is a chandelier, it needs to hang! While I was at ACE, John, my helpful hardware expert cobbled together a few pieces to create a loop at the top of my fixture.
 The top of the post actually comes off and I removed it and inserted the pieces to create the hanging loop.
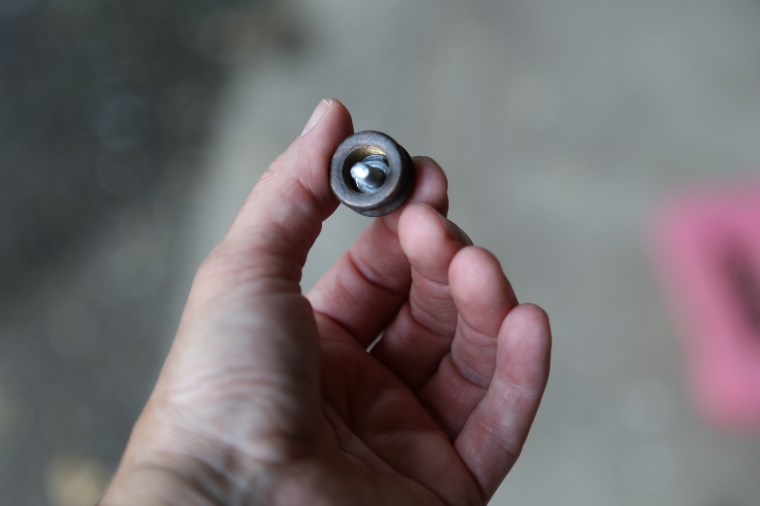 It was a tiny space to work in so I suggest you get a hold of some really narrow and long needle nose pliers if you have a fixture like mine.
 The finished hanging loop is ready to hang!
 The final step is to fill the pots. One thing many folks don’t consider when they arrange plants in hanging planters is that size is crucial. My pots are small, about 2 cups in capacity and that means a plant could quickly out grow the space. To prevent that from happening, I chose plants that I know have shallow growing roots that require little space; sedum and succulents! To fill my cups, I used a sedum v. John Creech and an ice plant. They have a low watering need and will not out grow the cups quickly.
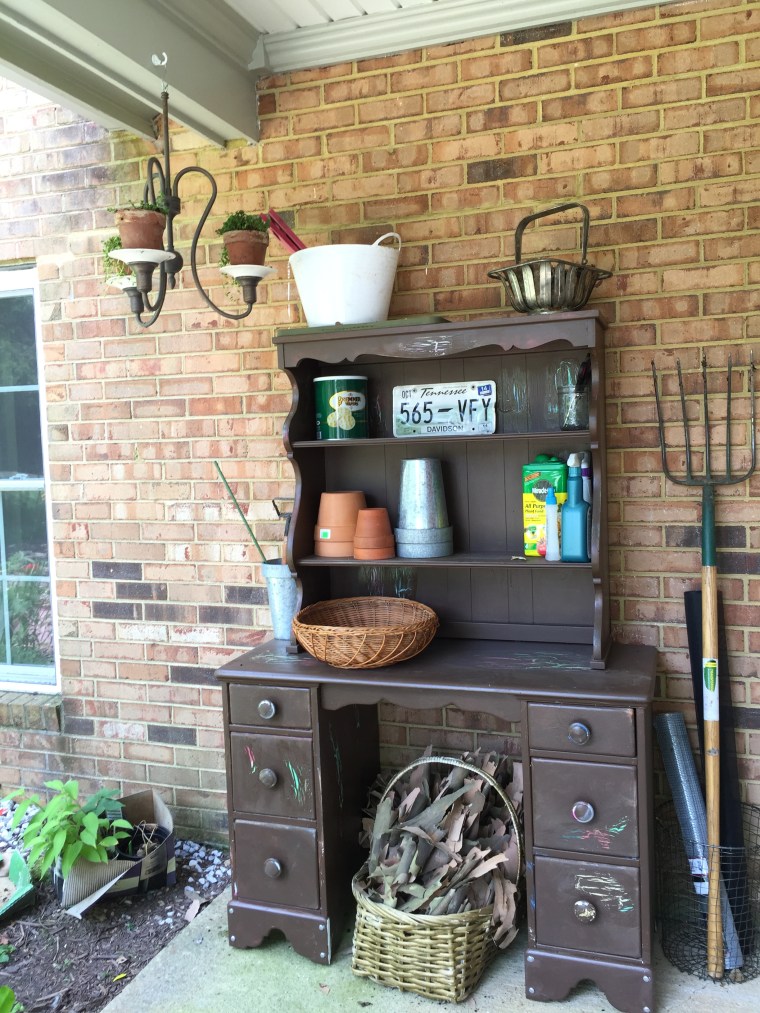
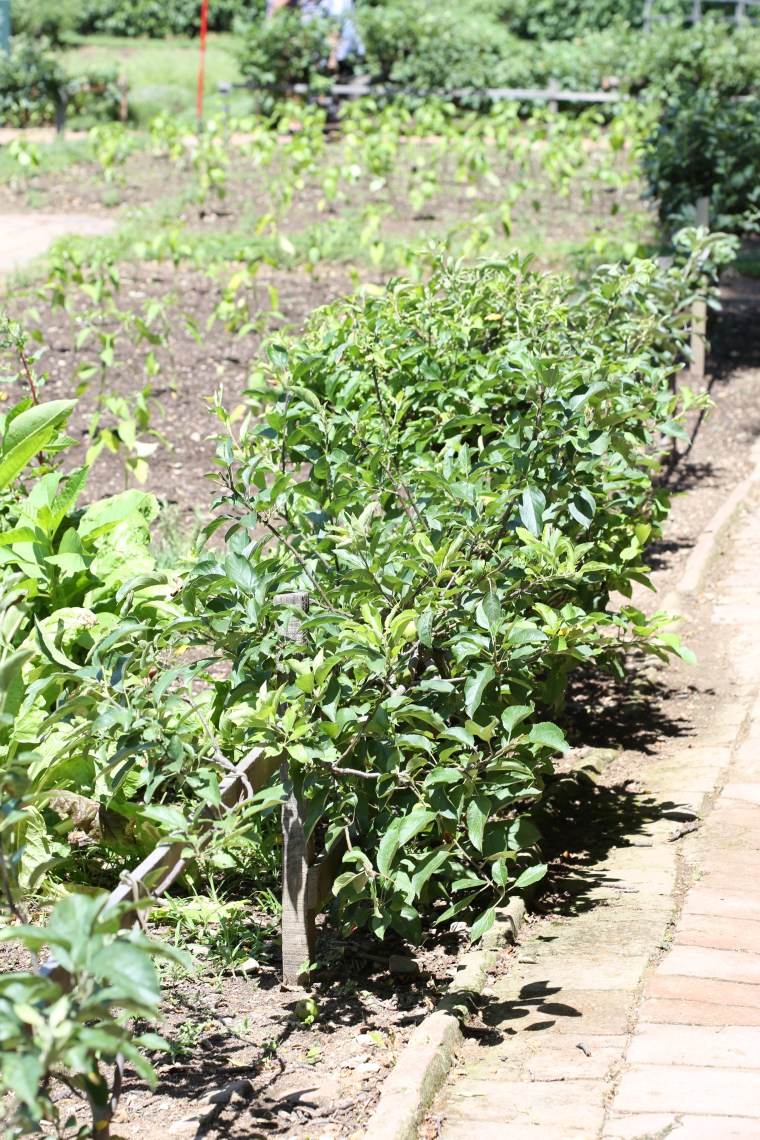 In the lower garden, most of the beds included fruit trees grown in the espalier style. Some were trained to grow up against walls and others, like these apples, were grown as a living fence for the garden.
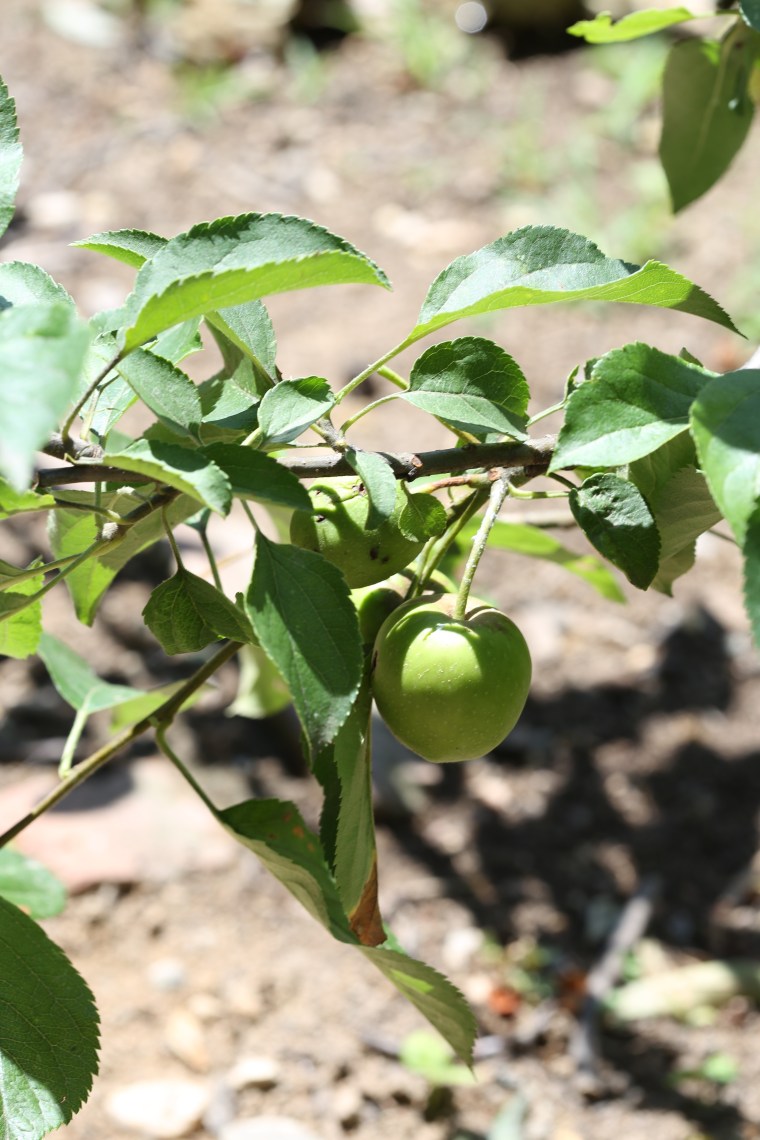 There were so many apple trees-I was truly jealous!
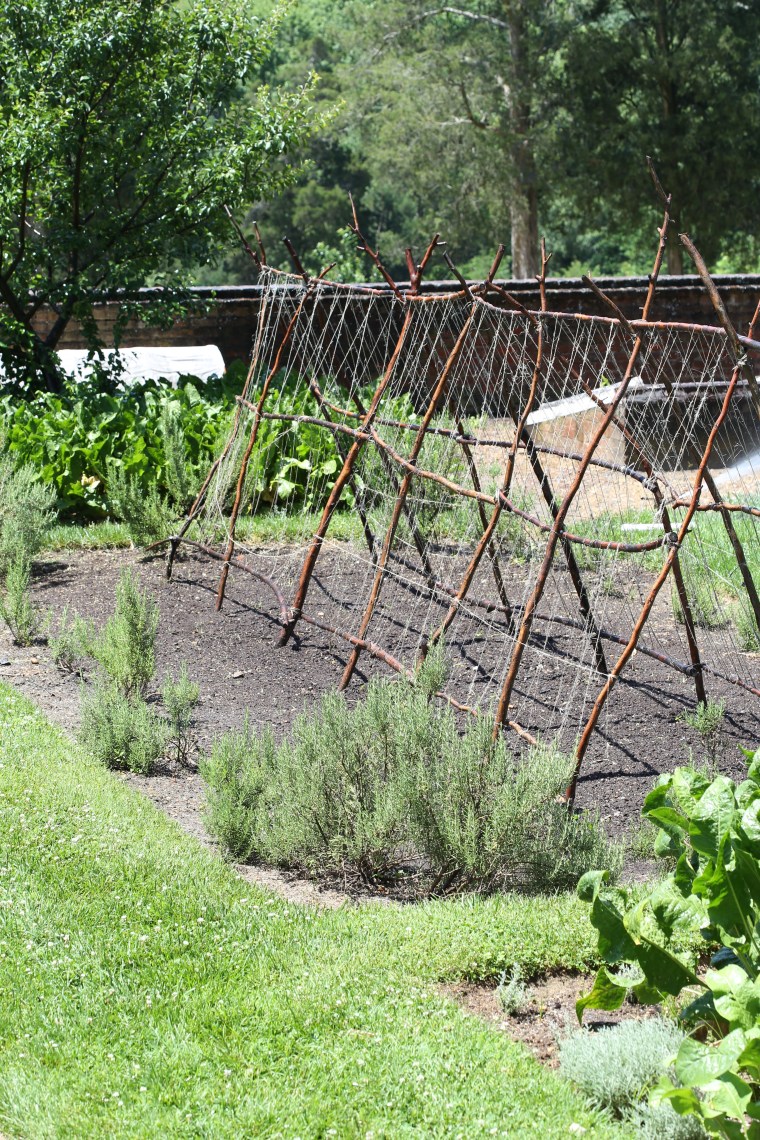 This trellis looks a little intimidating but it is easier to construct than you might think. There weren’t any plants growing near it so I wonder what it will be supporting.
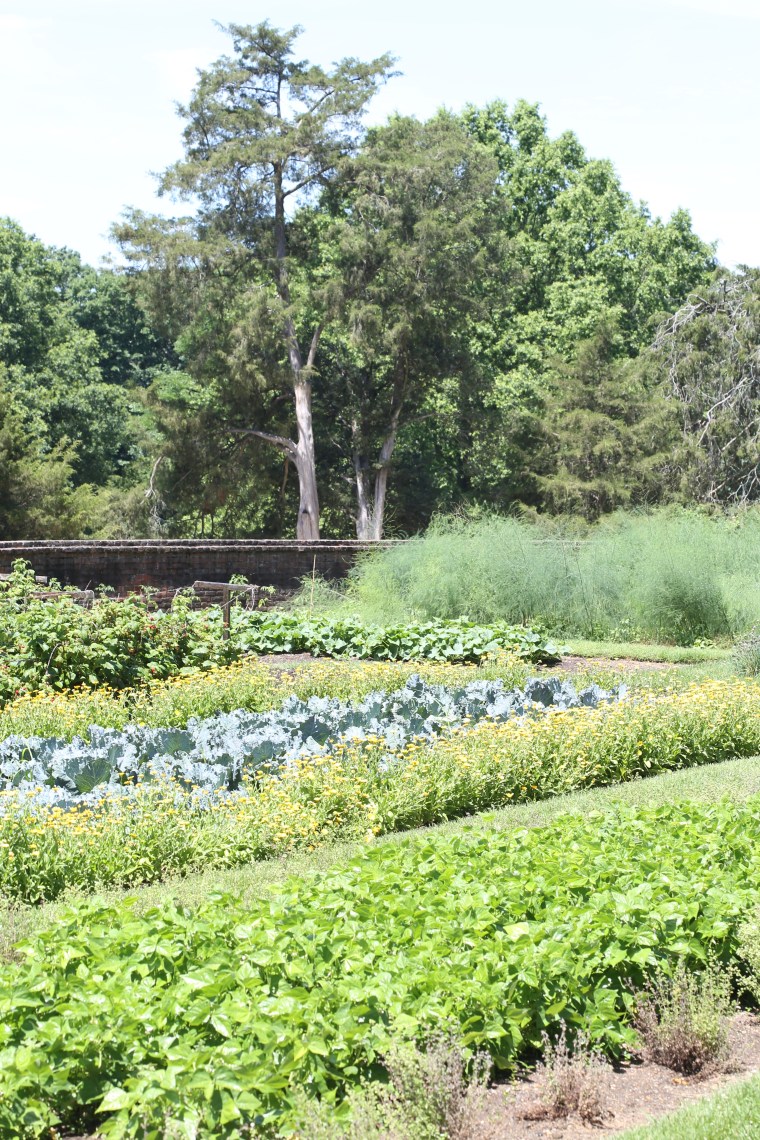 The high walls surrounding the garden created a micro climate that helped keep the temperatures up to give the plants an early start in spring.
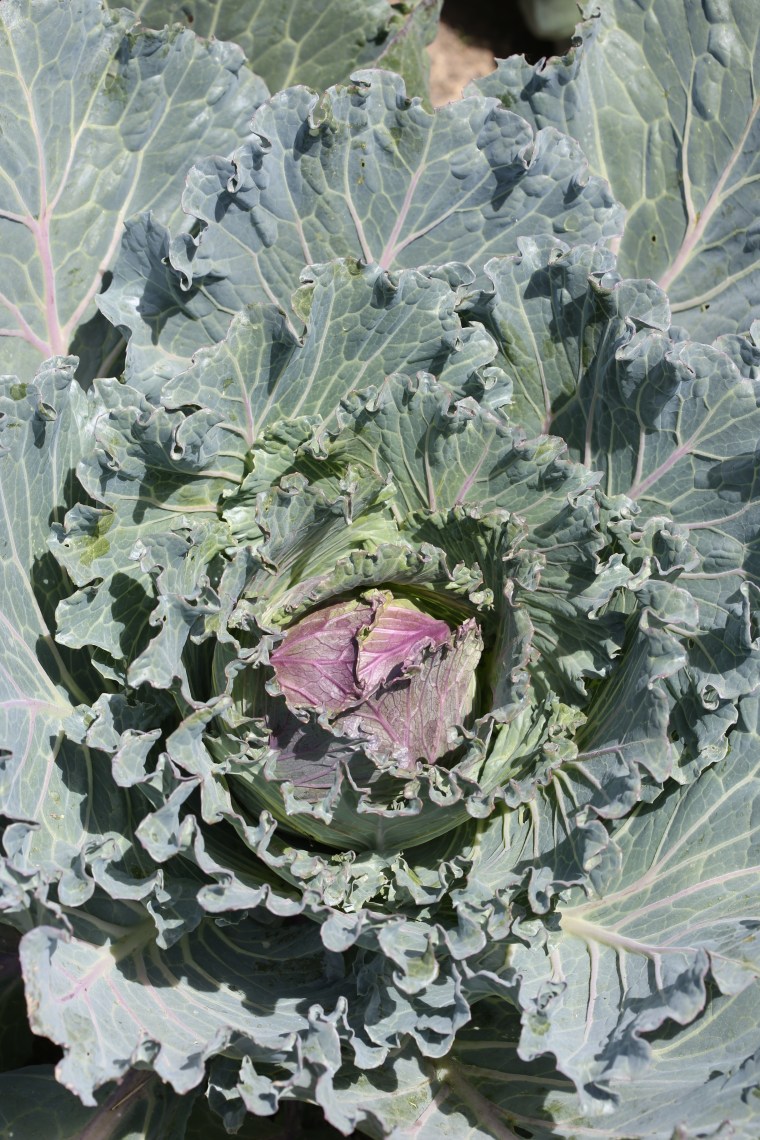 Have you ever heard of cabbage envy? No? Well, you have now. Down by the river, there is another small garden area near the 16 sided barn. We literally stood there and stared at the cabbages. Someday, when I grow up, I’m gonna grow cabbages like these…
 And not a cabbage worm in sight. Then we stood there and wondered what chemicals they were using on them to keep the caterpillars at bay…
 These onions were at in bloom and they must have been near 5 feet tall and as big as a softball. Again, some day…
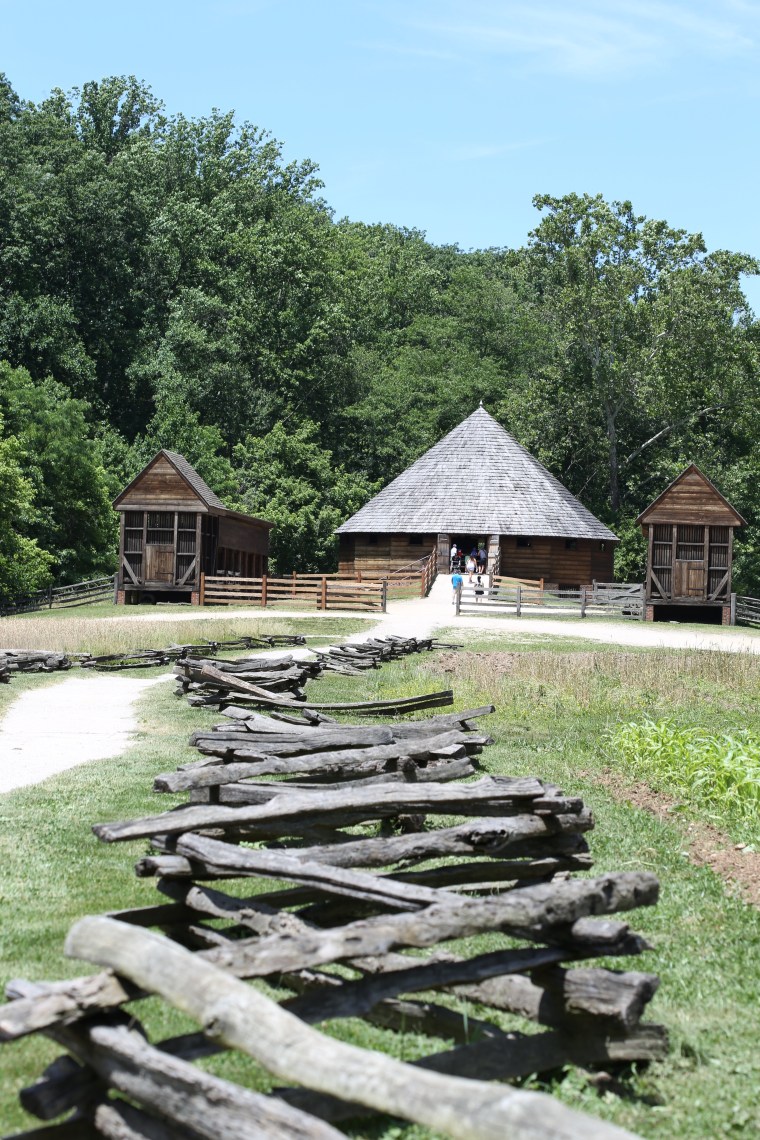 As we ponder the possibilities of fencing for our own garden, I admired this one because of its simple construction. Then I remembered that I do not live in a forest and my husband is not a lumberjack; this might not be our solution.
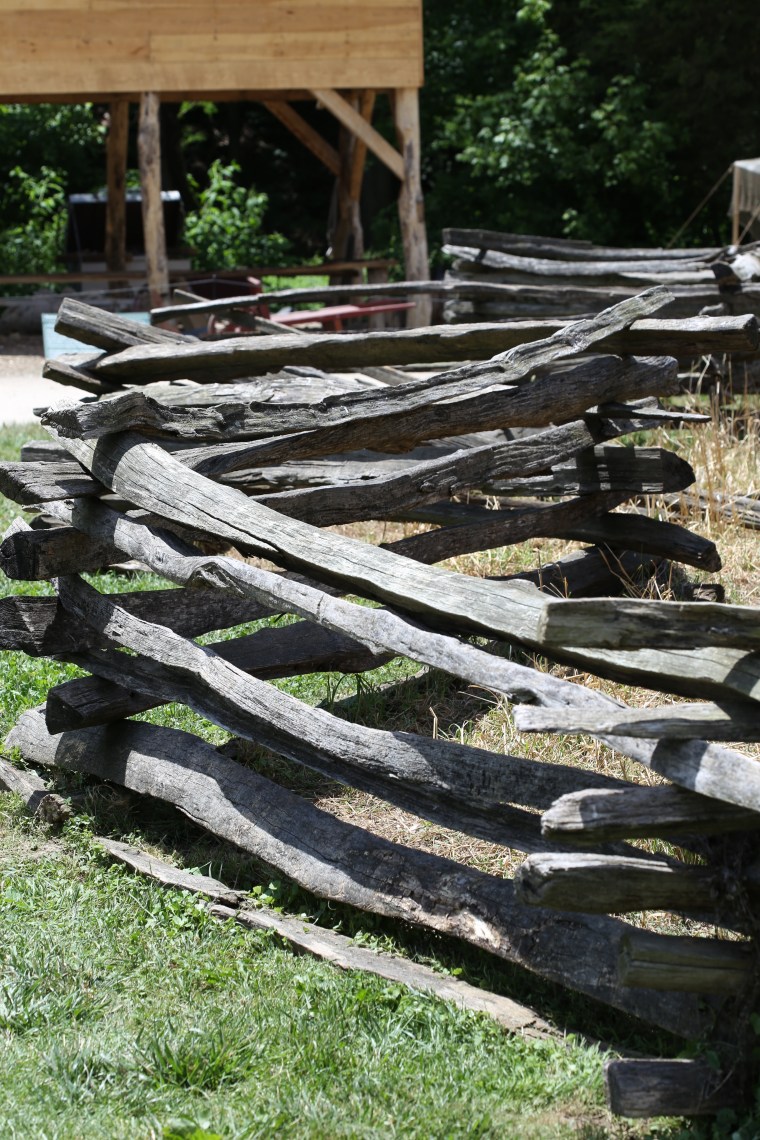 Really loving the fencing
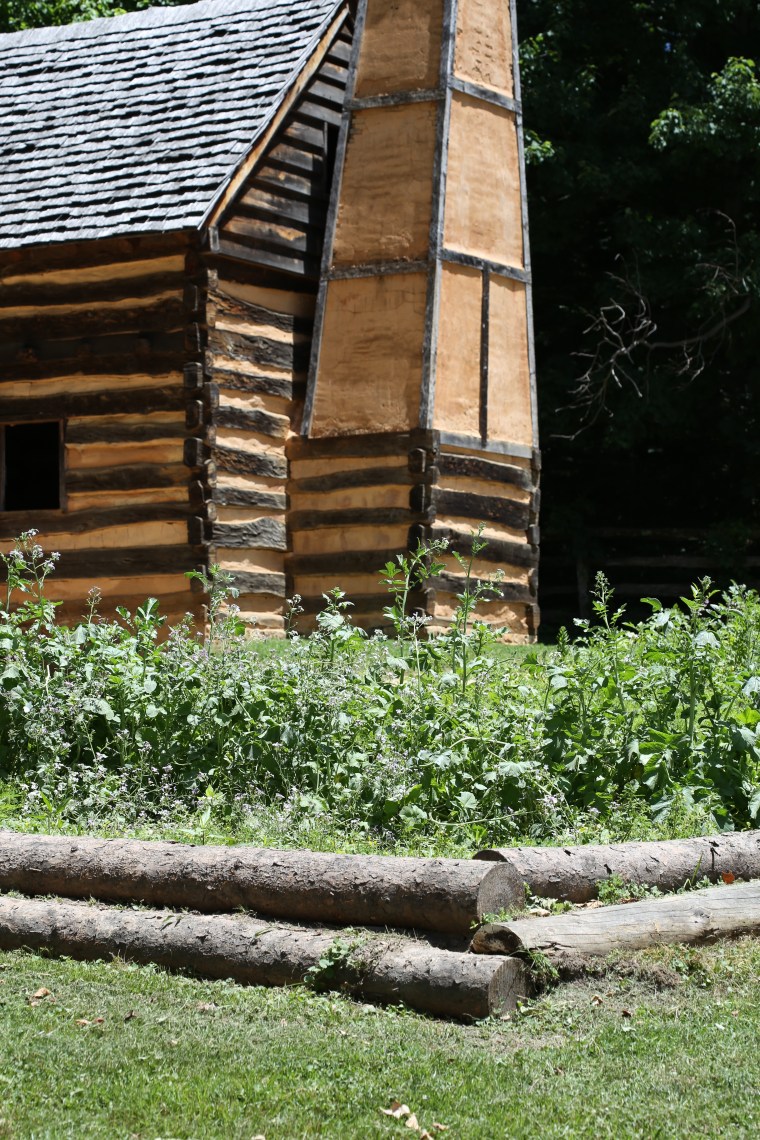 This house is a recreation of a cabin that belonged to one of the more prominent slaves and his family.
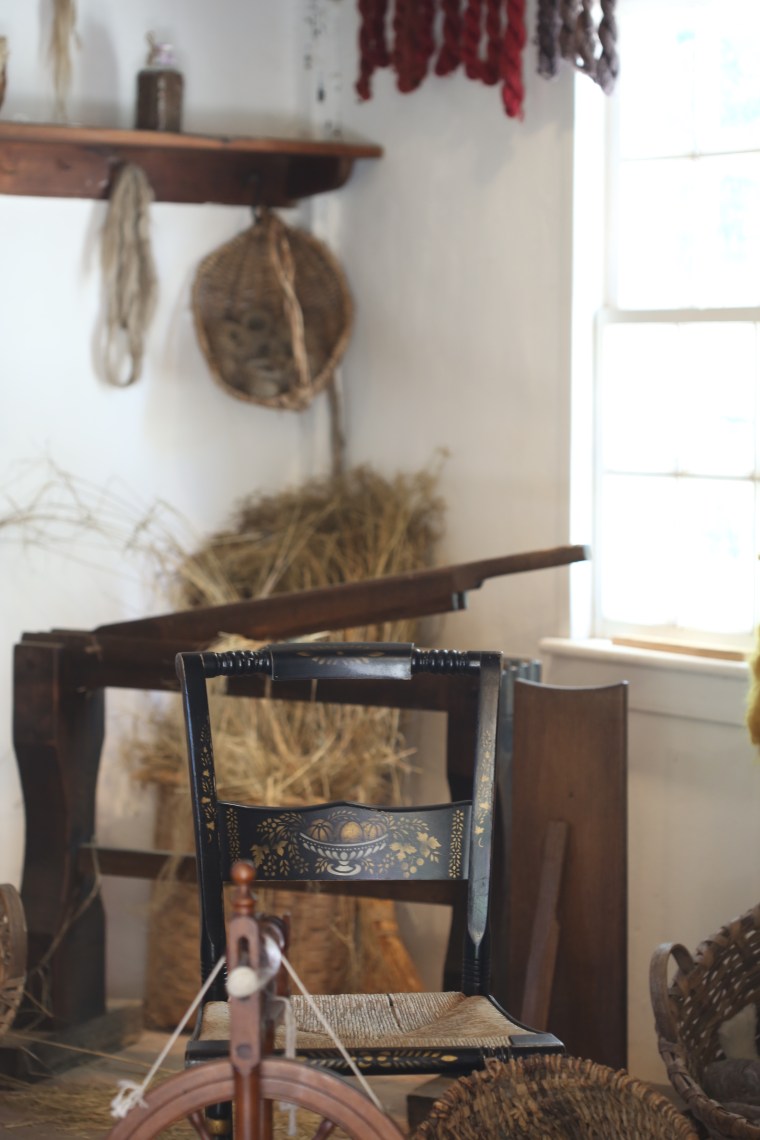 Just out of view from the mansion is a row of buildings. Many had a specific purpose; salt house, smokehouse and so on. This was the knitter/weaver house and as a knitter, I had to stop in and take a few photos. George Washington led a very ordered life. His primary goal was to be as self-sufficient as possible and while he had the advantage of wealth, the slaves working on his estate were able to produce most of what they needed. The things produced here would most likely have been used on the property.
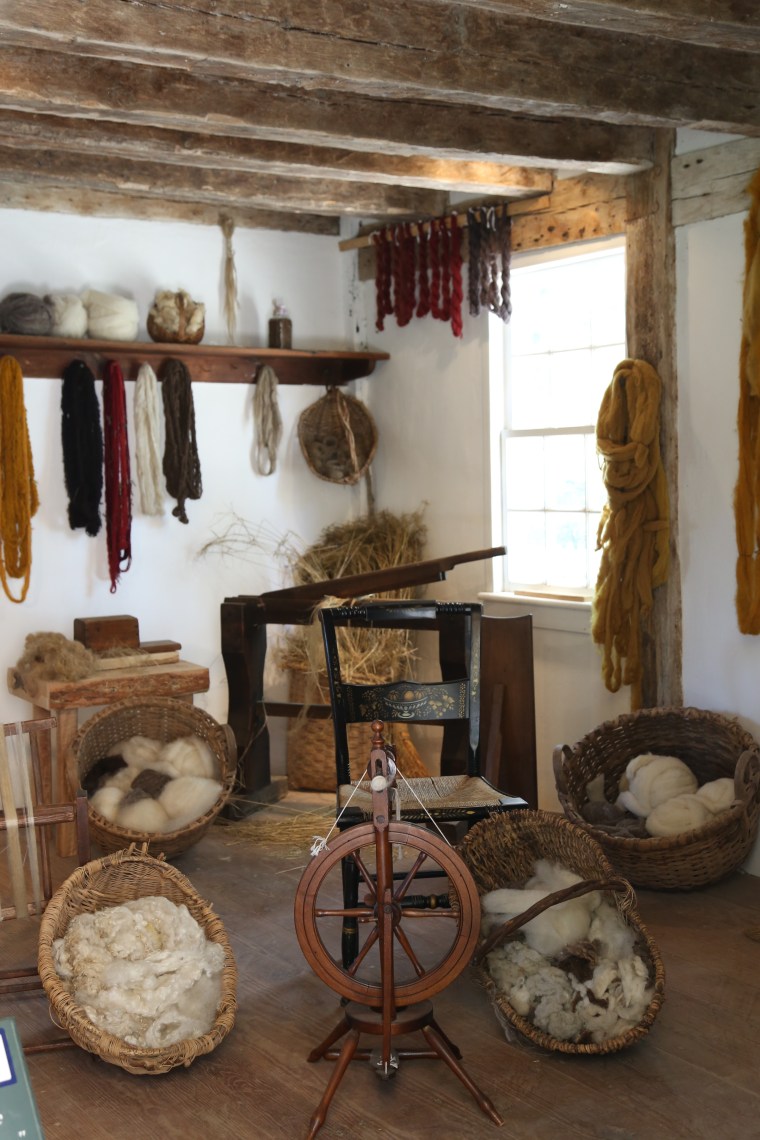 The wool would have come from livestock on the estate and it would have been processed by slaves who would have also used it for weaving and knitting.
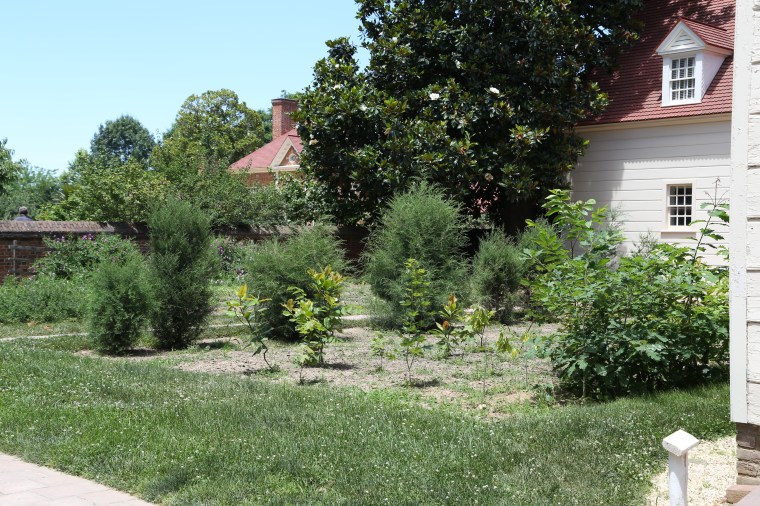 Along side the weaving house was a small plot that was called the botanical garden. In this small space, Mr. Washington would experiment with new varieties of seeds and plants. If they were successful, they would have been added to one of the gardens or groves to produce food.
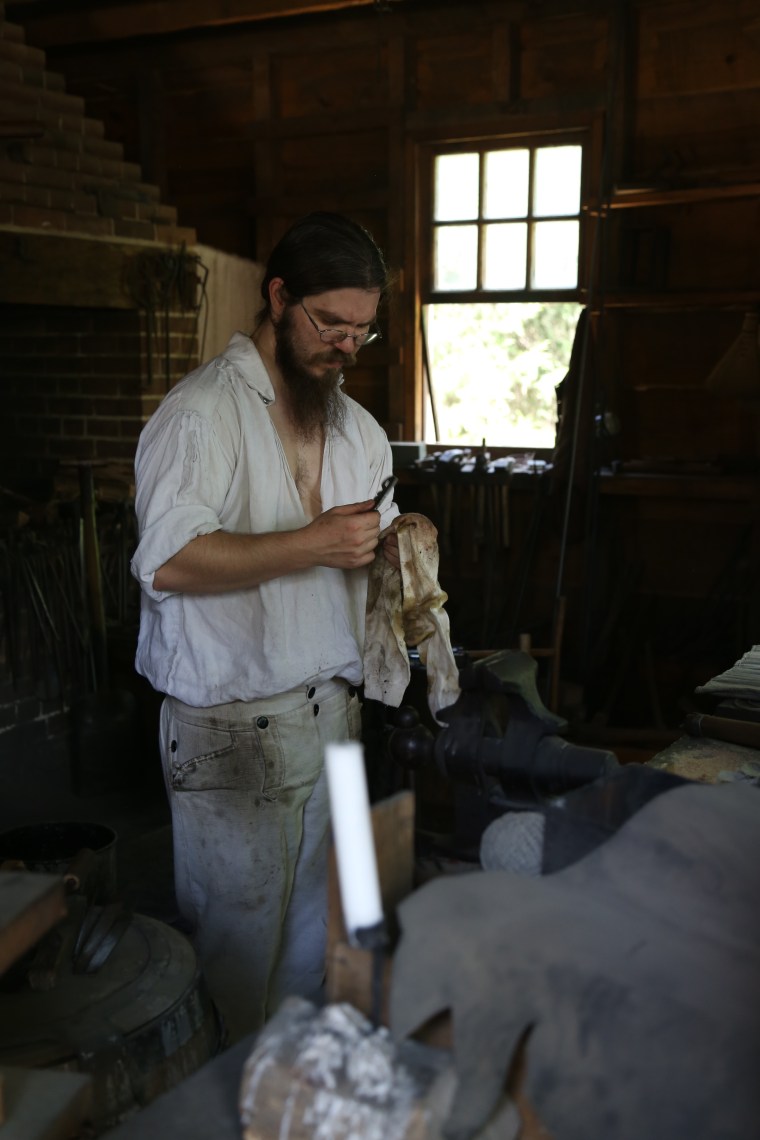 There is a recreated blacksmith shop along the path as well. In this shop, tools are produced using the same methods that were employed over 200 years ago. Most of the tools they make now get used around the estate.
 As we looked on, this gentleman was working on a project. They may have a lot of stuff in there for visual impact but this really is a working blacksmith shop and he went back and forth between the table/anvil and the fire as he worked on the piece in his hand.
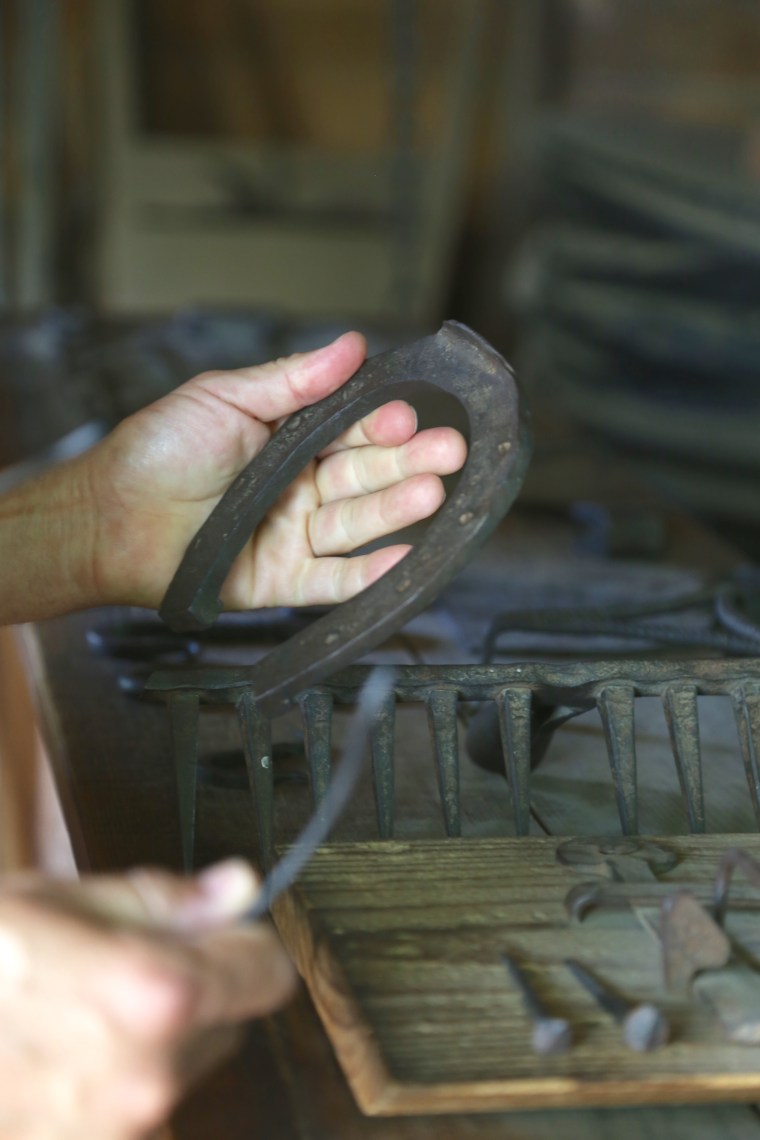 There were horses present back then but there wasn’t a farrier to produce shoes for them. Because Mr. Washington was not one to spend money unnecessarily, he made sure that a few of the blacksmiths were properly trained to produce shoes and tend to a horse’s feet.
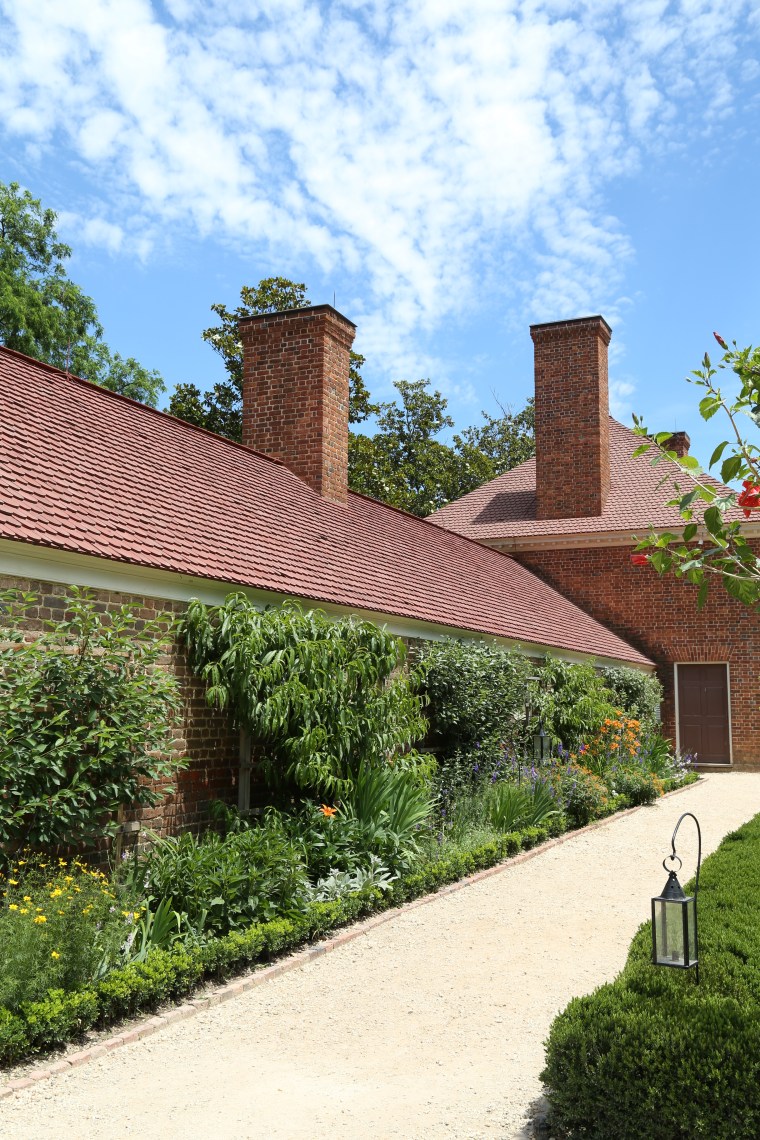 One of the most interesting parts of our Gardens and Groves tour was the greenhouse. While we were not permitted inside, it was interesting to know that back then, they would grow citrus trees and other tropical plants in the greenhouse during winter and move them outside in summer. There was a room in the back of the building where a fire was tended around the clock to keep it warm for the plants. The men in charge of keeping the fire lit would sleep in that room .
 The larkspur is one plant that they know was growing on the property when Mr. Washington lived there. They actually sell packages of seeds and when my mother in law visited here last year, she brought me one. So far, I haven’t had any luck getting them to germinate but I will try again this fall.
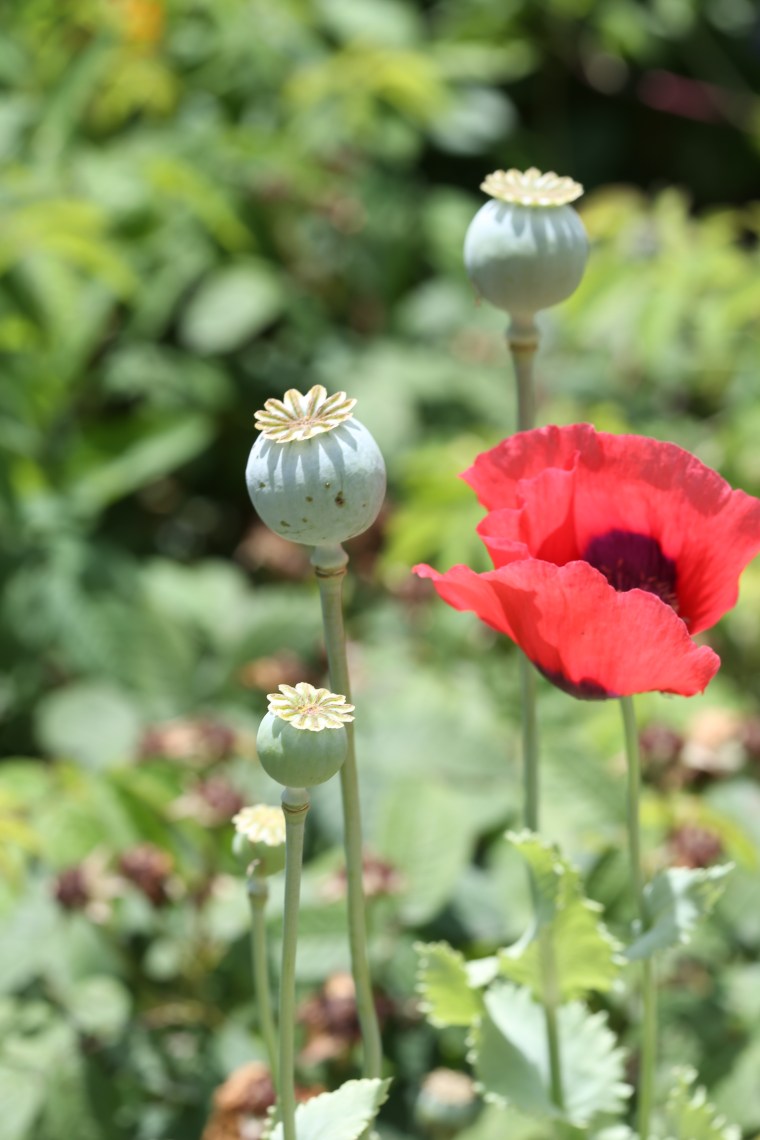 After seeing these poppies, I have a new admiration for them! Beautiful when in bloom and then come the seed pods, which I think are just as pretty as the flowers.
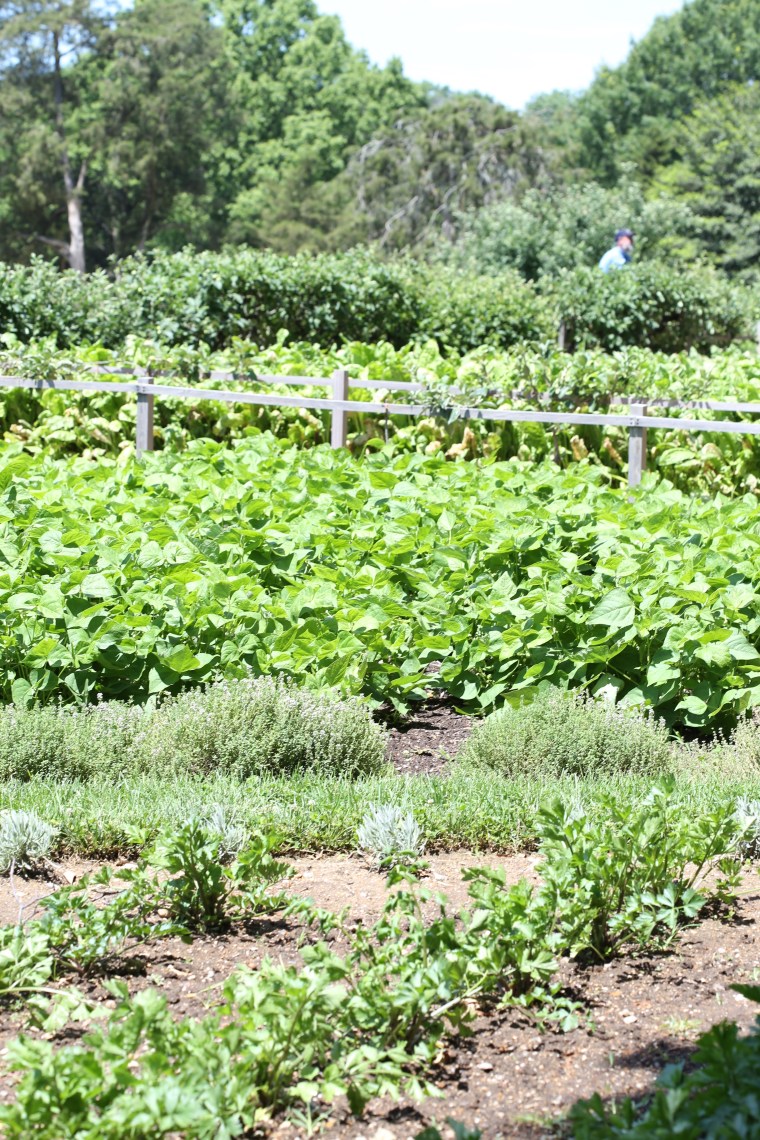
 In the upper garden, flowers are everywhere but if you look closely, there is a vegetable garden hidden in there too!
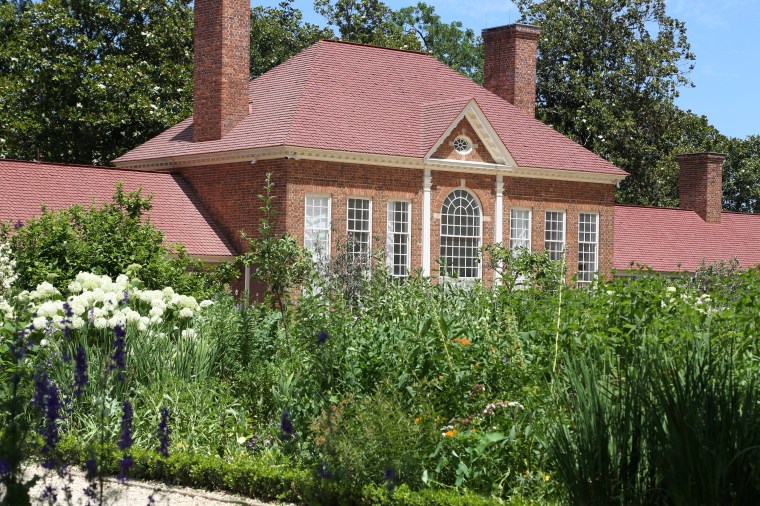 We toured the mansion (a quickly guided walk through with little time to stop and truly take it all in-and no photos allowed), walked the grounds, saw the tomb and trees that George Washington himself planted (two tulip poplars and a hemlock-absolutely huge) and then wandered through the museum. The museum is a trip in itself, honestly. There are several videos to watch and plenty of historical displays with lots of text to read. He was such a fascinating man and it was a bit overwhelming after all the walking in full sun for two hours on the grounds. Then we arrived at the end of the tour and the final display; his teeth.
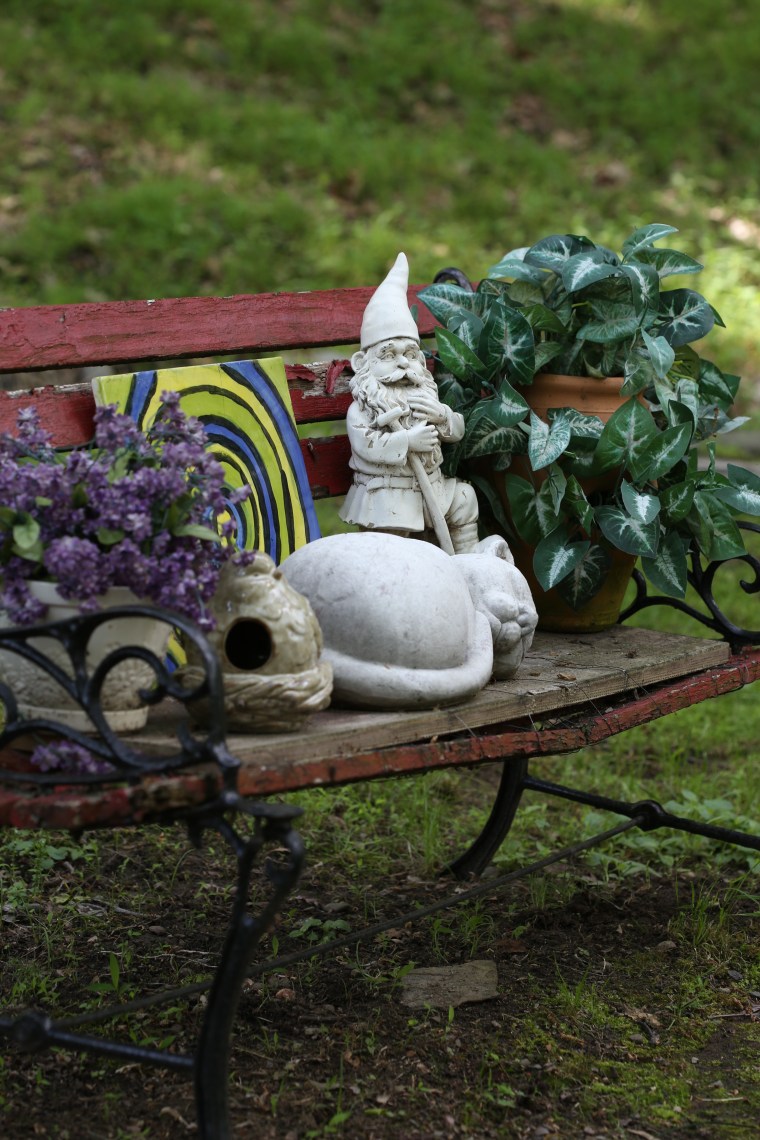 Just as there are many types of plants, there are many types of gardens. Some gardeners work with shade, some with flowers or succulents and others with just vegetables. Potagers, cottage gardens, rain gardens and so on. Personally, I have an herb garden, a shade garden and a sunny area planted with perennial flowers in addition to the very large potager style vegetable garden that takes up much of our front yard.
 Gardening with deer is a challenge. Especially when the community you live in is surrounded by state owned forest land. At times, there can be a dozen or more deer grazing around the yard. The landscape provides areas for them to sleep and rest and even when you think the small herd may have left the yard, it is entirely possible that some are still there but out of view. As if the deer weren’t enough, black bears also live in the area and have come through yard and more than one raccoon has raised a litter of kits in a tree near the shed. If you think deer can do damage, mischievous raccoons and squirrels can also cause problems.
 As a result, my mother is a gardener of things. All around the yard, you will find statues and knick-knacks, baskets of silk flowers and plants, gazing balls. She finds things in stores and yard sales and has them all over the yard. Bird houses hang from low branches all over the yard. Every where you look, little pops of color are present and it truly makes for a restful place to spend the afternoon outdoors.
 The deer really do eat just about everything and it was surprising that these little bluets were present since they are usually eaten to the ground.
 A constant theme in the garden is a smiling sunface. Actually, sun and moon faces are all over. That may be partly my fault since I often send them to her!
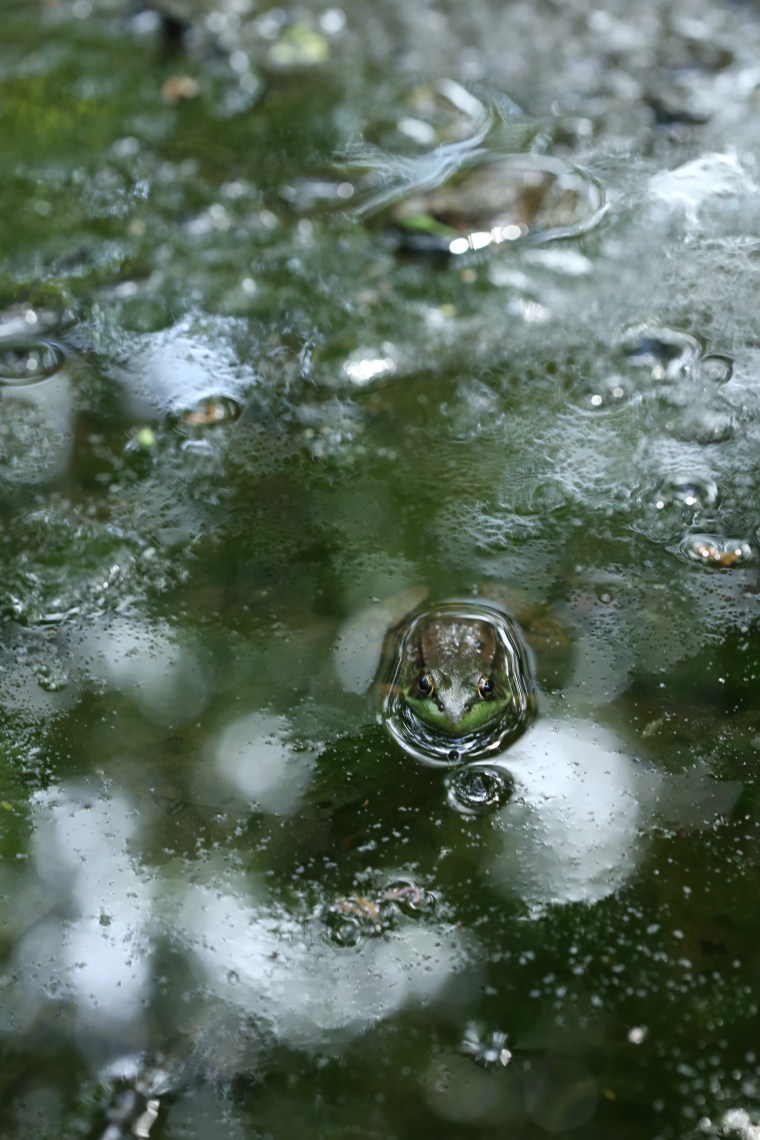 In a small hillside drainage pond, frogs rule. They are loud and you can hear them all over the yard. On this afternoon, I saw four of them in the water and on the rocks around it.
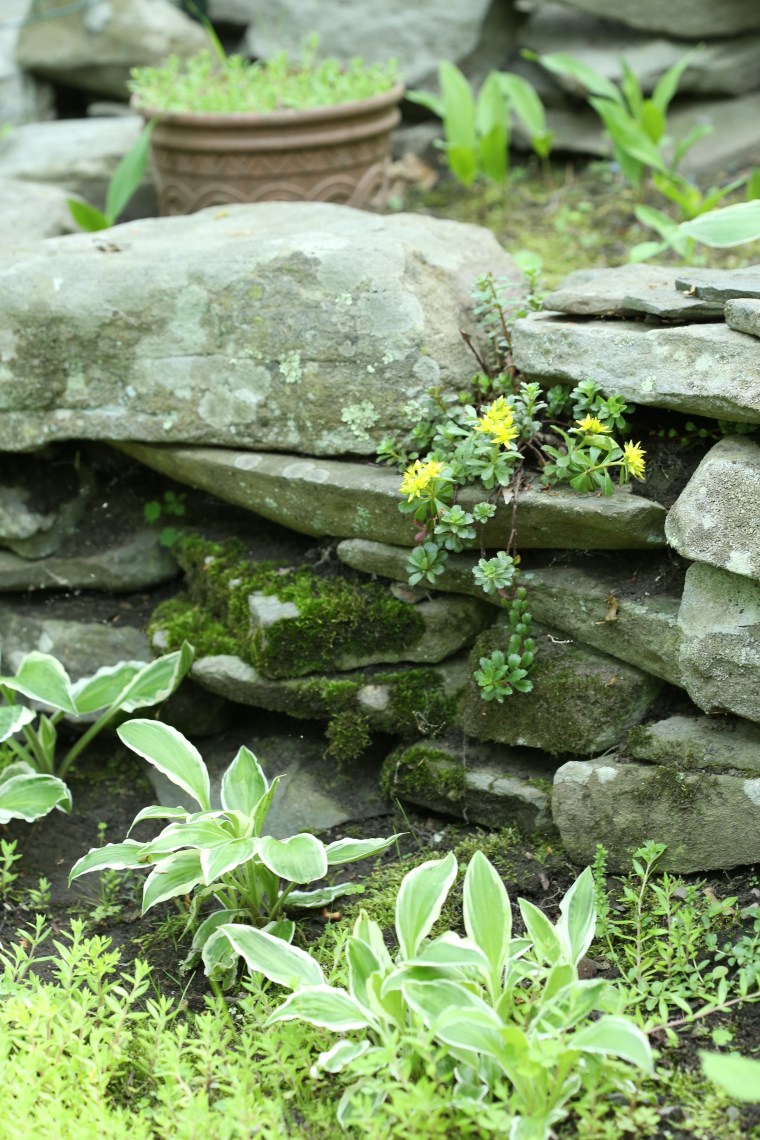 This is one of the few parts of the yard that actually has plants. The previous owners of the yard placed fencing around plants and shrubs to protect them from the deer. It was an unattractive sight and my mother has removed most of it. Although that meant the plants within met a nibbled to the ground death, it greatly improved the appearance of the yard. One place she left the fencing was around the pond and in this small area, she has a few hostas, several sedums and lily of the valley along with statues and knick-knacks.
 Lichens and moss cover all of the rocks in the yard.
 The pond is truly the focal point in this part of the yard. The Autumn Joy sedum has filled in the crevices above and moss and ferns are filling the areas near the water.
 Gazing balls are one of her favorite ways to add color to the yard. She will tell you that they must be colored and not silvered. Twice, my mother has placed silvered gazing balls in the yard and twice, a woodpecker tried to kill his reflection. Both of those gazing balls were shattered.
 You must walk around the yard to see it all because it is everywhere.
 Along the back of the house, she has a simple row of silk plants with pottery and glass accents.
 In that row, tucked in a corner, is what remains of a deer skull. It seems that this buck died on the property and after the vultures cleaned it, my mother placed the skull in her garden along the back of the house. Squirrels continually gnaw on the bones to keep their teeth in shape and have chewed up quite a bit of the skull and antlers.
 Have you ever heard the phrase referring to “bones knitting,” especially if you have broken a bone? It is easy to see why they say that when you look at the fuse line going up the skull. This was one of the most fascinating things to look at in the garden!
 You really must look carefully or you might miss something.
 And look everywhere, despite being colorblind, my mother has a talent for choosing colors so that they either blend in seemlessly or jump out.
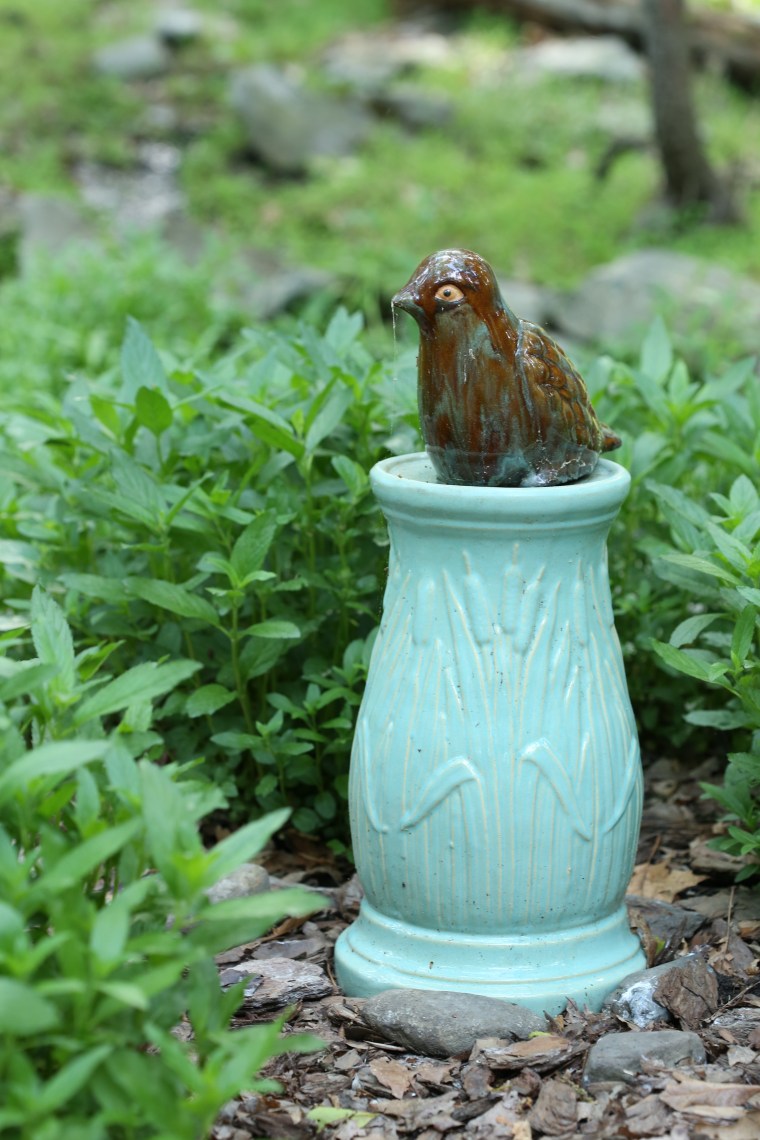 She also has a talent for finding unusual pieces like this pottery base to a planter.
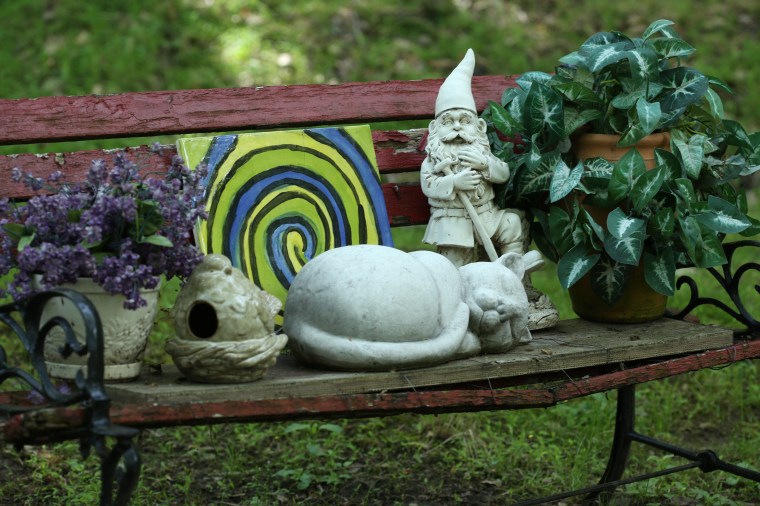 This old bench is so worn out that she has added a board to hold the objects on it. That gnome looks familiar-he lived in our house in Nashville for years and when we moved, I sent him to live with my mother. One of the girls, I think Alix, painted the tile and yes, the plants are silk. At least the deer won’t eat them! But beware, the raccoons love to move things and you never know what they will do.
 This part of the garden does not get much direct sunlight and once the crape myrtle, which is not in the photo, leafs out completely, it gets little filtered light as well. Last spring I spent a week amending the soil and adding shade tolerant perennials to the bed. This year, nearly all of them came back except for a bleeding heart plant and they have truly filled the space.
 The iris actually gets enough light because it blooms before the crape myrtle creates shade. Also in bloom are azaleas, dianthus and phlox.
 Remind me to tell you the story of the gnome sometime… He is watching over the sunny part of the garden.
 Love the little blossoms on the strawberry begonia.
 While I have put a lot of work into the perennial beds near the front door of the house, none of that compares to the amount of work the vegetable garden has taken. We began in late fall of 2014 by composting the leaves that fell from our trees with grass clippings from the lawn and bags of coffee grounds from Starbucks. In spring of 2015, I topped each of the beds with that compost and placed 45 bales of straw on the beds in the garden. Throughout the year, I attempted to grow vegetables in the bales with out a ton of success. In early winter, when the bales began to tip like drunkards, I broke them down and scattered the straw on top of the compost along with more coffee, ground egg shells, compost (that includes litter from our hens) and a topping of purchased garden soil.
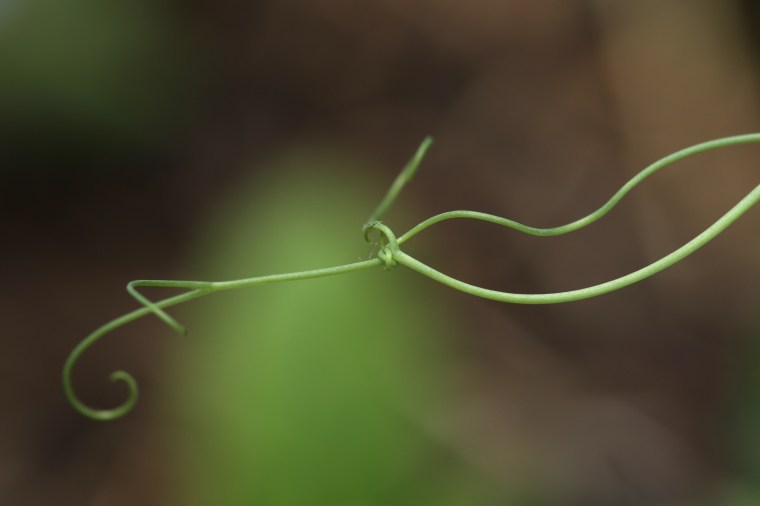 Peas were slow to get going but have finally come on board. Gotta love the tendrils and the way they tie themselves into knots.
 Everybody loves surprise potatoes! Must have missed one when I harvested them last fall. not sure what it is but I am thinking it is most likely a yukon gold but the alternative is red norland; either way works for me!
 A lot of firsts this year. Ailsa Craig onions along with some radishes from an 8 year old package of seeds I found lurking in the box! We have lots of mushrooms coming up in the beds. Did you know that is a good thing? There is a relationship between plants and mushrooms and when some combinations are grown together, you can actually improve your yields-this pairing was random and not of my doing but my fingers are crossed that it helps. Want to know more about it, pick up a copy of
  Chinese cabbage is doing so well-and I grew this from seeds!
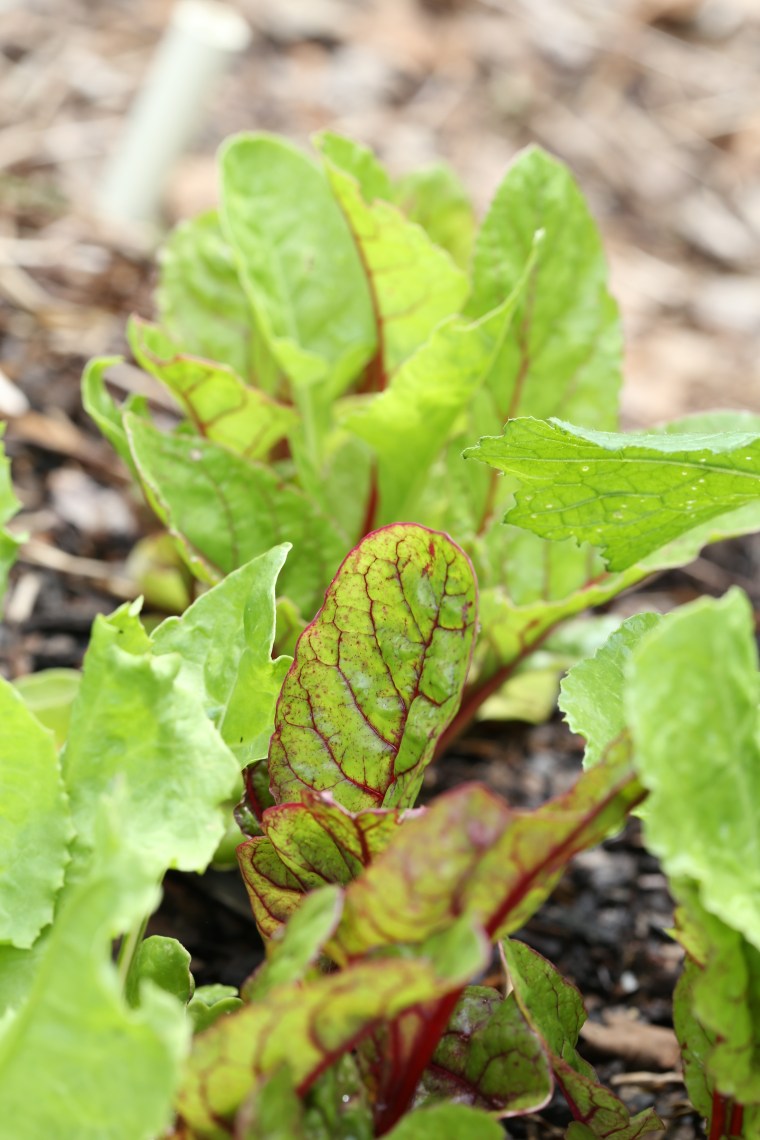 The way chard glows when backlit never gets old.
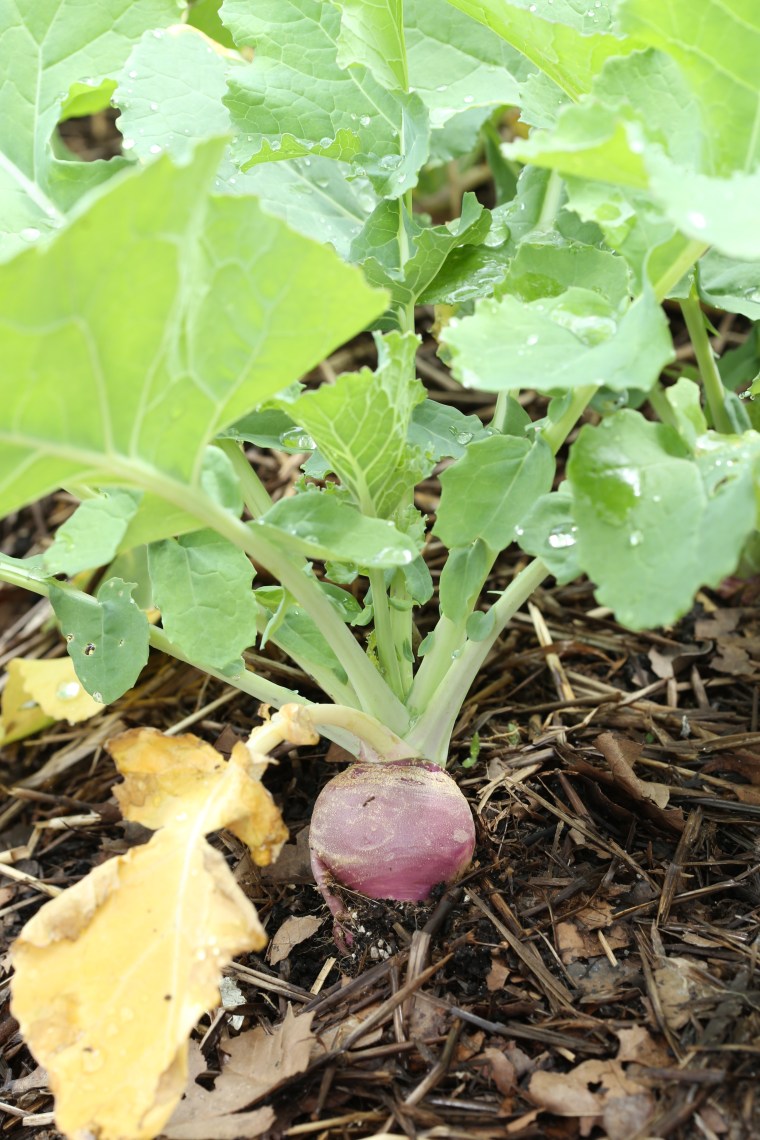 These rutabegas are taking off in the garden. If you grow them, be sure to eat the greens too! Cook them as you would collards and the plant will be doing double duty.
 Another of the firsts in our garden, salsify. Have no idea if we will enjoy it but I saw some plants in Colonial Williamsburg in the garden the the local master gardeners maintain and decided it was pretty and it needed to live in my garden too!
 Speaking of pretty, these radicchio starts have been stealing the show for a while now. We pull a few leaves off from the bottom and are letting the heads fill out.
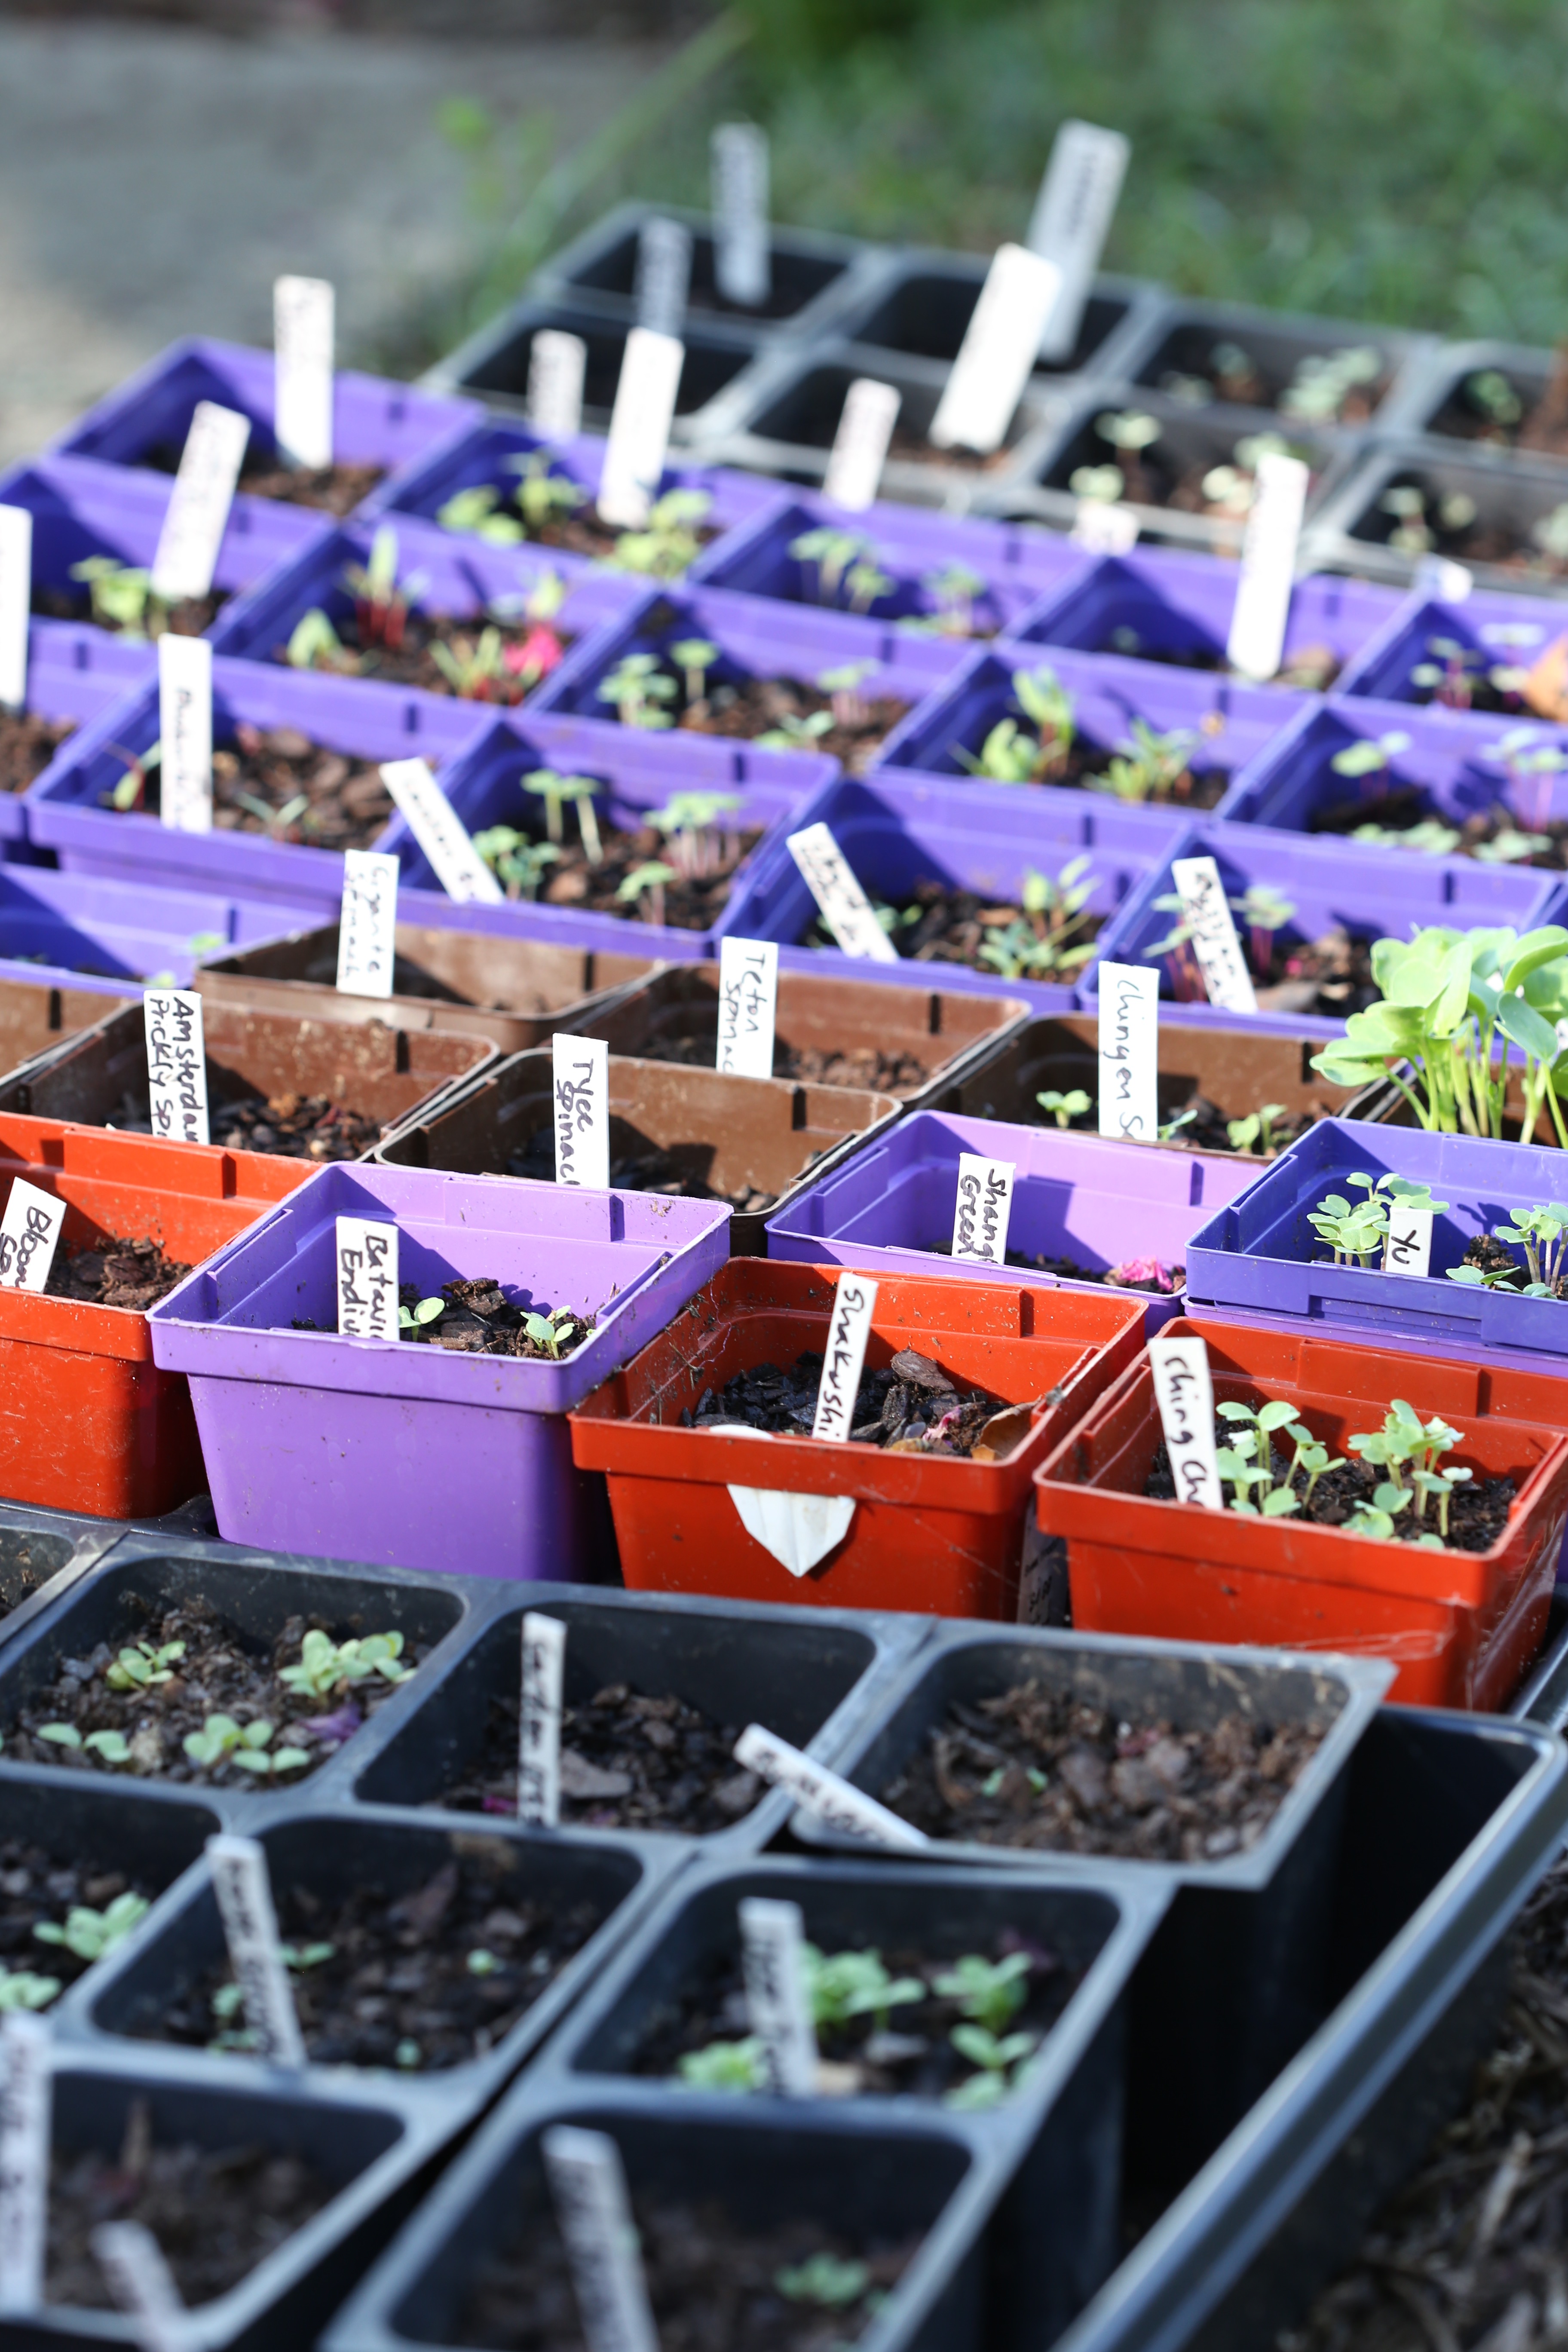
 More starts, celery is taking its time.