i like big bundts!

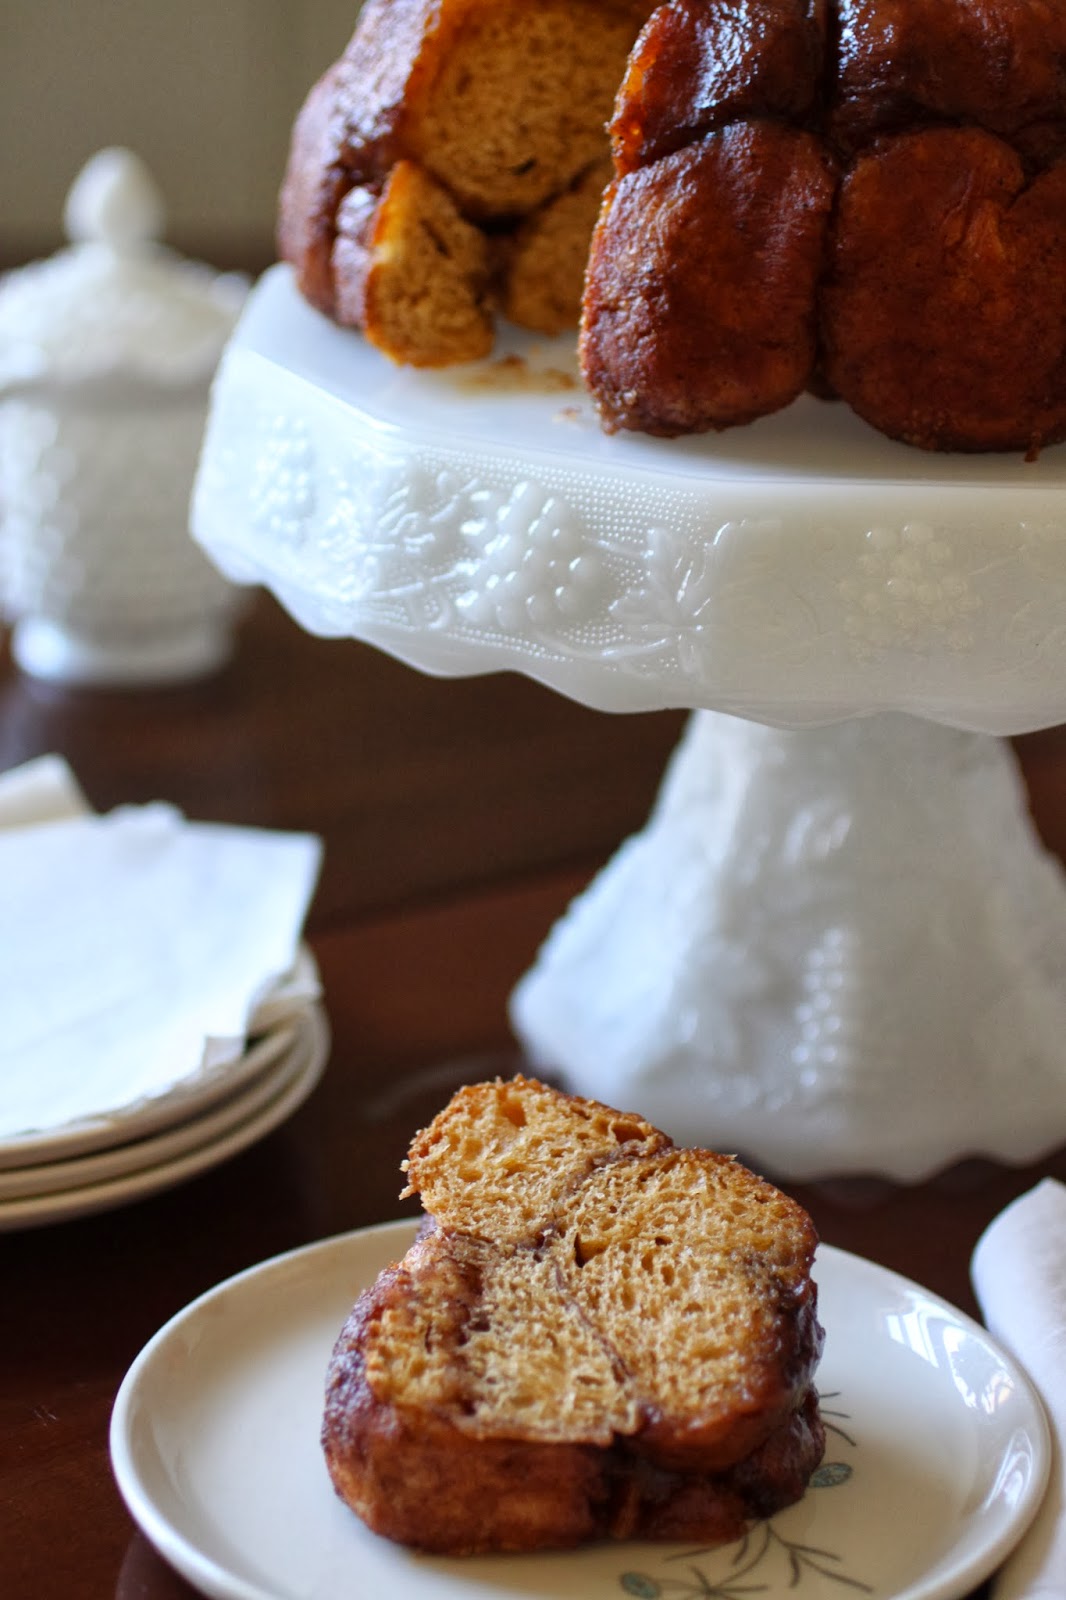
pull out the turntable and cue up the sir mix-a-lot…sing a long if you can, “i like big bundts…”  no, i didn’t get that wrong.  this is all about the bundts, bundt cakes that is.  november 15 is national bundt day and every year, mary, the food librarian holds a bundt bake-athon.  in honor of the big day, i made a bundt shaped loaf of sweet potato monkey bread.  to see the round up of all the bakers who also baked a bundt in honor of national bundt cake day, click on this link to mary’s blog.

believe it or not, i actually used a recipe i found on pinterest.  shockingly, it actually worked!  of course, i made a few changes-had to make it mine.  tinkering with an untested recipe is risky.  generally, i fly by the seat of my pants and this time, i landed nicely.  to see the original recipe, click on this link.

sweet potato monkey bread
serves 10-12

1/2 cup buttermilk milk at room temperature
2 teaspoons active dry yeast
1/4 cup sugar
1/2 teaspoon salt
1 egg, beaten
6 tablespoons unsalted, divided
2/3 cup sweet potato puree
2 teaspoons ground cinnamon, divided
1/4 teaspoon ground nutmeg
2 2/3-3 1/3 cups bread flour

2/3 cup dark brown sugar

in a large stand mixer with the dough hook, stir buttermilk, yeast and sugar together. let it sit for 5-10 minutes or until it is foamy.  divide the butter, 2 tablespoons and 4 tablespoons.  melt them separately. stir in salt, egg, 2 tablespoons of the butter, sweet potato puree, 1/2 teaspoon cinnamon, nutmeg, and half the flour and mix. with mixer on, pour in remaining flour a tablespoon or two at a time until dough pulls away from the sides and is tacky but when touched, it doesn’t stick to your hands.  the dough may not need all of the flour, mine came pretty close to the full amount.  place the dough in a greased bowl and let it rise until double, about one hour.

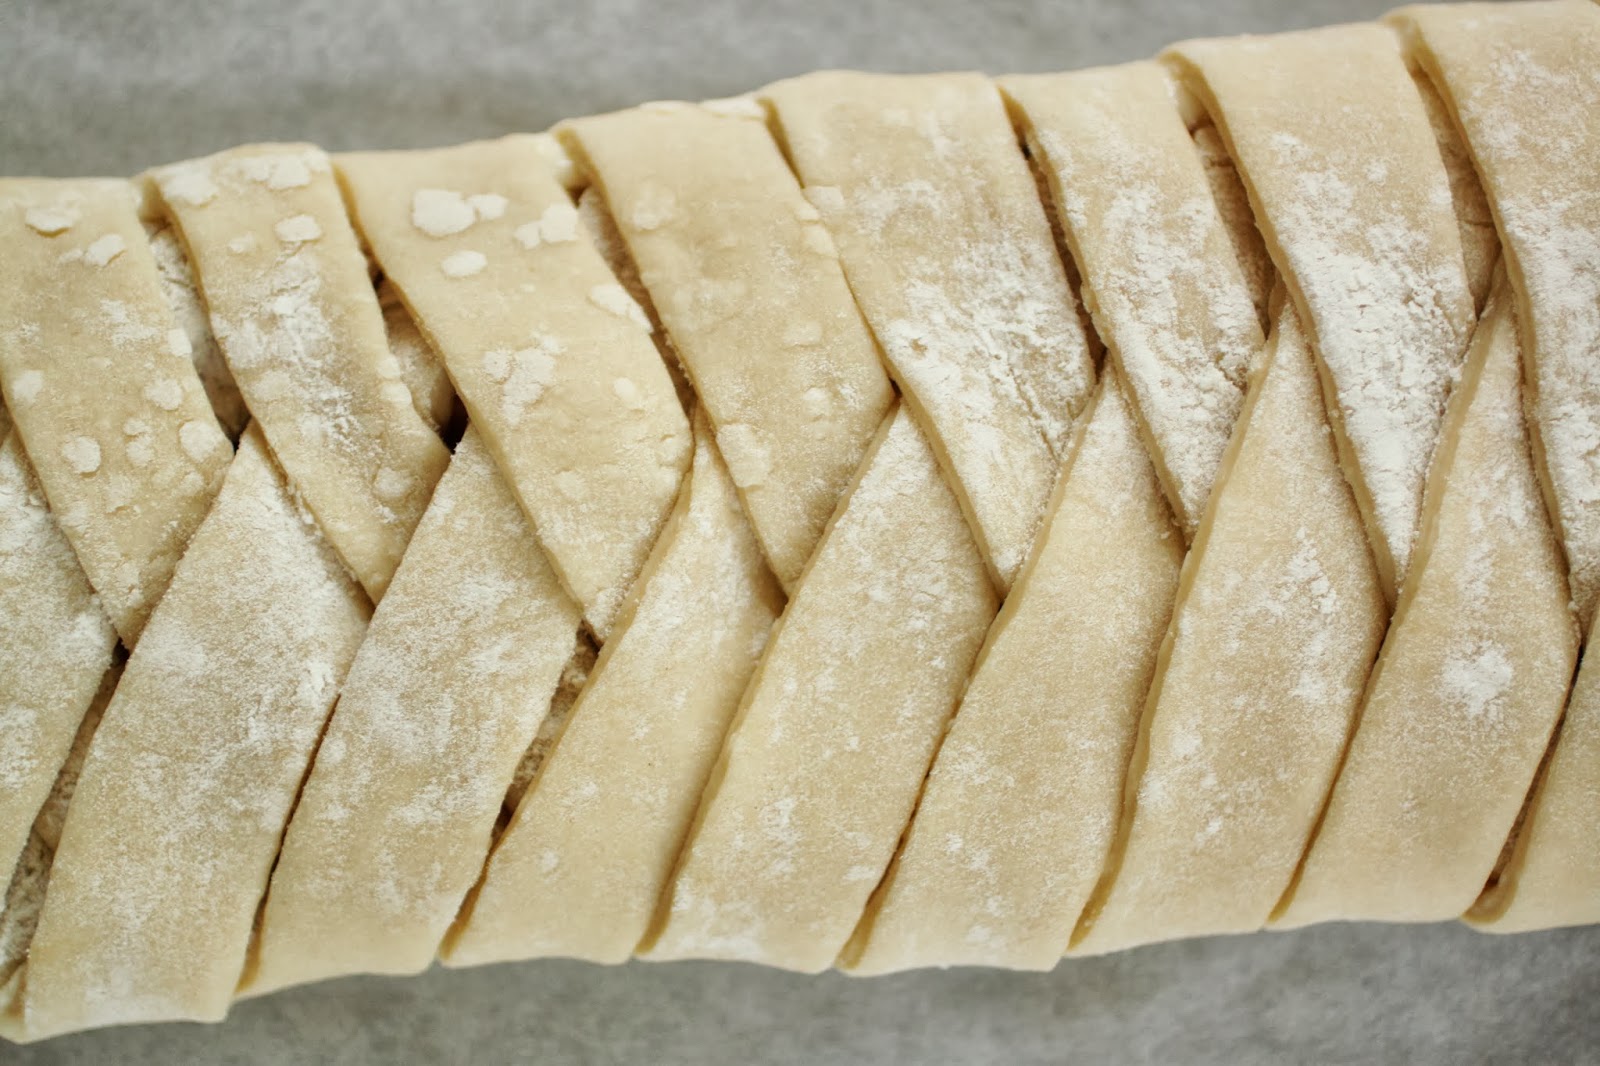
grease a bundt or angel food cake pan with and set aside. punch down dough and place it on the work surface.  cut it into two equal portions.  roll each portion into a long snake, about 18″ long and about 1″ in diameter.   cut dough into 1″ sections and roll each piece into a ball.  in a small bowl, mix the dark brown sugar with the remaining 1 1/2 teaspoons of cinnamon.  melt the remaining 4 tablespoons of butter in a bowl.  set up an assembly line by placing the bowls of cinnamon sugar and butter next to each other.  dip each piece in butter, then coat it with cinnamon sugar.  place each piece in the pan so that the pan is filled evenly.  sprinkle any leftover butter and cinnamon sugar over the top of the dough in the pan. cover pan with plastic wrap and either refrigerate it over night or let it rise until double, about one hour.

preheat the oven to 350.  bake until the top is nicely browned and the internal temperature of a section of dough (try to avoid the sugary parts) reaches about 200 degrees.  allow it to cool in the pan for about 15 minutes, turn it out onto a serving platter and allow it to cool for another 20 minutes or so.  cut into wedges or pull it apart.  keep in mind that when hot out of the oven, the sugary parts are like molten lava!  let it cool before trying to eat it!!!

double chocolate cookies; tuesdays with dorie

this weeks recipe for tuesdays with dorie was a simple one.  actually, that was exactly what i needed, a simple cookie recipe.  a chocolate cookie can do many things and after the craziness of travelling for a week, chocolate cookies were just what i needed.  to make the recipe, pick up a copy of baking with julia by dorie greenspan.

 the recipe uses a pound of chocolate.  twelve ounces of bittersweet chocolate and four ounces of unsweetened chocolate.  the recipe instructs you to melt half of the bittersweet chocolate with the unsweetened chocolate.  the other six ounces of bittersweet chocolate is cut into chunks and stirred into the batter.  since i think there can never be too much chocolate, i went ahead and added an additional six ounces of white chocolate chunks with the bittersweet chunks.

the recipe calls for chilling the dough for at least three hours if not longer.  but before you try to scoop them out, let them soften a bit; chilling makes the dough about as hard as cement.  i used a portion scoop, size 40 which will have a purple handle if you buy it from a restaurant supply.  my yield was almost 4 dozen after adding the extra chocolate.  the recipe states that you will get 24 large cookies and they are “spreaders” but i did not think they spread much at all.  the baking time was accurate; don’t go over the 12 minutes or they will not be fudgy.

these cookies are somewhere between a cookie and a brownie making this recipe  worth the pound of chocolate it calls for.  but don’t let that stop you from adding extra chunks-white, milk or dark.  they are best when warm so don’t hesitate to reheat the leftovers in the oven for a minute or two.  be warned, they are addictive.

generally, i ask people to buy a book but if that is not an option, consider borrowing it from a library or a friend.  however, many of these recipes are up online already and you can find it by searching for “double chocolate cookies baking with julia”.

pumpernickel loaves: tuesdays with dorie

this weeks challenge was pumpernickel loaves.  the recipe was contributed to the pbs series and the book by lauren groveman and you can find it on her website by following this link.  rye and pumpernickel bread have always been a favorite of mine.  actually, to be honest, i am a huge fan of toast and rye and pumpernickel breads are my favorite breads to toast.  i could literally eat an entire loaf, sliced and toasted and slathered with butter.

the recipe was a bit different from the usual pumpernickel recipes.  sure it called for rye flour and caraway seeds.  it wouldn’t be pumpernickel without them.  but this recipe also called for yogurt, espresso powder, unsweetened chocolate and prune lekvar.  because i was curious to try the combination, i followed the ingredient list closely with one exception; i did not have any prune lekvar and did not have time to make it so i used what i had, pumpkin butter.  funny thing is, it was unnoticeable!  i plan to make this bread again but may just use plain pumpkin puree.  to see what the other bakers came up with, visit the tuesdays with dorie page.

the ingredients were not the only unusual feature of the recipe.  once the loaves are shaped, the recipe calls for suspending them in towel slings.

not being a big caraway fan, i did not put any seeds on the outside of the loaf.  it just got the egg white glaze to give it a shine.

now that’s some fine bread with butter!
time to step away from the table…
buy a copy of the book, baking with julia by dorie greenspan and bake along with us!

pear upside-down cake; fall has arrived


with the kids out of the house, darry and i frequently do our grocery shopping at trader joe’s.  now that it is just the two of us, we can shop for the foods we prefer without having to worry about the kids not liking the dishes we cook.  a recent trip to the store had me stocking up on fall favorites.  a bag of pears made the trip home with me.  ripe, juicy pears are a favorite of mine.  unfortunately, i forgot about them and when i went to grab one, i saw that i had 4 very ripe pears.  knowing that i would not be able to eat them all, i decided to bake a cake and share it with my fellow garden volunteers.

upside down cakes are a favorite of mine.  this recipe actually appears in my second cookbook, desserts from the famous loveless cafe.  however, i used peaches in the book.  guess what, pears will work just as nicely, so will apples!  honestly, i am thinking that plums as well as pecan or walnut halves would also work nicely.  the most unusual fact about this cake, it is a whipped cream cake.  that means rather than use soft butter, you actually whip heavy cream with sugar to soft peaks.  eggs and vanilla are added to this and finally, self rising flour is sifted over the cake and folded in.  so simple, so tasty.  for those of you not in the south, you can make this with cake flour if you cannot find traditional self rising flour.  just use an equal portion of cake flour and add 1 tablespoon of baking powder and a 1/4 teaspoon of salt.

to make the cake, follow this link to the cafe’s website.  the full recipe is posted and available to you.  believe it or not, i followed the recipe making only one small change.  for the caramel that is cooked in the skillet, i used light brown sugar rather than the granulated sugar called for. my decision was based on the thought that brown sugar would add a little more flavor and it did.

pumpkin cornbread; pair it with chili

the change in season took me by surprise.  funny how that happens.  one day it is warm, actually a bit hot and then in the blink of an eye, it is cold and frosty.  chili seemed like the perfect solution for a dreary fall day.  in our house, it isn’t a proper bowl of chili unless there is a pan of cornbread on the table.

lurking in the fridge was an open container of pumpkin puree leftover from something i baked.  the idea of adding pumpkin to the cornbread recipe seemed natural to me.  it would add a little flavor, a little moisture and of course, some additional nutrition and fiber.  what i wasn’t expecting, that gorgeous golden color.  especially since i only added 1/3 cup of the puree to the recipe.

and, dinner is served…
to make the cornbread, i turned to my favorite cornbread recipe, it can be found on the albers website by following this link.  although i followed the recipe, i did make a few changes.  first, i reduced the sugar to 3 tablespoons because i did not want it to be sweet.  then i substituted and equal portion of buttermilk for the milk and finally, i added 1/3 cup of pumpkin puree by whisking it with the other wet ingredients.  by baking it in a 9″ round pan rather than the 8″ square called for in the recipe and the addition of the pumpkin did increase the baking time a bit, i had to check it for doneness by inserting a cake tester in the center.  it came out clean around the 30 minute mark in my oven.  and just a note for the leftovers, cornbread makes nice toast!  i cut wedges in half, horizontally and toasted them in the broiler.  they were tasty with a little butter.

banana oat bran muffins

every now and then, i like to bake up a batch of oat bran muffins.  despite the whole grain and fiber, these are pretty tasty.  the recipe uses a fruit puree such as banana or pumpkin to add flavor and moisture.  it also contains honey and dried fruit so there is no shortage of flavor.  these mix up quickly, but once baked, they hold well for a couple of days and can be frozen.  if you decide to keep a few in the freezer, wrap them individually in plastic and place them in a freezer bag.  to thaw, allow them to sit out at room temperature in the plastic wrap and then pop them in a hot oven for 5 minutes.

this is one of those recipes that can be manipulated pretty easily.  if you are not a fan of oat bran, use wheat bran instead.  the fruit puree can be easily swapped so don’t hesitate to try using apple sauce, pear butter so go ahead, go crazy and use the left over sweet potatoes you baked for dinner last night, i won’t be offended.  while i used currants in the batch i baked, there is nothing stopping you from using dried cranberries or peaches or any other dried fruit for that matter.  size doesn’t really matter here, bake them in paper lined muffin cups in whatever size pan you prefer, just keep in mind that the baking time will depend on the size so check them with a toothpick to see if they are done.

banana oat bran muffins
makes 12-16 standard size muffins
1 cup + 2 tablespoons of oat bran
3/4 cup whole wheat flour
1/4 cup sugar
1 teaspoon baking soda
1 teaspoon pumpkin pie spice (or cinnamon)
2 tablespoons vegetable oil
1 egg 
1/2 cup buttermilk
3/4 cup mashed bananas
1/3 cup wildflower honey
1/3 cup dried fruit, chopped 
preheat the oven to 375.  line the muffin pans with paper cups and set aside.  in a mixing bowl, combine the oat bran, whole wheat flour, sugar, baking soda and pumpkin pie spice.  whisk them to combine.  in a small bowl, whisk together the oil with the egg, buttermilk, banana and honey.  pour the wet mixture into the bowl of dry ingredients along with the dried fruit and gently fold it all together until completely mixed.  using a scoop or a large spoon, divide the batter among the muffin pans filling the cups about 3/4 full.  bake until the top springs back when lightly touched or a toothpick comes out clean, about 20 minutes for standard size muffins.  allow the muffins to cool in the pan for about 5-10 minutes and then turn them out onto a rack to prevent them from getting soggy on the bottom.  

losing my marbles

you see marbles, i see pie weights.  rather than buy fancy pants pie weights made of aluminum or pottery, i use my marbles.  beans and rice will also work but the thought of using them once and throwing them away seems wasteful to me.  but then, saving them for additional uses seems stupid since i bake pies at home very infrequently.  they also get stinky after repeated use and that makes it seem even more impractical to save them.  so, i use my marbles.  next time you need pie weights, use your marbles-they can stand the heat, you can wash them if they get greasy and they won’t get stinky!

how am i losing my marbles?  they bounce!  inevitably, a few miss the pie plate and roll off the counter top.  they bounce around the kitchen before disappearing down the basement stairs to never be seen again…

chocolate cake with peanut butter frosting: the authentic original

alix came home for her birthday.  her 24th birthday.   am i really that old, already?  when i asked what kind of cake she wanted, her quick response was “chocolate.”  that was all i needed to hear, i knew what cake i was making, it has become a signature of sorts.  it started way back when, in our bakery, it was the cake i made for every birthday, employees and family members alike.  chocolate cake, black chocolate cake to be exact with peanut butter frosting and a drizzle of ganache over the top.

when i wrote my first book, the now out of print “Sky High Irresistible Triple Layer Cakes,” including this cake was a given.  how could i not?  little did i know how popular this cake would become.  when the book came out, deb perlman of the blog smitten kitchen posted this recipe on her website.  in the years since, that blog post has had millions of hits, literally.  unfortunately, people often think she is the person responsible for the recipe.  many times since, i have found the cake on reddit.com with links leading back to smitten kitchen.  sadly, the sales for that book never saw the level of success that her blog post did and the publisher chose to let it go out of print.

beautiful isn’t it?  tasty too, although i only had one slice.  alix took the leftovers back to atlanta with her.  that was probably the best thing-i could have eaten the whole cake myself!

in the hope of gaining some of the credit for the cake recipes, i am actually posting them here!  if you want to help out cookbook writers, please do not post their recipes without permission-even if you do give them credit, you still shouldn’t post them without permission (something i have done in the past and make every effort not to do now).  whenever possible, link to the authors own site and the recipe if it is posted.  most importantly, buy the book!  if you cannot buy it, borrow it from a library or a friend.

sour cream-chocolate cake with peanut butter frosting and chocolate-peanut butter glaze

makes an 8-inch triple-layer cake serving 12 to 16

the cake
2 cups all purpose flour
2 1/2 cups sugar
3/4 cup unsweetened cocoa powder, preferably dutch process
2 teaspoons baking soda
1 teaspoon salt
1 cup vegetable oil-neutral in flavor (canola, soybean)
1 cup sour cream
1 1/2 cups water
2 tablespoons distilled white vinegar
1 teaspoon vanilla extract
2 large eggs
peanut butter frosting, recipe follows
chocolate-peanut butter glaze, recipe follows
garnish-chopped peanut brittle or chopped peanuts

preheat the oven to 350.  grease the sides and bottoms of 3 (8″) pans.  line the bottom of each pan with parchment and grease the paper as well

sift the flour, sugar, cocoa powder, baking soda and salt into a large bowl.  whisk to combine them.  add the oil and sour cream and whisk it to blend.  gradually beat in the water.  blend in the vinegar and vanilla.  whisk in the eggs and beat until well blended.  scrape down the sides of the bowl and be sure the batter is well mixed.  divide the batter among the pans.

bake for 30-35 minutes, or until a cake tester or toothpick inserted in the center comes out almost clean.  let the cakes cool in the pans for about 20 minutes.  invert onto wire racks, carefully peel off the paper and cool completely.

to frost the cake, place one layer, flat side up, on a cake stand or large plate.  spread 2/3 cup of the peanut butter frosting on evenly over the layer.  repeat with the next layer.  place the last layer on top and frost the top and sides of the cake with the remaining frosting.

to decorate with the chocolate-peanut butter glaze, put the cake on a large baking sheet to catch the drips.  simply pour the glaze over the top of the cake, and using an offset spatula, spread it evenly over the top just to the edges so that it runs down the sides of the cake in long drips.  refrigerate, uncovered,  at least 30 minutes to allow the glaze and frosting to set.  be sure to serve it as close as possible to room temp, remove it from the fridge before serving and allow it to sit out for about an hour.  decorate with the peanut brittle right before serving.

the frosting-makes about 5 cups
10 ounces cream cheese, at room temp
4 ounces unsalted butter, at room temp
5 cups confectioners sugar, sift after measuring if lumpy
2/3 cup smooth peanut butter

in a large bowl with an electric mixer, beat the cream cheese and butter until light and fluffy.  gradually add the confectioners sugar, 1 cup at a time, mixing thoroughly after each addition and scraping down the sides of the bowl often.  continue to beat on medium speed until light and fluffy, 3 to 4 minutes.

add the peanut butter and beat until thoroughly blended.

the glaze-makes about 1 1/2 cups
8 ounces semisweet chocolate, chopped coarsely
3 tablespoons smooth peanut butter
2 tablespoons light corn syrup
1/2 cup half-and-half

in the top of a double boiler or a bowl set over simmering water, combine the chocolate, peanut butter and corn syrup.  heat, whisking often, until the chocolate is melted and the mixture is smooth.

remove from the heat and whisk in the half-and-half, beating until smooth.  use while still warm.

a few notes:
i have found that a really good natural cocoa will work just fine here as well.  dutch process cocoa makes a blacker cake.  use what you have or can find.

cream cheese-i never use the name brand, the one named after the city, it makes a frosting that is almost too soft and runny.  stick to the store brand-it will make a frosting with a consistency that is easier to work with.

peanut butter- i always use a homogenized peanut butter to prevent the oil from separating.  i have never tried one of the natural, stir it in types of peanut butter.  if you use it, i cannot say how it will work for the frosting, the glaze should be okay.

find the kindle edition on amazon with this link.

Follow my blog with Bloglovin

danish braid; tuesdays with dorie

 
this weeks challenge called for making a batch of danish dough, something my current schedule did not have time to accommodate.  hard to believe but that actually worked in my favor.  way back when, in january, i was testing recipes for a project i am working on.  one of the recipes was for a danish dough.  after testing the recipe, i put half a batch in my freezer to see how it would work out after being frozen. needless to say, the dough will tolerate freezing but not being frozen for 9 months!  my guess is that 3 months is the maximum time it could be frozen and thawed and still rise properly.  while it was past its prime, it was still pretty good, just a little denser than i would prefer.

to bake a braid like the tuesdays of dorie bakers, buy a copy of baking with julia or visit the contributing baker’s, beatrice ojakangas, contribution to the woman today website.  to see how the tuesdays with dorie bakers did with this challenge, visit the website.

 since i was already breaking the rules by not making the dough-let’s just call this my effort to clean the freezer, i decided to wing it completely.  for the filling, i used a sweet red apple, a gala apple to be precise.  after peeling and slicing it, i mixed it with a little dark brown sugar, some spice and a little flour.  to complete it, i sweetened a little cream cheese and added an egg yolk to it and used that as a base for the apple filling.

 forming a braid is really simple.  the most time you will spend is marking out the dough and making the cuts.  it is really important to have a flap at the bottom and the top.  these are folded in over the filling to help keep it from oozing out during the rising and the baking.  then, going from left to right, fold a strip in to the opposite side to give the illusion of braiding the dough.

 the cream cheese base and the spiced apples fill the center of the dough.
 the completed braid is ready for rising
 just out of the oven

so, if you need any assistance, call me.  i will be in the kitchen breaking rules and not following directions and misbehaving in general.  this all has consequences-usually of the dessert kind…

52 pies in 52 weeks; a round up of sorts

it has been nearly two years since i finished the 52 pies in 52 weeks challenge.  hard to believe-time flies!  even so, if you recall, i invited readers to join in and bake the pies with me and send photos of their pie so that i could post them.  very few people sent me photos and i am not sure that many people even baked pies.   so imagine my surprise when i received an email with a photo of a pie!

this is the maple-pecan butternut squash pie from week #10 as baked by aimee.  to see the full recipe, follow this link.  and remember, if you bake one, send me the photo-this is proof that i will post it!