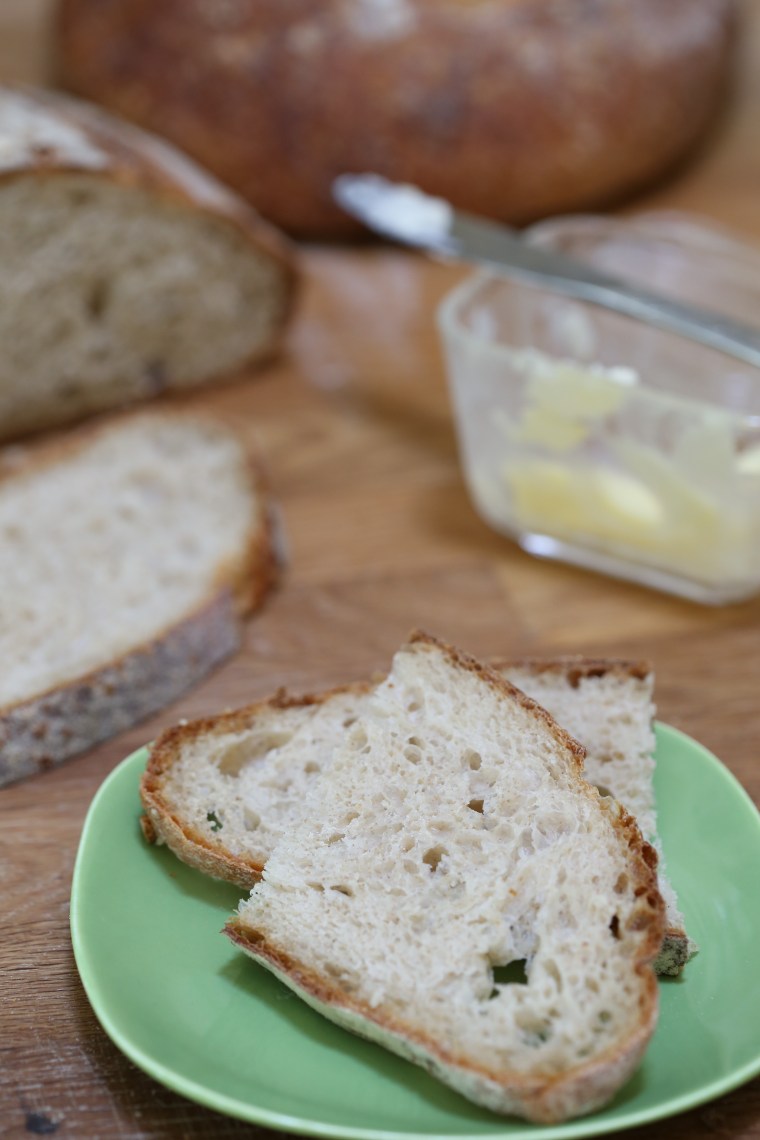
 On my last birthday, my husband gave me a copy of the Tartine Bread book. We were out on a rainy Saturday, wandering through the shops in Merchant Square and I had a chance to look through a copy of the book. The cover shot, the dark loaf with the blistered crust…Yes, it was bread lust at first glance. However, I suspect my husband was also lusting over that loaf of bread and now that I have made the Country Bread, I am sure of it!
Like so many of the popular books on bread available, this one relies strictly on techniques created by the author and many aspects of the methods used seem at odds with traditional bread making. Most notably, the lack of extensive kneading to build structure and instead, the use of an autolyse so the flour can expand and absorb the water and a longer bulk rising to allow the gluten to develop slowly. Now, to be perfectly honest, the first section of the book consists of only one actual bread recipe with sub-recipes that rely on the basic recipe with various additions, but to really understand the technique, you must master the Country Bread. The entire collection of bread recipes in the book rely on the methods outlined in that very first recipe!
What I love most about the Country Bread recipe, simplicity. Especially the equipment list. First of all, you must have a scale that measures in grams. The rest of the list includes a thermometer, bowl, plastic bowl scraper, a bench knife and an oven proof dutch oven or covered casserole dish. The recipe is worked in percentages, called baker’s percentages and the weights are all in grams. The good news is that weighing it all out in grams guarantees consistency.
 The only step I did not follow was creating a starter to leaven the bread because I have a starter that I grew from grapes that were growing in the Demonstration Garden that I worked in when I lived in Tennessee. The starter has been in use since 2009 and when we moved in 2014, it was one of the things I was most worried about losing! We had a 12 hour drive, stopped multiple times for the dog and for the night in the middle of that drive, the entire time the starter was tucked in a cooler with some ice. It made the trip like a champ and nearly 2 years later, I am still using it.
The starter is fed and allowed to develop overnight. If you read the recipe, you will be given many bits of information to help you along and I find that very helpful when using a new recipe. The instructions tell you to measure out the warm water, add the starter to it, and if it floats, it is fully developed and ready to go. As you can see in the photo above, my starter is floating in the water.
 There are two schools of thought on adding salt to flour dough. One says add it to the dough as you add the flour, one calls for holding it back and adding it later because it can affect the structure of the dough. At Tartine, they hold the salt and a small amount of water back and add them after the initial mixing and resting period. The salt is sprinkled over the dough, water is poured on and using your hand, you squeeze and squish and work the dough onto itself to mix it all in.
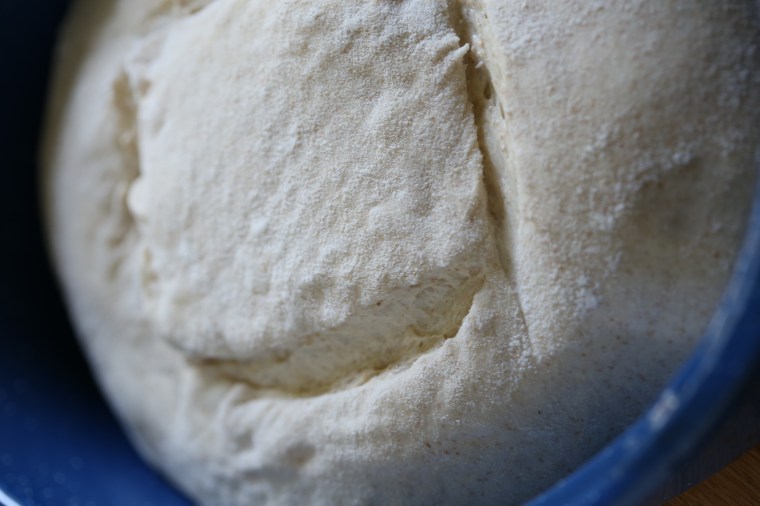
 As the dough develops during the bulk fermentation, bubbles form around the sides of the bowl. Rather than dumping it onto a table and forcibly kneading it, the dough is “turned” in the bowl every thirty minutes for three hours.
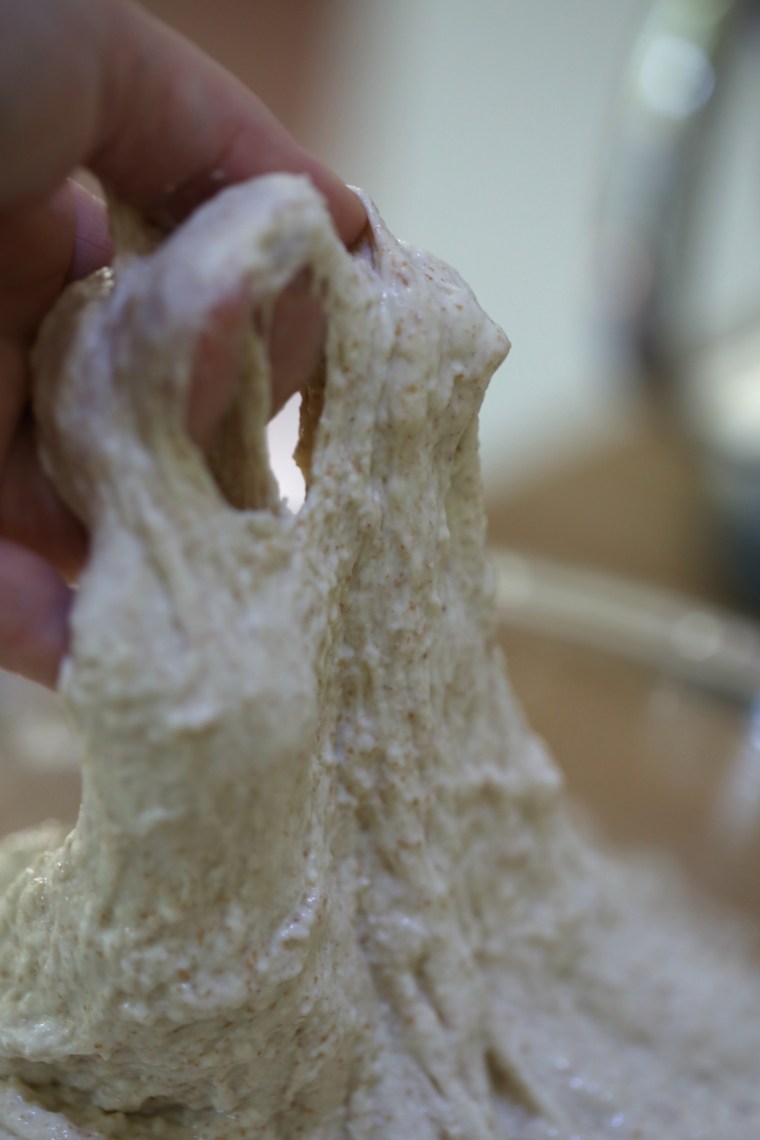
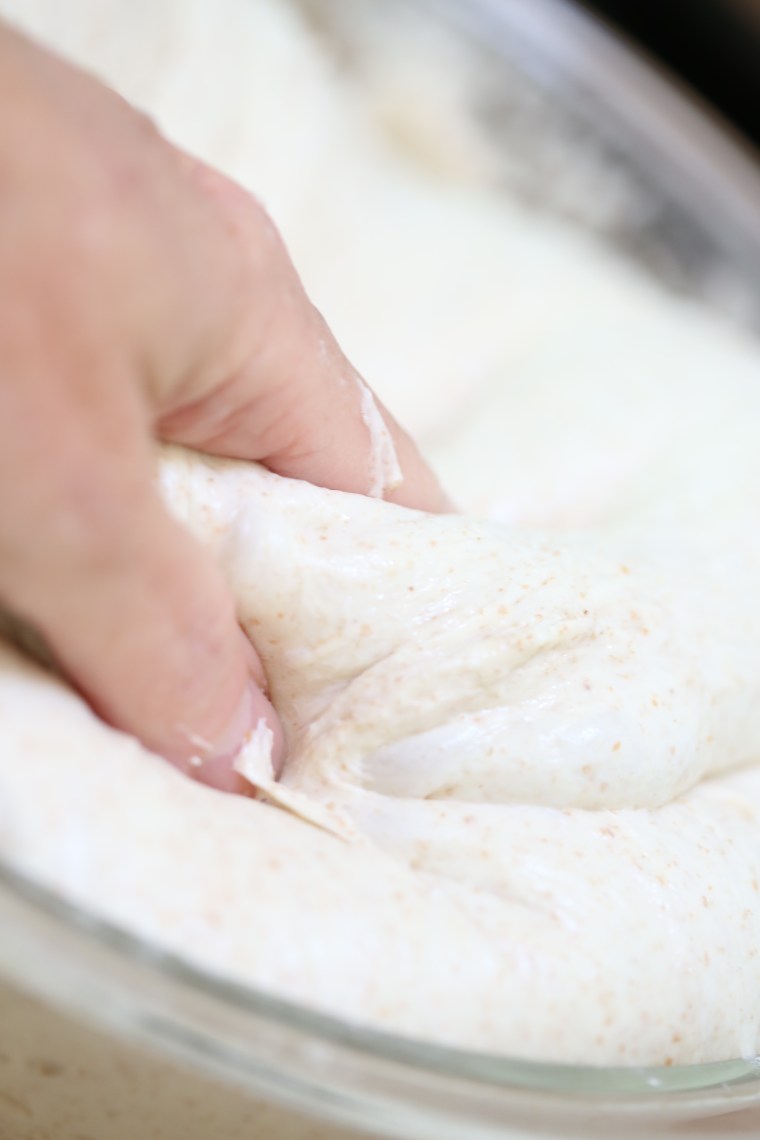 Using a wet hand, the dough is pulled up from the bottom of the bowl and stretched across itself, turning it. This is done 2-3 times each half hour, each time is called a “turn” and it is all the kneading the dough will get.
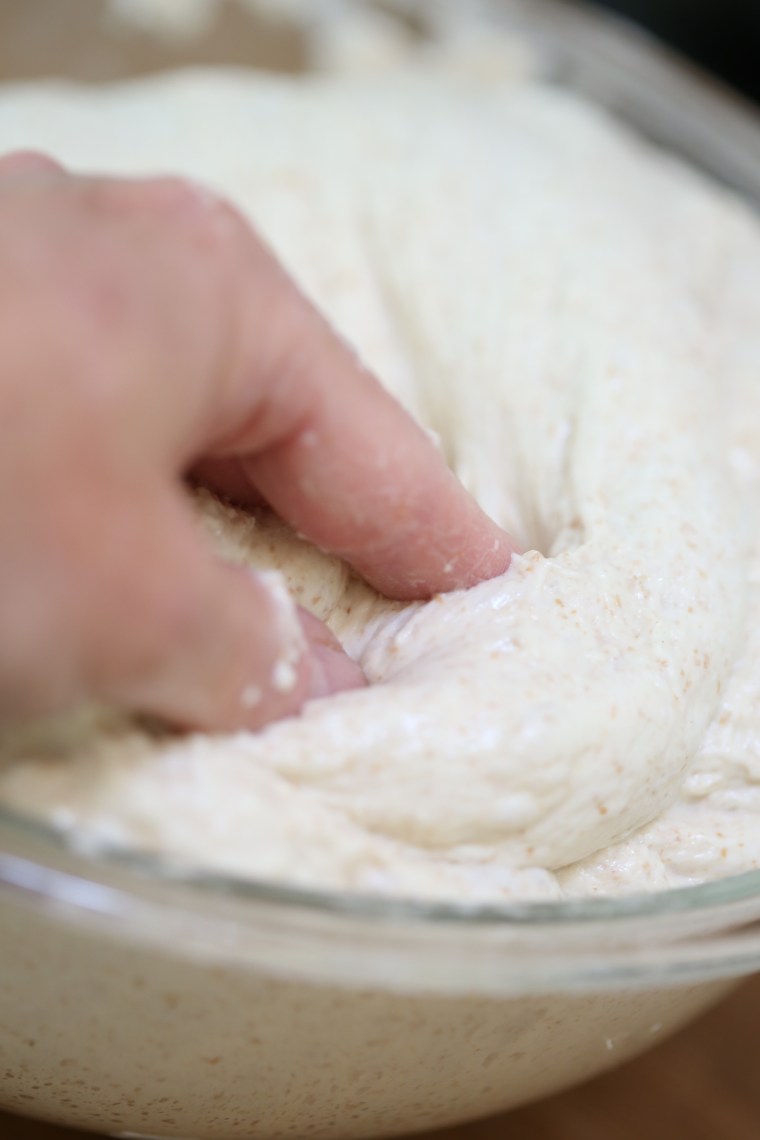 As the dough develops and rises, it gets softer and lighter and you need to take care not to press the air out in the process of turning the dough.
 When it is ready, dumped onto a table and cut in half. A minimal amount of flour is used to help with shaping. The folding and shaping is probably the most complicated step and it is completed with one hand and a bench knife. Lifting and stretching the dough across it’s center, it is carefully shaped so that it is not deflated.
 After shaping, it is allowed to rise in a cloth lined bowl which has been floured.
 The loaves rise for about 3 hours and because most of us do not have two dutch ovens or even the ability to bake with two of them simultaneously, you will want to hold one back by placing it in the fridge for a while.
 Once the oven and the dutch oven are heated properly, flour the surface of the dough (do not forget this step-it will not come out of the pan if you do!) and turn it into the hot pan. Using a lame or a very sharp blade, score the dough, cover it and place it in the oven. Twenty minutes covered, twenty minutes uncovered and it will be ready to take from the oven.


 Beautifully colored, perfectly blistered. Let it cool completely before cutting into the loaf.

To see the recipe, please consider purchasing a copy of the book Tartine or at the very least, borrowing it from a library. There are many great videos of the author as well as other bakers making bread using the technique described in the book and they are worth watching so consider looking them up. The Country Bread recipe is available, reprinted with permission on the New York Times website.
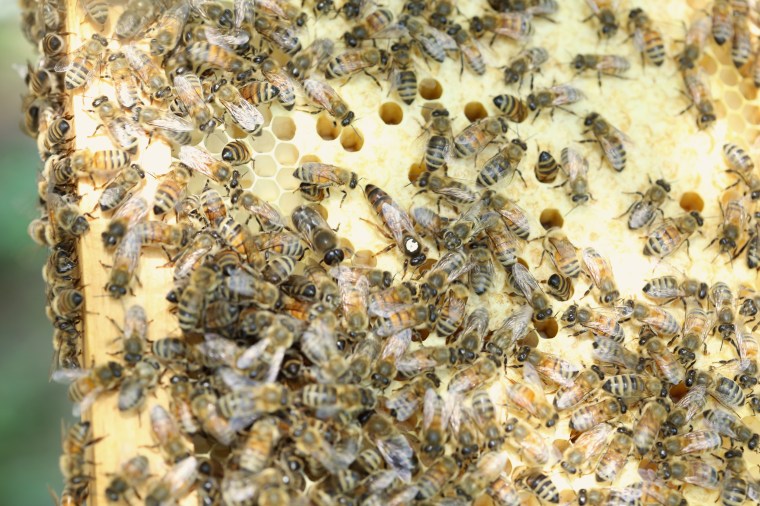 All hail the Queen. Can you see her? Center of the photo with the large yellow dot, that is our lady of the hive. We went into the hive yesterday to take a look, and there she was, at the top of the hive on the outside frame-not a good thing. What that means is that she is running out of room to lay eggs so lucky for her, we were prepared and had another box of frames ready to go.
 The hive is fairly full, so full that they were building comb in the feeder.
 Darry cleaned it all out and refilled it with sugar syrup.
 The hive has really increased in number, look at how busy they are!
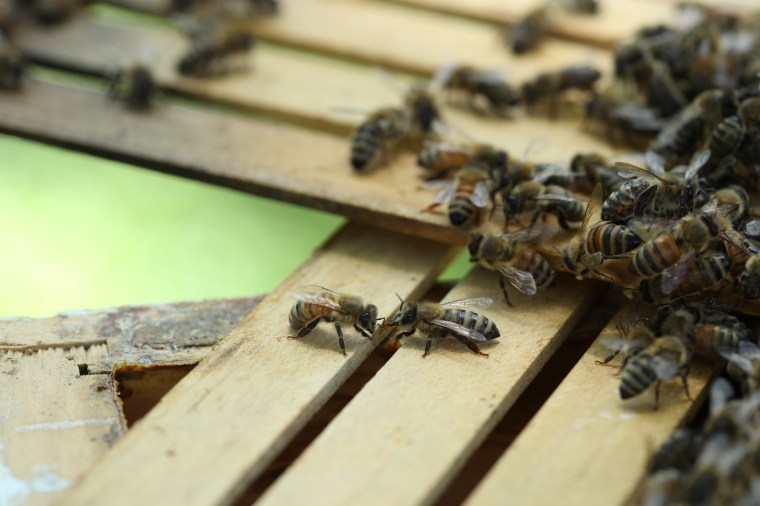
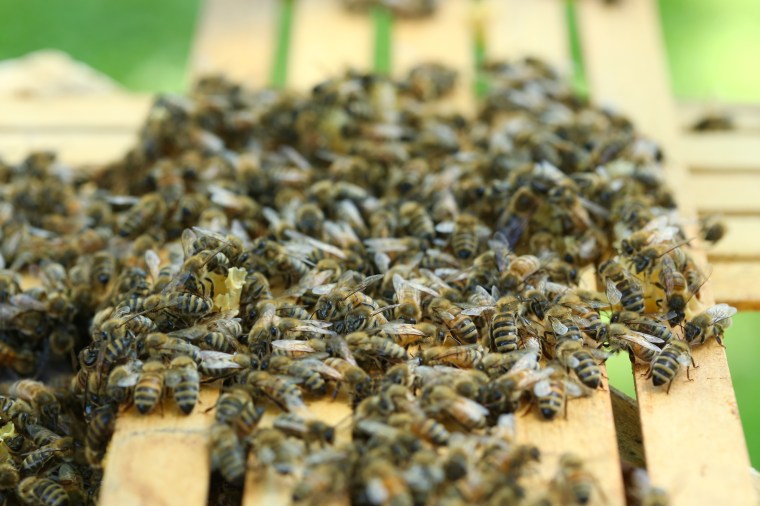 To clean out the feeder, Darry took out the floating bars, the bees were pretty calm about it and just gathered on the slats while he worked and I took photos.
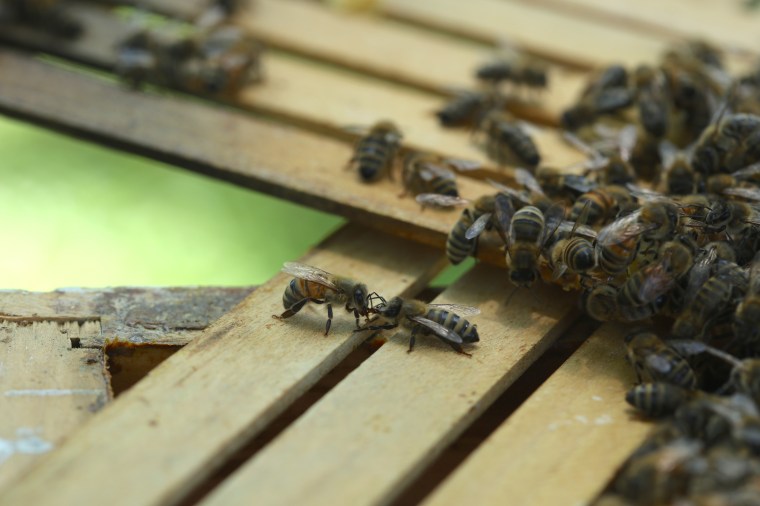 Drones cannot feed themselves when they first emerge from! The drone (on the left) is being fed by a worker bee (on the right) and he will start feeding himself by the time he is a week old. To learn more about the roles of bees in the hive, read this article by the Mid-Atlantic Apiculture Research and Extension Consortium.
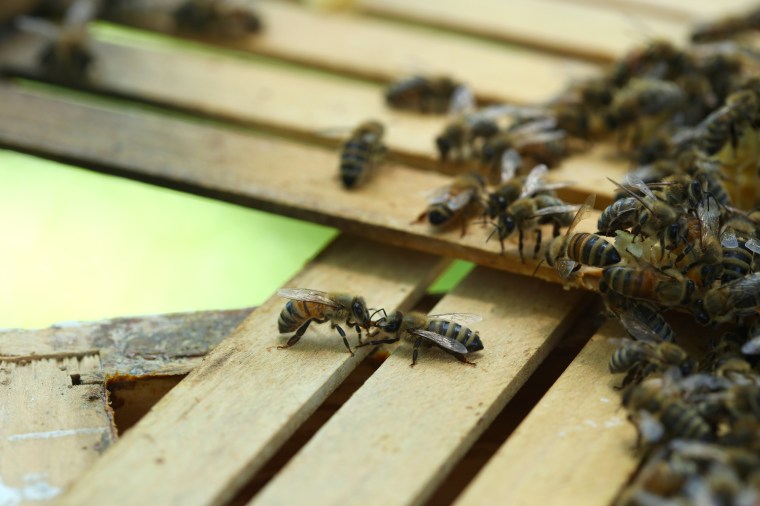
 Check back for more photos, I will post more next time we go in for a look!
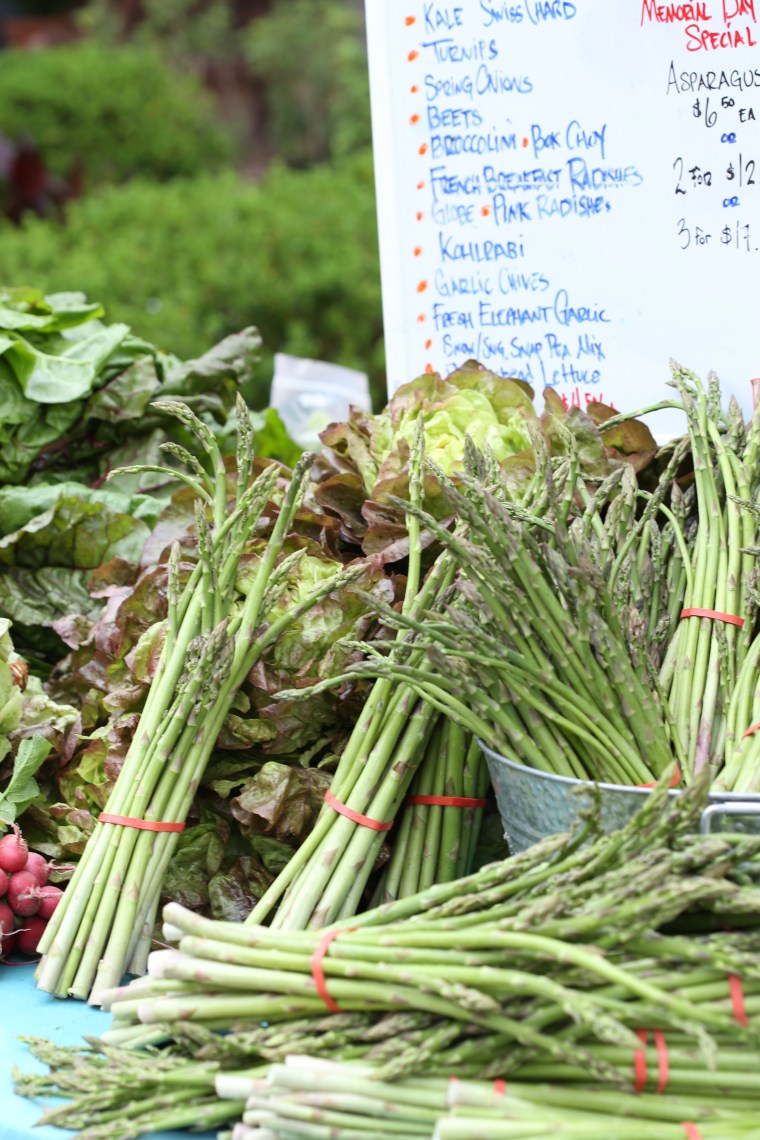 As spring comes to an end, our garden is beginning to provide us with more than we can eat. Because we have more freshly picked vegetables than we can eat, we very rarely go to the farmers market to shop. This past weekend, we ventured down to Merchant’s Square and took a look at what the farmers had to offer.
 There was no shortage of plants either; we came home with a Joe Pye Weed for our new bed in the front garden.
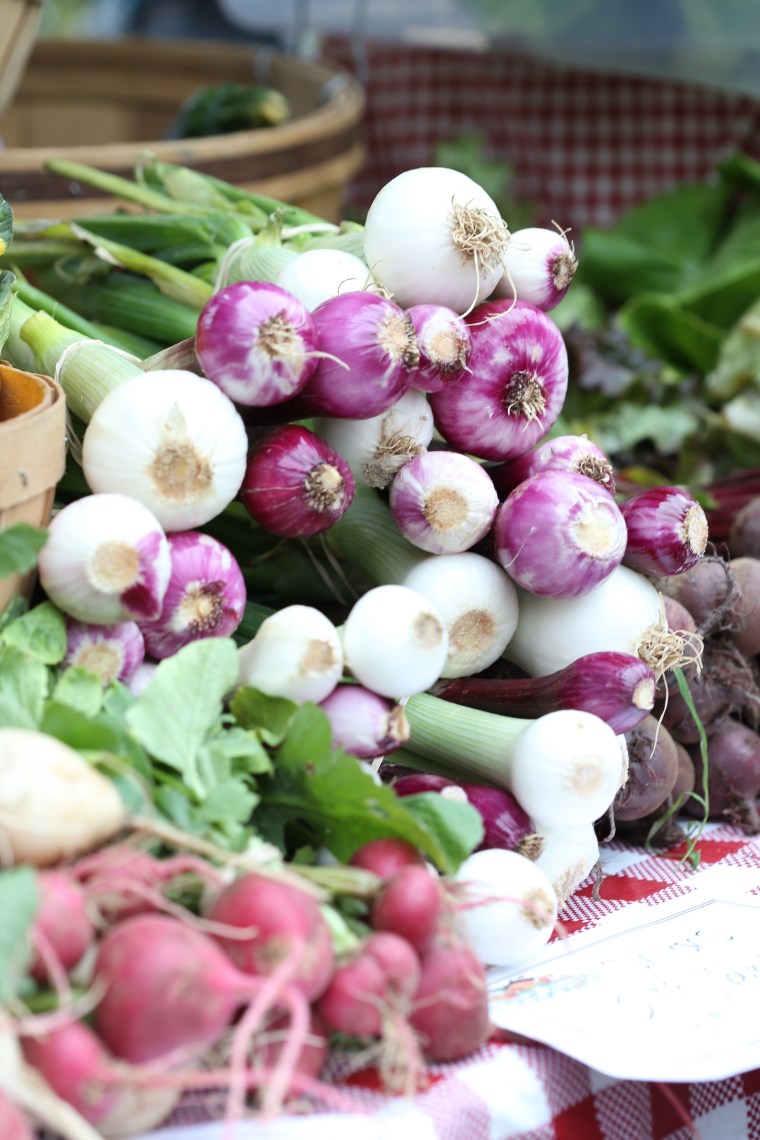 Onions and radishes were also plentiful.
 Since I discovered roasted radishes, I very rarely eat them raw but we did make some wonderful kimchi with them. Each week, the market has a core group of vendors that stay the same along with a group that come less frequently. This week, a group of women from the
  A table top spinner being used to spin cotton into yarn.
 It’s all about the tension, keeping it taught creates a fine thread.
 Not everyone uses a wheel to spin, some do it by hand with a drop spinner.
 The color of this yarn is beautiful, it looks fluffy too!
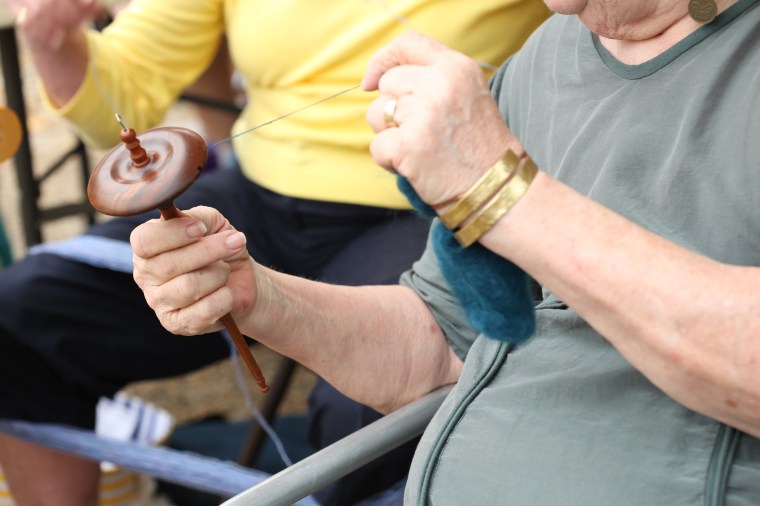 She worked at this yarn the whole time we were there.
 The weavers had Darry’s attention and he asked many questions about the process. This weaver had completed all of the work you see there in a rather short time, in between demonstrating the technique and answering questions. After we asked many questions and chatted with the ladies for a while, we headed back to the car.
 Not far from where we parked, Darry showed me a patch of
  We have a
 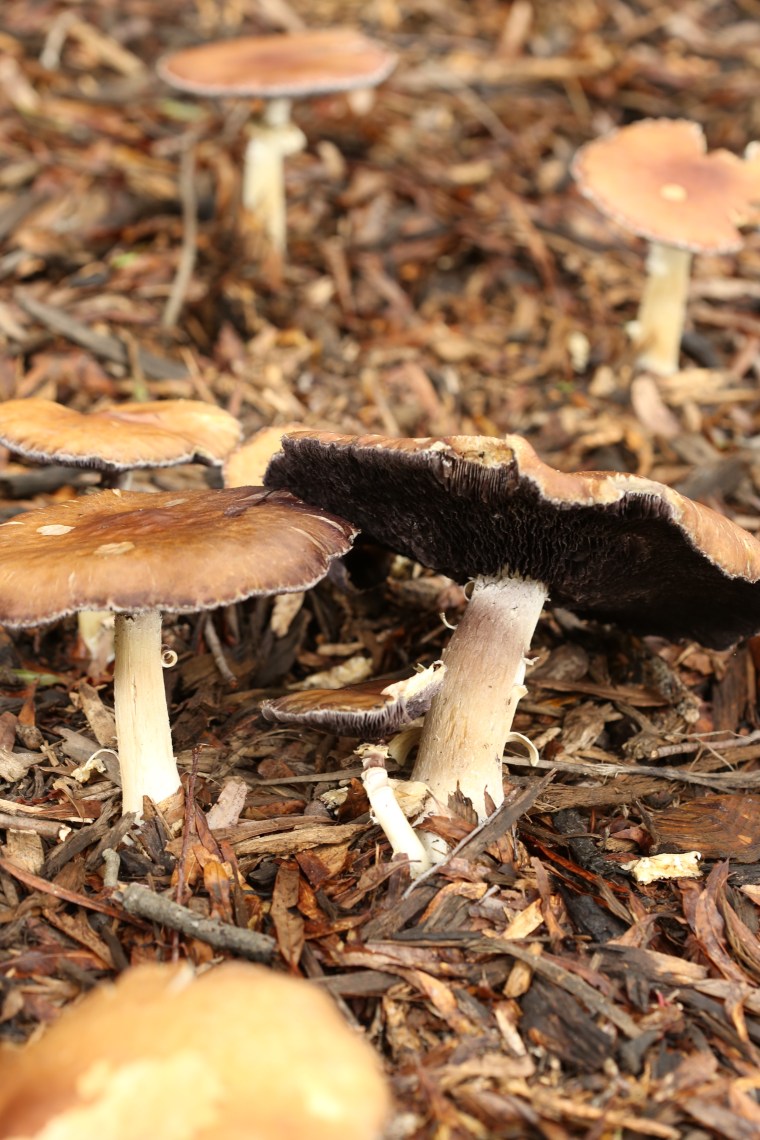 There were dozens of them and since we did not know anything about the mulch they were growing in, we did not pick any.
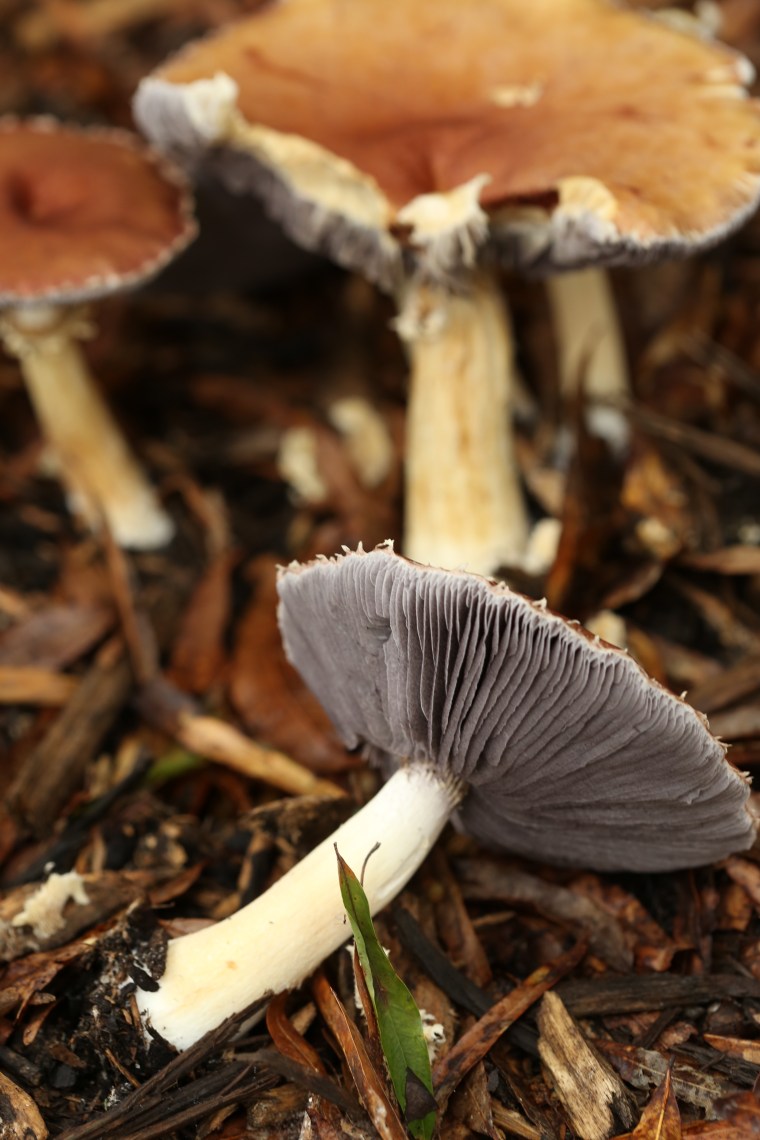 For now, we will have to wait for our patch to grow and multiply.
 Just as there are many types of plants, there are many types of gardens. Some gardeners work with shade, some with flowers or succulents and others with just vegetables. Potagers, cottage gardens, rain gardens and so on. Personally, I have an herb garden, a shade garden and a sunny area planted with perennial flowers in addition to the very large potager style vegetable garden that takes up much of our front yard.
 Gardening with deer is a challenge. Especially when the community you live in is surrounded by state owned forest land. At times, there can be a dozen or more deer grazing around the yard. The landscape provides areas for them to sleep and rest and even when you think the small herd may have left the yard, it is entirely possible that some are still there but out of view. As if the deer weren’t enough, black bears also live in the area and have come through yard and more than one raccoon has raised a litter of kits in a tree near the shed. If you think deer can do damage, mischievous raccoons and squirrels can also cause problems.
 As a result, my mother is a gardener of things. All around the yard, you will find statues and knick-knacks, baskets of silk flowers and plants, gazing balls. She finds things in stores and yard sales and has them all over the yard. Bird houses hang from low branches all over the yard. Every where you look, little pops of color are present and it truly makes for a restful place to spend the afternoon outdoors.
 The deer really do eat just about everything and it was surprising that these little bluets were present since they are usually eaten to the ground.
 A constant theme in the garden is a smiling sunface. Actually, sun and moon faces are all over. That may be partly my fault since I often send them to her!
 In a small hillside drainage pond, frogs rule. They are loud and you can hear them all over the yard. On this afternoon, I saw four of them in the water and on the rocks around it.
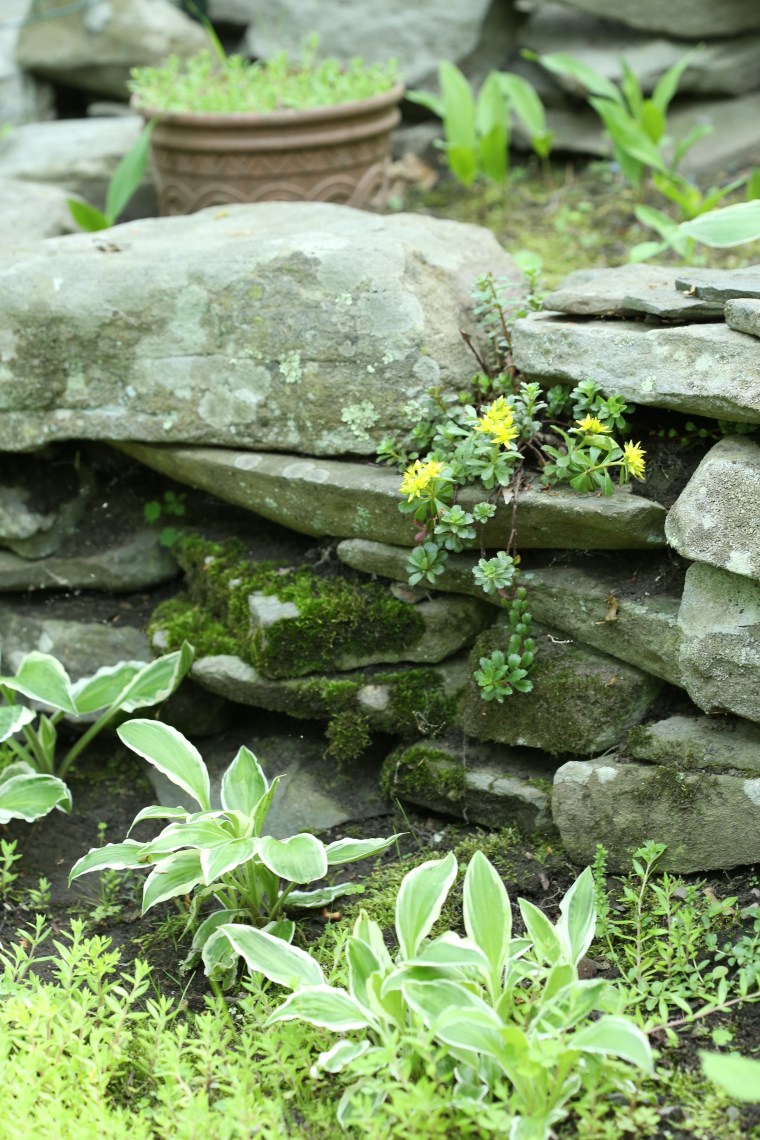 This is one of the few parts of the yard that actually has plants. The previous owners of the yard placed fencing around plants and shrubs to protect them from the deer. It was an unattractive sight and my mother has removed most of it. Although that meant the plants within met a nibbled to the ground death, it greatly improved the appearance of the yard. One place she left the fencing was around the pond and in this small area, she has a few hostas, several sedums and lily of the valley along with statues and knick-knacks.
 Lichens and moss cover all of the rocks in the yard.
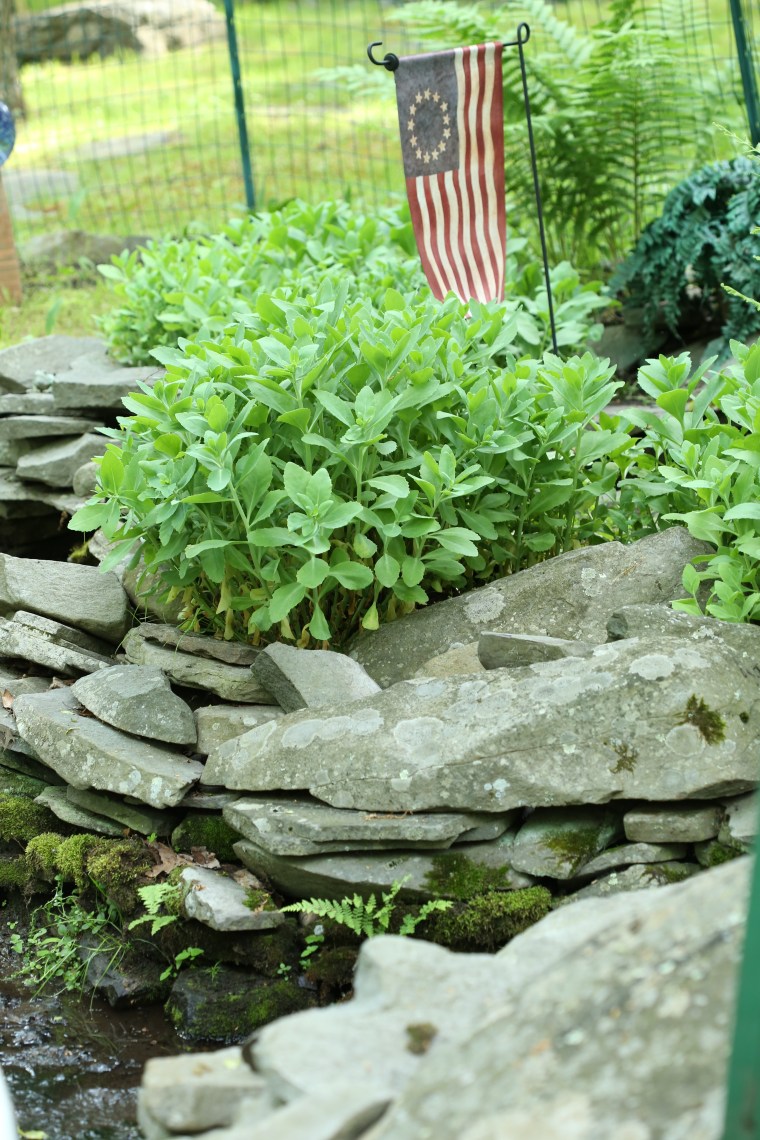 The pond is truly the focal point in this part of the yard. The Autumn Joy sedum has filled in the crevices above and moss and ferns are filling the areas near the water.
 Gazing balls are one of her favorite ways to add color to the yard. She will tell you that they must be colored and not silvered. Twice, my mother has placed silvered gazing balls in the yard and twice, a woodpecker tried to kill his reflection. Both of those gazing balls were shattered.
 You must walk around the yard to see it all because it is everywhere.
 Along the back of the house, she has a simple row of silk plants with pottery and glass accents.
 In that row, tucked in a corner, is what remains of a deer skull. It seems that this buck died on the property and after the vultures cleaned it, my mother placed the skull in her garden along the back of the house. Squirrels continually gnaw on the bones to keep their teeth in shape and have chewed up quite a bit of the skull and antlers.
 Have you ever heard the phrase referring to “bones knitting,” especially if you have broken a bone? It is easy to see why they say that when you look at the fuse line going up the skull. This was one of the most fascinating things to look at in the garden!
 You really must look carefully or you might miss something.
 And look everywhere, despite being colorblind, my mother has a talent for choosing colors so that they either blend in seemlessly or jump out.
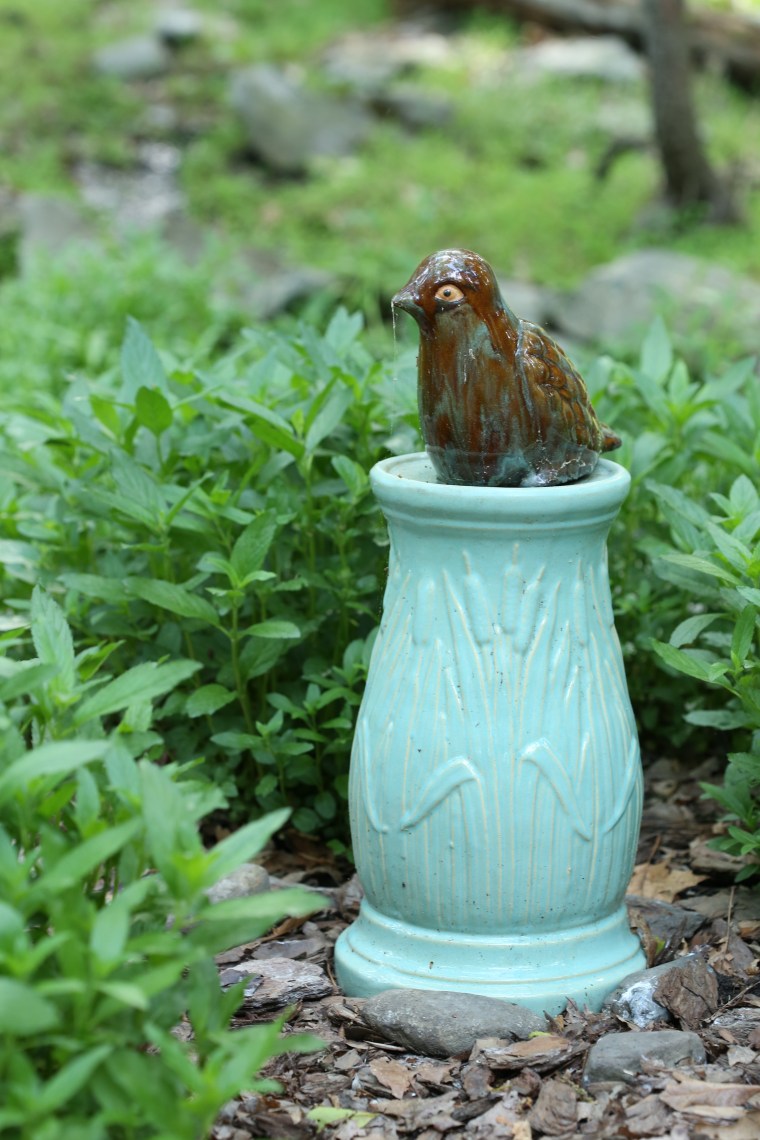 She also has a talent for finding unusual pieces like this pottery base to a planter.
 This old bench is so worn out that she has added a board to hold the objects on it. That gnome looks familiar-he lived in our house in Nashville for years and when we moved, I sent him to live with my mother. One of the girls, I think Alix, painted the tile and yes, the plants are silk. At least the deer won’t eat them! But beware, the raccoons love to move things and you never know what they will do.
 It’s salad season in my garden. Well, specifically, it is lettuce season. Living in the south means that lettuce is a cool weather crop while all the other parts of a salad, like tomatoes or cucumbers, are warm weather crops. Luckily, it is always fresh egg season in the chicken coop!
 There are a dozen different salad greens in the garden right now. In the salad above are Bloomsdale spinach, baby beet greens, parsley, salad bowl leaf lettuce, buttercrunch, forellenschluss and arugula.
 Simply dressed with vinaigrette, garnished with cherry tomatoes, cucumbers and some kalamata olives and served with the paper; my idea of lunch.


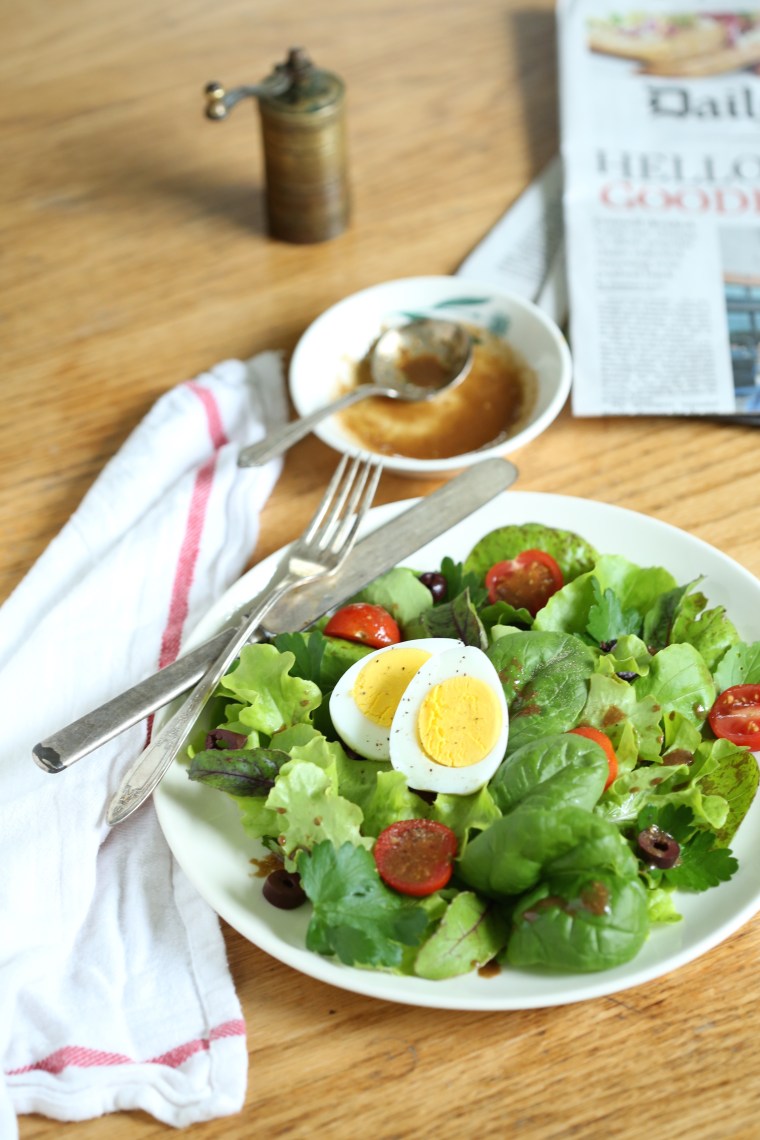 Of course, adding a hard boiled egg from one of our golden laced wyandotte hens and a slice of bread makes it a light, refreshing meal perfect for any season.
 This part of the garden does not get much direct sunlight and once the crape myrtle, which is not in the photo, leafs out completely, it gets little filtered light as well. Last spring I spent a week amending the soil and adding shade tolerant perennials to the bed. This year, nearly all of them came back except for a bleeding heart plant and they have truly filled the space.
 The iris actually gets enough light because it blooms before the crape myrtle creates shade. Also in bloom are azaleas, dianthus and phlox.
 Remind me to tell you the story of the gnome sometime… He is watching over the sunny part of the garden.
 Love the little blossoms on the strawberry begonia.
 While I have put a lot of work into the perennial beds near the front door of the house, none of that compares to the amount of work the vegetable garden has taken. We began in late fall of 2014 by composting the leaves that fell from our trees with grass clippings from the lawn and bags of coffee grounds from Starbucks. In spring of 2015, I topped each of the beds with that compost and placed 45 bales of straw on the beds in the garden. Throughout the year, I attempted to grow vegetables in the bales with out a ton of success. In early winter, when the bales began to tip like drunkards, I broke them down and scattered the straw on top of the compost along with more coffee, ground egg shells, compost (that includes litter from our hens) and a topping of purchased garden soil.
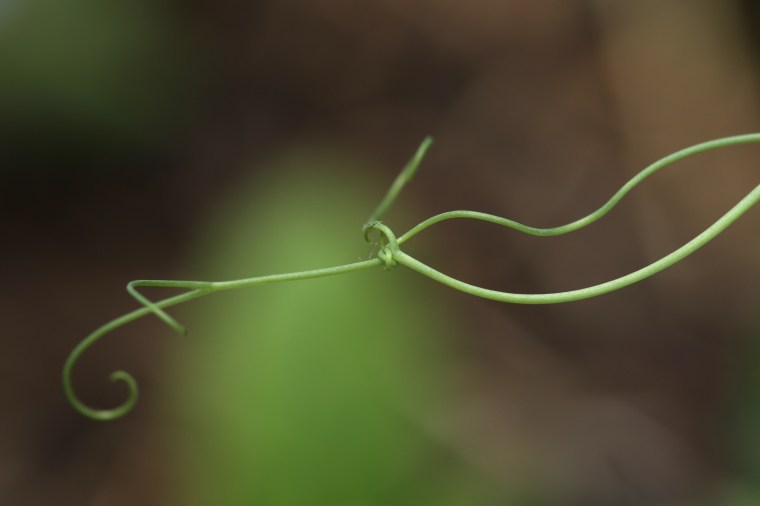 Peas were slow to get going but have finally come on board. Gotta love the tendrils and the way they tie themselves into knots.
 Everybody loves surprise potatoes! Must have missed one when I harvested them last fall. not sure what it is but I am thinking it is most likely a yukon gold but the alternative is red norland; either way works for me!
 A lot of firsts this year. Ailsa Craig onions along with some radishes from an 8 year old package of seeds I found lurking in the box! We have lots of mushrooms coming up in the beds. Did you know that is a good thing? There is a relationship between plants and mushrooms and when some combinations are grown together, you can actually improve your yields-this pairing was random and not of my doing but my fingers are crossed that it helps. Want to know more about it, pick up a copy of
  Chinese cabbage is doing so well-and I grew this from seeds!
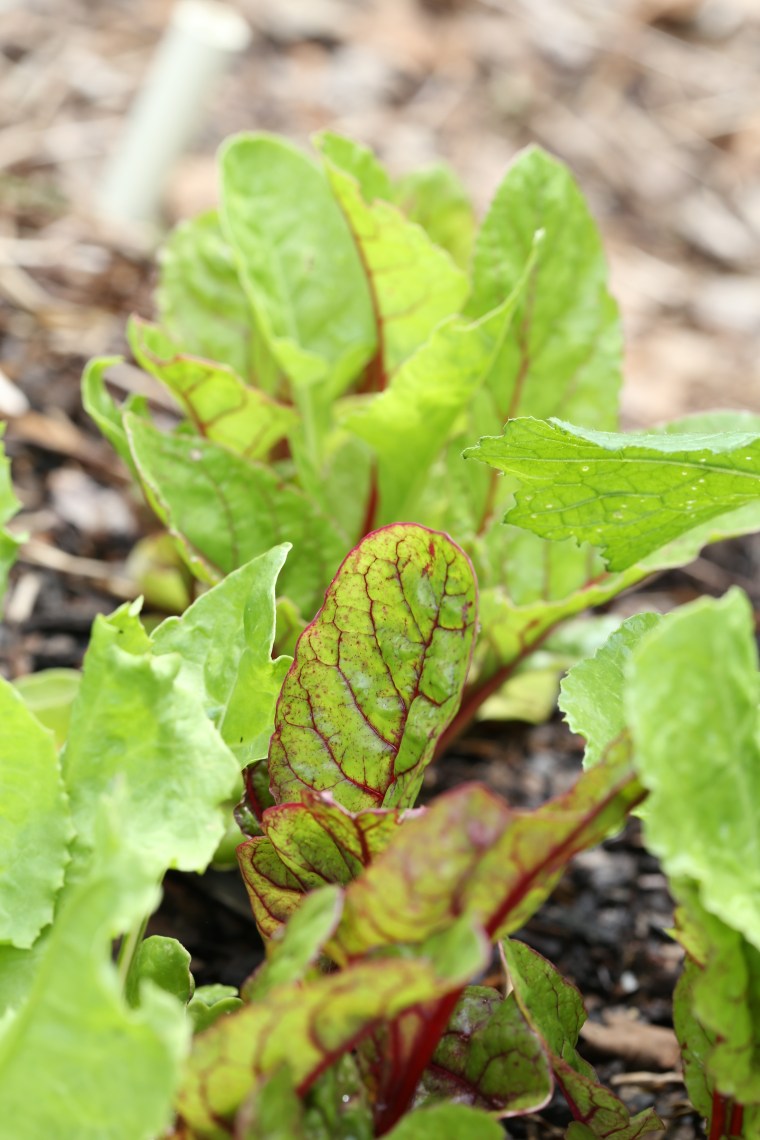 The way chard glows when backlit never gets old.
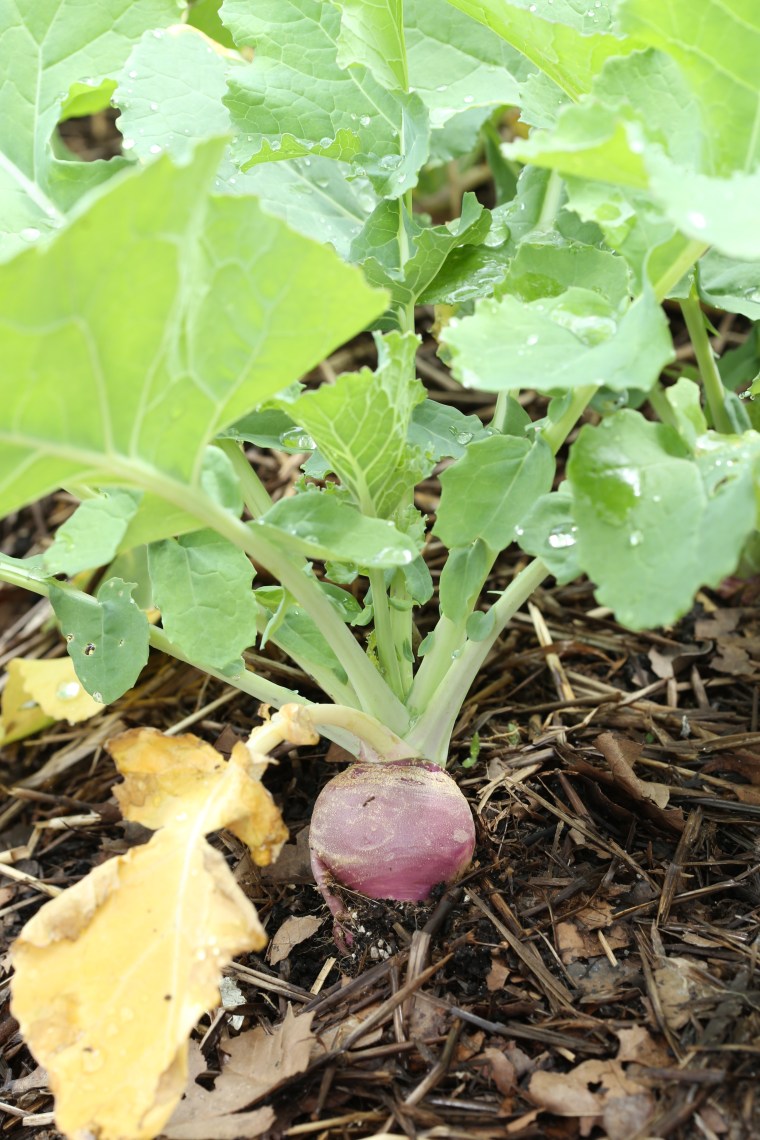 These rutabegas are taking off in the garden. If you grow them, be sure to eat the greens too! Cook them as you would collards and the plant will be doing double duty.
 Another of the firsts in our garden, salsify. Have no idea if we will enjoy it but I saw some plants in Colonial Williamsburg in the garden the the local master gardeners maintain and decided it was pretty and it needed to live in my garden too!
 Speaking of pretty, these radicchio starts have been stealing the show for a while now. We pull a few leaves off from the bottom and are letting the heads fill out.
 More starts, celery is taking its time.
 Last weekend, I had the pleasure of meeting with a group of ladies who also happen to be fellow members of the Virginia Bloggers. It was a rainy and somewhat dreary Saturday morning but it was perfect for drinking coffee and eating freshly baked sweets.
  Most of these ladies knew each other, or at least were familiar with each other, but there were a few that were new to the group, myself being one of them. The bakery is a bit small but we pulled a few tables together and spent our time chatting, trading business cards and getting to know each other.
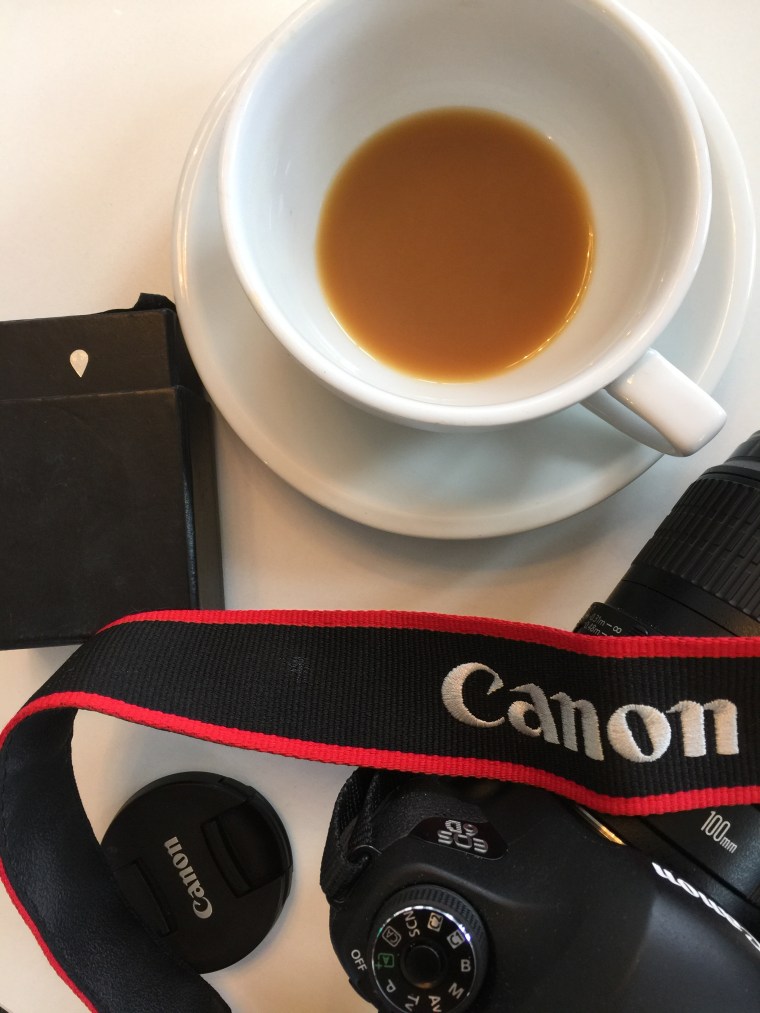 Of course, there were a few cameras out on the table and a bunch of cell phones so that we could all take photos.
 It was great to meet such a friendly bunch of ladies and trade information.
 My hope is to attend more of these meet-ups but it is a bit of a drive from Williamsburg, however, if the destination is another place like this, I will take one for the team!
 Before leaving, I picked a small selection of sweets to take home to Darry. These two were all but glued to the showcase-can you blame them?
 Most of the ladies that came out despite the rainy weather. If you are a blogger and live in Virginia, join the group and if you are interested in what is going on,
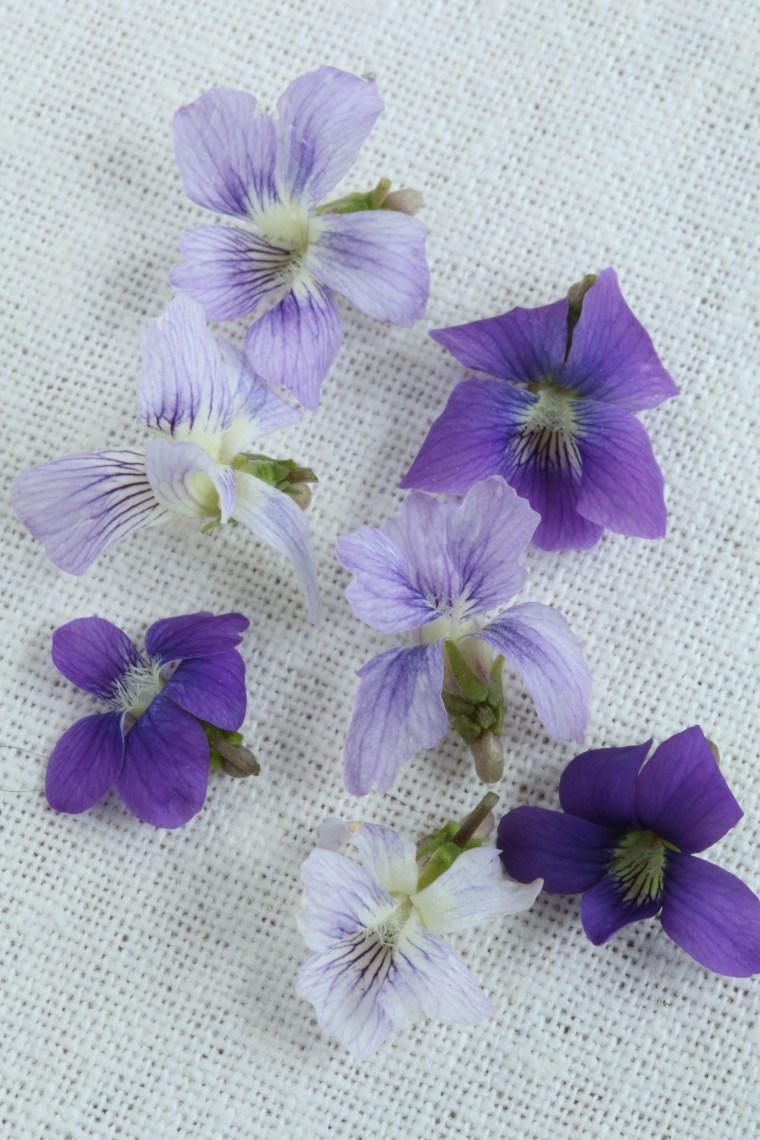
 Making liqueur is a bit tedious because you must pick large quantities of the blossoms. For the batch I made this year, I must have picked about 3 pints. For a single pint of liquer, I placed 2 cups of blossoms into a pint sized jar and added 2 cups of potato vodka and allowed the flowers to steep for a couple days, shaking it once a day. After it had sat and the flowers faded and grew limp, I strained them out and filled the jar with another 2 cups of blossoms. To this, I poured the previously infused vodka over the blossoms and allowed it to steep, shaking it daily for a couple of days and then I repeated the process a third time. My goal was to get a nice dark liqueur and a strong floral flavor.
 Having allowed the last batch of flowers time to infuse the batch, I strained them out and this was the result. If you look at the top of the liquid, you can see that it is a deep violet color, almost grey. Despite everything, it still had a strong alcohol taste but the aroma was all flowers-and honestly, I am not much of a vodka drinker so it was hard to not taste the vodka in the background but there was definitely a floral flavor there as well. And now that it has aged for a couple weeks, it has mellowed a bit.
 This beauty is
  A close up shot of the flower; look at the hairs on the back of the bloom and the tiny little stamens!
 Dead Nettle is a close cousin of Henbit, both are in the mint family, but if you look closely, you will see that these leaves are heart shaped and gradient in color from the top of the plant to the base while Henbit has round leaves with teeth. Another thing, Dead Nettle flowers make the blossoms from Henbit look huge!
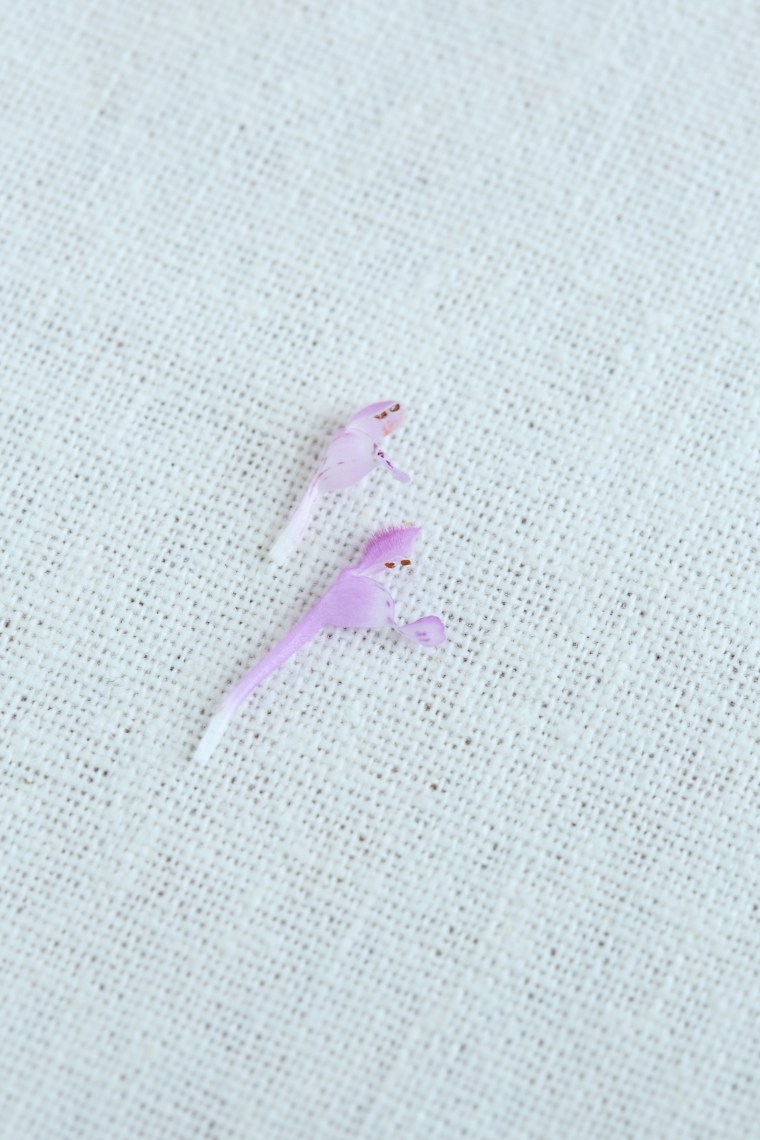 Dead Nettle flower on the top, Henbit flower on the bottom.
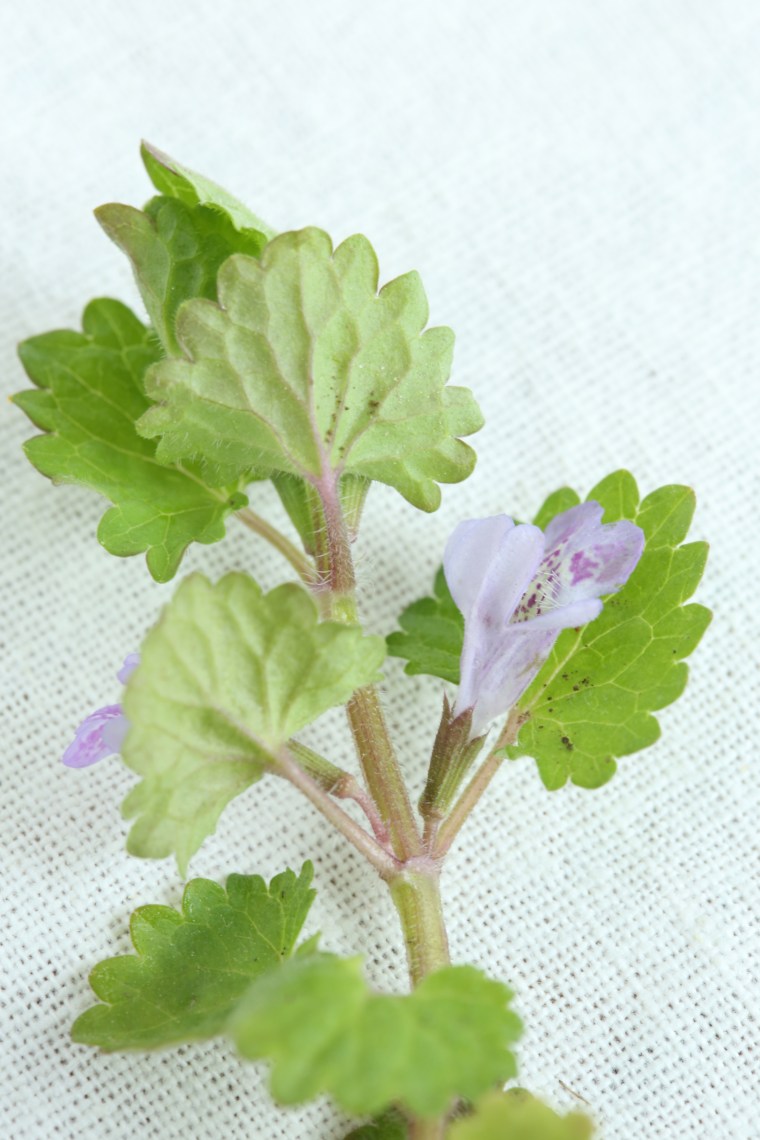 A third player in this game, Ground Ivy, also called Creeping Charlie because it trails like a vine and can quickly cover an area. These blooms are the largest of the three. While some publications will tell you that it is best to make teas rather than eat the leaves, I don’t think there is any real danger in adding a handful of blooms to a batch of likker-although, your back may cry foul!
 My first batch of lawn likker from last year, it has since changed color and is now a bright golden yellow and looks more like a bottle of urine than likker but trust me, the flavor is still floral and so is the aroma!
 This week, we revisited a recipe we prepared once before because part of baking every recipe in a cookbook means that on occasion, you make a recipe more than once. Sort of. The dough for Persian Naan is also the dough used for Oasis Naan, a flat bread we made way back when I lived in Nashville. The dough is quick and easy to mix and only requires a single rise until doubled before being shaped and baked.
 The bread is not one that holds well and as a result, I made half the recipe. Considering that the loaves are stretched until they are about 18 inches long, halving the recipe really made sense. My loaves were only about 12 inches long which fit my baking stone with room to spare. After dividing, preshaping and resting the dough while the oven heated, the dough was heavily dimpled with wet fingertips before the stretching began.
 My first loaf inflated like a balloon in the oven so I chose to dock the rest of them to prevent them from looking more like a bread pillow than a bread sheet.
 The recipe called for a simple topping of sesame seeds and I stuck to the recipe this time out. It was chewy and pliable with a light crust, perfect for scooping up stuff or wrapping around something while it was warm. My plan is to tear off pieces and eat it with some roasted vegetables for dinner.
 Late last month, I made a loaf of the buttermilk bread from Baking with Julia. It was the challenge for the week chosen by the Tuesdays with Dorie bakers and despite baking it on time, I never posted my photos.
 One of my favorite types of bread is Japanese Hokkaido Milk Bread. The tall loaves are actually made of smaller loaves placed side by side in the pan. Once baked, you can separate them into smaller pieces. Because there is just the two of us here, I chose to make my loaf into three smaller loaves.
 After the loaf cooled, I pulled it apart and froze two pieces for later. The texture was so nice and fluffy and it had wonderful flavor. We ate it all pretty quickly, it made fantastic sandwiches! This is definitely a loaf worth making again and if you haven’t made it yet, I highly recommend giving it a go-just add the flour cautiously, you may not need it all.
 The day I made the loaf was one of those days that I had a list of things to do that was as long as I am tall. Taking a lot of photos was not an option and I had to make do with what was in front of me rather than styling the photo. Rather than drag bounce cards and tripod out, I took an empty box of cereal and clipped a binder page to it to reflect the light.