off the shelf: quick crescent rolls from the fannie farmer baking book

IMG_2059

My name is Alisa and I have a lot of cookbooks.  When I go to thrift stores and antique shops, I buy more cookbooks.  In my house, I have a wall of shelves dedicated to just cookbooks…This is how I imagine a 12 step program for cookbook addicts might start.  First admitting that I have a lot, perhaps too many cookbooks.  And yes, I could say that I have too many, but when you start collecting a specific item, quickly amassing large quantities is what generally happens.  Truth be told, of all the things I could get involved with, collecting cookbooks is pretty tame and if I take them off the shelf and use them, delicious things happen.  One of the cookbooks I have had the longest, and judging by the condition, used often is a copy of the Fannie Farmer Baking Book.  It is also one that I highly recommend to new bakers looking for a starting point because the recipes are simple, easy to follow and pretty foolproof.

What many people do not realize is that Fannie Farmer really was a trained cook as well as an author of several cookbooks.  She studied at the Boston Cooking School in the late 19th century and eventually took the role of school principal before venturing out on her own by opening a school, Miss Farmer’s School of Cooking.  Although her main interest was proper nutrition and how it affected the health and well-being of the ill, what she hoped she would be most remembered for, it is the The Fanny Farmer Cookbook that most people today associate with her.   There are two books featuring her name, The Boston Cooking-School Cookbook, which she actually wrote and was revised, updated and renamed The Fannie Farmer Cookbook by the late Marion Cunningham and The Fannie Farmer Baking Book, also written by Marion Cunningham.  While Fannie’s name may be in the title of the baking book, she never actually wrote a book dedicated to baking or desserts.   Ms. Cunningham is solely responsible for making the book what it is; a master collection of baking recipes that every baker should own.  As hard as it is to believe, when I am developing recipes, I will pull this book off the shelf and read or make a recipe in it because I know it will work.  Other times, when I just want a recipe that is foolproof and guaranteed to please a crowd, this is my “go to-I don’t need to think about it” book.

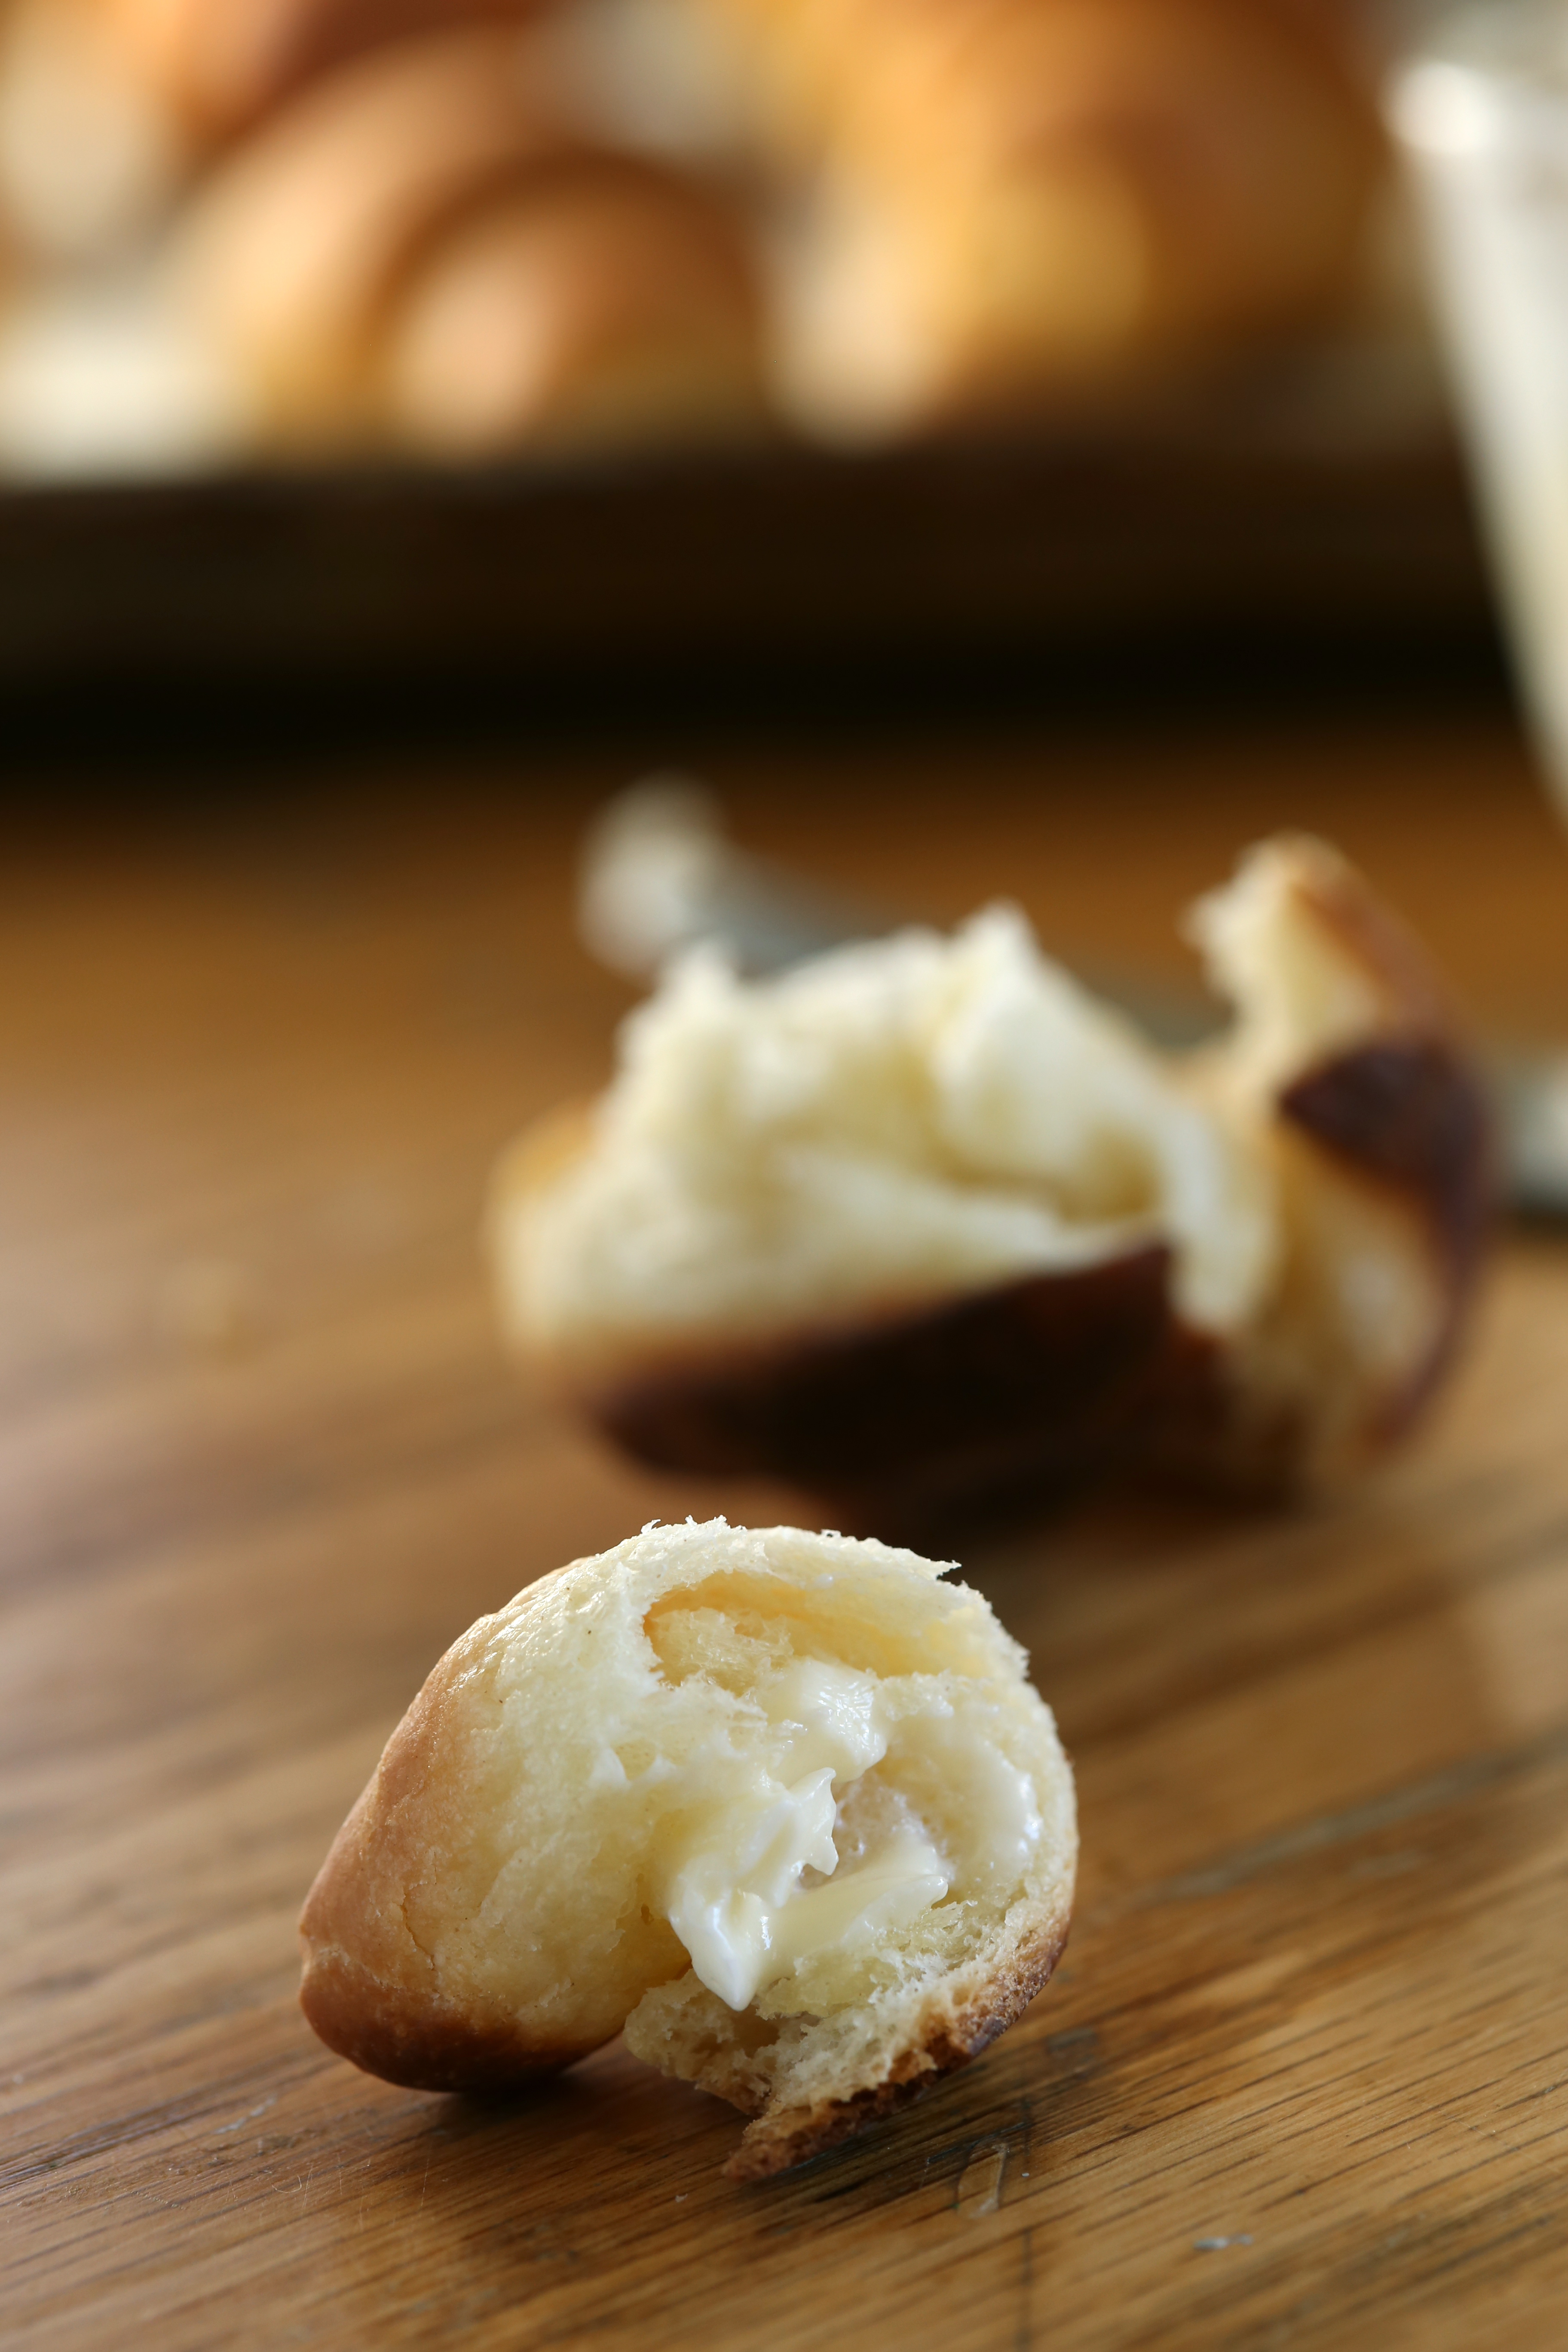
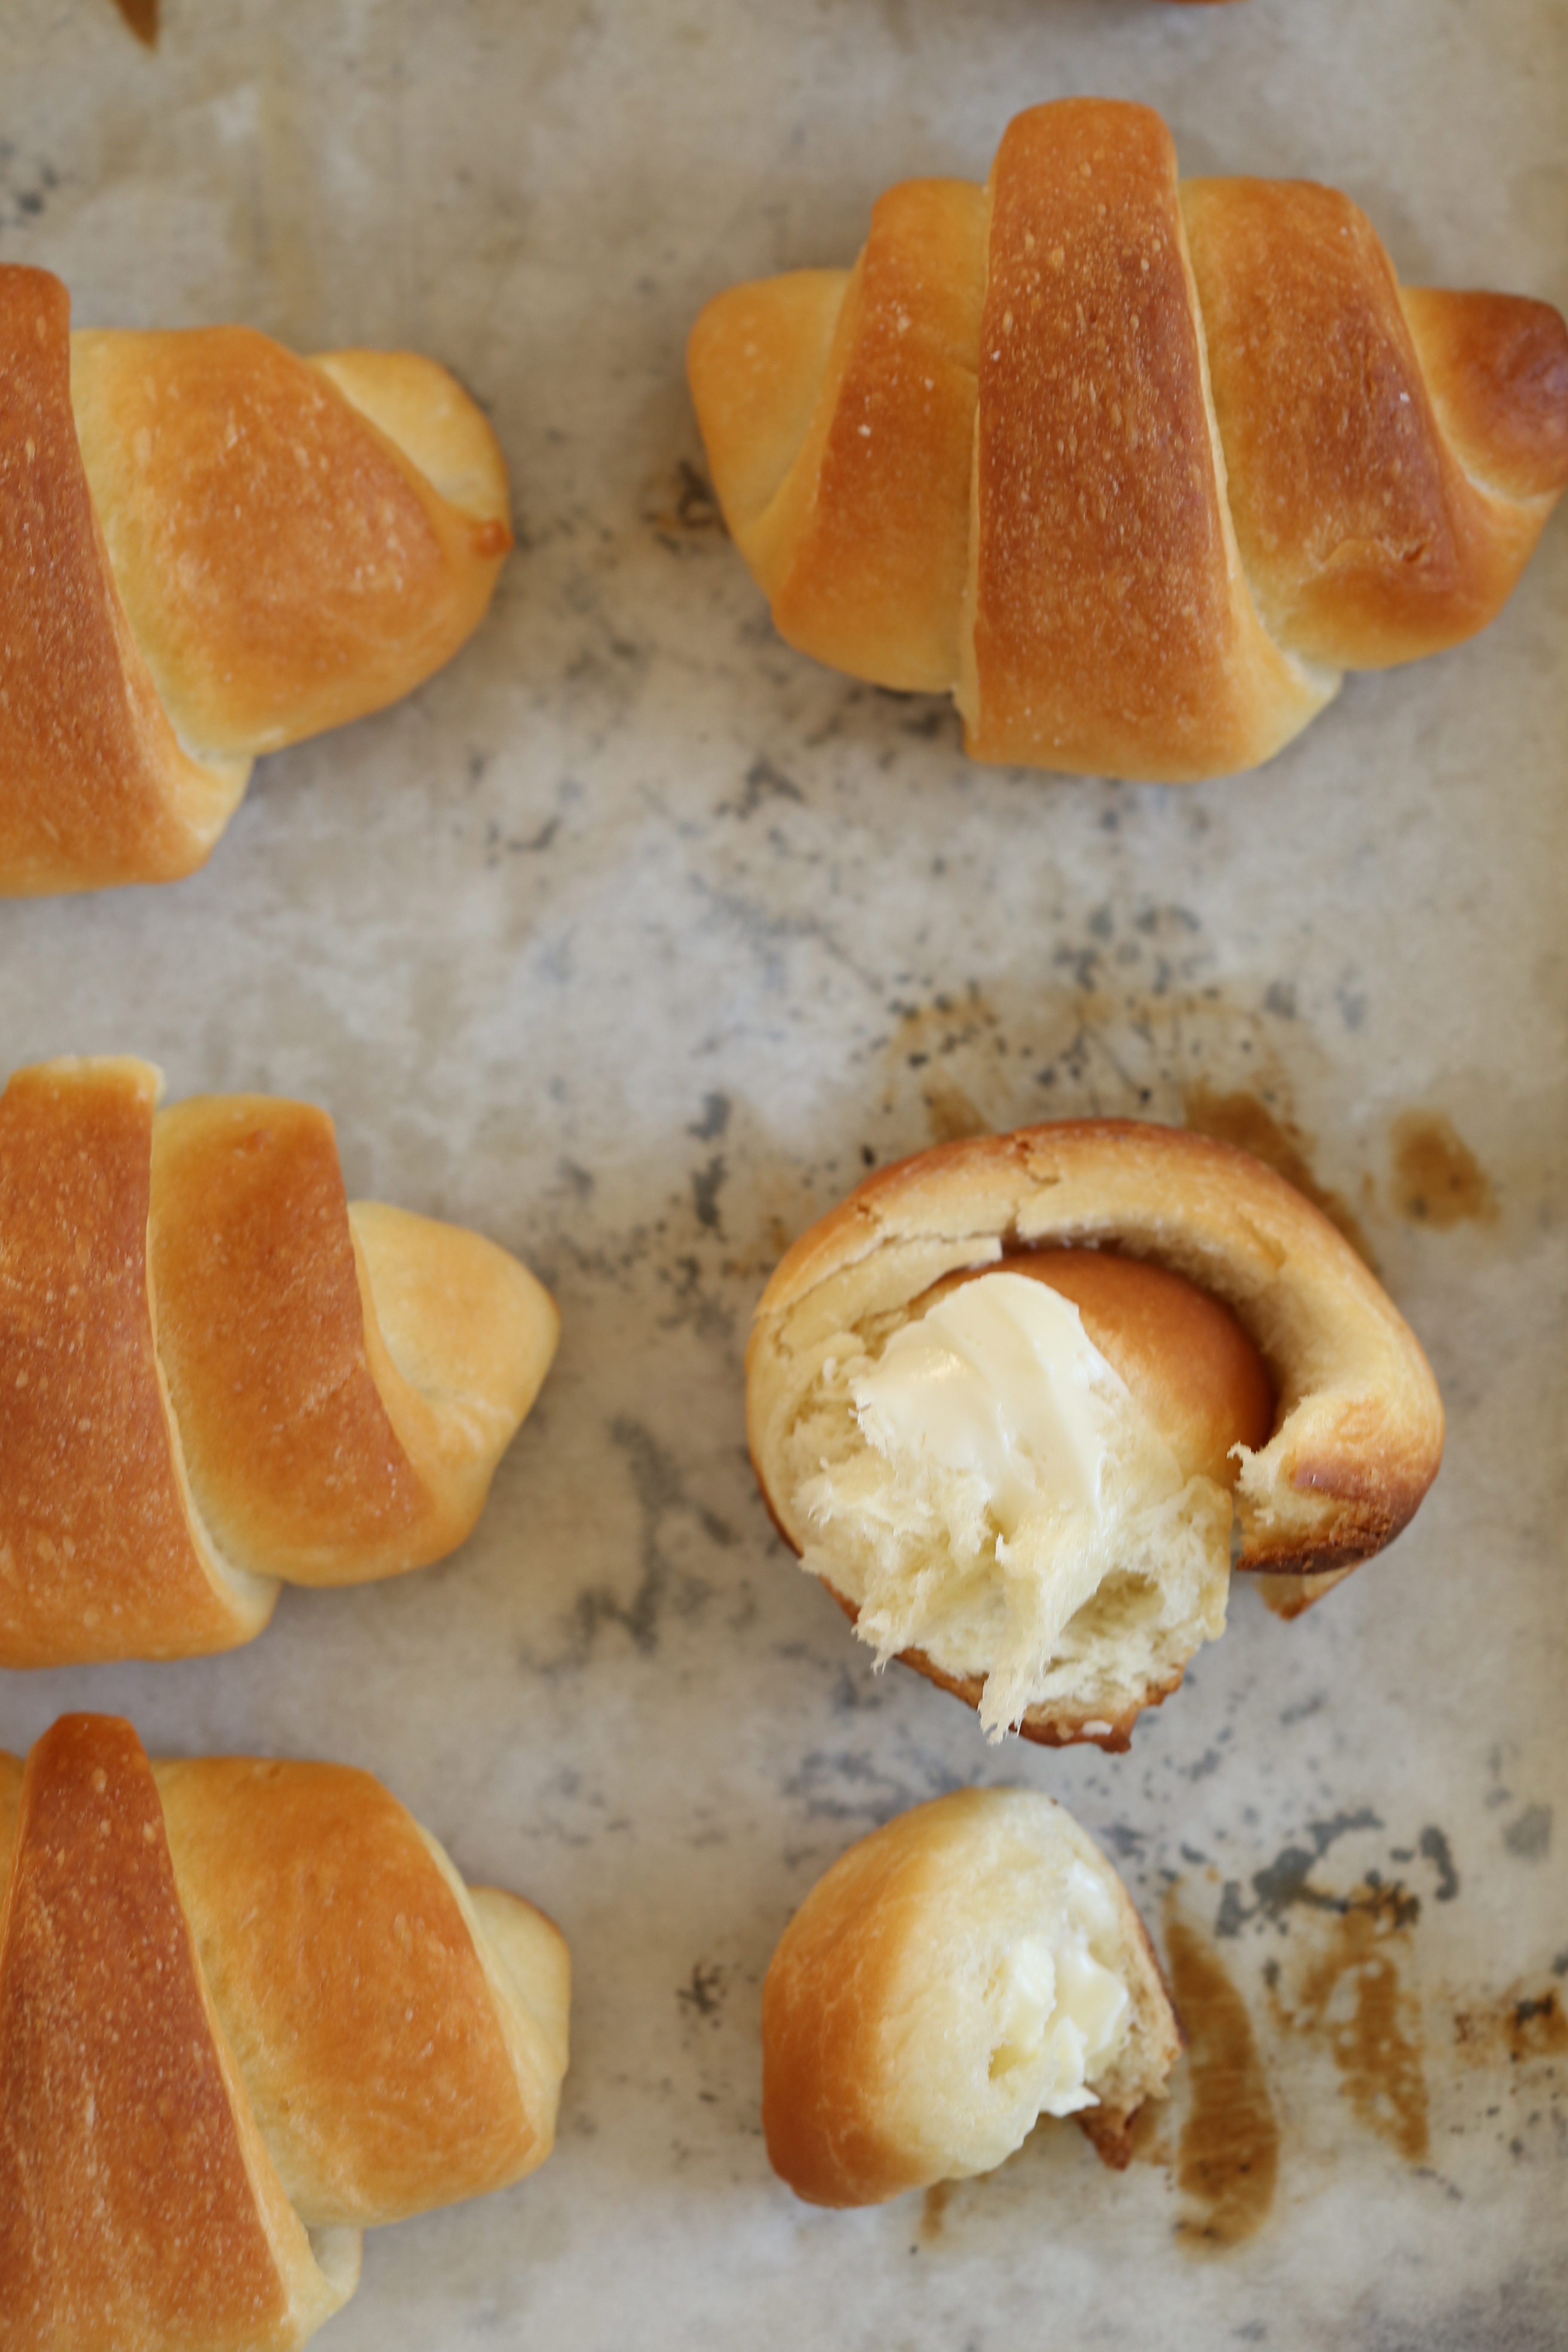
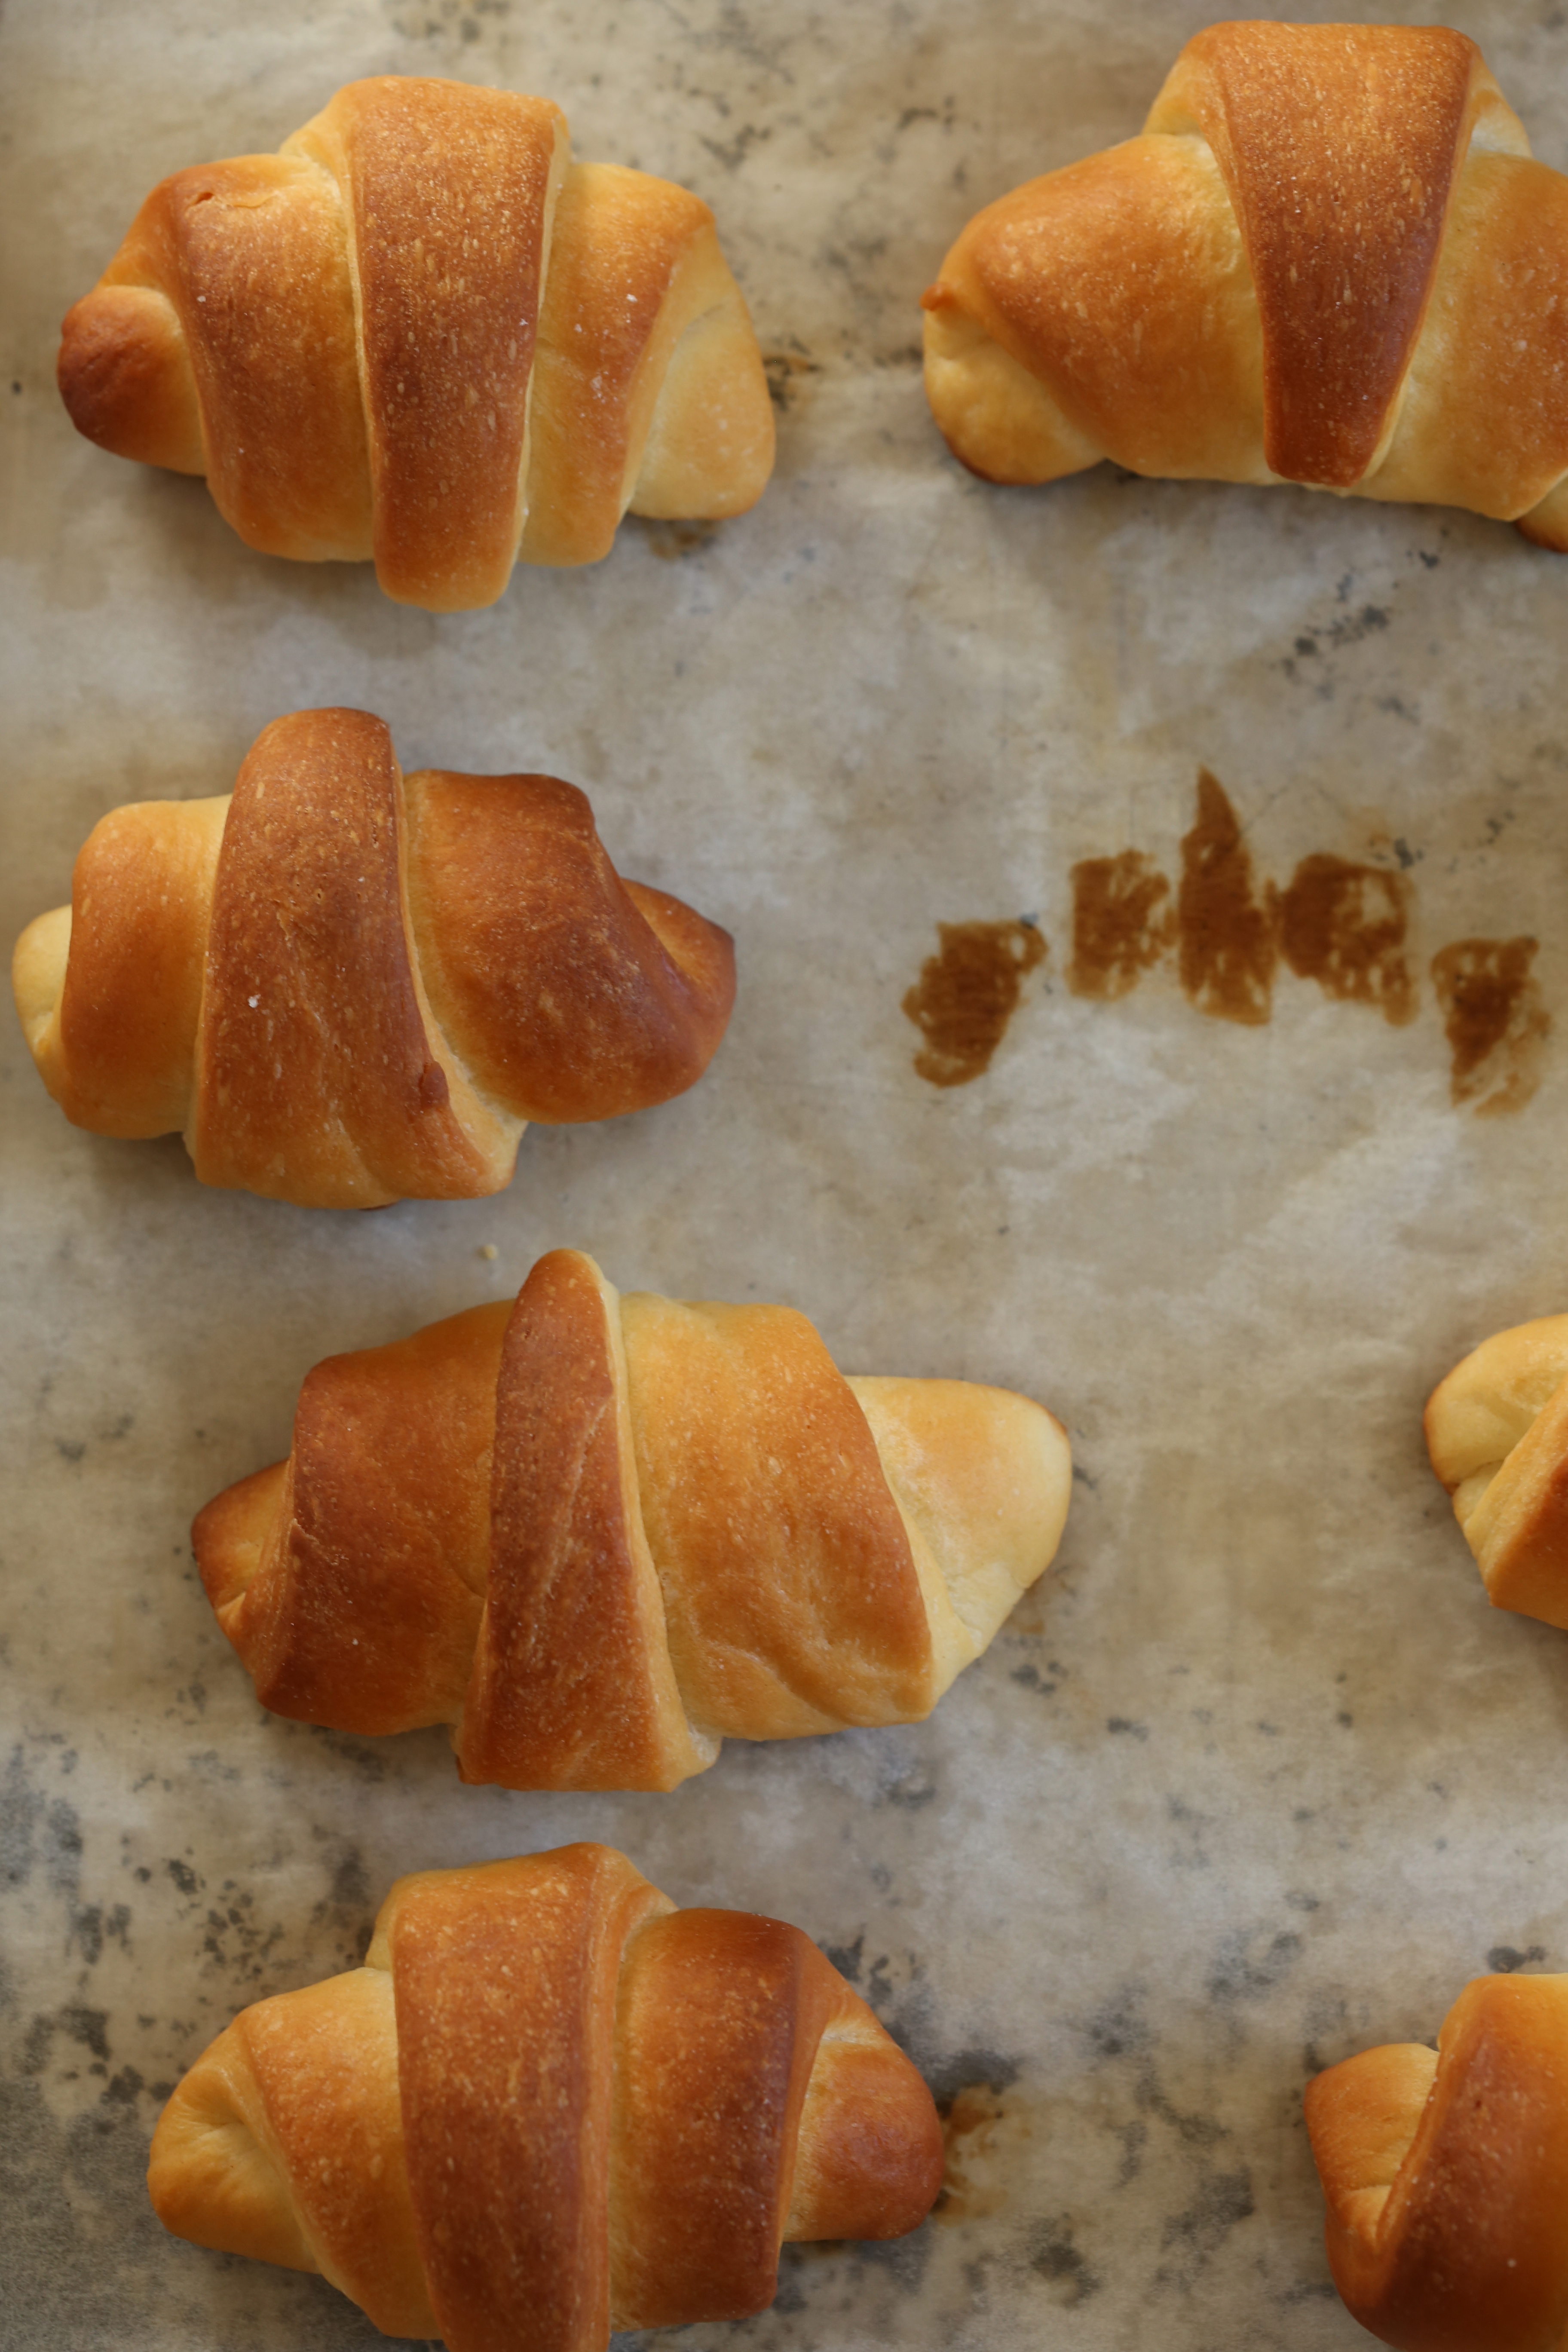
With this in mind, I pulled the book off the shelf with the idea of making some dinner rolls.  There is nothing worse than messing around with a bread recipe, spending a day or even two to make a batch of dough, only to have it completely flop.  Since I was short on time, I went with a recipe I knew would work perfectly, the simply titled Dinner Rolls.  Ms. Cunningham describes them as her “favorite dinner rolls, soft and barely sweet” and I couldn’t agree more.  They were quick to mix, easy to shape and baked up beautifully.  The recipe includes many options for shaping the rolls; pan rolls, crescents, clover-leaf, fan-tan or mini rolls.  Crescents were what I wanted, and I was quite pleased with the results.  If you do not have a copy of this book, get one; this recipe is one of the reasons why I keep this book on my shelf.

Dinner Rolls
IMG_2071 makes about 24 rolls

1 1/4 cup milk, warmed

1/3 cup sugar

2 teaspoons salt

4 tablespoons unsalted butter, softened

1 package or 2 1/4 teaspoons dry yeast

1 egg, slightly beaten

3 1/2 to 4 1/2 cups unbleached all-purpose flour

In a bowl, stir together the milk, sugar, salt and butter.  Sprinkle the yeast over the mixture and let stand to dissolve and become active.  Add the egg and 2 cups of flour and beat it vigorously for a minute or two.  Add enough flour to make a manageable dough.  Knead the dough in the mixer or by hand on a well floured surface until smooth or elastic.  Place in an oiled bowl, cover and let it rise until doubled.  Punch the dough down and shape as desired.  Place the shaped rolls onto a baking pan and let rise until double.  Preheat the oven to 400 and bake the rolls for 12-15 minutes until lightly browned.  Cool on a rack for a few minutes before serving.

To shape crescents:

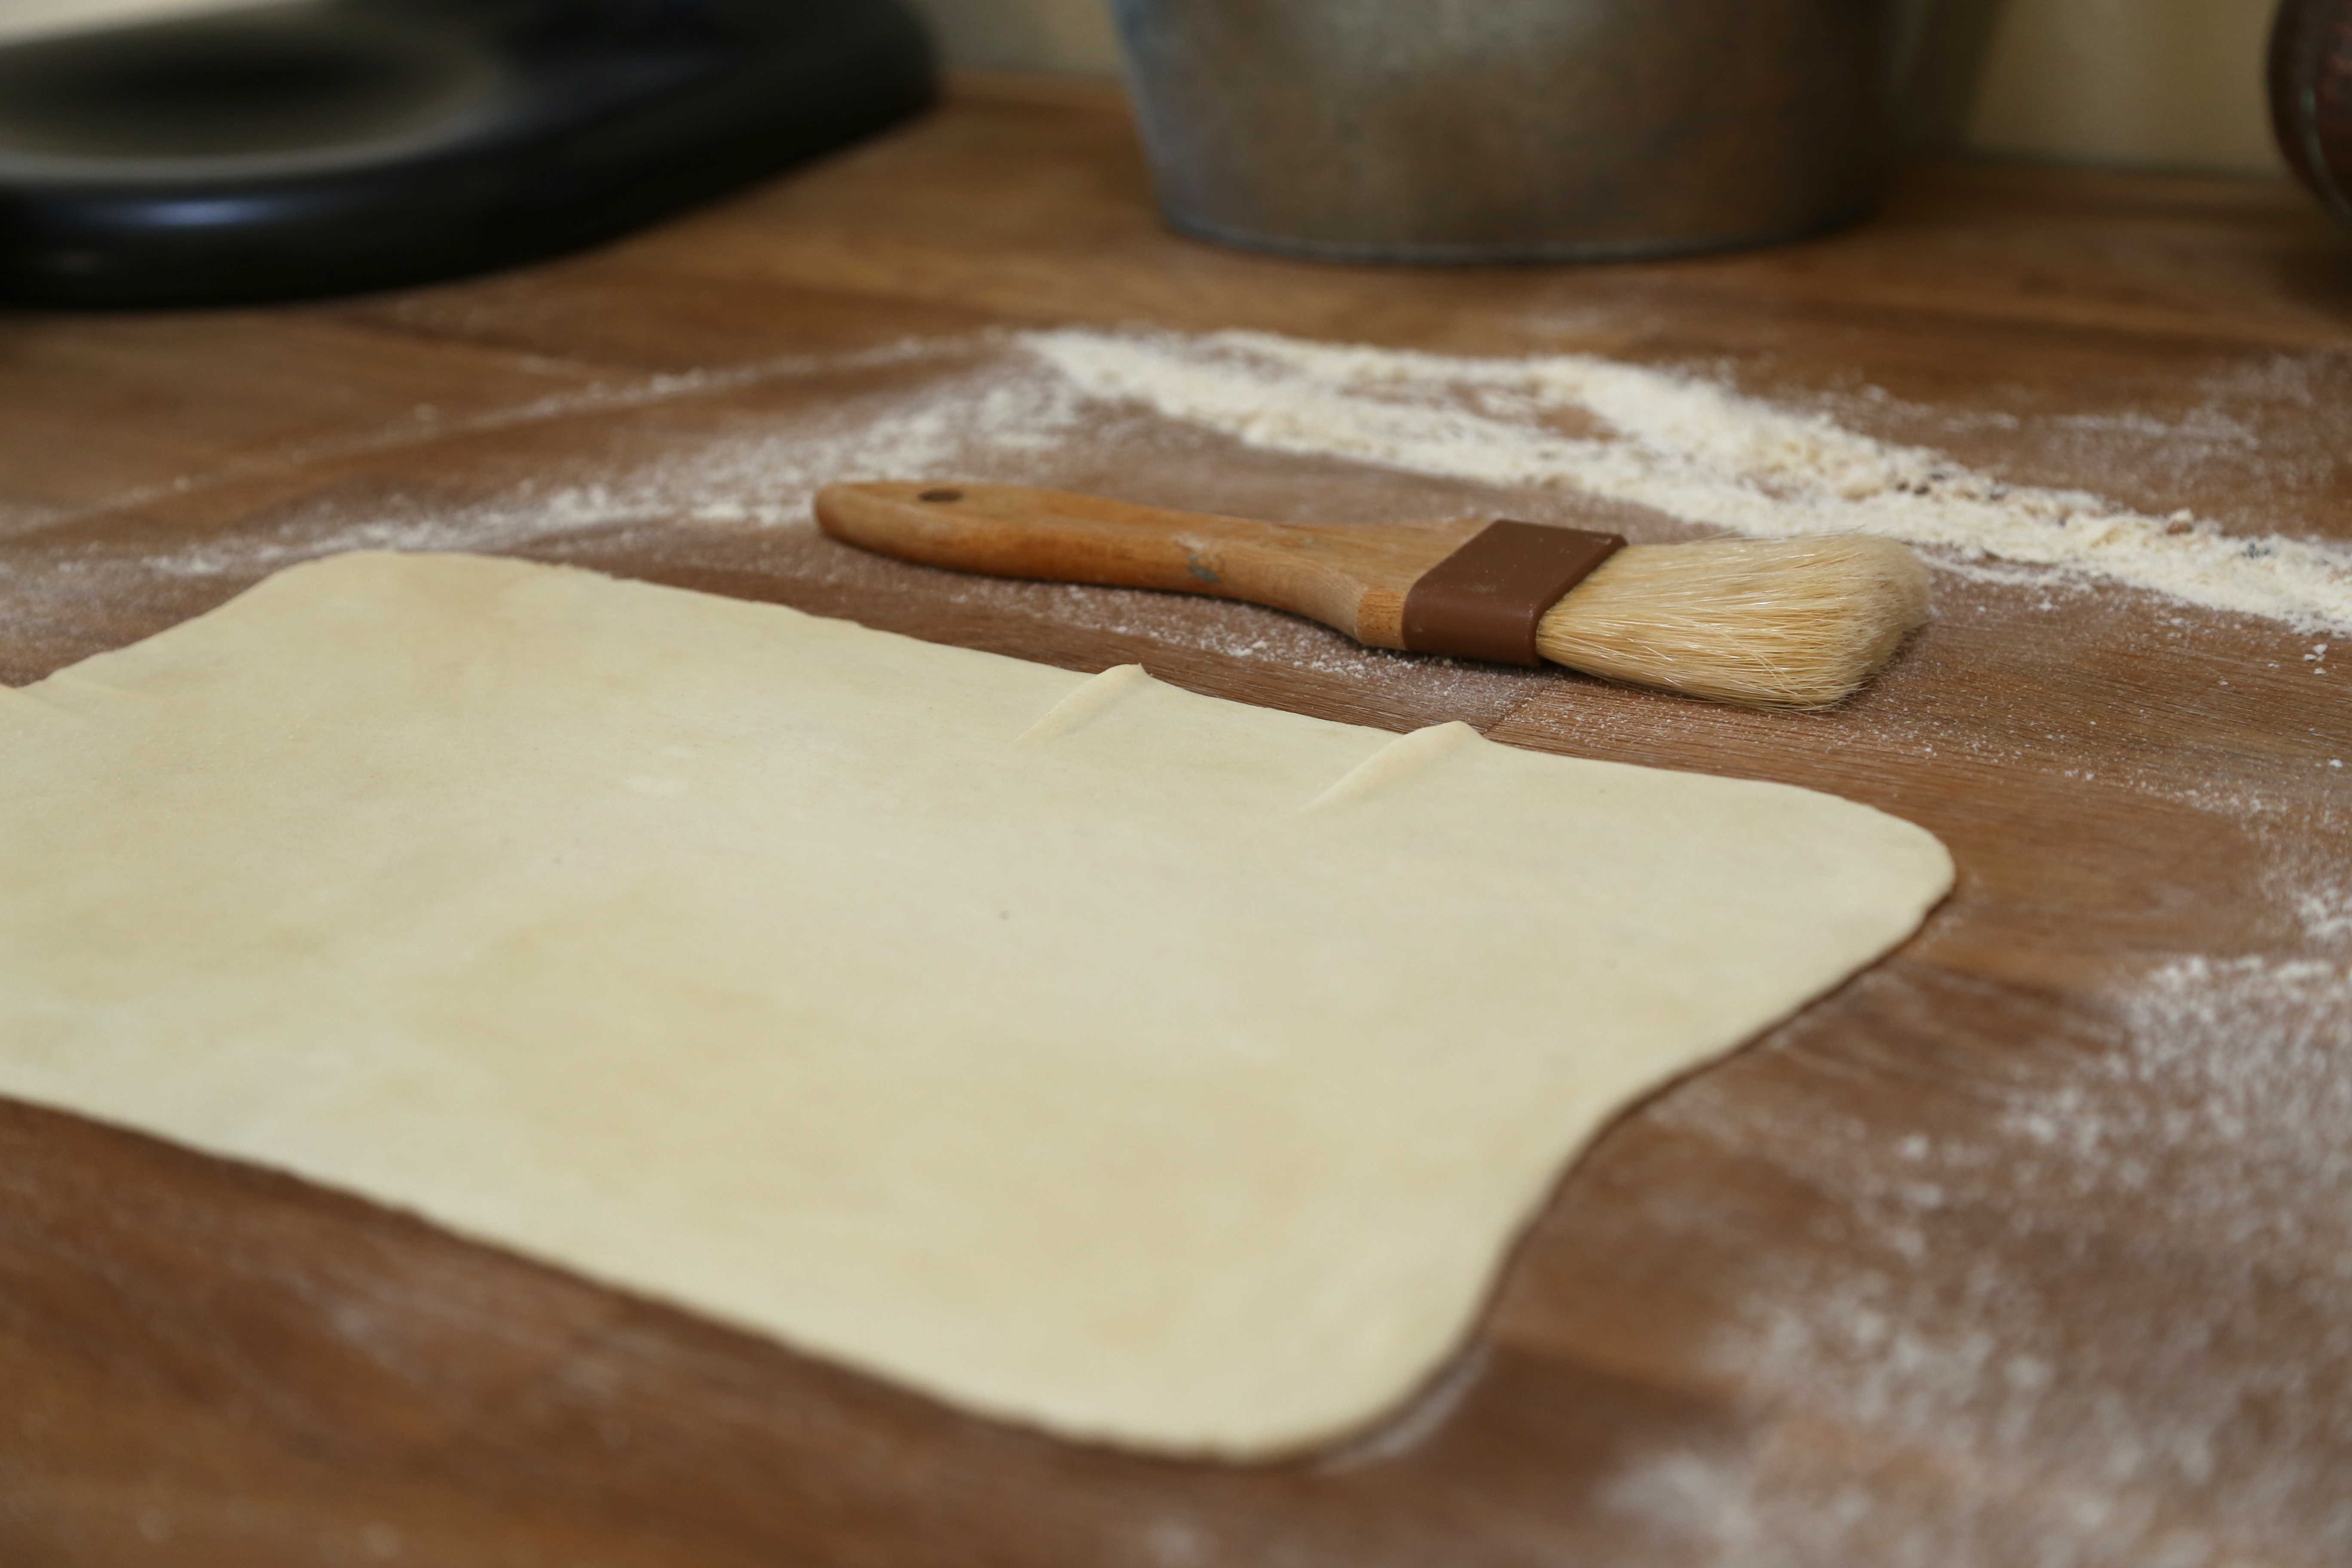
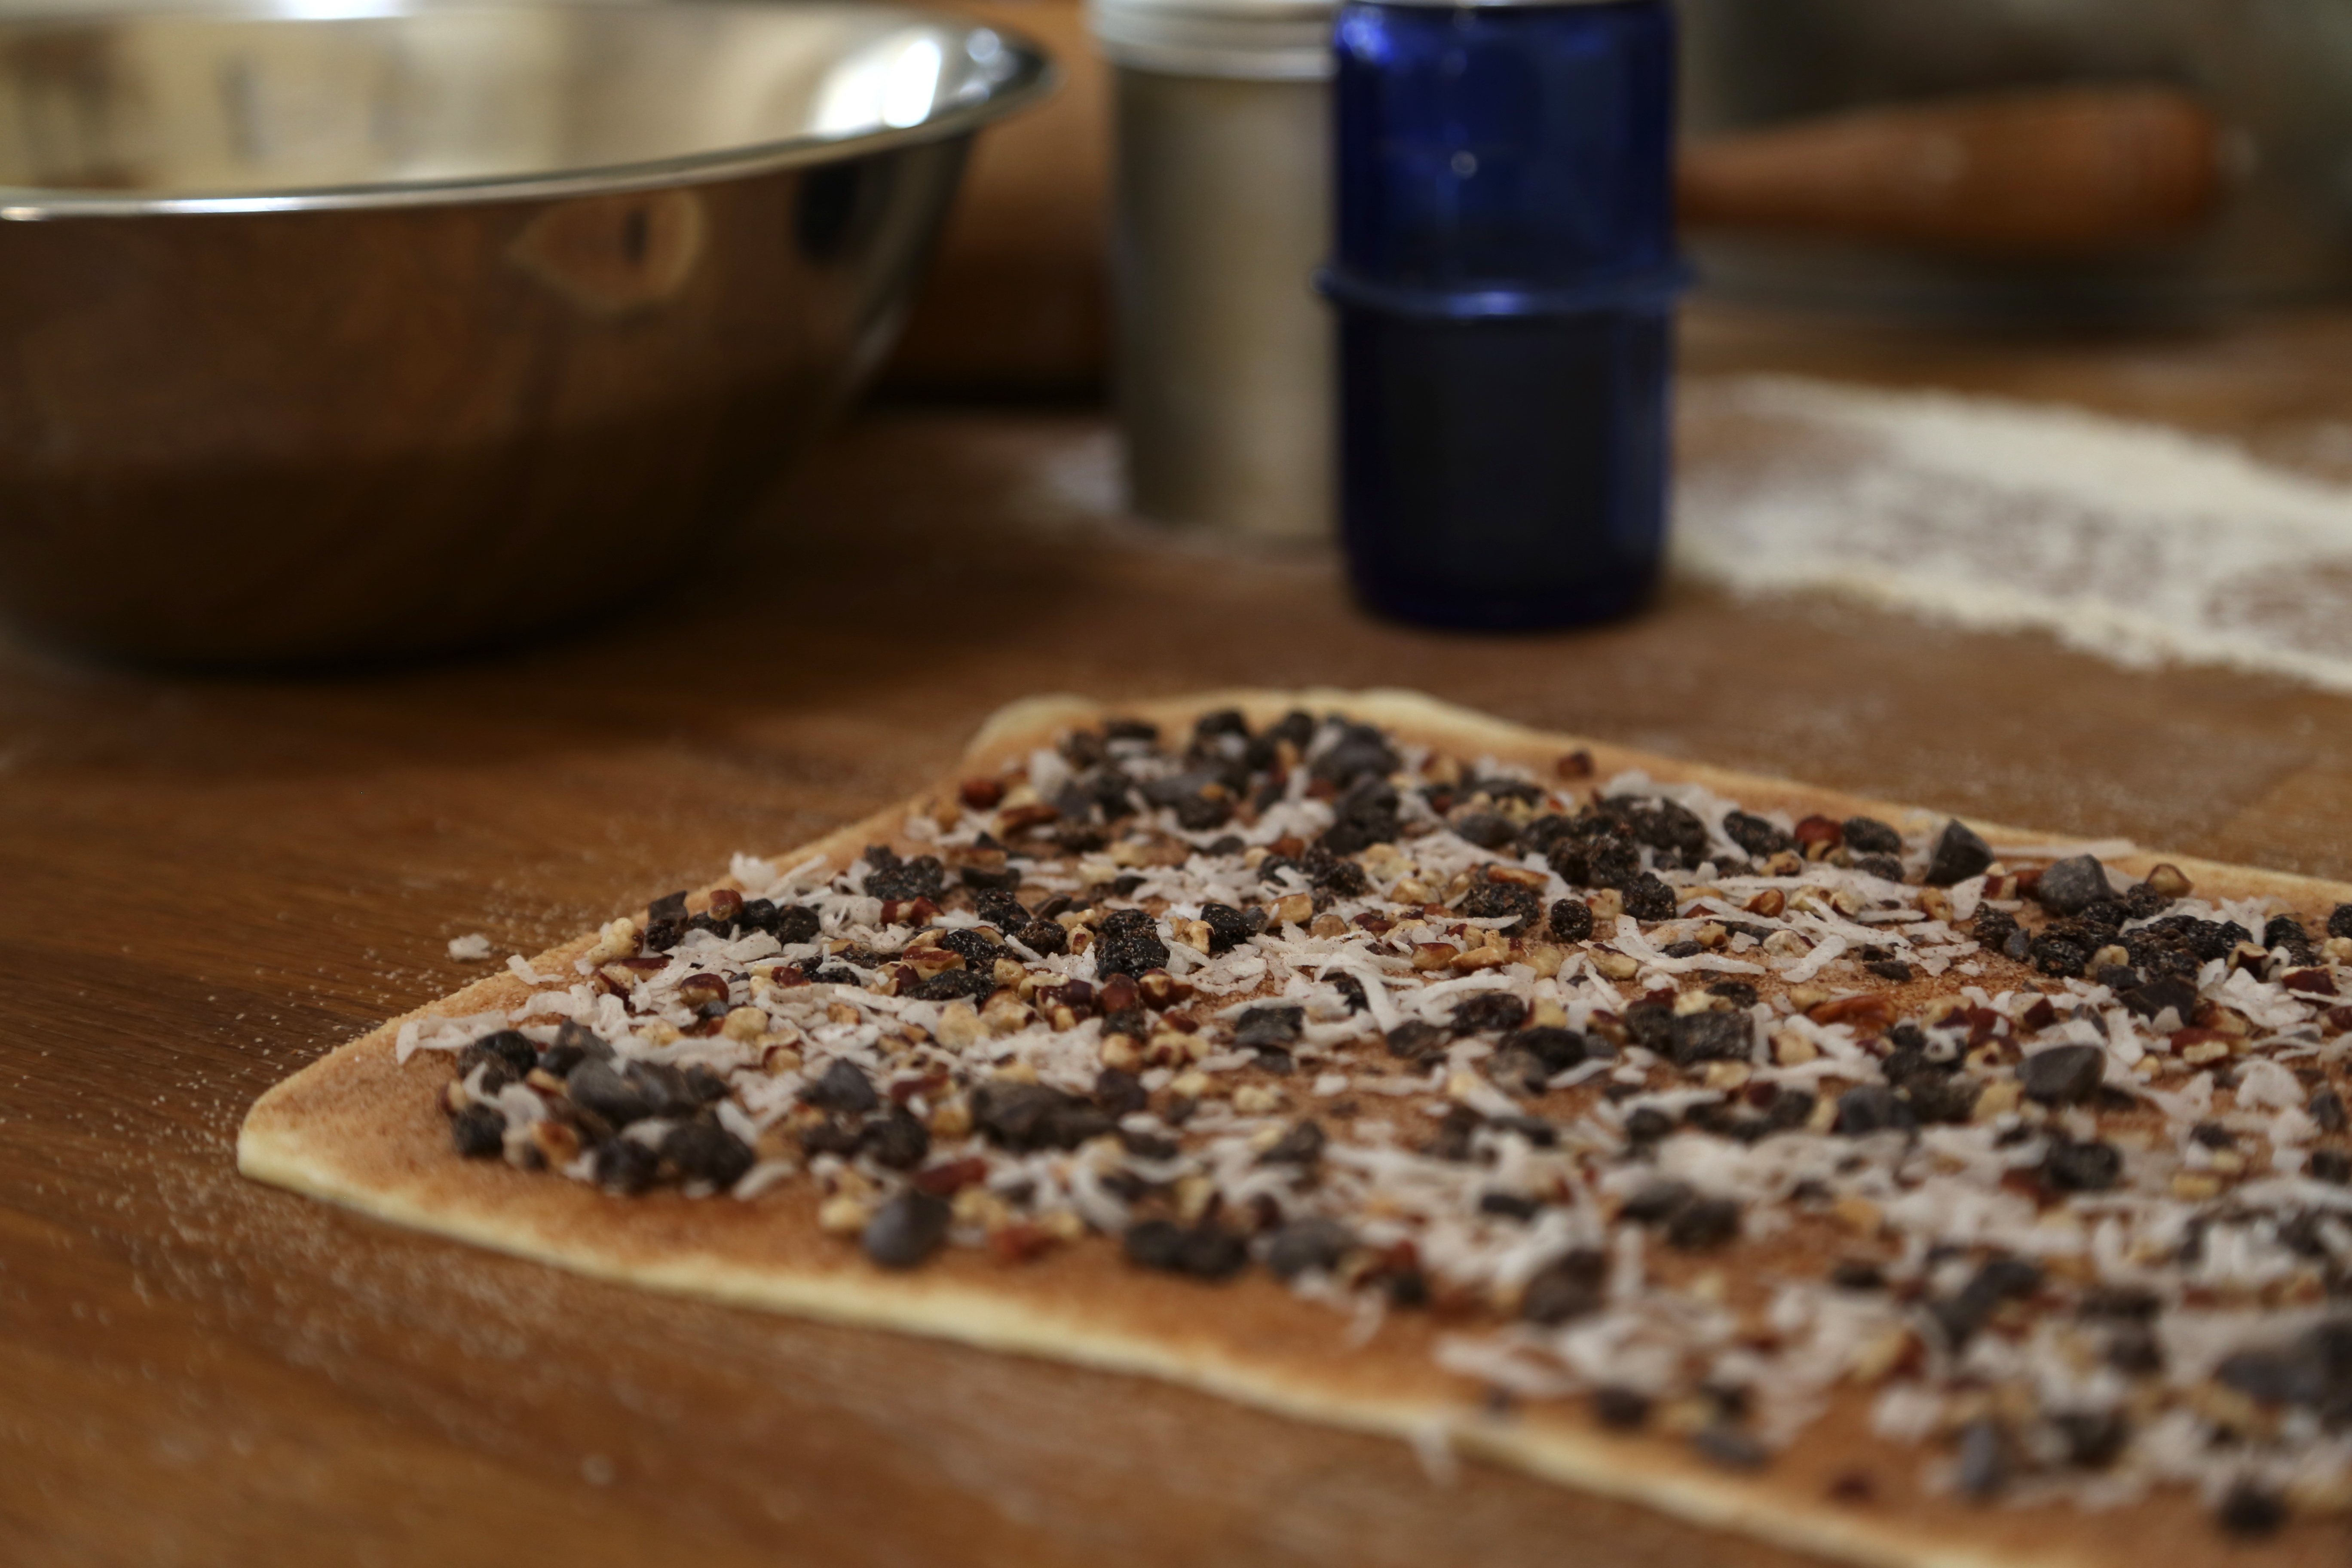
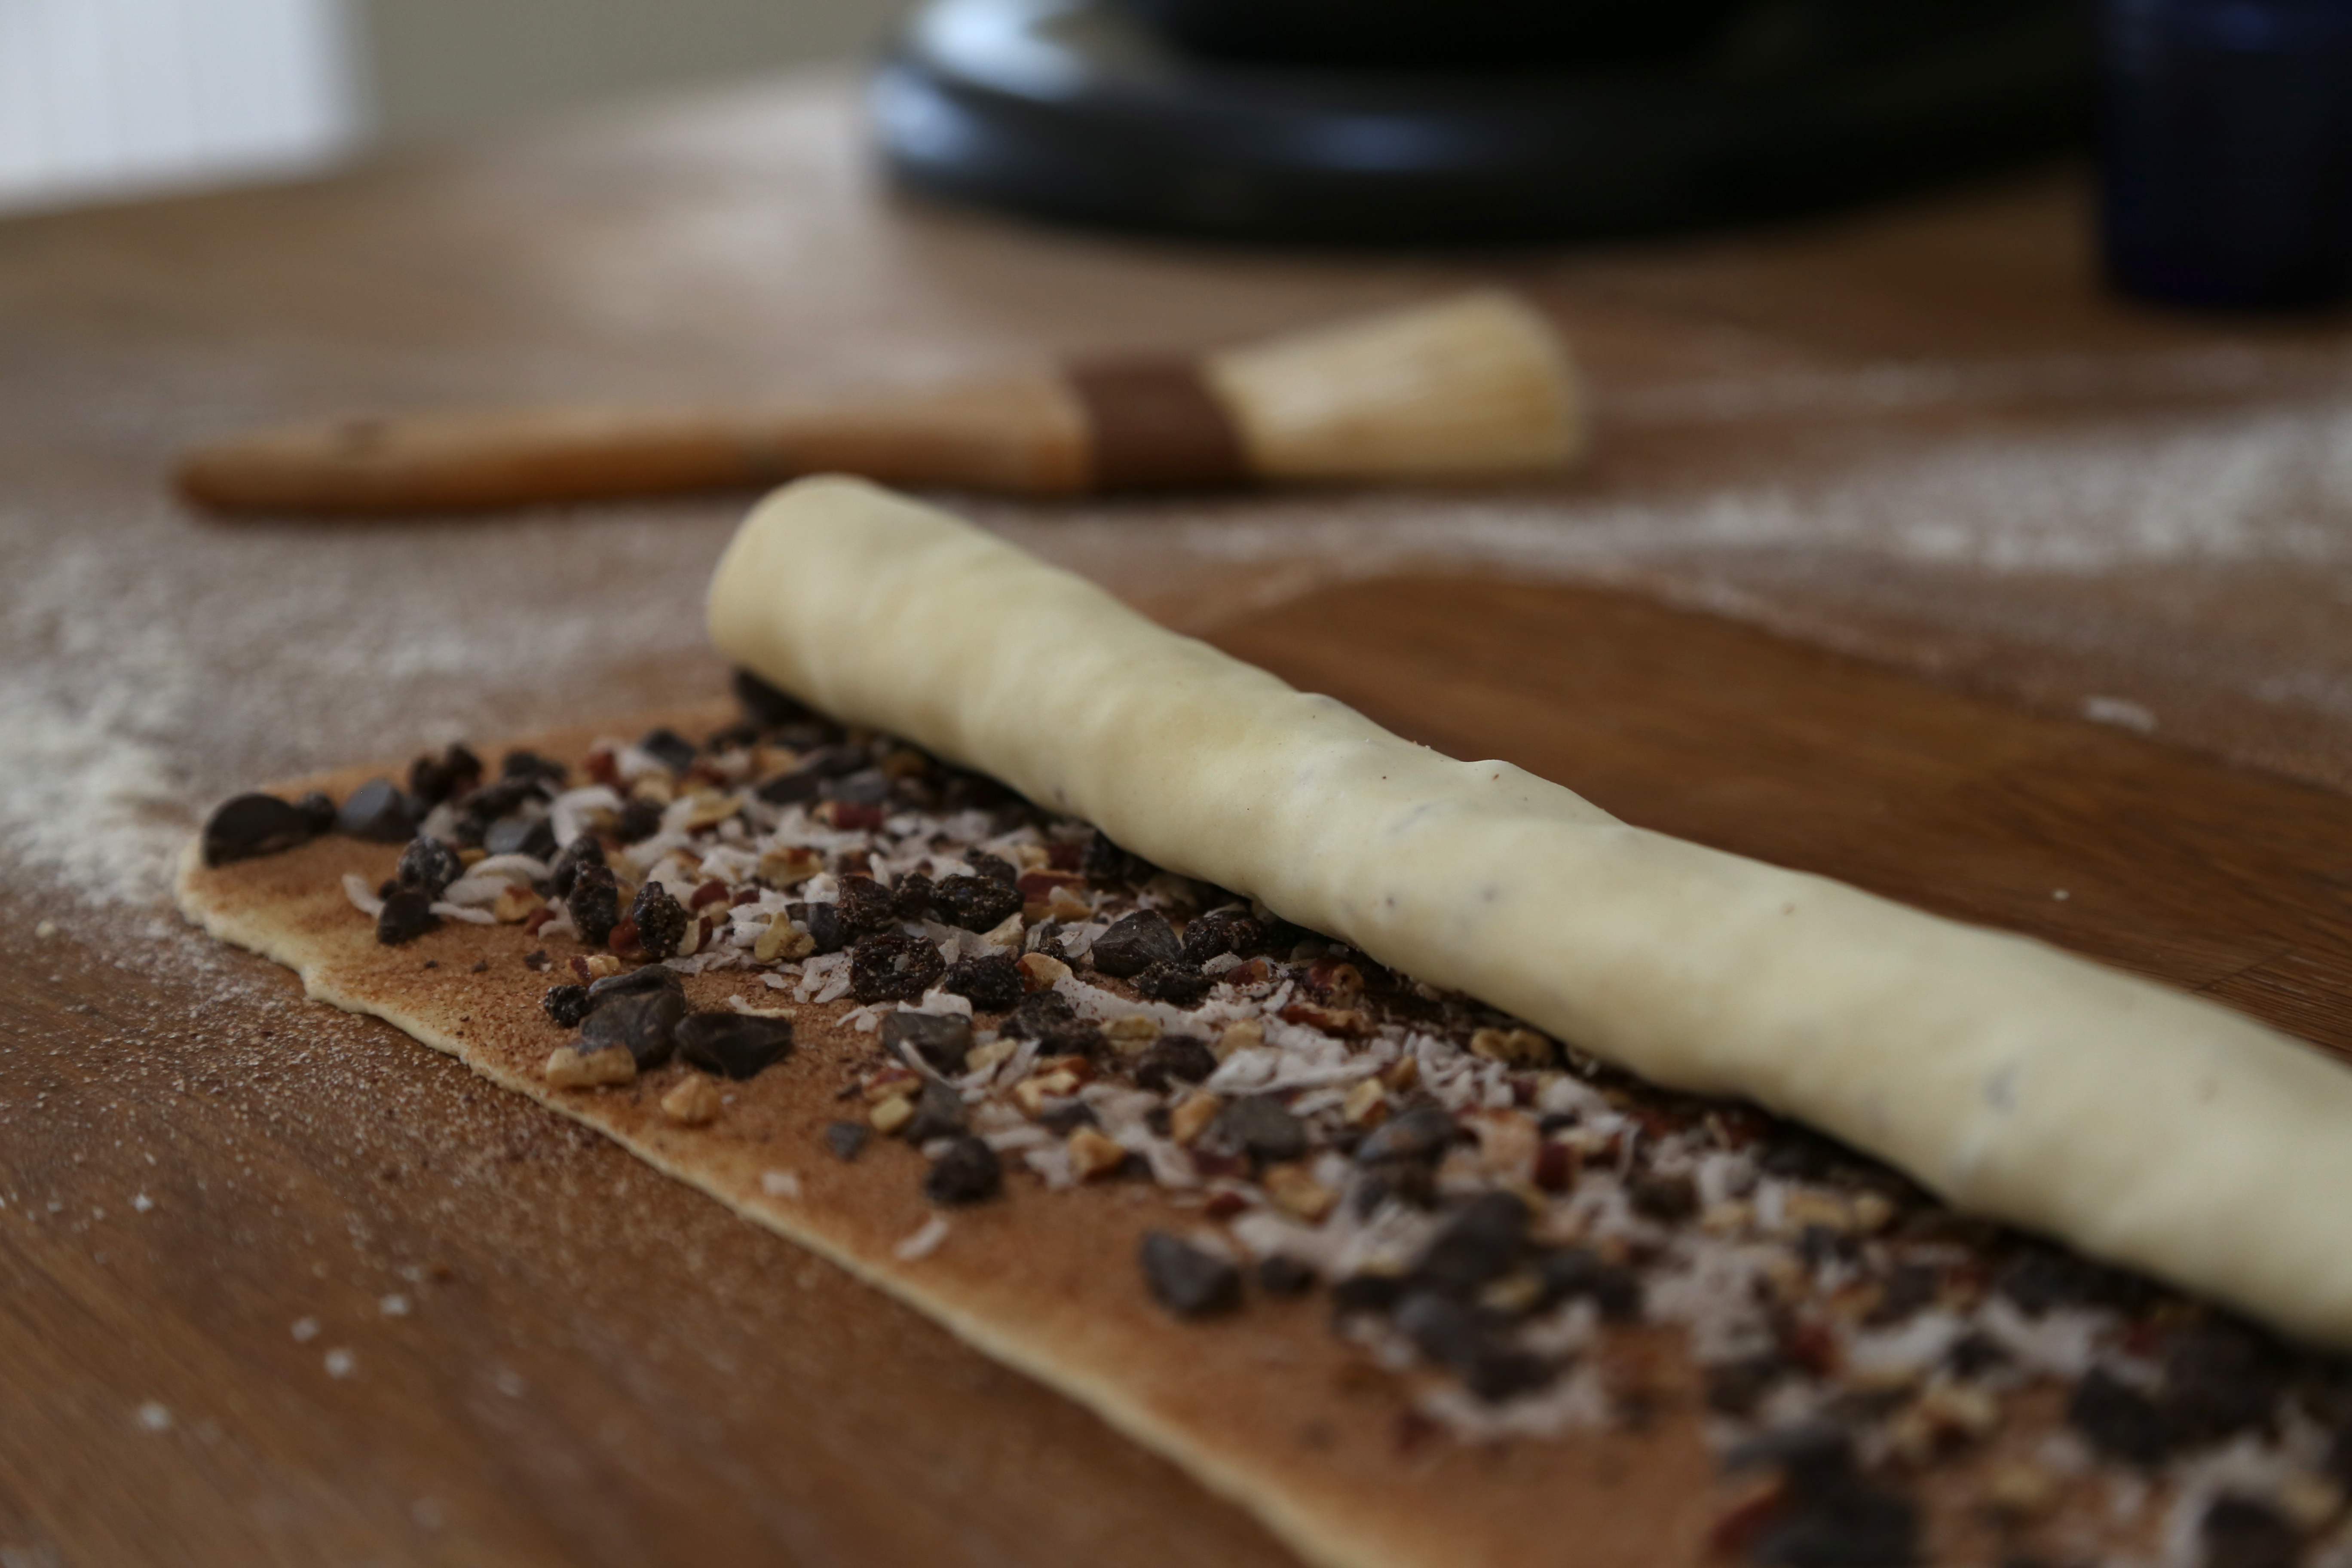
Melt 6 tablespoons butter.  Divide the dough in half and set half aside, covered.  Roll the other piece into a circle that is about 12″ in diameter and 1/8″ thick.  Brush the dough with some of the melted butter.  Cut the dough into 12 equal wedges.  Take one wedge of dough, starting with the wide end, roll it up and pinch the tail to the roll to keep it from opening during baking.  Place 12 rolls on a pan lined with parchment paper or silpats, tail side down.  Space the rolls at least 1″ apart, brush them with butter, cover the pan loosely with plastic wrap.  Repeat the process with the other ball of dough.  Let the rolls rise until double and bake as directed in the recipe above.

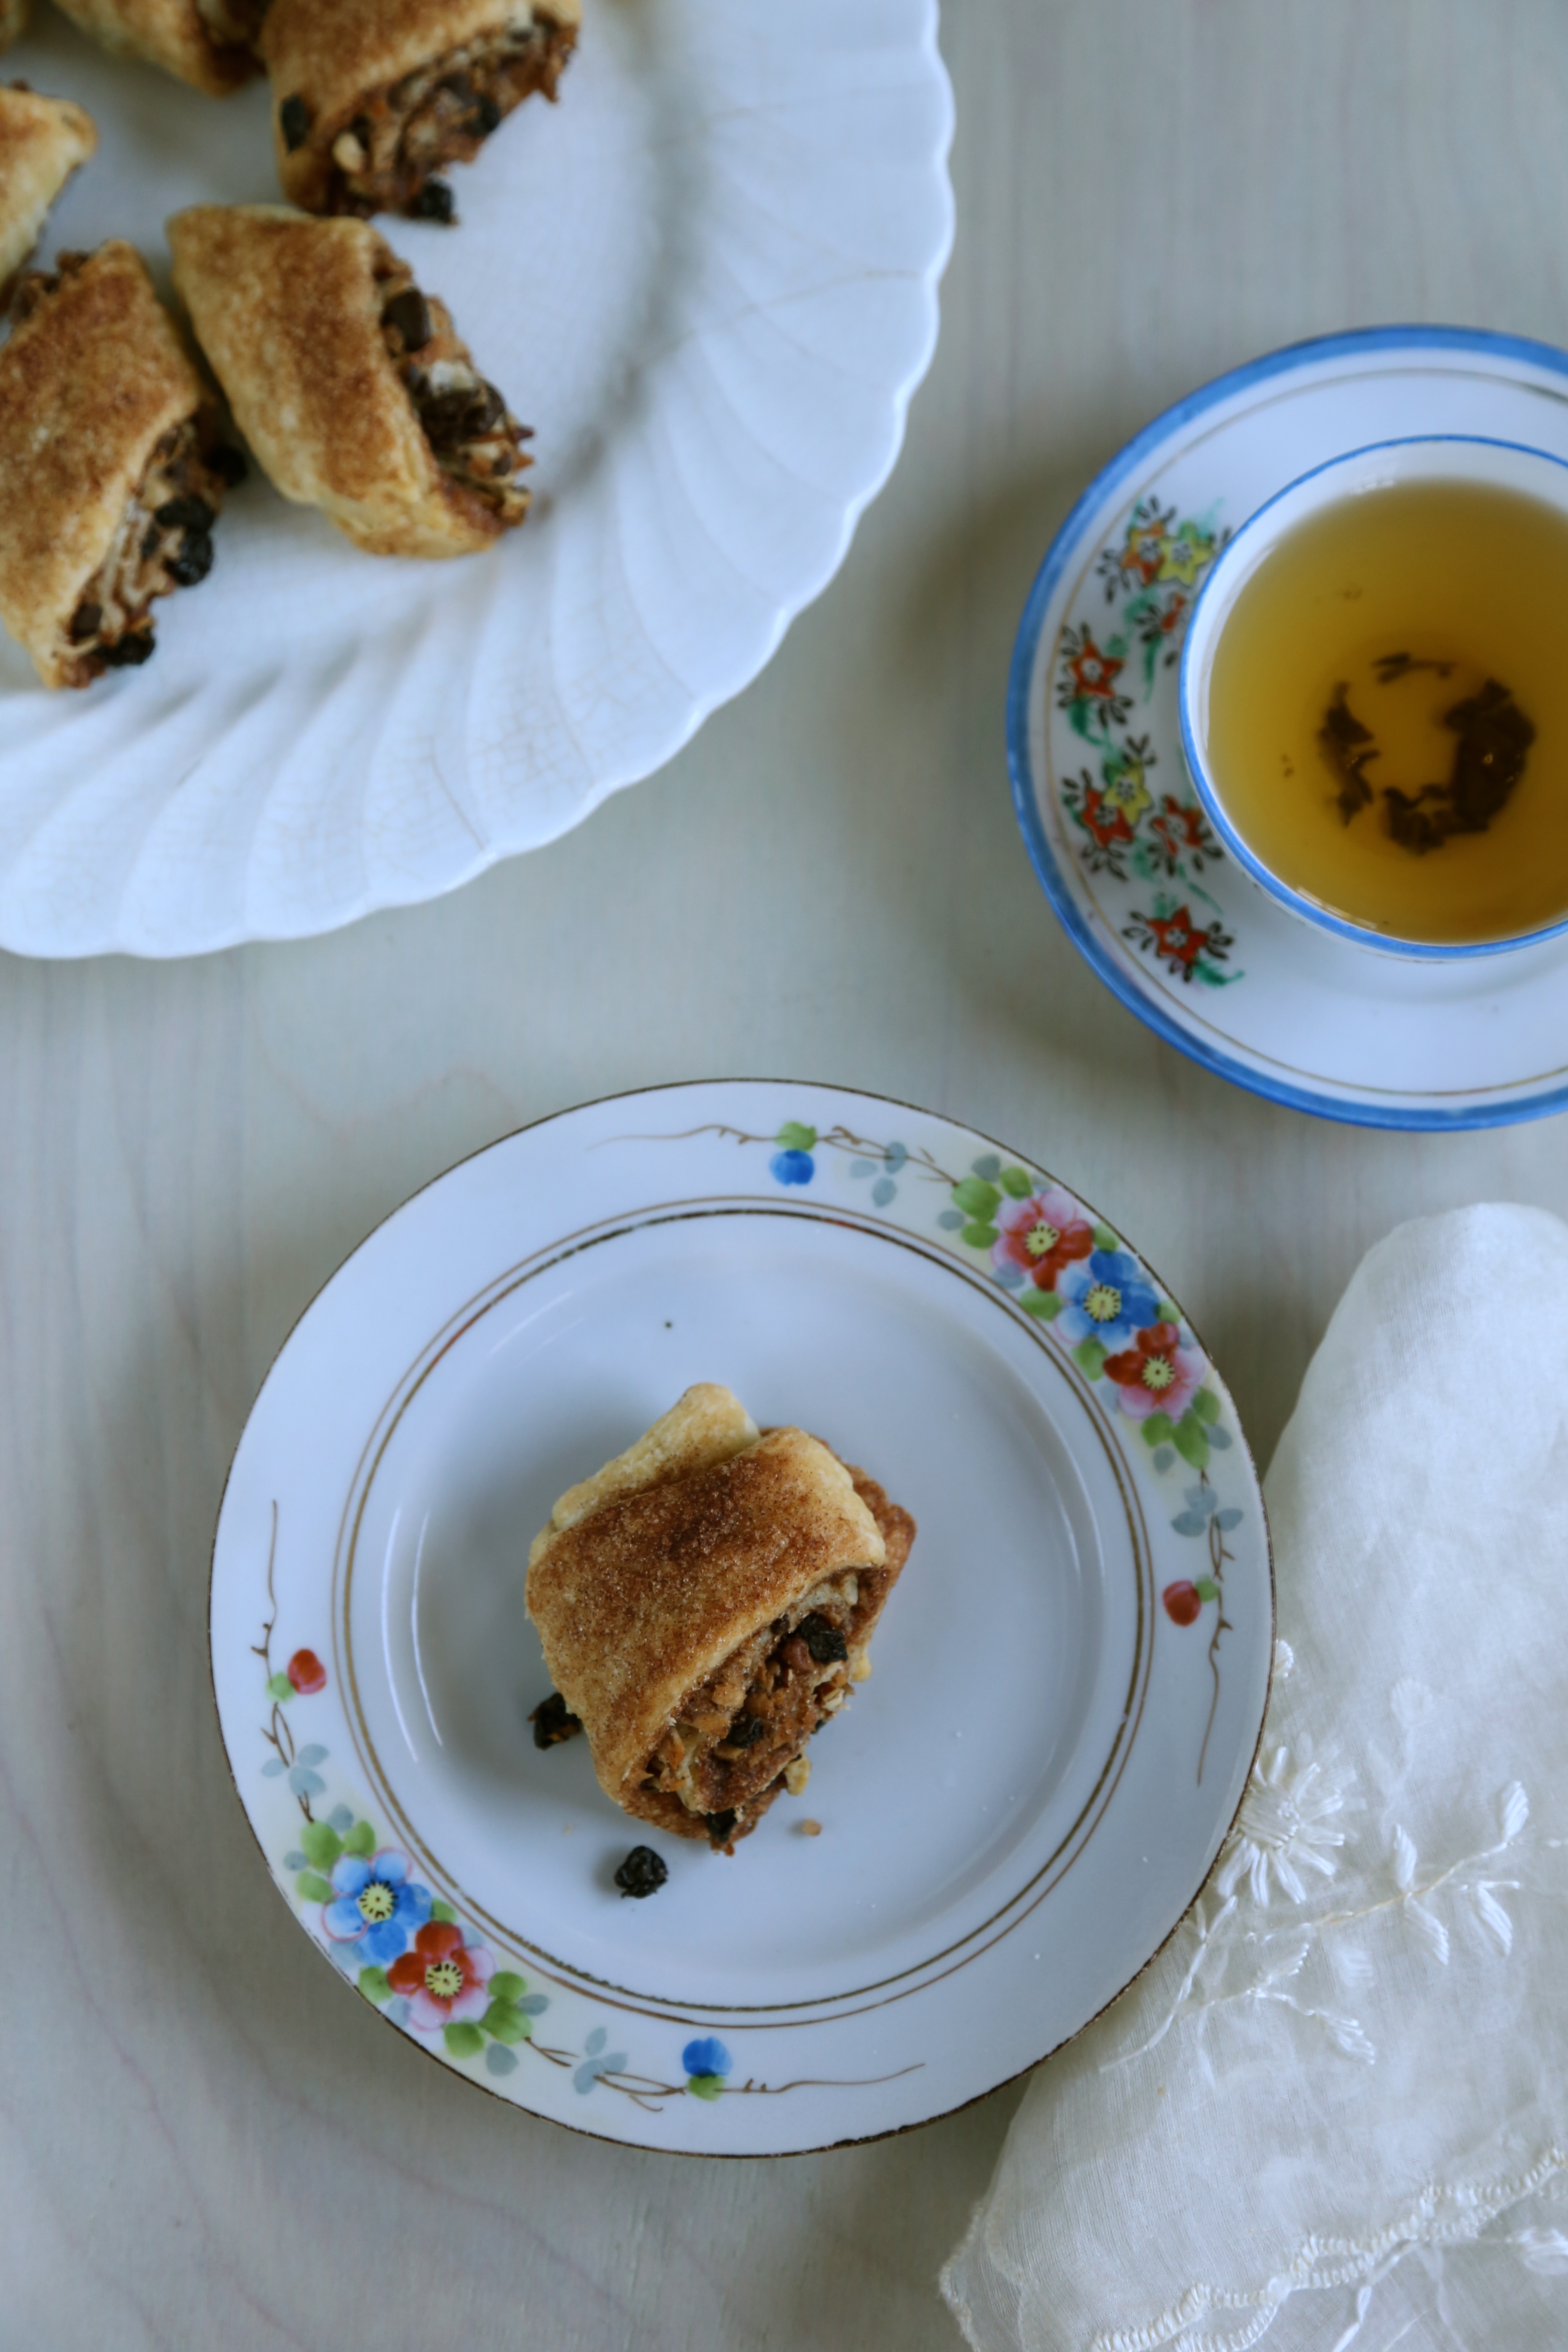
Serve the rolls fresh from the oven with butter or jam or butter and jam…They reheat nicely too and also make lovely rolls for little sandwiches!

IMG_2066off the shelf posts feature cookbooks from my personal collection.

Mad About Chocolate; a tuesdays with dorie post

IMG_2313

Cookies at Christmas are a given.  How can you not bake them?  What would Santa think if he slid down the chimney to find out you didn’t bake him cookies, chocolate cookies, with minty ganache???  Looks like I will find out since I had to sit this round out.  Hopefully, my fellow Tuesdays with Dorie bakers can forgive me because even though they sounded amazing, I was too busy to bake up a batch.  Truth be told, the thought of having an entire batch of chocolate cookies with a mint ganache filling and topping in the house terrified me; how would I be able to stay away from them???

Luckily for me, I came up with a better idea.  The contributing baker, Marcel Desaulniers is a bit of a legend here in Williamsburg.  For years, he was responsible for the desserts at the landmark Trellis restaurant, but two years ago, he opened his own shop, Mad about Chocolate.  Knowing I did not have the time or the willpower for these cookies, I took a trip to the shop and picked up a few sweets to indulge in.

Centrally located near the Historic Village, Merchants Square and the College of William and Mary, the shop is easy to find and so is the parking.  Make a trip in and see the sights and take a short visit to the shop and refuel!
IMG_2319So far, I am having a hard time finding anything I do not like about the historic district.  You can wander the streets of the colonial villiage and find plenty of shops and restaurants in Merchants Square and everywhere you go, there are places to sit and enjoy the view.  While I do realize this is a tourist destination, so far, I have not encountered crowding and congestion that make it unpleasant, even during August, it was busy but not impossible to get around.

IMG_2317

While chocolate is the specialty of the house at Mad about Chocolate, the menu does include a few savory options, be sure to check the special board out front on your way in.

IMG_2303

Don’t let the sizes of the showcases fool you, while they are small, they are stocked and if you ask me, less is better-they do not overload the cases meaning what you see is freshly baked.
IMG_2306Need a gift?  All of Chef Desaulniers books are available, I personally have a copy of Desserts to Die For on my book shelf.  The cute seasonal gift packaging makes even a gift of cookies seem extravagant.

IMG_2309

While I was in the shop, the man himself came in to chat with the staff.  Of course I had to say hello and in the process, told him his recipe was the one chosen for today’s post by the Tuesdays with Dorie bakers.  It was a pleasure to meet him and while I am sure he was busy, he took a few minutes to speak with me.

IMG_2308

The indoor seating area is very colorful and the artwork is all available for purchase; some of the artwork is by Connie Desaulniers.
IMG_2299

Each of the tabletops is made with a different colorful design that appears to be a glass mosaic of sorts.


IMG_2325But let’s not forget why I went to the shop in the first place:  cookies, lots of cookies.  Starting at the top, bourbon oatmeal, tribe (a William and Mary tribute) and the infamous black mamba.  Resting on top, a synergy bar.  So let’s take a moment to admire them…

IMG_2343

This right here, my new favorite decadent treat.  Ordinarily, I do not like oatmeal combined with chocolate, but this, a dark chocolate candy bar with (oatmeal) granola, cacao nibs, chocolate covered coffee beans and coffee is absolutely perfect.

IMG_2336

Think they are ordinary cookies?  Look at the size of that-and it is just half of it!  The bourbon oatmeal is loaded with dried cranberries and there is nothing ordinary about them.  
IMG_2338College team names are funny and William and Mary teams are known as The Tribe.  While I do not know the history behind the name, I can say this, if you are not a chocolate fan, the Tribe cookie is for you.  It has a bit of lemon zest, pistachios and white chocolate in it and it is every bit as decadent as the others.

Since I was losing light on this grey, dismal day, I did not take a photo of the black mamba but all you need to know is that it is dark and chocolatey almost to a fudge brownie extent and chock full of walnuts and pecans.  It is also still in the bag-I could not take even one more bite of cookie…  This could be a dangerous situation for me; the shop is pretty close to our new house and I can easily get there when I need a chocolate fix; remind me to buy a bicycle…

To learn more about Mad about Chocolate, visit the website.  To see what the other bakers came up with, visit the Tuesdays with Dorie website.

skillet fried chicken cakes; putting leftovers to work

IMG_1781


Tis the holiday season and days full of hunting and gathering.  Shopping for gifts, planning for parties, wrapping gifts, writing cards and so on.  Often, dinner is an after thought and most of us grab something from the market or a favorite take-out spot that we can dump on the table with little to no effort.  When the stress associated with getting everything done, the cookies, the gift wrapping and the decorating, who wants to make dinner?


Even so, a nice dinner on the table at the end of a busy day is just what I want and now that there are just two of us to cook for, I actually look forward to the task.  Generally, helpful hints for the homemaker (laughable isn’t it-me a homemaker?) call for cooking large batches of stuff and serving it all week long or they instruct you to divide it up and freeze it for days like this when cooking is not an option.  That is a sound plan and good advice, just not for me.  When I am faced with eating my way through two gallons of chili or a ginormous pan of baked pasta, I get tired of it quickly.  More often than I care to admit, good food ends up putrefying in the back of the fridge.


One way I have managed to get a menu together that covers the whole week is to pick a few ingredients, purchase them in bulk and prepare different dishes from them so that even though I am essentially eating the same thing, there is enough variety to keep me from getting bored.  Remember my recent series on One Bag of Kale?  A large, one pound bag of kale appeared in four separate meals and no boredom was detected!  This time around, I used a whole, roasted chicken, two of them actually, to fill my menu.  We feasted on soup, creamy chicken and vegetables over rice and a new favorite dish, Skillet Fried Chicken Cakes.


IMG_1798

As you may know, we recently relocated to Williamsburg, Virginia and if you are familiar with the geography of the area, you also know that we are a hop, skip and short trip across a couple of bridges from the Chesapeake Bay.  In culinary terms, that means we are smack dab in the middle of oyster and crab country.  Amazingly enough, I am not a huge fan of either one.  Mussels, absolutely!  Calimari, duh, I am Italian, calimari is a given here.  Lobster, now you’re talkin!!!  Crab, meh; I’ll stick with shrimp and lobster.  Oysters, eeewww-can’t even think about them.  However, I can shuck ’em all day long thanks to my first real job after graduating from the CIA.


My husband, on the other hand, has a thing for crab cakes, specifically Maryland Crab Cakes.  Since I do not eat them, I naturally assumed from the name that the cakes were made of blue crabs from the nearby Chesapeake Bay.  However, the difference between other crab cakes and Maryland crab cakes is huge.  In this part of the country, folks like their cakes to be made from fresh crab and little else.  They like them large and pan fried in patties that are so tender they barely stay together and are eaten with little more than a bit of remoulade sauce.   Not being a fan of remoulade sauce or it’s low brow cousin, supermarket tartar sauce in a jar, I never even consider ordering the crab cake special in a restaurant, much less making them at home!


Oddly enough, the dish does sound tasty to me, except for the crab part, and it had me wondering, if we can call tuna the chicken of the sea, could we let a chicken take a deep sea dive?  Would replacing the crab meat with freshly pulled chicken meat work in a crab cake recipe?  You bet it does and despite my enthusiasm for this compromise, I was skeptical that my husband would agree.  The long and short of it all, he devoured them and did not even miss the crab.  Success!


But how can this be a time saver?  Easy, next time you are going to roast a chicken, roast two or three if you can.  Pull one (or two) chicken(s) to pieces, separate out the meat, discard the skin and save the bones and carcass for soup.  Weigh out (yes, weigh it out-a scale is easy to find and surprisingly affordable!!!) a pound of pulled meat for a batch of cakes and set aside the remaining meat for soup, white chili or another of my favorites, chicken and black bean tacos.  You can freeze it until you need it or spend a day in the kitchen making everything-personally, I prefer to freeze components and then thaw and cook them as needed.  The recipe is quick to make and easily doubled if you want to plan ahead; just freeze the cakes and thaw and cook when you want to serve them.


Make these cakes as long as one day ahead, cook them when you plan to serve them and put them on the table with your favorite buns (kaiser rolls for me if I am buying them, homemade otherwise!) and fixings, a local brew and secretly wish for the chaos season to end and for  summer to arrive…

Skillet Fried Chicken Cakes

IMG_1806Recipe is adapted from one that appeared in Food and Wine and was written by Andrew Zimmern.  See the original recipe here.  And for the crab lovers out there, just prepare the recipe as written in the link, I am pretty sure Chef Zimmern knows what he is talking about here!

Makes 8 cakes, serves about 4


1 pound cooked, pulled chicken meat

1/2 cup mayonnaise

1 large egg

1 tablespoon mustard, preferably whole grain

1 tablespoon worcestershire sauce

1-2 teaspoons Creole spice mix

1 teaspoon hot sauce

3/4 cup cracker crumbs, about 20 saltines

Oil for frying

Buns, sandwich fixins, pickles


Pull the chicken meat so that it is shaggy and rough, cubes will not bind!  In a small bowl, whisk together the mayonnaise, mustard, worcestershire, spice mix and hot sauce.  Add the chicken meat and the cracker crumbs and gently mix to combine but take care not to mash it to a paste.  Divide the mixture evenly and form patties.

Pour enough oil into a large skillet so that the entire surface is covered by an 1/8th of an inch over medium heat.  Carefully add the cakes and fry on one side until browned.  Turn the patties and fry the other side until nicely browned and hot in the center.  Lift the cakes from the oil and set them on a tray lined with brown paper or paper towels, serve immediately.


For the OCD, make your own buns, I do when I can and freeze them, find my recipe here


the rugelach that won over France; a tuesdays with dorie post

IMG_2207I have been baking rugelach for at least 25 years.  It all started when I worked in a bakery just north of Sausalito, California.  We did everything by hand there and the rugelach dough was rolled out into large circles, topped with butter, cinnamon sugar, chopped walnuts and currants.  Each round was cut into 12 wedges and then rolled up into crescents.  We made them by the hundreds and after the first taste, I was hooked.

Over the years, I have made rugelach to sell in my bakery and to give as gifts during the holidays.  While the purpose of making them has changed from time to time, one thing hasn’t, the filling; I always made them with the same combination of ingredients that I first learned years ago.  Whenever I would see them for sale with jam fillings, I was always so excited by the choices but in reality, disappointed by the results.  I’ve always thought that cinnamon sugar, walnuts (or pecans) and currants make the perfect filling but this week’s recipe for the Tuesdays with Dorie bakers put that filling combination to the test.

Upon reading the ingredient list for the filling, I was completely skeptical, a little worried actually; my mother was visiting and she would be tasting them too.  While sharing rugelach with your mom sounds harmless, keep in mind that rugelach is one of her favorite things and she likes them the way I make them; no filling upgrades needed or wanted.  How could I possibly dump chocolate, coconut and cherries into her idea of perfection?  So I compromised.  After mixing up a double batch of dough so I could send mom home with a plate of goodies, I rolled out the first portion with cinnamon sugar, pecans and currants.  For the second portion, I combined cinnamon sugar, coconut and chocolate chips.

The directions call for rolling out a very thin sheet of dough that is 12″x6″ and then topped and shaped into a foot long spiral that is about an inch or so thick as well as tall.  If you cut them as instructed, you get a lot of single bite pastries making this a great treat to give as gifts or share at a cookie swap.  But for rugelach connoisseurs like us, bite sized wasn’t going to cut it.

IMG_2152

The secret to perfect rugelach, use lots of flour to roll it out but brush it off both sides or it will make them taste doughy.

IMG_2146

As I mentioned, I compromised, I added currants rather than cherries but kept the coconut, pecans and chocolate and spread them over a liberal dusting of cinnamon sugar.

IMG_2155

In my opinion, the more pronounced the spiral, the better the flavors blend.  To achieve this, I rolled out the rectangle of dough a little wider so that mine was about 12″x 8″ and only about 1/8″ thick.  Despite this fact, the dough was still cool enough to work with and it rolled up easily.

IMG_2151

One step I completely eliminated was to freeze the rolled and filled dough.  Honestly, that sounded like a disaster waiting to happen.  With my spiral still on the table, I quickly cut it into thick slices, on the bias.  This change affected the yield greatly; my batch of dough only made about 18 thick slices.

IMG_2165

One other change I made, no egg wash.  The leftover melted butter wasn’t going to be wasted on my watch and I brushed it over each roll along with a dusting of cinnamon sugar before they went into the oven.

IMG_2169

Once again, the recipe called for baking the rolls at 400F and that worried me.  When I prepared the last Baking Chez Moi recipe, Cranberry Crackle Tart, the instructions to bake at 400F turned out badly for me.  Perhaps the oven in our new home is a little hot, or maybe Dorie’s oven is a little cool, either way, I wasn’t taking any chances and I baked them at 375F.  Oddly enough, at this temperature, they baked in the time called for in the recipe.  Looks like I will be paying close attention to the oven temperature in the recipes from now on!

IMG_2199And as Dorie suggests, the perfect companion to a cup of tea on a dreary winter day.

To see what the other bakers came up with, be sure to visit the Tuesdays with Dorie website and if you like, buy one of the two books we are baking from and bake along with us!

mixed starter bread; a tuesdays with dorie post

IMG_2112This is the Tuesdays with Dorie/Baking with Julia tale of two breads; the train wreck version and the fingers crossed I hope it works version.

Bread baking has always been one aspect of my career that I completely lack confidence in.  There are so many variables and so many ways for it to go wrong and yes, baking in general is often a disaster waiting to happen, but bread is where I have had so many more failures.  As you know, baking is science oriented and when you add a living creature, yeast specifically, there are just so many more rules that must be followed.  In my world, a baguette has always fallen into the buy it not bake it category because I have never achieved good results when baking one at home.

So it was with the greatest of expectations and hopes that I set off to bake this bread.  When I read the instructions, I saw that I could actually make four different shapes if I followed the recipe, and I was determined to make at least three of the shapes.  But, as the Steinbeck wrote, “even the best laid schemes of mice and men, often go awry.”

First mistake; no bread dough to make the starter with.  Not a problem, I subbed a small amount (1/4 cup) of my homemade starter.  While this sounds good in theory, it made the starter very wet and it set the stage for more problems as I followed the recipe.  In the final rise stage, my dough was simply too soft and probably could have used another half cup of flour to make up for the added moisture in the starter I used.  However, the mistakes are not all mine.  Did anyone else notice the rather large discrepancy between the photo tutorial on page 116 and the directions in the recipe on page 117?

Give me a moment to vent and then I shall stumble down off my soapbox.  First let me state that I admire Dorie greatly.  She has helped put women bakers up in front of the crowd and to show the world that yes, women can be pastry chefs too.  She has in a lot of ways done for baking what women like Alice Waters and Julia Child did for cooking as far as convincing the world that women can do this and do it just as well if not better than men.  But editing is editing and as a published cookbook author, I can say that if the words under the photo do not match the words in the recipe, we’ve got a problem.  While this may have been fixed in later editions, my $3 flea market find is actually a first edition and I had a major mishap as a result.

My complaint is simple, step 3 of the photo tutorial instructs you to fold the dough down again (the folding process starts in step 2) and to seal the seam…it then goes on to tell you to repeat this process once or twice to form a short log shape with a tight skin.  That right there is it, one of the largest factors that my bread dough simply spread out rather than rise up and why it was not possible to get it off the floured towel without deflating it.  If you read the recipe, it only tells you to complete the folding and rolling once.  The tight skin is crucial not only to the success of a crispy, flaky skin but to the shape and the height of the loaf as well.

After having nurtured this dough along for 2 days, arranging our day around the baking schedule and then having such a flop that I had to go out and buy bread for dinner, I was truly annoyed with myself for not succeeding.  As I dumped half of the batch in the trash, I made the decision to save a piece of the dough and start again.  Then, while standing there in my kitchen peeling the rest of the dough off of a floured towel, I could not bring myself to tossing it in the trash.  Stubborn determination had me grabbing my basket and shaping the remaining dough.  The dough was soft and a little sticky at first but as I worked at shaping it into a smooth ball, I saw a change in the texture, it was no longer soft and shapeless and it was now tight and structured.  It rose beautifully in the basket and when it had doubled, I dumped it out on to the baking peel, slashed the top, slid it onto the heated stone in the oven and poured the water into the pan in the bottom of the oven.  Voila!  Picture perfect bread, and a lesson learned!

IMG_2125

The crust was thin and crispy, just like a good baguette and despite the many missteps and the extra rise time, it has absolutely no sour taste.

IMG_2141Just look at the interior of the loaf, all of the open bubbles you would expect after reading the recipe, but not the photo tutorial as it does not advise you to retain the open structure and air bubbles by handling it gently and not to deflate or mash it.  In the end, I am better prepared to make a baguette and my second batch is nearing the final rise.  Stay tuned fellow bakers, I will post additional photos when I get a decent loaf!

To see what the other Tuesdays with Dorie bakers came up with, visit the website.

cranberry crackle tart; a tuesdays with dorie post

IMG_2028

Cranberries are a vital part of the holiday season for many Americans.  In my family, we cook them up into a sweet sauce flavored with oranges, vanilla bean and spices and the kids eat them by the bowl full.  It is one tradition that I really will miss this holiday season.  We relocated from Nashville to Williamsburg and our family group that gathered together each Thanksgiving and Christmas is now separated by nearly 700 miles.  Even so, I couldn’t resist buying a bag or two, or four of cranberries and had to find a tasty way to use so many fresh cranberries.  Thankfully, this recipe used more than half of a bag, and now I only have 3 and a half more bags in the fridge…

The recipe gives you some good options and I decided to test some of them out.  With two different dough recipes to choose from,  I decided to mix up a batch of the sweet tart dough and as I mixed it, I chose to follow the recipe suggested in the “Bonne Idee” sidebar; it gave the option of using a small portion nut flour in place of the all purpose flour called for in the recipe.  It was quick to mix up in the food processor but I really think the amount of dough it produces was about double what was needed to make the pie shell.  As a result, I formed a patty with the leftover dough and tucked it away in the freezer.

As a person who literally has rolled out hundreds of pie shells by hand, this dough was very pleasant to work with and I did not have any sticking or crumbling or tearing.  It was so easy to work with that I had the crust rolled and in the pan in a matter of minutes.  Where I had issues, the baking time.  When I read the instructions and saw 20 minutes at 400, I was skeptical, it seemed like a long time for such a high temp.  In hindsight, I wish I had listened to my inner voice.  My crust came out of the oven a little black around the edges.  Luckily, I had not trimmed it down by one-third as the recipe called for and had enough to trim away the burnt edges and still have a side crust.

The filling of a marshmallowy meringue was such a small amount that I had trouble mixing it in my 6qt kitchen aid bowl; it just wasn’t enough volume for the beater to really come in contact with it at first.  After a really long time, it finally came together.  Since I did not want to buy any jam-I have two dozen jars of homemade blackberry jelly in my pantry, I just used some of my own from the open jar in the fridge.

As the tart baked in the oven, it puffed and cracked and finally, it was a nice, light golden shade and had a few deep cracks across the top. Carefully, I removed the pan from the oven, closed the door and set it down to cool.  A quick glance at the clock, 11:12pm; we wouldn’t be tasting this pie tonight.  Off to bed, to sleep and to dream of crunchy, crackly meringue and tart pockets of ruby red berries…

IMG_2029

One bag of kale, part 4; greens and beans

IMG_1856In my final recipe of the series, I give you one of my favorite recipes.  This recipe is adapted from one by famed vegan chef, Isa Chandra Moskowitz and can be found in her book, Appetite for Reduction and on her website, theppk.com.

Living in the south for as long as I have has influenced many aspects of my life and my meal choices reflect my current location frequently.  The biggest change on my plate is the heap of cooked greens and beans, two things I have never disliked but I also never thought to make a meal of them either.  The difference from the ones I feast on and the ones typically found in the south it that there is no pig on my plate.  Yes, I am a meat eater, yes, I like bacon but truth be told, I like my greens without the added pork products.  Honestly, if they are made well, they do not need the bacon because they have tons of flavor all on their own.

Despite the fact that I am technically a trained chef, while I can bake just about anything, my cooking skills sometimes are lacking and that is where Isa Chandra comes in, specifically her cookbook.  By using her book, I have learned how to make vegetable dishes every bit as amazing as the desserts I produce in my professional life.  Appetite for Reduction as well as Veganomicon and Vegan with a Vengeance are some of the most used books on my shelf and I highly recommend picking any of them up if you come across them.

This recipe uses the last portion of the big bag of kale, it calls for approximately 4 ounces or about 4 cups of kale or any other cooking green.  If you have been following this series, this is approximately 1/4 of the 1 pound bag; part 1 used half of the bag, part 2 and 3 each used 1/8 of the bag and this recipe uses the remaining 1/4.  To repeat the dividing process, for part one, use half the bag.  Take the remaining half of the bag and divide it in half.  Place one half into a storage bag and place it in the fridge till you need it.  Divide the remaining portion into two equal parts and bag each separately and store until needed.  For those of you that are not kale fans, try using mustard, collards or any other green suitable for cooking in place of the kale.

While I used white beans, specifically white kidney beans, you can use any bean you like.  The original recipe calls for black eyed peas, one of my favorites but I have made this recipe with chick peas, fava beans, butter beans and several different white beans, all with delicious results.  Do what you like, you’re the one who is going to eat it!

Greens and Beans

serves 2 as a main dish, 4 as a side

1 tablespoon olive oil

1 small onion, diced

1-2 cloves garlic, minced

4 cups, packed, torn kale with stems removed, about 4 ounces

3/4 cup broth, divided

1/4 teaspoon salt

1 (14.5oz) can white beans, drained and rinsed

3/4 cup tomato sauce or crushed tomatoes

1 tablespoon sriracha or other hot sauce

1/4 teaspoon smoked paprika

1/4 teaspoon liquid smoke, optional

In a large, deep pot, heat the olive oil and saute the onions over medium heat until translucent, about 3-5 minutes.  Add the garlic and cook about 1 minute longer.  Dump in the kale, salt and 1/4 cup of the broth and immediately cover the pot for at least 1 minute.  Stir the greens and keep it covered to allow them the time to cook down, about 10-15 minutes and be sure to stir them occasionally to make sure they are cooking evenly.  Reduce the heat to medium low and add the beans, tomato sauce and the remaining broth and allow to cook for at least 5 minutes, covered.  Stir in the sriracha, paprika and the smoke flavor and allow it to simmer for another 5-10 minutes.  Check the seasoning and add additional salt and hot sauce as needed.

One Bag of Kale Recipes:

Autumn Kale Salad with Butternut Squash

Potato-Kale Hash with Chickpeas

Vegetable Barley soup with Kale

local friday; a hike on the back bay trail

IMG_1155When our daughter came to visit last month, she had only a few requests:  she wanted to visit a winery and she wanted to go to the beach.  Fortunately, in Williamsburg, Virginia, both requests can be met quickly because there are wineries all around us and the beach is just over an hour away.  We set the GPS for Virginia beach and went on our way.  After one of the best breakfasts I have had in a while (beachside no less!), more on that another day, we walked the boardwalk and visited some shops along the way.   It was a windy day and we decided we wanted to see more than the typical tourist beach stuff so we drove further down the coast to the Back Bay Wildlife Refuge.

The Back Bay Wildlife Refuge, part of the National Wildlife Refuge System, is about 30 minutes from the main drag on the beach and it features multiple trails and activities.  The trails lead to the bay and the beach.  You can also launch boats, canoes and kayaks here as well as travel by bike.  Since we were on foot, we took the Charles Kuralt trail.  It was cool out but sunny and breezy and we wandered all over.  The walk from the trail to the dunes was easily negotiated along the raised boardwalk.  Until you hit the base of the last dune, you can see the footprints that lead up over it to the beach and it was impossible to do without getting sand in our shoes!

IMG_1158Along the way, I spied what almost looked like a champagne cork sitting on top of the sand.  A closer inspection revealed that it was a mushroom.  Imagine that-a mushroom growing on the sand, the mycelium was actively fruiting and we saw many of them around us.

IMG_1161

At some point, I hope to get this identified but it will be tricky, we did not bring it with us because you cannot remove things like this from a refuge.  The color of the gills was a rosy red, almost a purple tint to it.  If anyone has a clue as to it’s identity, please, leave a comment.


IMG_1147We walked to the beach and found it nearly deserted.  Swimming is not allowed here but fishing is and the only other people we saw had multiple lines in water.

IMG_1129

It was a beautiful day with a deep blue sky, and the visibility was very good.


IMG_1126

Walking along the trail we passed a marsh where migrating birds will stop to hunt.  Can you see the Great Blue Heron near the center of the photo?  We have seen many of these birds all around the country.  Although this is part of a birding trail, this guy was the only bird we were able to spot!


IMG_1125

The trails around the Visitors center are interpretive and they are also at water level.  What this means is that at high tide, some areas are flooded.  We couldn’t take the one trail because it was about 6″ underwater in one area and neither of us had on waterproof boots.  The marsh that the path cut through was almost like a corn maze at times and we could not see anything but the plants on either side of the walkway.  This wet area with its tree roots and grasses was eye-catching.  It was nearly impossible to see where the water stopped and the plants started.  The only clue was the rings on the surface of the water.

IMG_1124A shot from further away of the reflection pond.

IMG_1122

When you visit a wildlife refuge, you hope to see the wildlife.  Aside from a bunch of seagulls and a heron, we only say this snake.  Actually, it is a cottonmouth and it is not a snake you want to mess with.  Luckily for me, he wasn’t threatened by my presence and let me take his picture.


IMG_1121You can see how well he blends in, we walked past him the first time.  A teacher leading a group of students on the trail pointed him out to us in warning and we were grateful.

Do yourself a favor, visit the refuge and take in the sights and see what wildlife inhabits the area .  There are multiple activities from bird walks to whale watches available.

Winter waterfowl walks

Whale watching

535412_193698534082190_1827035283_nclick on the image to visit the Friday Favorites linkup on the Virginia Bloggers website!

One bag of kale, part 3; vegetable barley soup

IMG_1664

For those of you who just joined, this week I am posting recipes using one bag of kale.  Everyone who shops in a grocery store has encountered the large, pillow sized bags of greens and probably most of us thing out loud, “I could never cook all of that before it goes bad…”  Well, worry no more, you can use that bag of kale before it turns to slime and you will wonder why you didn’t try this before.  Of course, you have to like cooked greens or this will not work for you!  To see the first two recipes, follow the links at the end of this post.

With the change in season, soups are appearing on the table often at our house.  Lunch or dinner, either will work, I enjoy a soup that is full of vegetables and beans but I really love it when barley is in the mix as well.  To make this soup, you can use whatever vegetables you like but to end up with a hearty vegan soup that is full of flavor, you do have to add some things to replace the flavor that meats and salts provide.  The kale will impart some flavor and contribute to the hearty profile, the beets will add an earthy quality along with color but the ingredient that really does it is the mushrooms.  They will take the flavor profile in a direction that is full flavored and satisfying without needing a single bit of meat or poultry.   Mushrooms and mushroom powders are the secret ingredient I reach for whenever I am making a soup or sauce that is meatless because they give it a similar flavor profile and add a richness that meateaters (and some former meateaters) often find lacking in a vegan recipe.

Vegetable Barley Soup with Kale

IMG_1684

serves 2-4

1 tablespoon olive oil

1/2 large onion, diced small, about 3/4 cup

1-2 cloves of garlic, minced

1 carrot, diced small, about 1/3 cup

1 celery stalk, diced small, about 1/3 cup

1 fresh beet, peeled and diced into small cubes, about 1/3 cup

1 1/2 cups diced mushrooms

6 cups vegetable broth, more as needed

1/3 cup pearled barley

2 cups chopped kale

salt and pepper

In a large pot over medium heat, saute the onions in the olive oil until translucent, 3-5 minutes.  Add the garlic and saute for an additional minute.  Add the carrots, celery, beet and mushrooms and saute for a couple minutes to get the mushrooms to release their juices.  Pour in the broth and the barley and bring the mixture to a boil.  Immediately reduce the heat so that the soup simmers slowly.  Continue at the simmer until the barley is soft.  The cooking time will depend completely on the barley and it can take from 30-45 minutes to soften completely.  As the soup liquid reduces, you can add additional broth or water.  Stir in the kale and cook until the it turns bright green and wilts a bit.  Season with the salt and pepper and serve with crusty bread or crackers.

One Bag of Kale Recipes

Autumn Kale Salad with Butternut Squash

Potato-Kale Hash with Chickpeas

Greens and Beans

amaretti; a tuesdays with dorie post

Amaretti, even the name sounds delicious.  These little cookies are so simple to make, it is almost a crime not to whip up a batch.  Of course, you have to be a fan of the bitter almond flavor the almond paste contributes to the cookie.

Traditionally, these cookies are served with a cup of coffee or bit of wine or liqueur.  In our house, they are consumed by themselves, two or three at a time, every time we pass by the box they are stored in.  Needless to say, I will not be making these again for a while-my clothes are getting tight…

Way back when, in my days of working at the World Trade Center in New York City, I was a pastry cook in the hotel that sat between the two towers.  Our pastry chef, who was from France, had us make these all the time but he called them macaroons or maybe macarons, it was a long time ago and I cannot remember.  The recipe was nearly identical to the one we used at the hotel.  This I do remember because I still have the recipe and I make them from time to time.

The crazy thing about all of this, I was probably toiling away, below the plaza while Nick Malgieri, the contributor of this recipe to Baking with Julia, was working away at the top of the towers in the world famous restaurant, Windows on the World.  Small world, isn’t it?

To see what the other Tuesdays with Dorie-Baking with Julia bakers came up with, be sure to check the homepage.  Consider baking along with us if you have the book, or buy/borrow one and join in on the fun.  We are also baking our way through Dorie’s new book, Baking Chez Moi.