country style pot pie, #22 of 52 pies

it was a cold and dreary day…and just whose idea was that?  it has been so nice and warm and sunny and then suddenly, i’m freezin in here!  when the weather is like that, i have a taste for hot soup.  soup isn’t very pie like though so i decided to go with a pot pie-it’s hot and creamy and perfect for cold and dreary days.

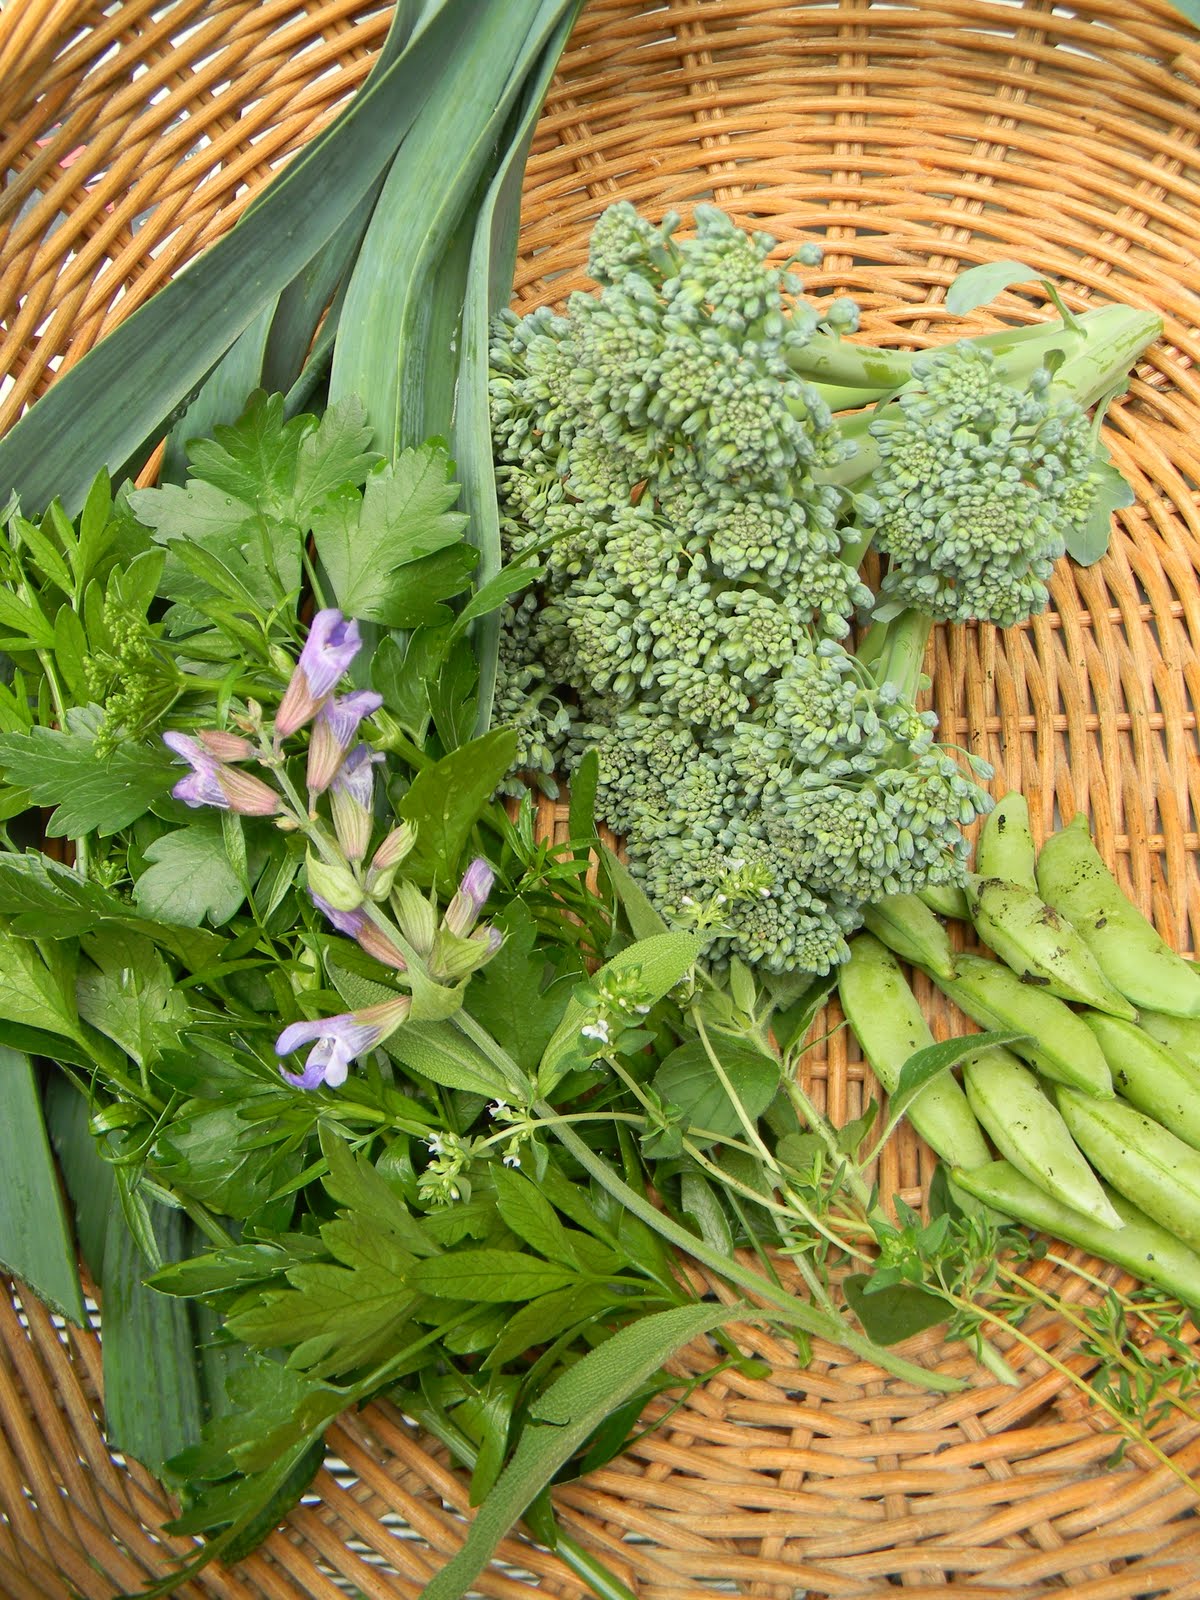
right now, we have lots going on in the garden.  in between showers, i grabbed my basket and a pair of scissors and went out to gather what i would need.  leeks, broccoli, peas and herbs (parsley, sage, oregano and thyme).  in the house i had some mushrooms and garlic as well as some asparagus that my husband had already picked from the garden.  if it seems like something is missing, it is.  when i pulled out the leftover turkey from the fridge, i was nearly over come by the smell.  it had been living in there for a week but i thought it might still be good.  however, it is destined to make the trip to the digester where the worms will enjoy it.

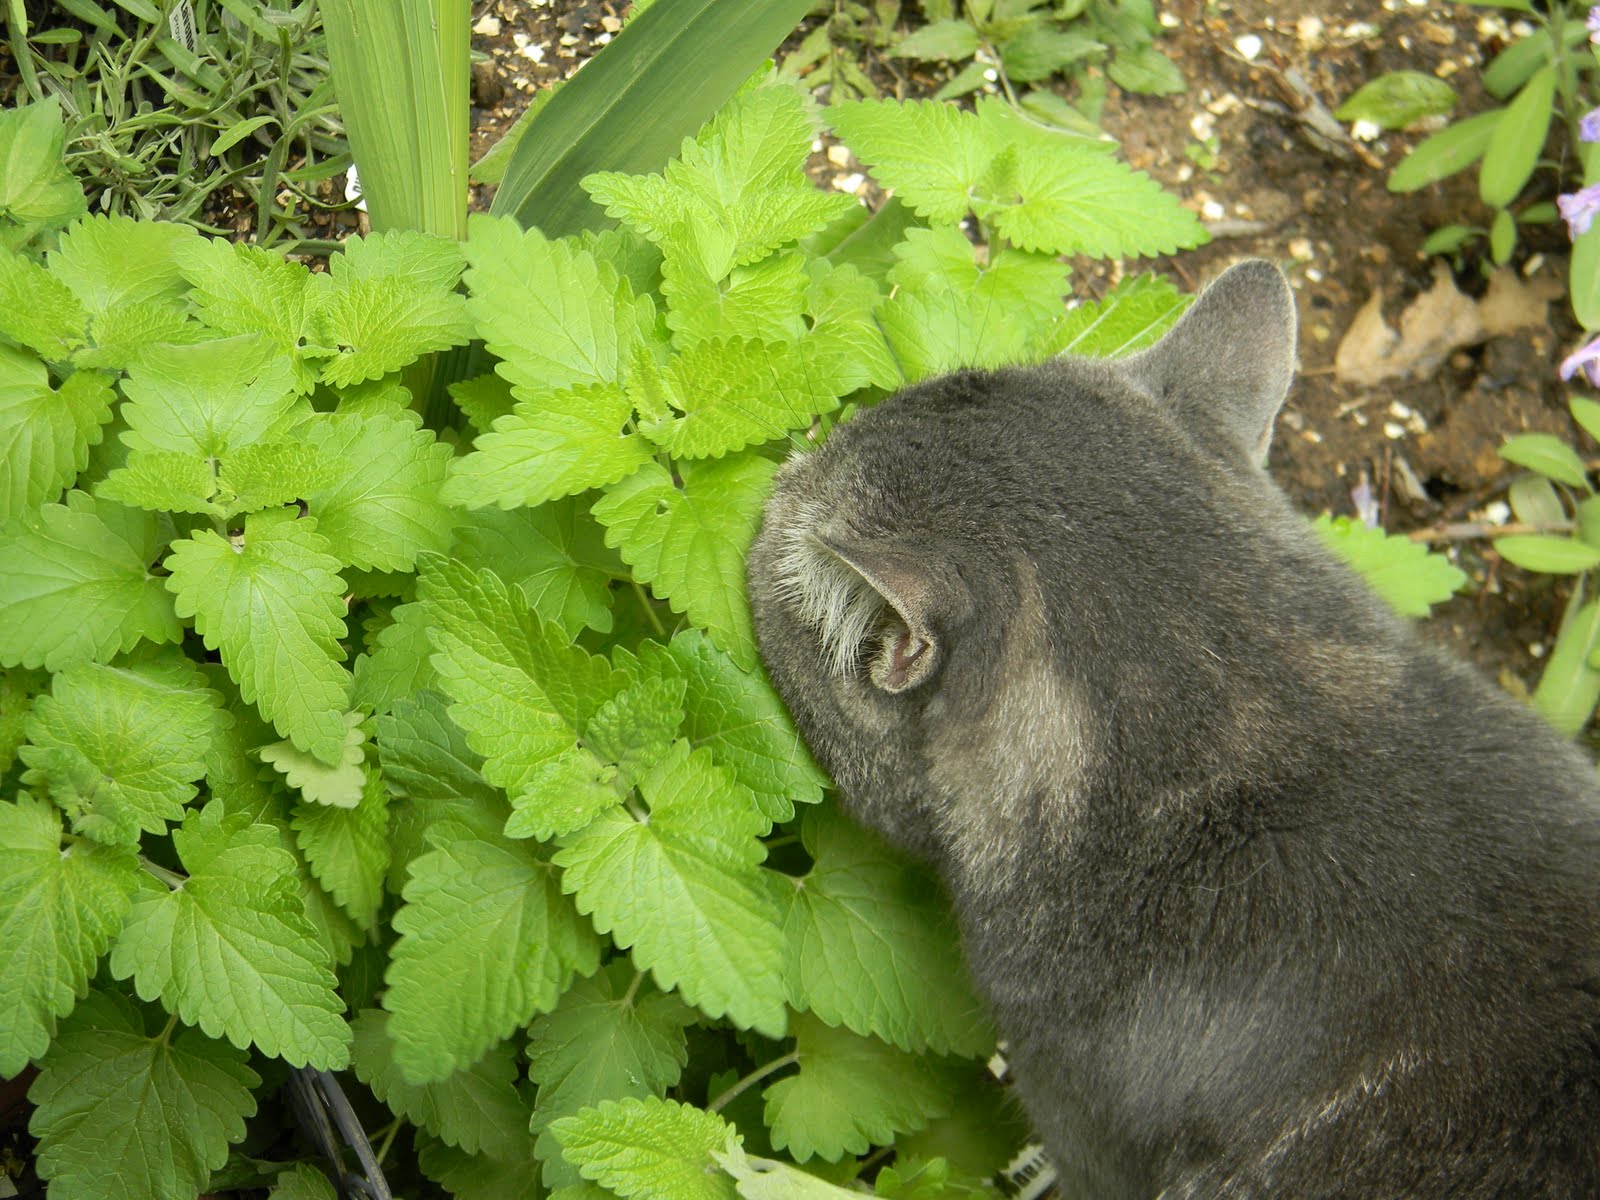
as always, when i am out in the garden, the captain tags along.  somebody has to make sure i am behaving.  as you can see here, he got sucked into the catnip.  looks like he needs the chaperon now…

i prepared the vegetables first.  some were sauteed-leeks, garlic and mushrooms.  others were blanched-carrots, broccoli and asparagus stems.  others were added raw so they would not overcook-broccoli florets, asparagus tips and freshly shucked peas.

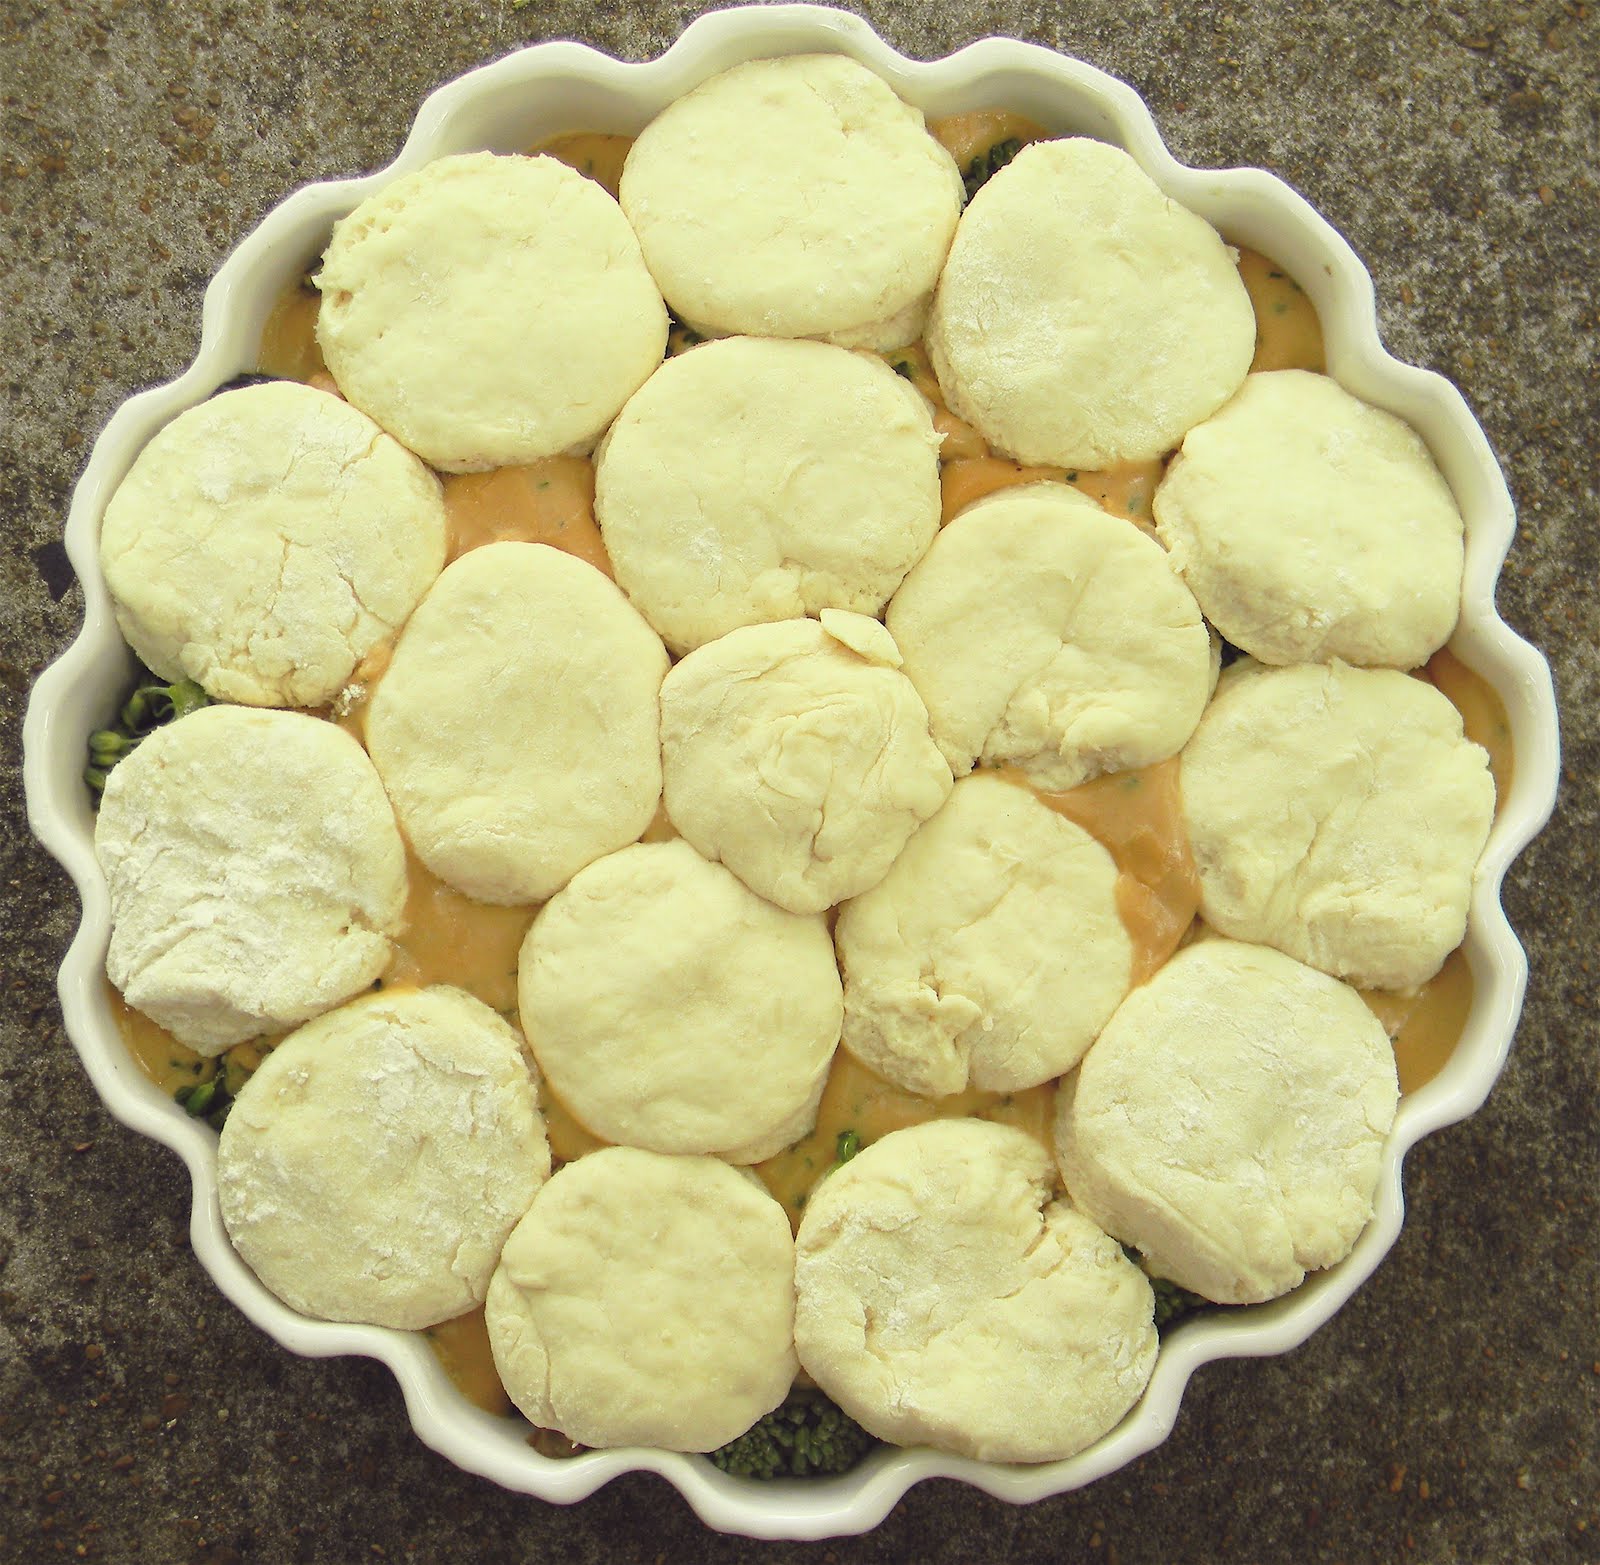
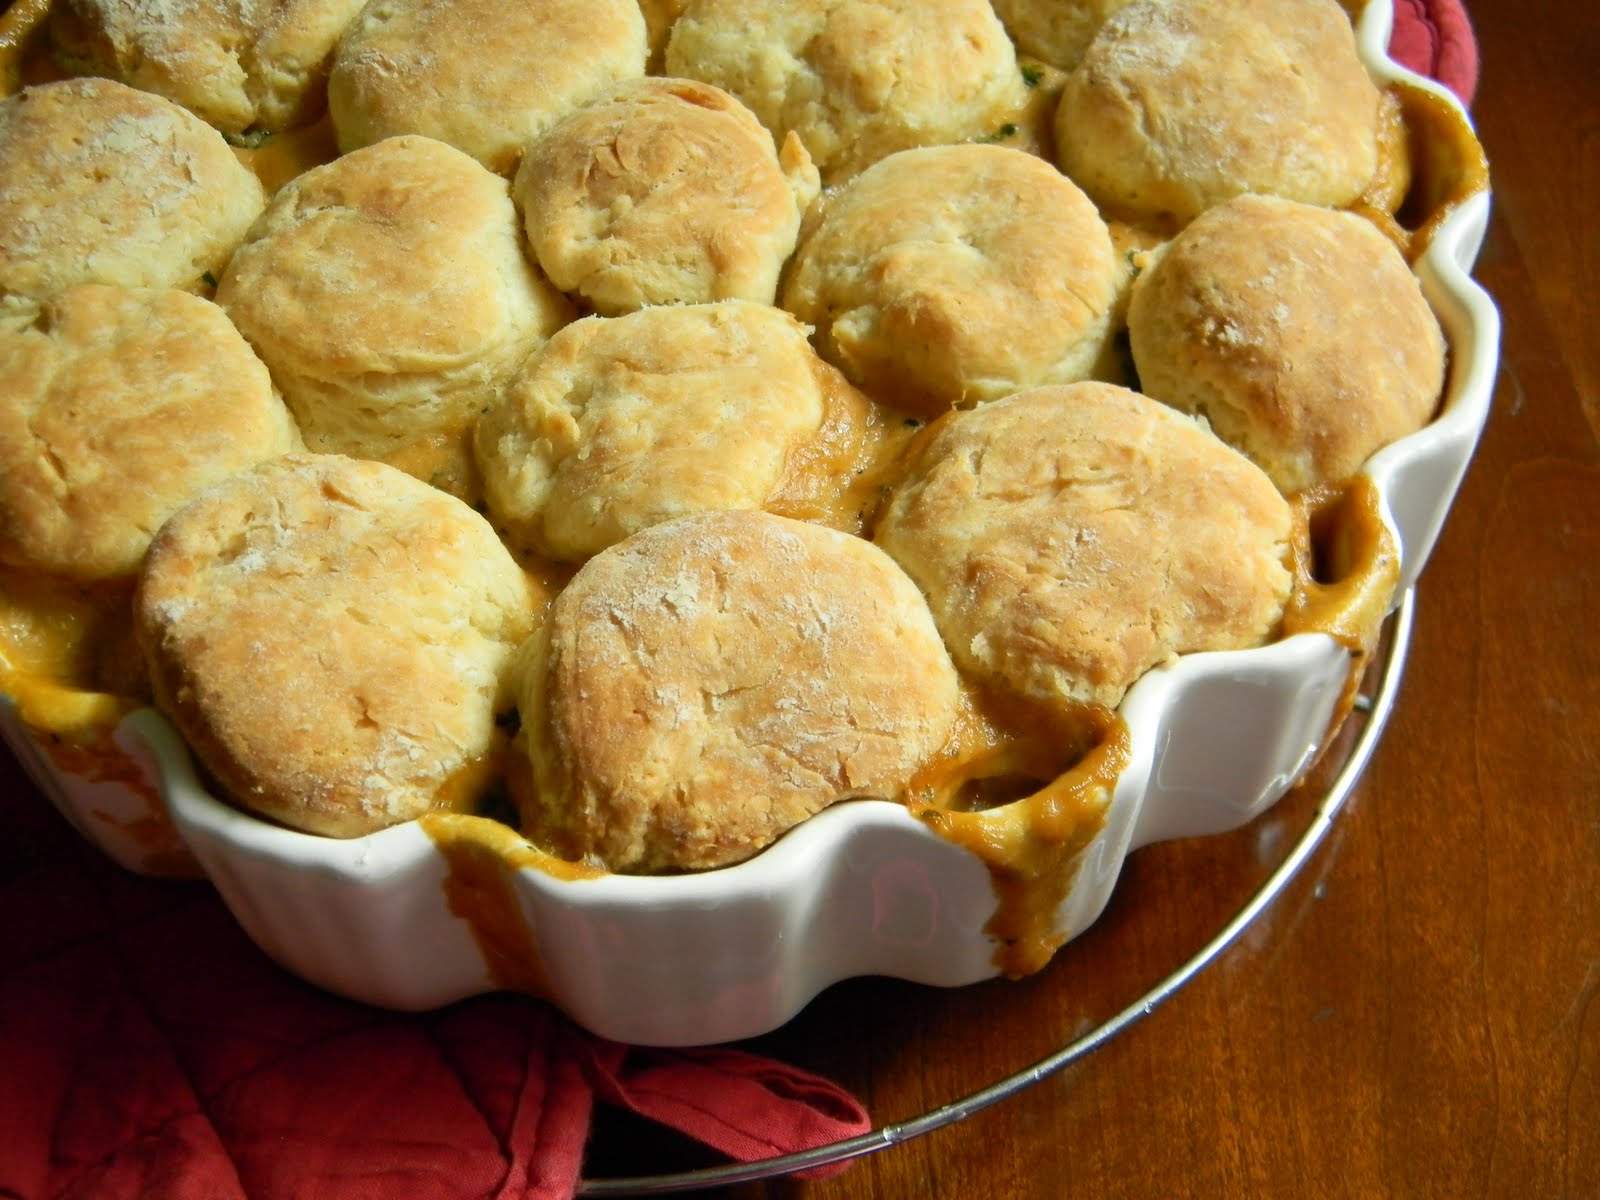
using vegetable broth and some half and half, i made a nice creamy sauce and finished it off with the herbs.  then it was poured over the vegetables and topped with biscuits.

into the oven it went and in 30 minutes, dinner was served!
country style pot pie
one (9″) crustless pie which serves about 4 as a main course

filling
the great thing about this recipe, you can customize it however you like!  don’t like broccoli-use something else.  just want mushrooms-go for it!  want it meaty, add cubes of cooked meat and use a beef broth.  you call the shots-me, i’m going for turkey next time.

3 tablespoons olive oil
1 1/2 cups sliced leeks, green part only
1 tablespoon garlic
2 cups mushroom-buttons, halved or quartered
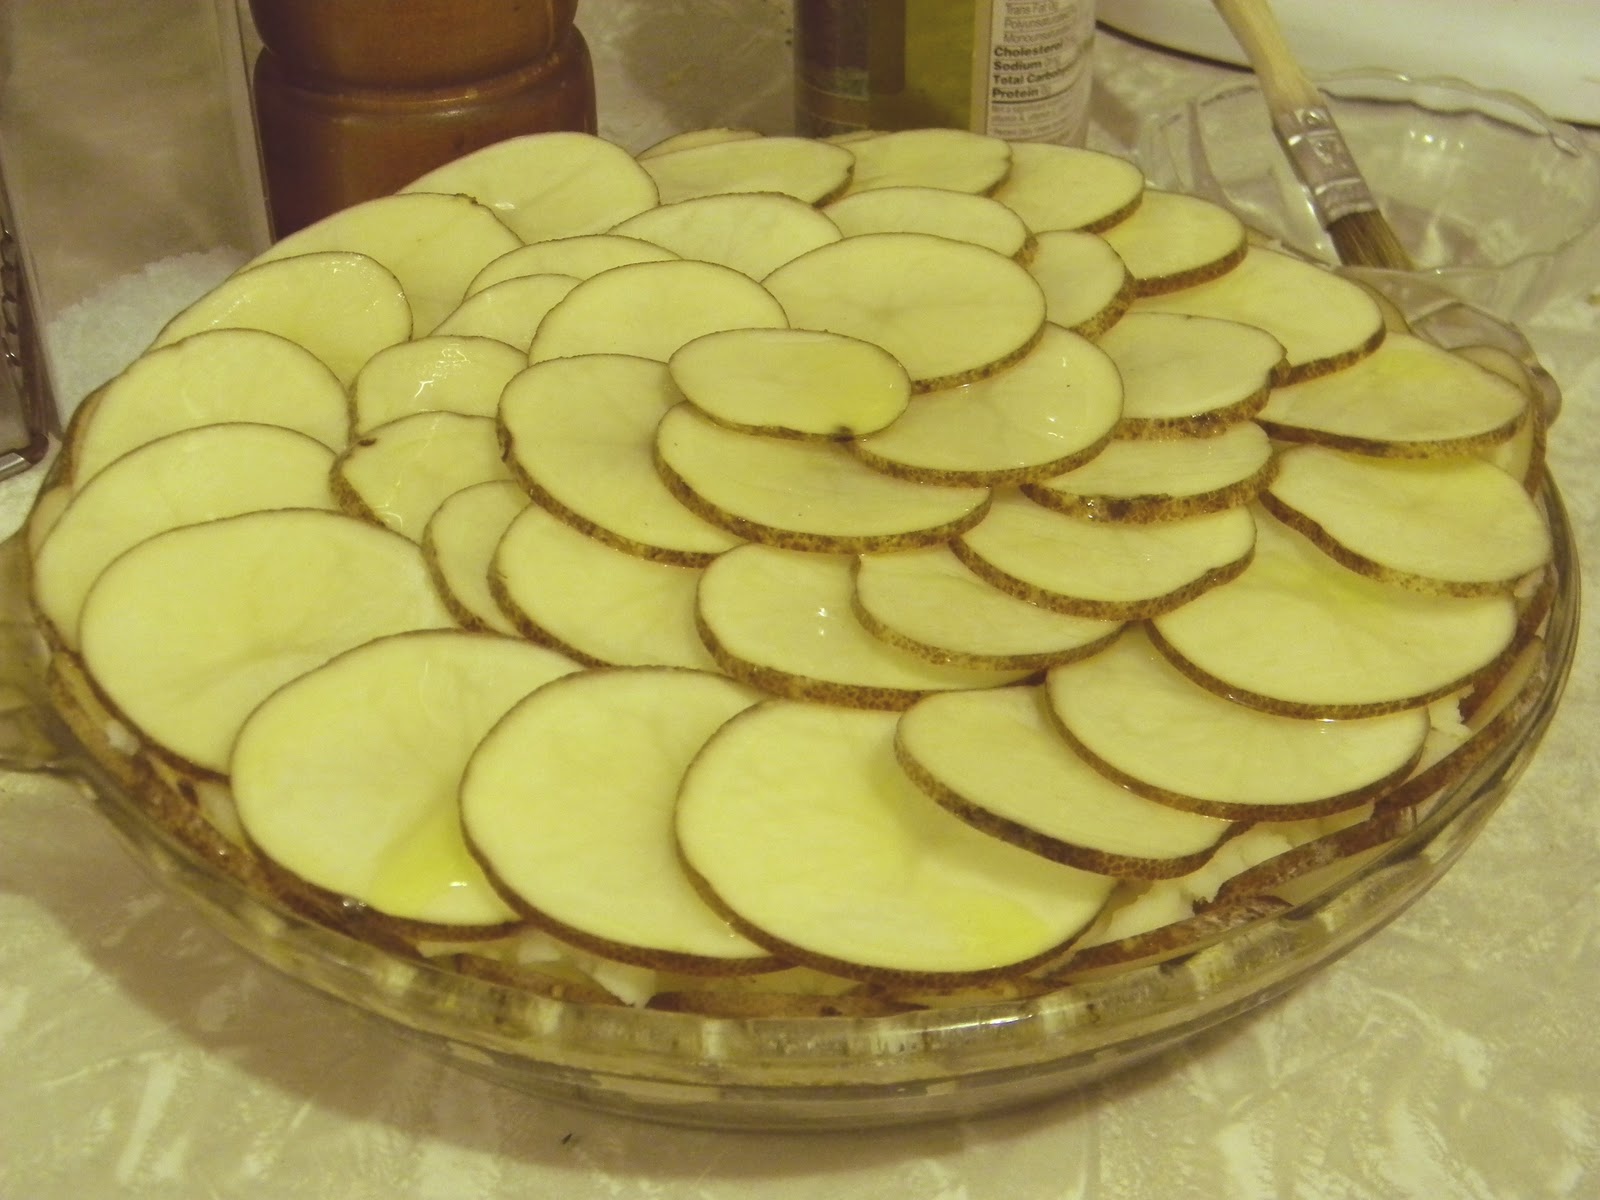
3 cups assorted vegetables-for things that will overcook easily (broccoli flowers, asparagus tip), plan to add those raw.  for the hard ones (carrots, potatoes) cook them first
5 tablespoons unsalted butter
1/3 cup flour
2 cups broth
1/2 cup half and half
1 tablespoon finely chopped fresh herbs
salt and pepper, to taste
1 batch of biscuits, recipe follows

preheat the oven to 375.  sautee the leeks in the olive oil until soft, add the garlic and continue to saute.  add the mushrooms and cover the pan to cause them to sweat.  when mushrooms are cooked, remove the pan from the heat and prepare the remaining vegetables.  combine them in and even layer on the bottom of the pie dish.  in a sauce pot, melt the butter.  add the flour and cook the roux over medium heat for several minutes, stirring constantly.  whisk in the broth and then the half and half and continue to simmer gently for a few minutes.  off the heat, season with salt and pepper and then stir in the herbs.  pour over the vegetables and top with the biscuits.  bake until bubbly and the biscuits are an even golden brown, about 25-30 minutes.

buttermilk biscuits
1 3/4 cup all purpose flour
2 teaspoons baking powder
1/2 teaspoon baking soda
1/2 teaspoon salt
5 tablespoons unsalted butter, cold and cut into small cubes
3/4 cup + 2 tablespoons buttermilk
place the flour, baking powder, baking soda and salt into the bowl of a food processor and pulse to combine.  sprinkle the butter cubes over the top and pulse to cut in the butter-the mixture should look very coarse with little bits of butter visible.  add the buttermilk and process long enough to combine.  turn out onto a floured surface and with floured hands, pat it into a 1/2″ slab.  using a 2″ cutter, make small biscuits, reworking the scraps to yield 16-18 biscuits.  arrange the biscuits on top of the pie and follow the baking instructions.

one more round up!
my berry rhubarb pie was an inspiration to melanie.  she used the pie crust recipe i posted with that pie to make her raspberry-cherry pie.  and can you believe that is her first attempt at a lattice top?  beautiful pie melanie, thanks for sending me the photo!
and as always, bake one, send a photo and i will post it here.  go ahead, i dare ya… double dare ya… bakinbabe116@aol.com

is it custard or cream? coconut cream pie-#21 of 52 pies

i am not sure what has happened but suddenly, it seems that i am constantly playing catch up.  no matter what is going on, i just feel like i am falling far behind…take this post for instance.  the pie was done on time, the photos too but when i looked at the calendar, it was suddenly tuesday!!!  as i have said before, it’s that time of year when we have lots to take care of and we are spending as much time as possible tending to the garden.

for those of you who are familiar with my job, you know that i make coconut custard pies-tons of them each week.  they are pretty tasty too.  often i find myself trying to explain the difference between coconut custard and coconut cream.  so here goes…a custard is usually a dairy product that is thickened with eggs; it can be sweet or savory and it can also have other thickeners like flour or cornstarch in it.  while almost all cream fillings are based on a custard, not all custards are creams.  sounds like i’m mincing words doesn’t it?  mainly, it is a lot of opinion but simply put, the main differences between a cream and custard fillings are when and how they are cooked.  in the case of coconut cream and coconut custard pies, the latter is cooked on a stovetop and cooled in a prepared crust while the former is baked in the crust.  since i make the custard version on a nearly daily basis, i decided to go with the cream version this time.

coconut cream pie
1 (9″) deep dish pie that serves 8-10
1 (9″) chocolate cookie crust-homemade or store bought
1 1/4 cup shredded coconut-do not use the fine cut macaroon coconut
1/3 cup cornstarch
2 cups whole milk
1 (14oz) can coconut milk-do not use the reduced fat variety
2/3 cup sugar
4 eggs
1″ piece vanilla bean
whipped cream, recipe follows
preheat the oven to 350.  toast the coconut until it is a nice and even golden brown color.  reserve 1/4 cup for the garnish.  place the cornstarch in a heat proof bowl, add 1/2 cup milk and whisk until smooth. place the remaining milk, coconut milk, sugar and vanilla bean in a heavy bottom sauce pot and heat over medium heat.  whisk the eggs into the cornstarch mixture.  when the milk comes to a gentle boil, remove it from the heat and whisk it into the eggs.  pour this mixture back into the pot and place it over medium low heat.  while whisking constantly, bring it to a gentle boil again for one minute to fully cook the starch and the custard.  off the heat, remove the vanilla bean, stir in the coconut and pour it into the pie crust.  press plastic wrap to the surface and refrigerate until cold, about 2 hours.  make the whipped cream and spread it over the top of the pie and decorate with the remaining coconut.
whipped cream
1 1/2 cups heavy cream
1/2 teaspoon vanilla
3 tablespoons sugar
in a chilled bowl, combine the ingredients and whip until moderately stiff peaks form.  take care not to whip it too stiff or it will be difficult to smooth it out or even worse, you will have butter…

the latest pie round up

this weeks entry comes to us from benni.  you may recall that she has baked one of my pies before and sent photos.  this time, she chose to make the peanut butter and chocolate swirl pie.  the family loved it and if you look at the photos, you can see that she barely had time to take a photo at all…
 going
 going
gone!
thanks for baking with me benni!  for all of you who dare, and i do dare you, double dog dare you to go ahead and bake my day-i mean pie.  send me photos and i promise i will post it here!  bakinbabe116@aol.com

that’s just nuts! chewy nut tart-#20 of 52

bake one original pie each week for 52 weeks.  sounds easy.  actually, it’s more work than you might think.  even for me, a person who bakes pies, lots of pies, almost every day of the week.  after the pop tarts, it was tough to come up with an idea.  i wanted something fruity and fitting for spring.  but to be honest, around here, there isn’t much fresh fruit to choose from in spring.  it is either shipped in from far away and very expensive or it’s frozen and we won’t even mention the stuff in the cans…so there i was, wandering the aisles of my local supermarket searching for inspiration at an affordable price.  and then i spied the little packets of nuts-recipe helpers or something like that.  each packet has about a half cup of  nuts in it.  i thought about it for a moment, i had some hazelnuts at home and if i added pecans, walnuts and almonds, i could make a mixed nut tart.

i tossed them together and toasted them in the oven

a cooked syrup of honey, brown sugar and butter makes a gooey tart.  the comb in front of the jar is from our hive-i can’t wait to get some of the honey from our bees.  until then, it’s honey from the store.

after cooking the syrup, it gets tossed with the nuts and poured into a prebaked tart shell.  then after a bit in the oven, it gets bubbly and later it gets chewy and gooey!

the finished tart, make sure it is completely cooled or it will not cut nicely!
chewy nut tart
1 (9″) tart that serves about 8
1 prebaked (9″) tart shell-use a rich, short dough rather than a flaky pastry crust
2 cups nuts-any combination of nuts you like, i used equal parts of walnuts, almonds pecans and hazelnuts
4 ounces unsalted butter
1/3 cup brown sugar-light or dark
1/3 cup honey-any light variety
2 tablespoons heavy cream (or coconut milk if you have some open)
1 teaspoon vanilla 
preheat the oven to 350.  completely bake the tart shell making sure that it is just beginning to turn a light golden brown.  if the dough is sweetened, take care not to allow it to color too much or it will gain a burned flavor during the second bake.  do not remove the crust from the pan at this point or it could collapse.  mix the nuts and place them on an oven proof pan.  toast the nuts until fragrant, about 5-7 minutes.  allow them to cool while you make the syrup.  in a sauce pot over medium-low heat, melt the butter with the brown sugar and the honey.  stir it occasionally to prevent hot spots and scorching.  bring the mixture to a gentle boil and allow it to boil for 5 minutes.  stir in the cream and the vanilla and bring it back to the boil for a minute.  remove from the heat and combine with the nuts.  scrape the filling into the tart shell and bake it until it is bubbly, about 10-15 minutes.  cool completely, remove the tart from the pan and cut into wedges with a sharp knife.
and as always, bake one and send me a photo-i will post it here!  bakinbabe116@aol.com  come on, i dare ya!  double dare ya!!!

pie #19-homemade blueberry toastries

a day late and a dollar short-the summary of my life lately.  no matter how hard i try, i am perpetually scrambling to meet a deadline and not always successfully.  it is spring and that means i have work to do in the garden; at home we have a vegetable garden, an herb garden and many other separate beds of flowers, plants, shrubs and trees.  then there is the demo garden where i do my volunteer hours for the master gardeners-too much to type, just look at it here.  did i mention the bees?  we have one colony and they need our attention on occasion.  then there is the house, the girls-they both graduate this year, the herd (too many cats and a dog) and did i mention my full time job?  at a busy restaurant? which makes coming home and baking seem like too much some days?  oh and there was that big birthday for my husband last week-he’s 39 again…

is it any wonder that i decided to make pop tarts for last week’s pie?  comfort food, a return to carefree childhood days and nothing more important than the lunch menu in the middle school cafeteria or maybe this week’s spelling test on my mind.  i tell both of my girls regularly that they will long for the days of high school-no worries more importantly, no bills, just school.  they don’t believe me now, but we all know that someday, they will and i doubt they will ever tell me so.

i experimented with two different doughs and settled on the second one.  it is more like a tart dough and has sugar, egg and buttermilk in it.  in the end, it was easy to work with-even the scraps.  it held the jam without bursting and after almost a week, the toastrie dough was still tasty with a nice texture.  they never had the cardboard snap of the commercially produced tarts and remained a little on the softer side but even so, everyone who ate one, reached for a second.

one thing to keep in mind, you can use any flavor filling you like.  i happen to like blueberry and made a quick batch of jam with just a one pound bag of frozen blueberries from the grocery store.  you could use raspberry, blackberry, rhubarb or pineapple-all of those are available frozen which makes them a little more affordable than fresh fruit.  if you have a surplus of apples or pears-try those.  and while i did not experiment with things like nutella or lemon curd, i am pretty sure that either one would be pretty tasty.

i didn’t need any special equipment either.  armed with a set of square cutters that range in size from 1 3/8″ to 2 5/8″, i chose the largest cutter but you could do this just as easily with a ruler and a pizza cutter.   to make the fluted edges and to prick the tarts (to allow the steam to escape during baking) i reached into the silverware drawer and used a regular fork.

lined up on a tray, they baked up quickly.  this was a quick treat to make and one of those things i hope to add to my list of things to make at home myself from now on.  just as soon as we move to a 36 hour day and my new clone arrives.  i really need to simplify my life-eliminate and reorganize the excess-now, to find the time to do that…

homemade blueberry toastries

yields 16 small treats-each one is about 2 1/2″ square
toastrie dough
1 1/2 cups all purpose flour
1/3 cup sugar
1 teaspoon baking powder
3/4 teaspoon salt
8 tablespoons unsalted butter, cold and cut into cubes
1 egg
2-3 tablespoons buttermilk
egg wash (1 egg and 1 tablespoon water)
jam filling-recipe follows
in a mixing bowl, stir together the dry ingredients to combine them.  cut in the butter until it is in small pieces and is beginning to resemble a coarse meal.  add the egg and 2 tablespoons of the buttermilk and mix gently to combine and only until it comes together.   add the additional tablespoon of buttermilk only if the dough seems a bit dry or crumbly.  you want a soft and pliable dough but not a wet and sticky one.  wrap the dough in plastic and chill it for 30 minutes to make it easier to work with.
preheat the oven to 350.  on a large, floured surface, roll the dough 1/8″ thick.  i did this in two batches to keep the dough from getting too soft as i worked.  cut the squares and place half of them on a lined baking pan-paper or silpat will make it easier to work with if any of the jam leaks out.  brush the edges with a light coating of egg wash and place a dollop (about 2 teaspoons) of jam in the center of the square.  add the top square and gently press the edges with your fingertips to seal.  using a regular fork, press the edges to make a decorative seal and prick the center of the toastrie several times to make steam vents.  do not egg wash the tops or you will seal the vents and the toastries may burst.  
homemade blueberry jam filling
makes about 1 2/3 cup
1 pound blueberries-i used frozen
1 cup sugar
zest of one lemon
piece of vanilla bean pod (i always save the scraped out pods to use for things like this)
1-2 tablespoons all purpose flour
thaw the berries and place them and the juices into a blender.  with the lid securely fastened (does this sound like experience talking???) blend them lightly just to chop them coarsely-do not puree them!  place the berries into a pot with the remaining ingredients and bring them to a slow boil.  allow this mixture to boil gently for about 15 minutes.  remove the vanilla pod and pour into a heat proof bowl.  chill completely before using-several hours or overnight.
when you are ready to make the toastries, measure out 1 cup of jam and reserve the rest for another use (homemade scones, anyone?).  if the jam seems thin and a little runny, stir in the 2 tablespoons of flour.  otherwise, if you were able to release lots of pectin and your jam is thick and gelled while it is cold from the fridge, just stir in 1 tablespoon.  mine was a little on the thin side so i used the full amount.
and look for me to have this weeks pie up soon-i am working on that today along with another loaf of salt rising bread.  and as always, bake it and send me a photo-i will post it here!  bakinbabe116@aol.com.  happy baking!!!

berry rhubarb pie-#18 of 52 pies

 for me, spring is one of the most wonderful times in the year.  the visions of flowers and mushrooms dancing around in my head… planting the garden, pulling weeds, preparing the bee hive for the honey flow, cleaning out the freezer… where did that come from?  well it does need to be done and this weekend, i cleaned mine out-kinda, sorta.  in the process, i found some rhubarb and some raspberries that needed to be used up and when darry asked me to make a pie for our mushroom hiking friends, i decided to use them in the pie.  along with some strawberries and lots of other good things like orange zest, vanilla bean, pumpkin pie spice, cardamom and rosewater, i made a lattice topped pie for our hiking/lunch date with friends.


first, place your bottom crust in the pan and trim it to leave an even 1″ of dough all the way around.  pour in the filling.  lattice tops are an easy way to make a pie look fancy.  to keep your sanity, work with part of the dough at a time and don’t worry about weaving the strips.  simply laying them out in two layers will be easier and elegant all at the same time.

once you have your second layer of strips on top, carefully roll the edges up to make a raised rim of dough all the way around the edge of the pie plate.

using your fingertips, flute the edges.  finally, brush the strips (not the fluted border or it will darken too much in the oven) with a little egg wash and sprinkle it with some sanding sugar.  into the oven she goes…

berry rhubarb pie
1 (9″) pie serving 8
crust
2 2/3 cup all purpose flour
1 teaspoon salt
1 cup shortening-i used a non-hydrogenated shortening found in the health food section of my grocery store.
1/3 cup cold water
1 1/2 tablespoon vinegar-white or cider
berry-rhubarb filling, recipe follows
in a bowl, stir the flour and salt.  cut the shortening into the dry ingredients until it is in small pieces.  add the cold water and vinegar and mix until a smooth dough is achieved.  divide into two pieces but not equal pieces-one should be slightly larger than half the dough.  wrap them and chill them for about an hour.  allow them to soften slightly before rolling them out.  preheat the oven to 350.  roll the smaller piece into a circle and fit it into the pie plate making sure that at least 1″ of dough overhangs the edge of the plate.  trim away any parts that are more than 1″.  to make it easier to handle, place  the pie plate on a sturdy baking pan that is lined with paper or foil and grease it slightly to prevent the plate from sticking.  make the filling and pour it into the crust.  to make the lattice top, divide the remaining dough into 2 or 3 pieces.  to prevent the dough from toughening, make an effort to roll it into a neat rectangle wide enough to fit the width of the pie.  cut the strips about 3/4″ wide to fit the pie and be sure to use the photos above as a reference.  finally, flute the edges and bake the pie for about 1 hour and 15 minutes or until the juices are bubbling in the center.  allow the pie to rest for at least 4 hours or it will be too runny to serve.  
berry rhubarb filling
2 cups of halved strawberries
1 cup raspberries
1 cup rhubarb-slice about 1/4 inch thick
1 cup sugar
4 tablespoons cornstarch
1-2 teaspoons freshly grated orange zest
1/2 teaspoon pumpkin pie spice-or cinnamon
1/4 teaspoon cardamom
1/4 of a vanilla bean-seeds scraped out and the pod reserved for another use
2 teaspoons rosewater
toss the berries and rhubarb together-if using frozen, allow them to thaw completely but measure them while frozen.  combine the sugar, cornstarch, orange zest, spices and vanilla and rub them together to disperse them evenly.  toss the fruit and sugar together and add the rosewater-mix to combine and pour into the prepared pie shell.
and as always, if you bake one and send me a photo-i will post it here.  contact me at bakinbabe116@aol.com.  and now if you will excuse me, i think i hear some morels giggling in the woods and i must go find them

kale and ricotta quiche, #17 of 52

while wandering through my little backyard garden last week, i could see it was time to pick the kale.  we have two varieties growing and they had begun to send out flower stalks-in other words, they were going to seed.  we had overwintered them and it was time to harvest the plants.  unfortunately, our red cabbage had chosen the same route.  we never got any heads on the plants, just leaves and now flower stalks.  we love to eat cooked greens but there is only so much you can eat in one weekend.

while perusing through food52.com, i saw that the weekly challenge was winter tarts-sweet and savory.  they post links and invite members to test the recipes and then report back to them.  by the time i had looked at the list, almost all were claimed and i decided not to participate.  on closer inspection, i spied a link to a spinach and ricotta pie.  suddenly, the light bulb blinked on and i realized i had a use for some of that kale and cabbage!

using my new red pie dish, i mixed up a blue cornmeal pie crust.  i recently found a bag of blue cornmeal lurking in the freezer.  using a non hydrogenated shortening, i made a flaky pie crust that appears slightly grey and flecked with little bits of blue cornmeal.

there are two types of kale and some red cabbage in the mix.  looking at the center of the photo you will see a flower stalk from the red cabbage.  to the left of it is the kale we received from jeff poppen, the barefoot farmer and to the right is red russian kale.  all of the flower stalks i cut off were added and they taste a lot like broccoli raab

off to the garden i went-i picked a large bowl full and after washing it thoroughly, i cut it into thin strips.  the total amount ended up being about 5 cups of raw greens.   once sauteed with onions and garlic, it is hard to tell which is which.  the greens and the cabbage looked about the same.

kale and ricotta quiche
1 (9″) quiche serving 8
recipe adapted from lizthechef on food52.com
1 (9″) pie shell, homemade or purchased and partially baked
fresh kale or other greens-see above for amount
3 tablespoons olive oil
1/2 cup finely diced onion
1 tablespoon minced garlic
1 pound ricotta-i used a 15 ounce tub from the grocery store
3 eggs
1/2 cup half and half (could use sour cream, yogurt or buttermilk to help cut the richness of the cheese)
1/2-3/4 cup grated cheese-the sharper the better
salt, pepper and nutmeg to taste
preheat the oven to 350.  heat the olive oil in a skillet over medium heat.  saute the onions until translucent, add the garlic and saute for a minute or two.  add the kale and saute until tender.  season the mixture with the salt, pepper and a pinch of nutmeg-season a little more than you think is necessary since the rich cheese custard will be on the bland side.  spread the mixture in the pie shell.  in a mixing bowl, whisk the ricotta with the eggs until smooth.  add the half and half and whisk to combine.  top the kale with the grated cheese and pour the custard into the dish.  stir up the kale a little so that some is on top of the pie-this is a thick custard and the kale will not float to the top.  bake until the custard  is set, about 45 minutes.  allow it to rest for about 10-15 minutes before serving and serve it with an acidic side dish such as a salad dressed in a vinaigrette or citrus dressing.
and as always, bake one, send me a photo and see it here.  bakinbabe116@aol.com

something new for #16-homemade marshmallows and a parve s’more tart

like many of you foodies out there, i also look at many other websites and blogs dedicated to food.  in a recent post on food52, i saw an invitation to members of the website to test tart recipes that they are featuring in an editors pick challenge.  since i knew i would be making a pie this week, i quickly committed myself to testing the s’more tart on the list.  little did i know that it was a parve tart.  for those of you who do not know what this means, it is a jewish dietary law that does not allow the mixing of meat and dairy.  anyone who has come from a home with a kosher kitchen understands this-i did not but have had enough exposure to it to know that this was going to be interesting.  how can you make marshmallows without egg whites?  since i have promised an original recipe each week, i am including the link to the recipe from the food52 as well as my nonparve interpretation.

no homemade s’more tart is complete without homemade marshmallows.  i made a small batch using a recipe i found on an interesting website called cooking for engineers.  the recipe is a good reference for someone who has never tackled the task of making fresh marshmallows-like me.  the only suggestion i have to the recipe is to cut the vanilla extract in half.  for my pie, i piped them out into little kisses so that i could arrange them on the top of the pie.  they came out nice with a good texture.  they were a little sticky but i will attribute that to the fact that i did not make them into a slab dusted with cornstarch as suggested in the recipe.
now, for the parve version.  if you follow the link above, you will find yourself looking at a recipe that just might be missing something-especially if you are not familiar with the term parve or the practice of eating a kosher diet.  the recipe is mainly water, sugar and gelatin.   while it looks improbable that the two steps could combine to form a marshmallow like topping, they do and for what it’s worth, it’s pretty close in flavor and texture to the commercially produced stuff available.  keep in mind that most of them are not made with egg whites either-just lots of sugar and gelatin.

i made two small tarts, the parve version is in the rear while the nonparve version is in the forefront.

both were placed under the broiler for a little color-its not a s’more without a toasted marshmallows…

the parve version was made with cookie crumbs (should be non dairy/egg cookies like graham crackers to be truly parve-i did not have any so i pretended) as well as sugar and margarine.  the chocolate ganache filling was a combination of bittersweet chocolate and coconut milk.  it worked out well but it was a little firmer than i prefer for a ganache.  the topping formed a crispy crust under the broiler and was very sticky to cut through-must use a wet knife to do so.  all in all, the flavor was good and the topping was surprisingly like a marshmallow.  would i make this again-not sure.  honestly, we do not have the need to follow a parve diet and since none of us suffer from food allergies to dairy or egg whites(albumen), it is not likely that i would do this.  however, it is nice to know that this can be done just as easily as the non parve version and i am glad to have had the chance to try it out.  at the end of the day, i learned a new technique and that in itself made it worth the effort.

s’more tart
adapted from shoshana of couldn’t be parve and michael chu of cooking for engineers
1 (9″) tart serving 8
1 1/2 cups cookie crumbs-i used a combination of non-dipped biscotti pieces
1/3 cup sugar
6 tablespoons butter, unsalted and melted
9 ounces bittersweet chocolate
1/2 cup coconut milk
1/2 cup heavy cream
1 tablespoon unflavored gelatin, about 1 package
2 1/2 tablespoons water
2/3 cup sugar
3 tablespoons corn syrup
2 tablespoons water
pinch of salt
1/2 teaspoon vanilla
in a mixing bowl, combine the cookie crumbs with the 1/3 cup sugar.  add the melted butter and mix well.  press it into a tart pan with a removable bottom.  it is possible to bake this crust to make it crispy but i skipped that step.   heat the coconut milk and heavy cream until it is almost simmering.  place the chocolate in a heat proof bowl, pour the milk/cream over it and let it sit for 5 minutes.  stir until smooth and then scrape it into the tart shell.  place in the fridge to set while you prepare the marshmallows.  
pour the water into a small bowl and sprinkle the gelatin over it.  set aside and proceed with the recipe.  place the sugar, corn syrup, salt and water into a small sauce pan.  bring to a boil, washing down the sides of the pot if necessary and cook to 248 on a thermometer.  remove from the heat, add the gelatin and stir until smooth.  pour into the bowl of a stand mixer and with the whip, whip until fluffy and no longer hot.  add the vanilla and mix well.  using a piping bag, pipe little mounds onto a pan that has been dusted with cornstarch.  let the marshmallows set and when they are no longer soft and sticky, arrange them on top of the tart.  using the broiler or a torch, carefully toast the marshmallows.  use a wet knife to cut the tart.

it’s 3/14!!! happy pi(e) day!!! #15 of 52, peanut butter & chocolate pie

forget the math, eat pie!!!  it’s like i have a holiday of my own just to celebrate this blog challenge!!!  so in honor of the day, i pulled out all the stops anad relived a vintage tv commercial.  and for those of you who do not remember: 

now that we’ve gotten that out of the way, let’s make a pie…around my house, pie is not something that gets eaten quickly unless it is ice cream or something chocolate.  add peanut butter to that and it will be gone in a flash.

chocolate cookie crumb crust

peanut butter and chocolate fillings are poured into the dish and then swirled together with a skewer

the finished pie before baking

the pie after baking

peanut butter and chocolate pie

1 (10″) deep dish pie that serves 8-10

preheat the oven to 325.  make the crust and then the two fillings.  pour each of the fillings into a measuring cup or pitcher with a 2 cup capacity.  alternately pour 1 cup of each filling into the center of the crust.  you will have a series of rings, see photo above.  swirl the two together gently.  bake for about an hour or until the pie is slightly puffed around the edges and a little firm in the center.  cool completely and chill before cutting and serving.  serve with whipped cream if desired.

crust
1 1/3 cup cookie crumbs
3 tablespoons sugar
4 tablespoons melted butter
combine the cookie crumbs and sugar.  pour in the butter and mix.  press evenly up the sides and across the bottom of the pie plate.  for the best consistency, use cookies that are not high in fat.  graham crackers, wafers or undipped biscotti will be lower in fat.  high fat cookies will make a crust that is greasy and hard to press into the pan smoothly.

peanut butter filling
1/3 cup brown sugar
1/2 cup corn syrup-light
1/3 cup half and half
1/3 cup peanut butter-homogenized!
1/2 teaspoon vanilla
2 eggs
place all ingredients in a bowl and use that elbo grease to whisk it together until it is smooth!

chocolate filling
2 ounces unsweetened chocolate
1/3 cup half and half
1/3 cup brown sugar
2 eggs
2/3 cup corn syrup
1/2 teaspoon vanilla
melt the chocolate and half and half in a microwave using the lowest heat setting.  the goal is to melt but not overheat so use short intervals of 30-45 seconds.  whisk the chocolate with the brown sugar.  whisk in the eggs, one at a time.  whisk in the corn syrup and the vanilla.  to get a smooth and emulsified filling, follow the order as listed and do not try to take shortcuts-the chocolate can separate and it will not taste good or have a creamy texture.

this week’s round up!!!
many thanks to gwen daniels for sending photos of the maple pecan tart with butternut squash.  she also posted it up on her blog and you can read the full post here.  

well done gwen!  thanks for sharing photos and your blog page!   now for the rest of you out there-bake one, send me photos and see it here.  bakinbabe116@aol.com is the address and have a happy pi(e) day, y’all…

14 and counting; banana creme brulee tart

what a week it has been…construction, or rather reconstruction, of my house is well underway.  despite the torrential rain of last week, they are almost finished.  the repair of the small section of the foundation required jacking up that part of the house.  luckily, it is an addition and the rest of the house was not affected.  they warned me that walls could crack and that windows could pop out and shater the glass.  no windows shattered but the cracking was unbelievable-every wall is cracked and will need patching.  in the wall just above the repair, it will need new sheetrock since it looks like a road map now.  the good thing, mr. kenmore has recovered and i am baking again-happily!

faced with an ugly bunch of bananas, i decided to try something new.  first i pureed them and then i mixed them into a rich and creamy custard filling. 

the filling was poured into a partially baked tart shell and then it was baked until set.  the results-banana creme brulee tart.

since creme brulee means burned custard, i needed to burn the top of mine.  a thin layer of sugar was sprinkled over the top of the tart.

mr. kenmore assisted by burning the sugar to make a thin and crispy caramelized crust on the top

banana creme brulee tart
1 (9″) tart to serve 8

1 partially baked (9″) tart shell, use any type of crust except one made from crumbs.  my suggestion is to use a dough specifically formulated for tarts.  they usually contain some egg and sugar to make them easier to work with.  for hints on partially baking tart and pie shells, read this previous post.

4 egg yolks

1/3 cup dark brown sugar
1/2 teaspoon chinese five spice powder (or cinnamon)

3/4 cup banana puree, about 2-3 bananas-make sure they are ripe for the best flavor
3/4 cup half and half
1/4 cup sugar

preheat the oven to 325.  place the tart shell, still in the tart pan, on a sturdy baking tray that will not warp in the oven.  whisk the yolks with the dark brown sugar and the spices.  whisk in the puree and the half and half.  only mix to incorporate, the more you whisk, the more air you incorporate and the less creamy the final texture of the custard will be.  pour into the tart shell and  bake until set, about 20 minutes.  leave the tart in the pan and cool completely.

to make the caramel crust, spread the sugar evenly over the top of the tart so that it is almost a single layer of crystals.  using the broiler or a propane torch (if you have one, which i do not) and carefully melt the sugar.  it will bubble as it gets hot and then will quickly begin to burn.  be careful not to let it burn black or it will be very bitter tasting.  serve immediately, once it sits, for a while, especially in the fridge, the sugar crust melts. 

by the way garrett, i seem to have lost my marbles again…really, i did.  they hit the counter and bounced around the kitchen.  a couple landed in the living room and the cat got at least one.  i also found one in the basement, never a dull moment!

and as always, bake one, take a photo and send it to me-bakinbabe116@aol.com, and you will see it here.  happy baking!

back in business with pie #13, potato knish pie

this has by far been the longest two weeks of my life!  never in my wildest dreams would i have thought that i could miss having my oven.  when the heating element in my oven burned out, my first thought was that it was time for a new oven.  we had already spent a lot of money to have the burners repaired/rewired due to the excessive workouts our cheap electric range gets.  the visions of a new range, a gas range, a gas range with a convection oven…pick one, they all danced around my head like sugar plums at christmas.  then was the realization that i would need to hire a plumber to run the gas lines, buy a not so cheap range and i’m sure i don’t need to explain.  we then thought about just replacing the electric box with another and still, it was more than we wanted to spend right now.  after a quick internet search for elements and youtube how to videos, we went the cheapest route and ordered parts.

the parts arrived and my husband set about installing the new element.  it all went well and i am back in the business of baking.  with the oven out of action for two weeks, i had to use up a big bag of potatoes in a hurry.  normally, i cut the potatoes into wedges, toss them in olive oil and seasoned salt and then bake up oven fries.  but for some reason, i wanted to make a more substantial dish with them-a pommes anna or a gratin/scalloped potato dish and since my in house repair man has a thing for knishes, a knish pie was the solution to my abundance of potatoes.  the nice thing about this dish, it doesn’t really require a recipe.  it can be made in any size dish and with any kind of potatoes.

while my potatoes for the filling boiled, i used my mandoline to slice some potatoes into thin rounds.  they were layered into a greased glass pie dish and brushed with some olive oil.

the boiled potatoes were mashed and mixed with caramelized onions and garlic, seasoned with salt and pepper and combined with some freshly grated asiago cheese.  this was carefully packed into the “crust”.

a final layer of potatoes was arranged over the filling and also was brushed with some olive oil.  into the oven it went!

 an hour and 15 minutes at 400 and my pie was ready.  this pie is so versatile.  the filling could be made with any potatoes you like-how about purple potatoes?  mix in some parsnips or other root vegetables or maybe some of your favorite herbs.  want a vegan dish-leave out the cheese or for you meat lovers, add some crumbled bacon, chives and cheddar for a loaded potato pie.

potato knish pie
1 (9″) pie serving 8

potato crust
6 medium baking potatoes
1/4 cup olive oil
wash the potatoes and using a mandolin or similar slicer, slice the potatoes no thicker than 1/16″ thick.  grease the pie dish and layer the slices in the bottom and up the sides of the dish.  brush carefully with the olive oil using a soft bristle brush.  save the remaining slices to decorate the top of the pie.

knish filling
6 cups diced potatoes
2-3 tablespoons olive oil
1 1/2 cups 1/4″diced onions
3 cloves garlic, minced
1/2 cup finely shredded asiago cheese
salt and pepper to taste
preheat the oven to 400.  place the potatoes in a pot, cover them with water and gently boil until soft.  heat the olive oil in a skillet and saute the onions until translucent-3-4 minutes.  add the garlic and continue to saute until a golden brown color, stir frequently to prevent burning.  drain the potatoes and using a ricer or a food mill (if you have one, otherwise just use what you have) mash the potatoes to remove the lumps.  add the onions/garlic and cheese and mix well.  season them to taste with the salt and pepper.  when finished, carefully fill the crust with the mashed potatoes and smooth it out.  use the remaining sliced potatoes to cover the top of the pie.  bake the pie until the potatoes are a nice golden brown, about 1 hour and 15 minutes for a 9″ dish.  cut into wedges to serve.

this dish can be served with gravy of any kind if you have to eat your mashers with gravy.  a dollop of sour cream may also be a good garnish.  for those knish fans out there, you know that nothing else is necessary!

and as always, make one, send me the photo and see it here!  bakinbabe116@aol.com

welcome back mr. kenmore!